Dungeons & Derps: Owlbear

The series continues with direction from a Twitter poll this time.
Design Notes
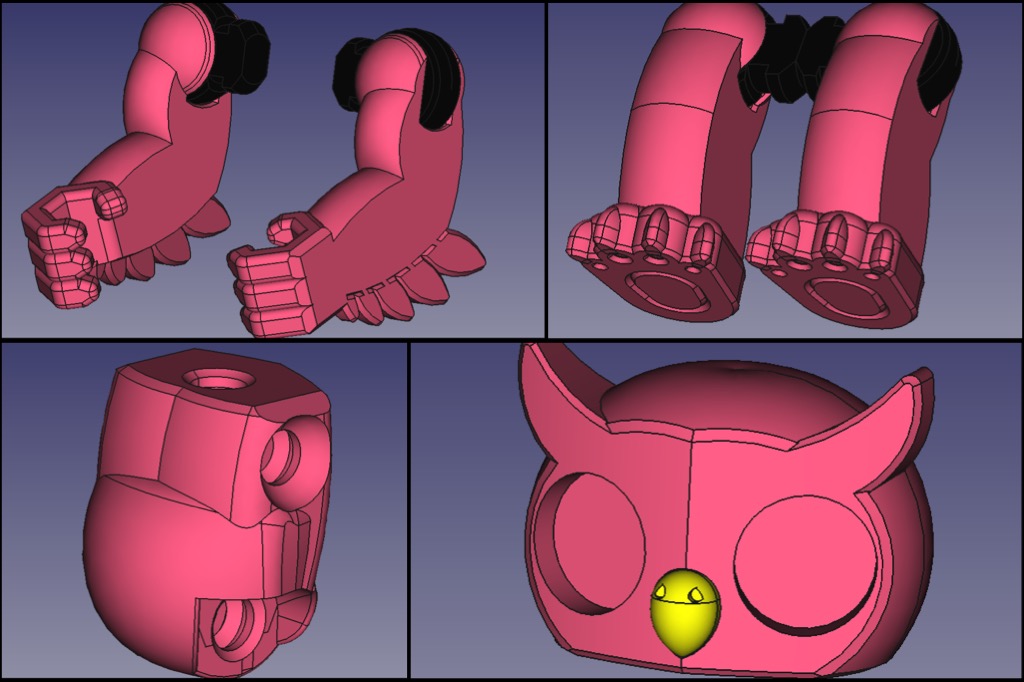
Once again modeled in FreeCAD v0.19, and while things don’t go as planned 100% of the time (regardless of software), this has continued to develop creative thinking and problem solving skills. Here, one of the biggest challenges was getting the chamfers on the shoulder sockets. They worked without flaw on the Nothic, but for some reason this time they absolutely refused to cooperate. As a solution, a new file was opened, a shoulder “block” was designed where the geometry worked as intended, it was saved and imported into the arm part, and boolean’d together to execute the proper vision.

Am I thrilled that this workaround had to be implemented? No, but now I have another tool to use in case things go awry in another model.
Started to dabble with the Asssembly 4 workbench as well, but haven’t fully figured it out yet. We’ll get there.
Parts List
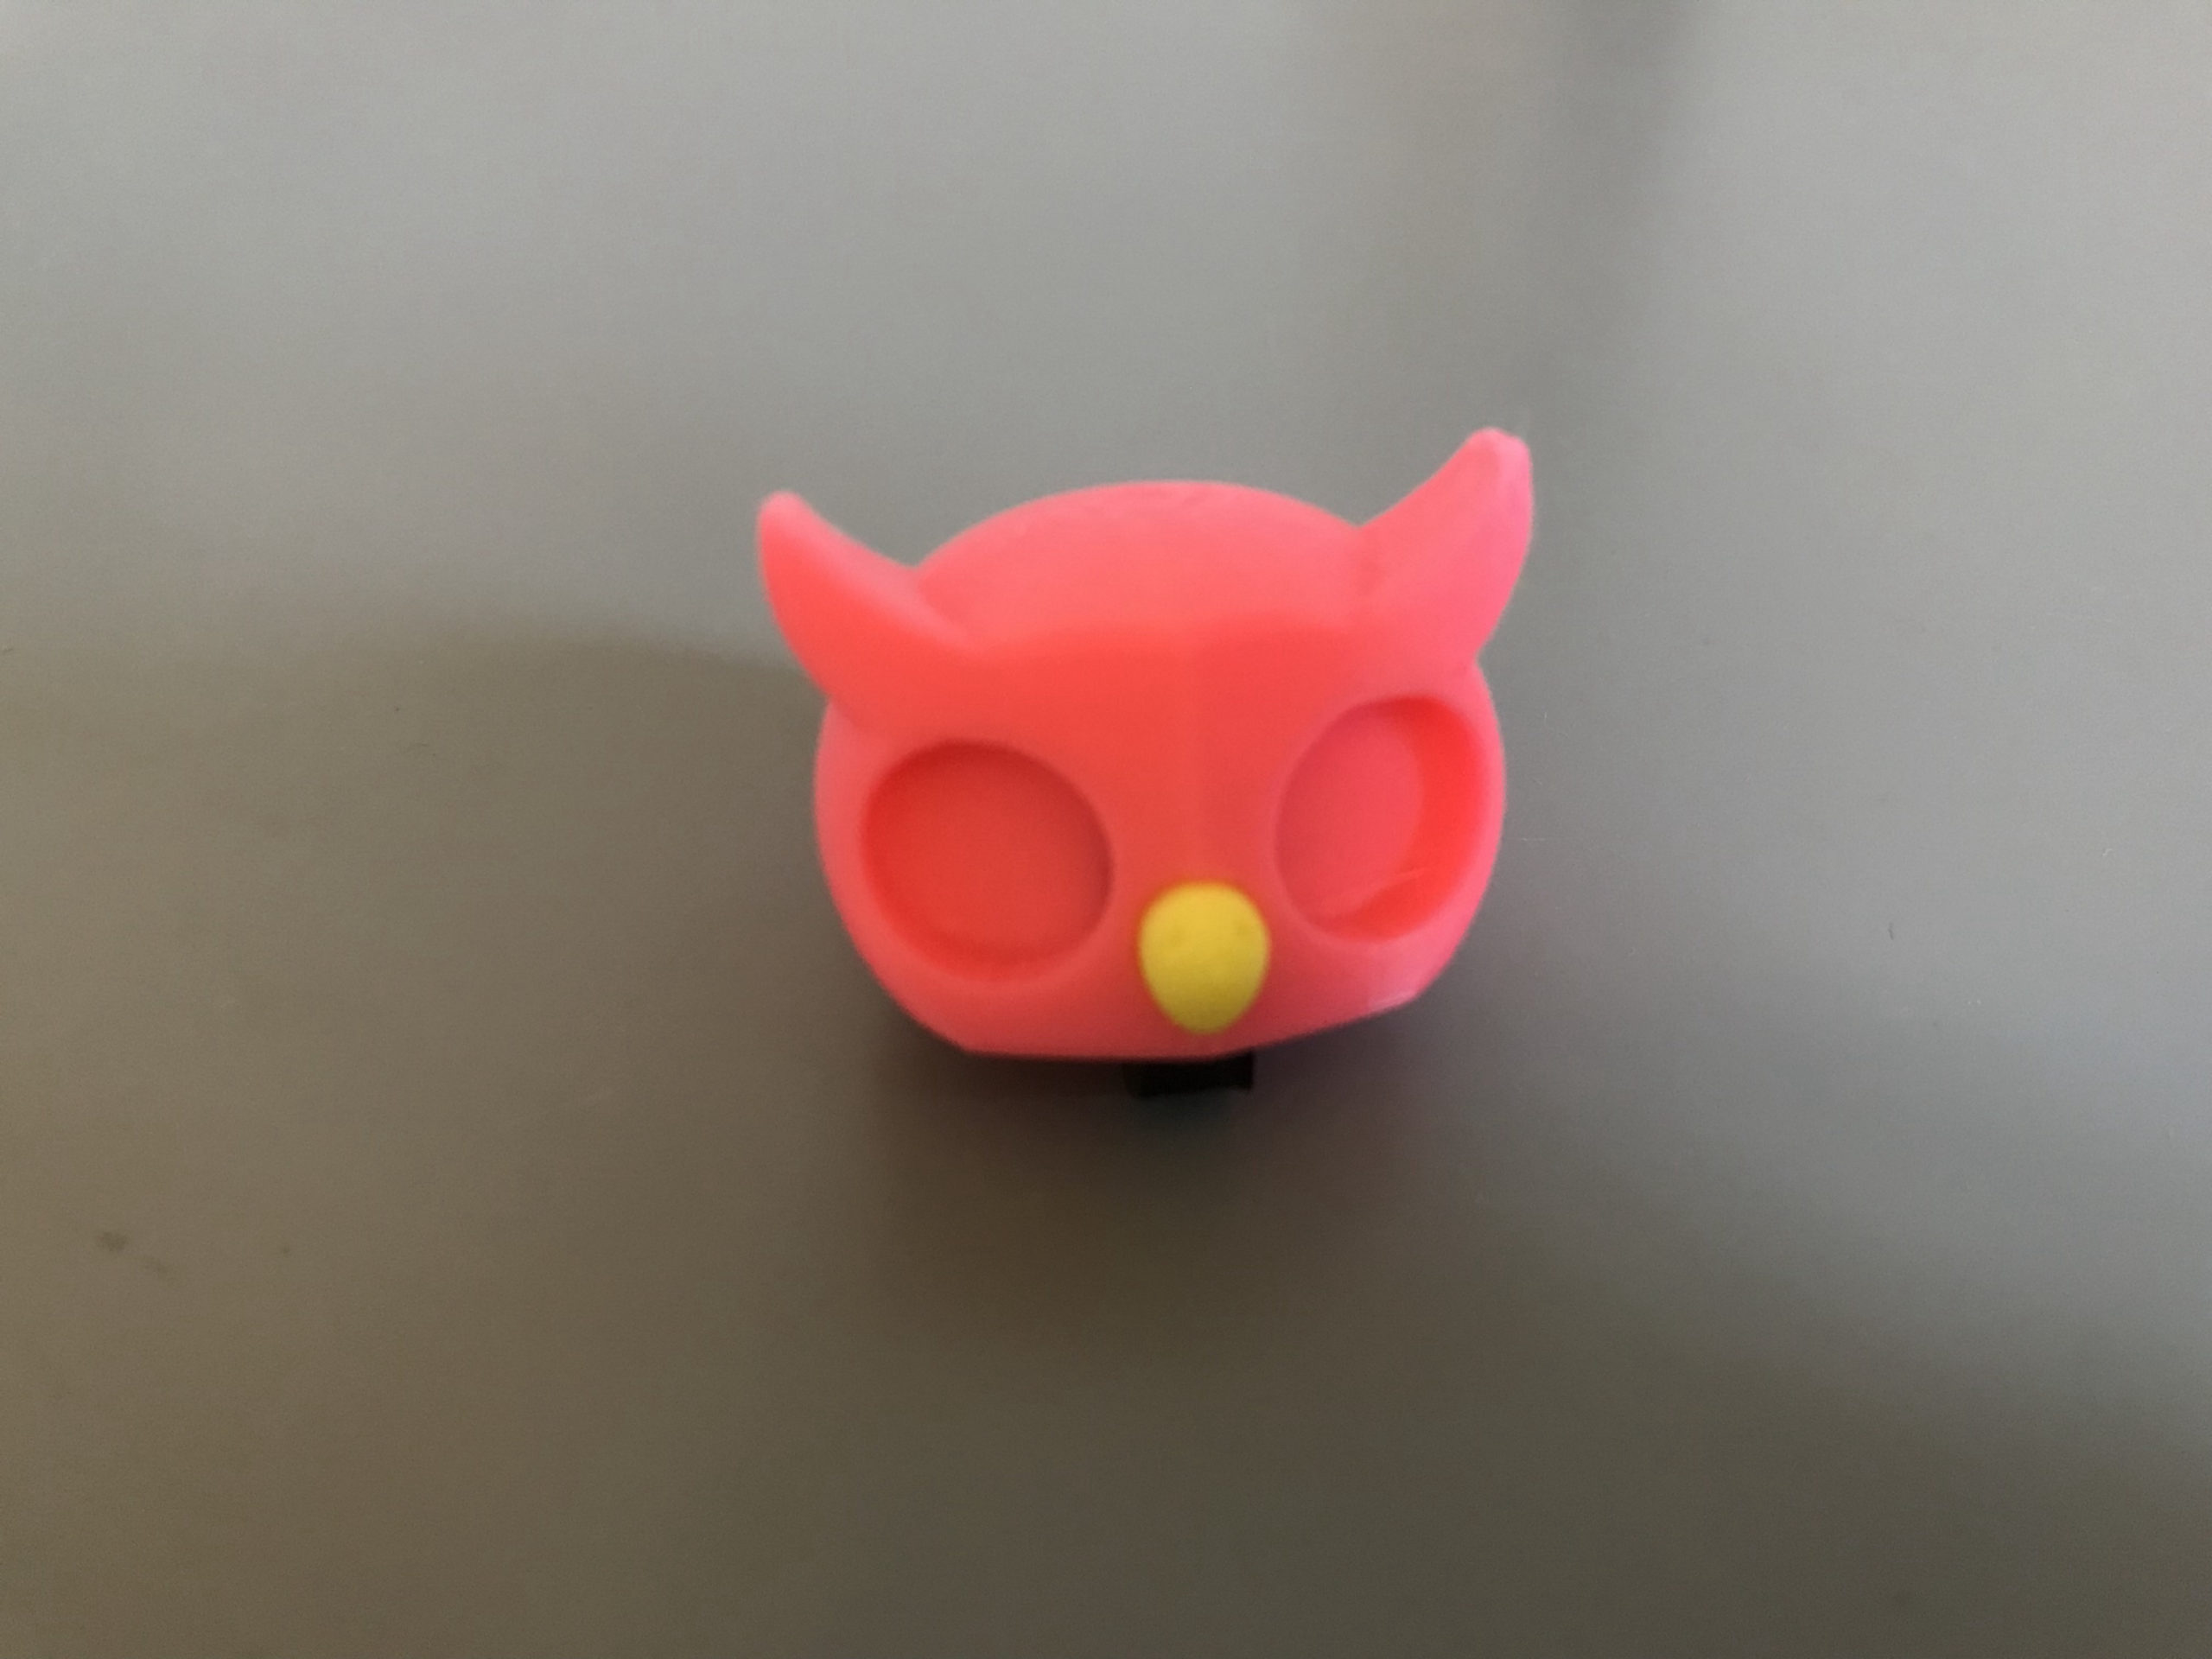
10mm Wiggle/Googly Eye (gosh I am loving these)
Helpful Tools
3D printer capable of working with flexible materials
Super Glue
Something thin and rigid, like a small knife (maybe)
Let’s gooooo!
1. Print out Parts
Files can be found toward the bottom of the page.

AFJ-FreeCAD (x5)
Material: Flex (98A)
Infill: 15-20%
Supports: No
Brim: No
Owlbear-LeftFoot, Owlbear-RightFoot, SwordOfVoxEl-Blade, SwordOfVoxEl-Hilt
Material: PLA
Infill: 50% (recommended)
Supports: No
Brim: No
Everything else
Material: PLA
Infill: 15-20%
Supports: No
Brim: No
2. Assemble Joints
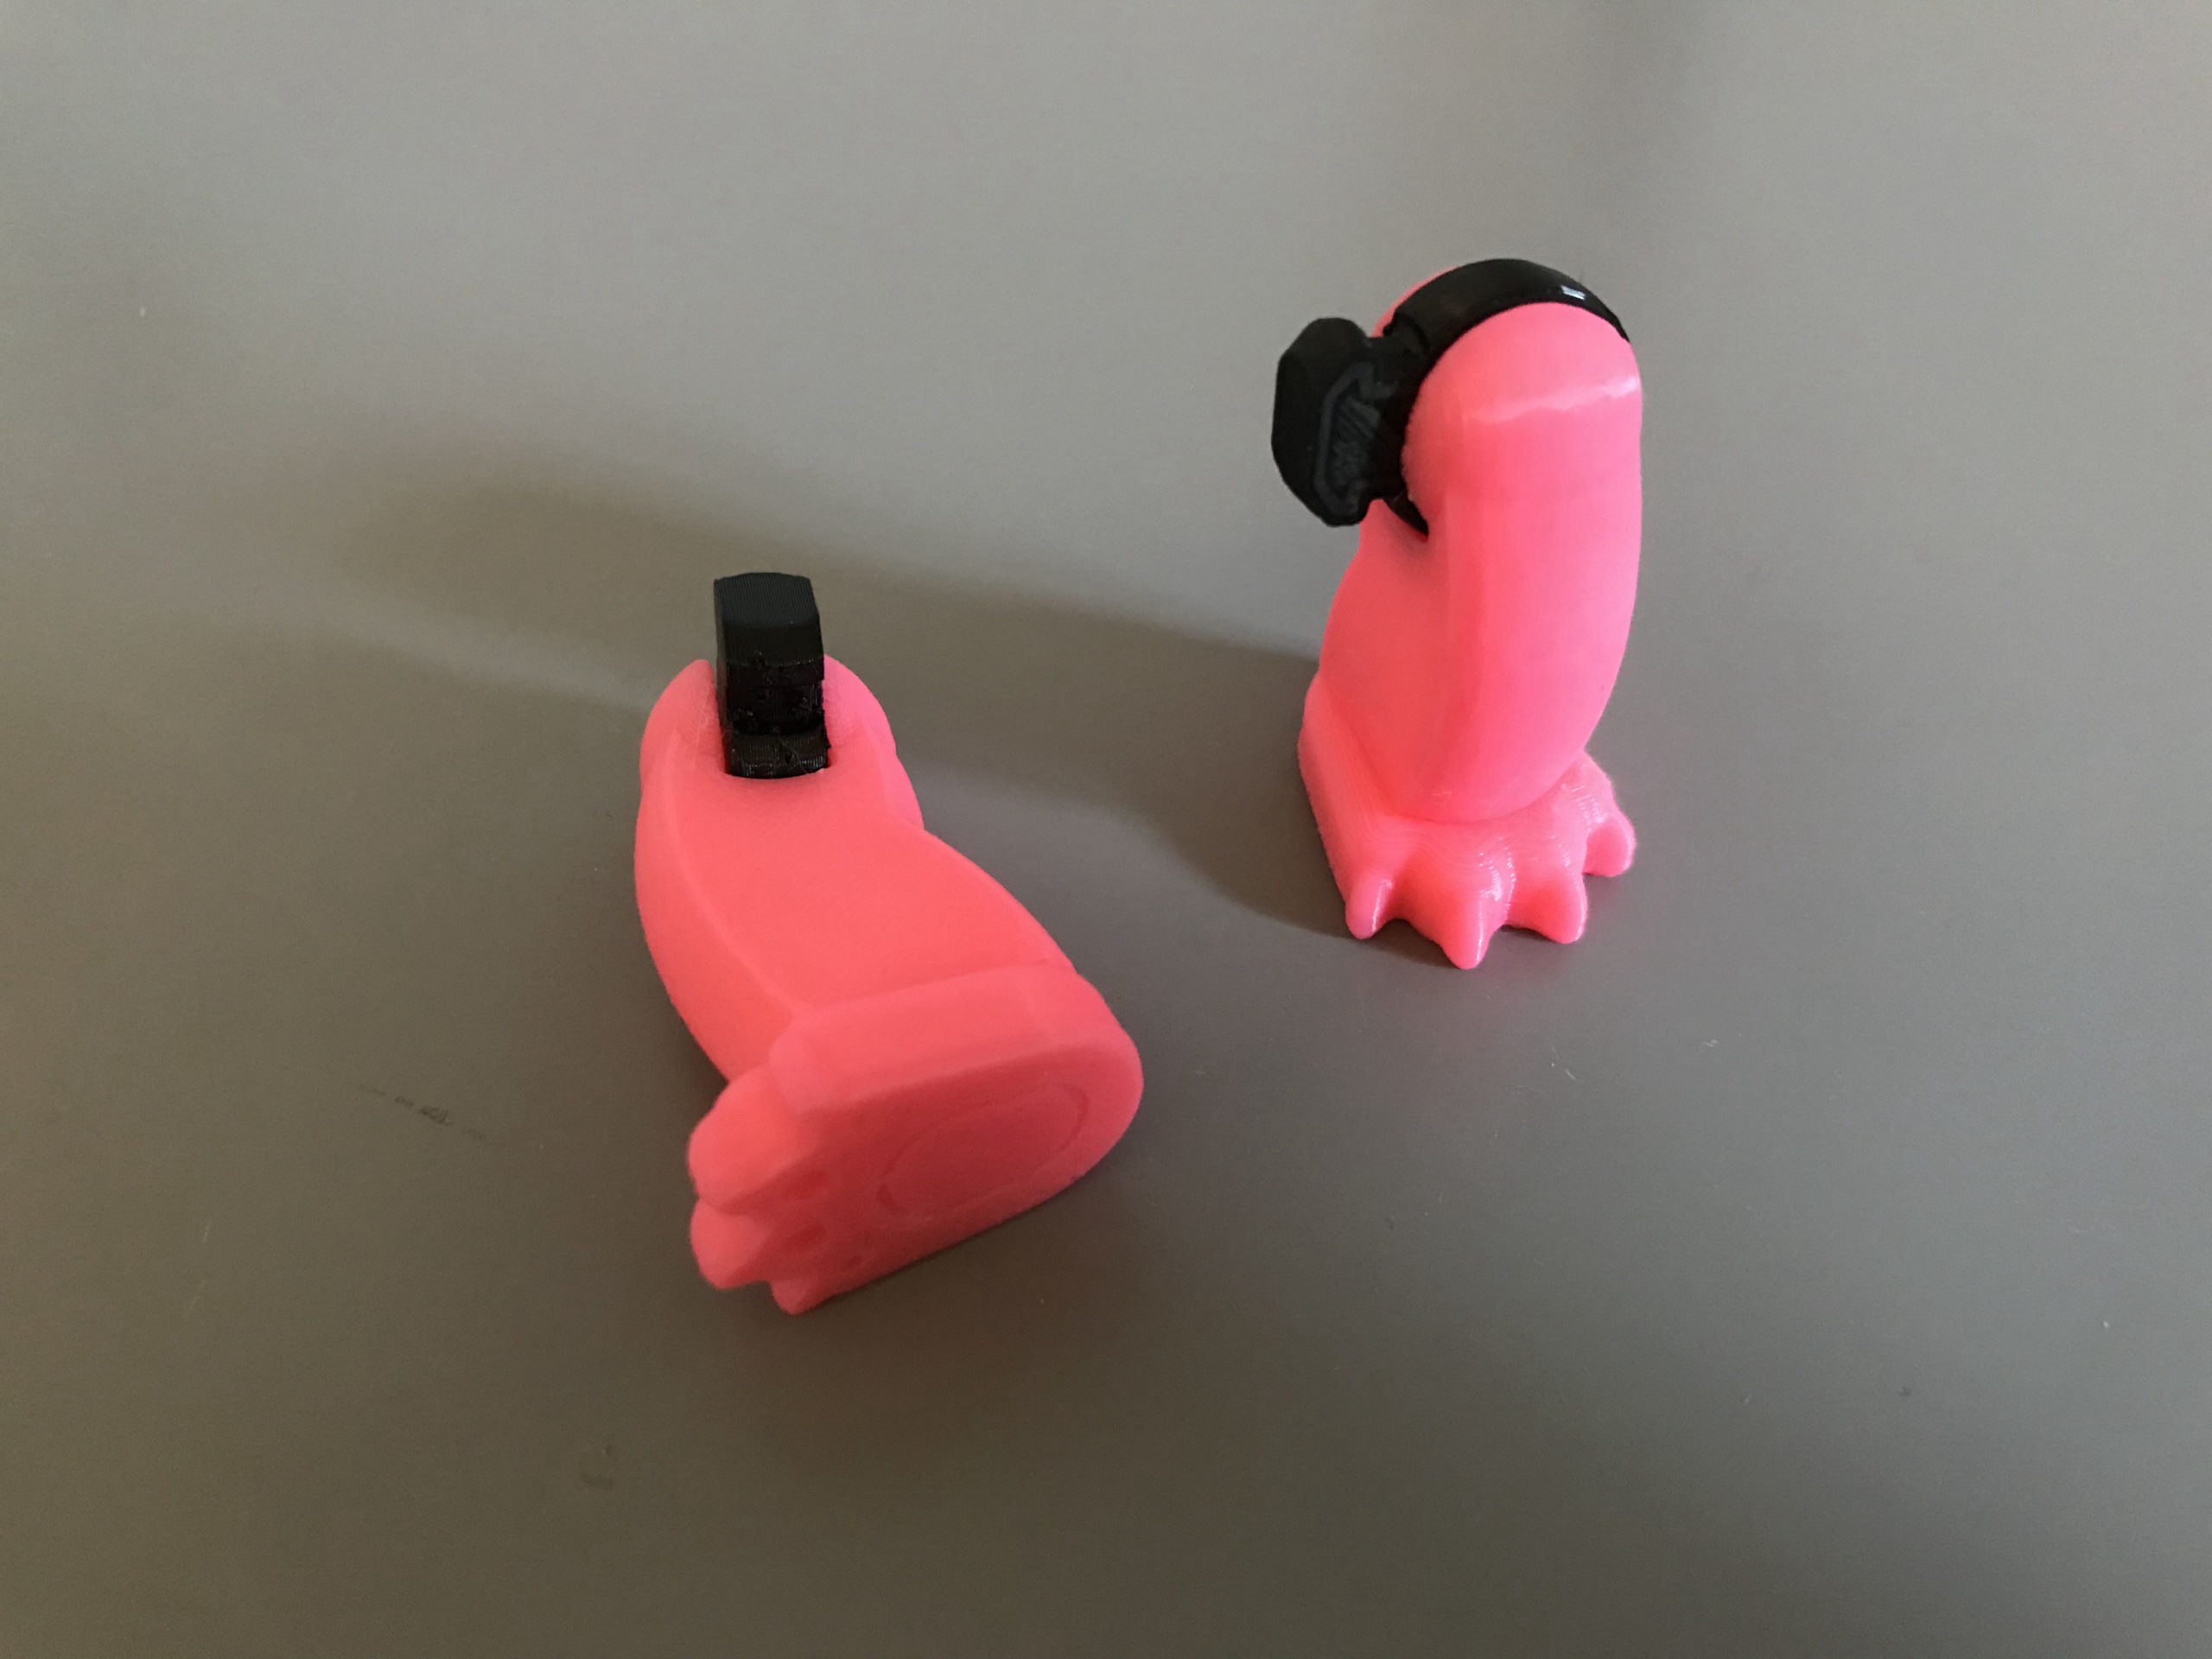
Press-fit the AFJ-FreeCAD components into the corresponding slots of the limb components as shown.
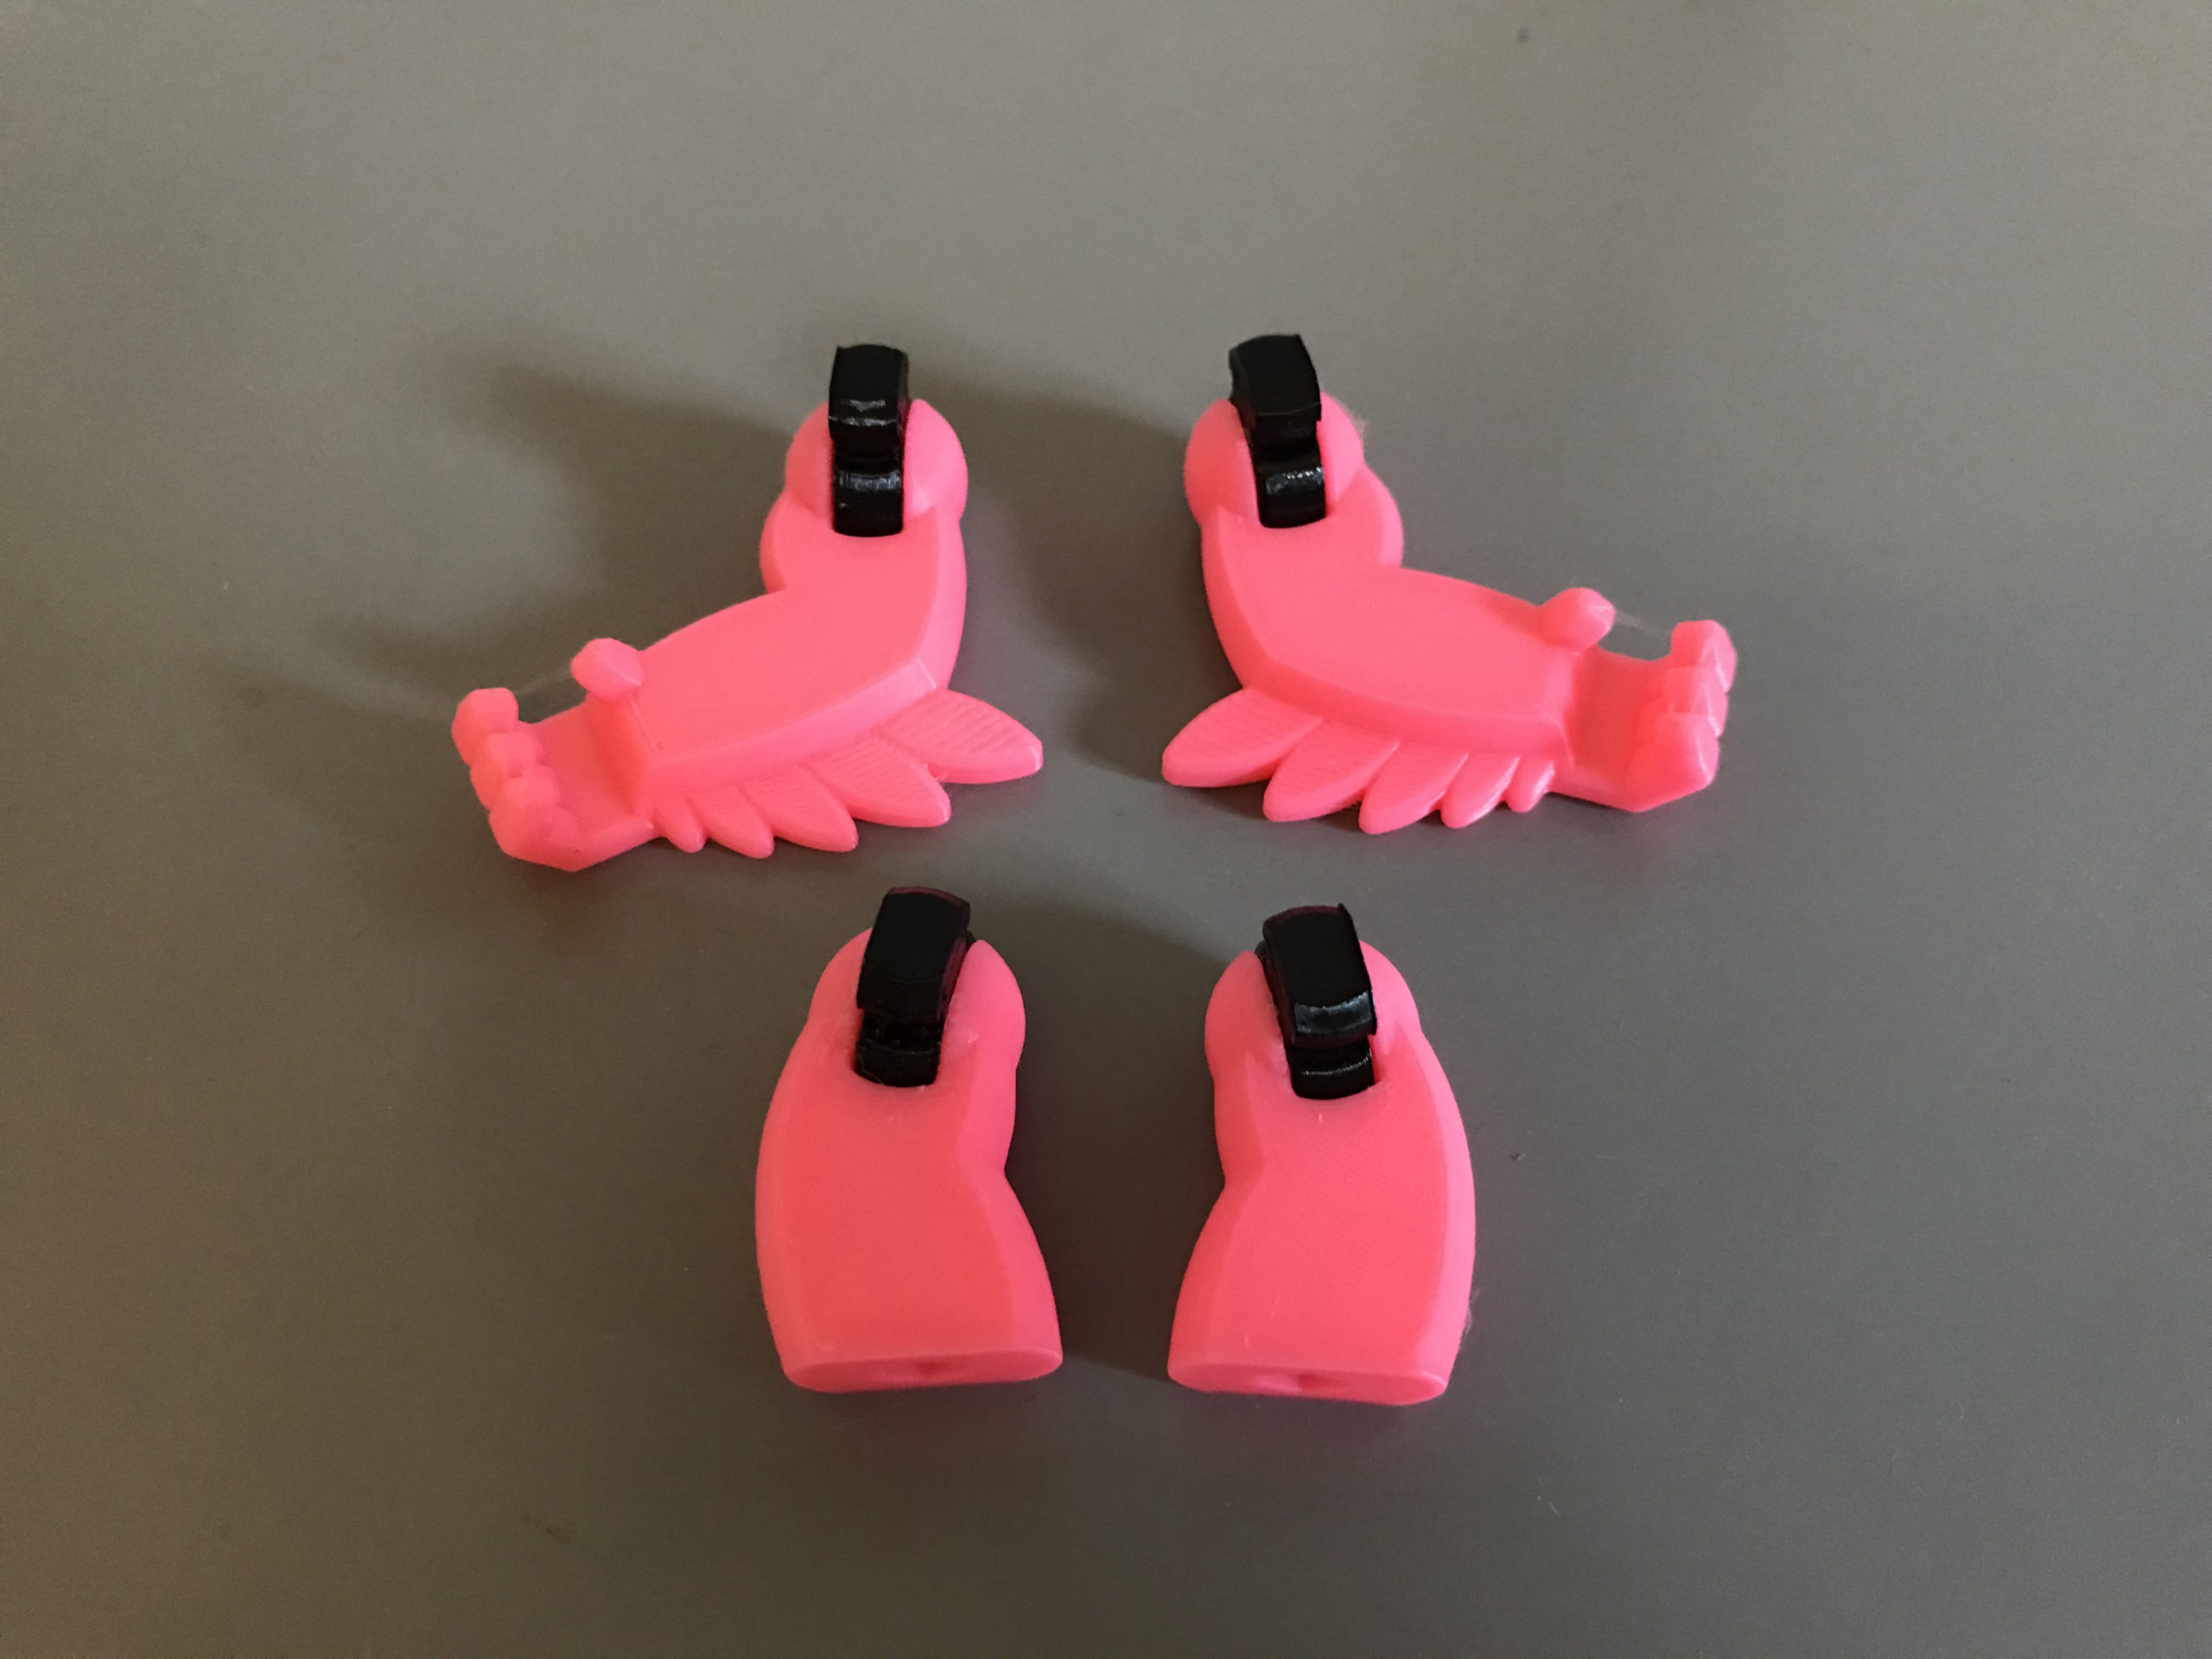
Press-fit the feet into the legs as shown. Use a little glue if necessary.
3. Assemble Head
Press-fit the final AFJ-FreeCAD component into the head as shown.

Press-fit the beak into the head as shown. Use a little glue if necessary.
4. Assemble Body
Press-fit the limbs and head joints into the corresponding sockets of the body.

Glue the 10mm googly eyes into the corresponding sections of the face. If the fit is tight, use something thin like a small knife to carefully push the edges of the googly eyes into the sockets.

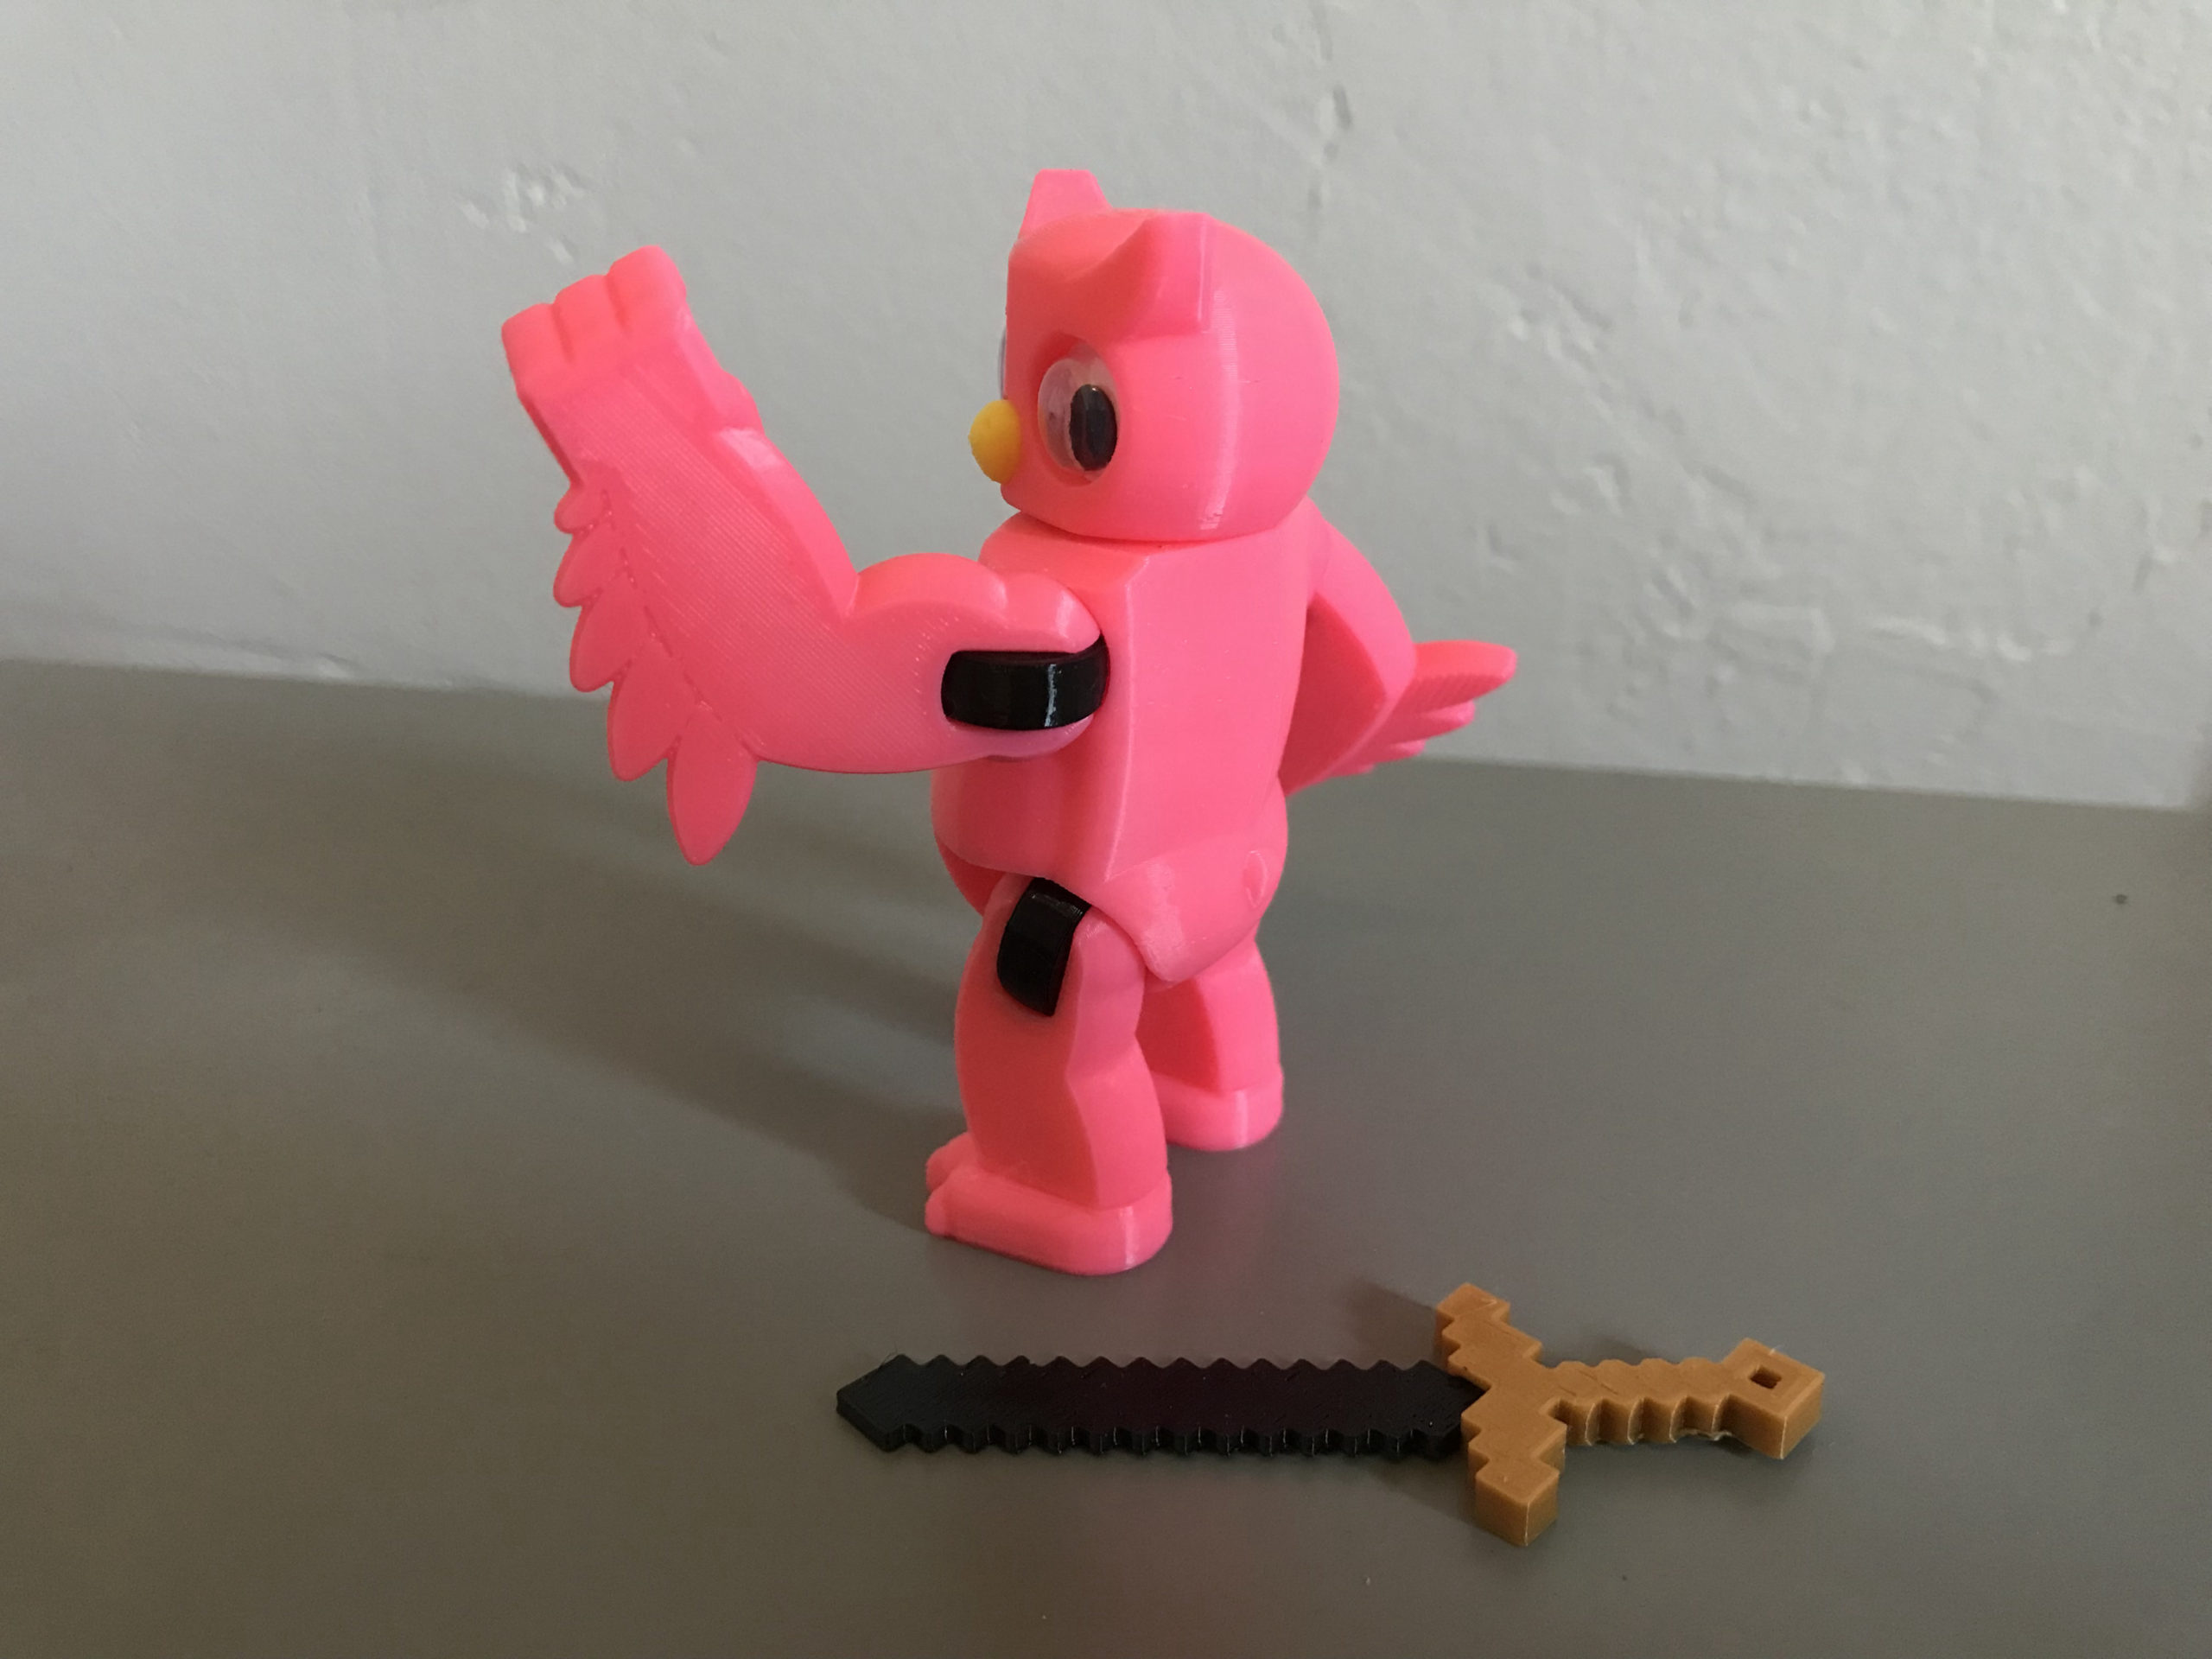
5. Assemble Sword
Press-fit the blade component into the hilt component. Use a little glue if necessary.

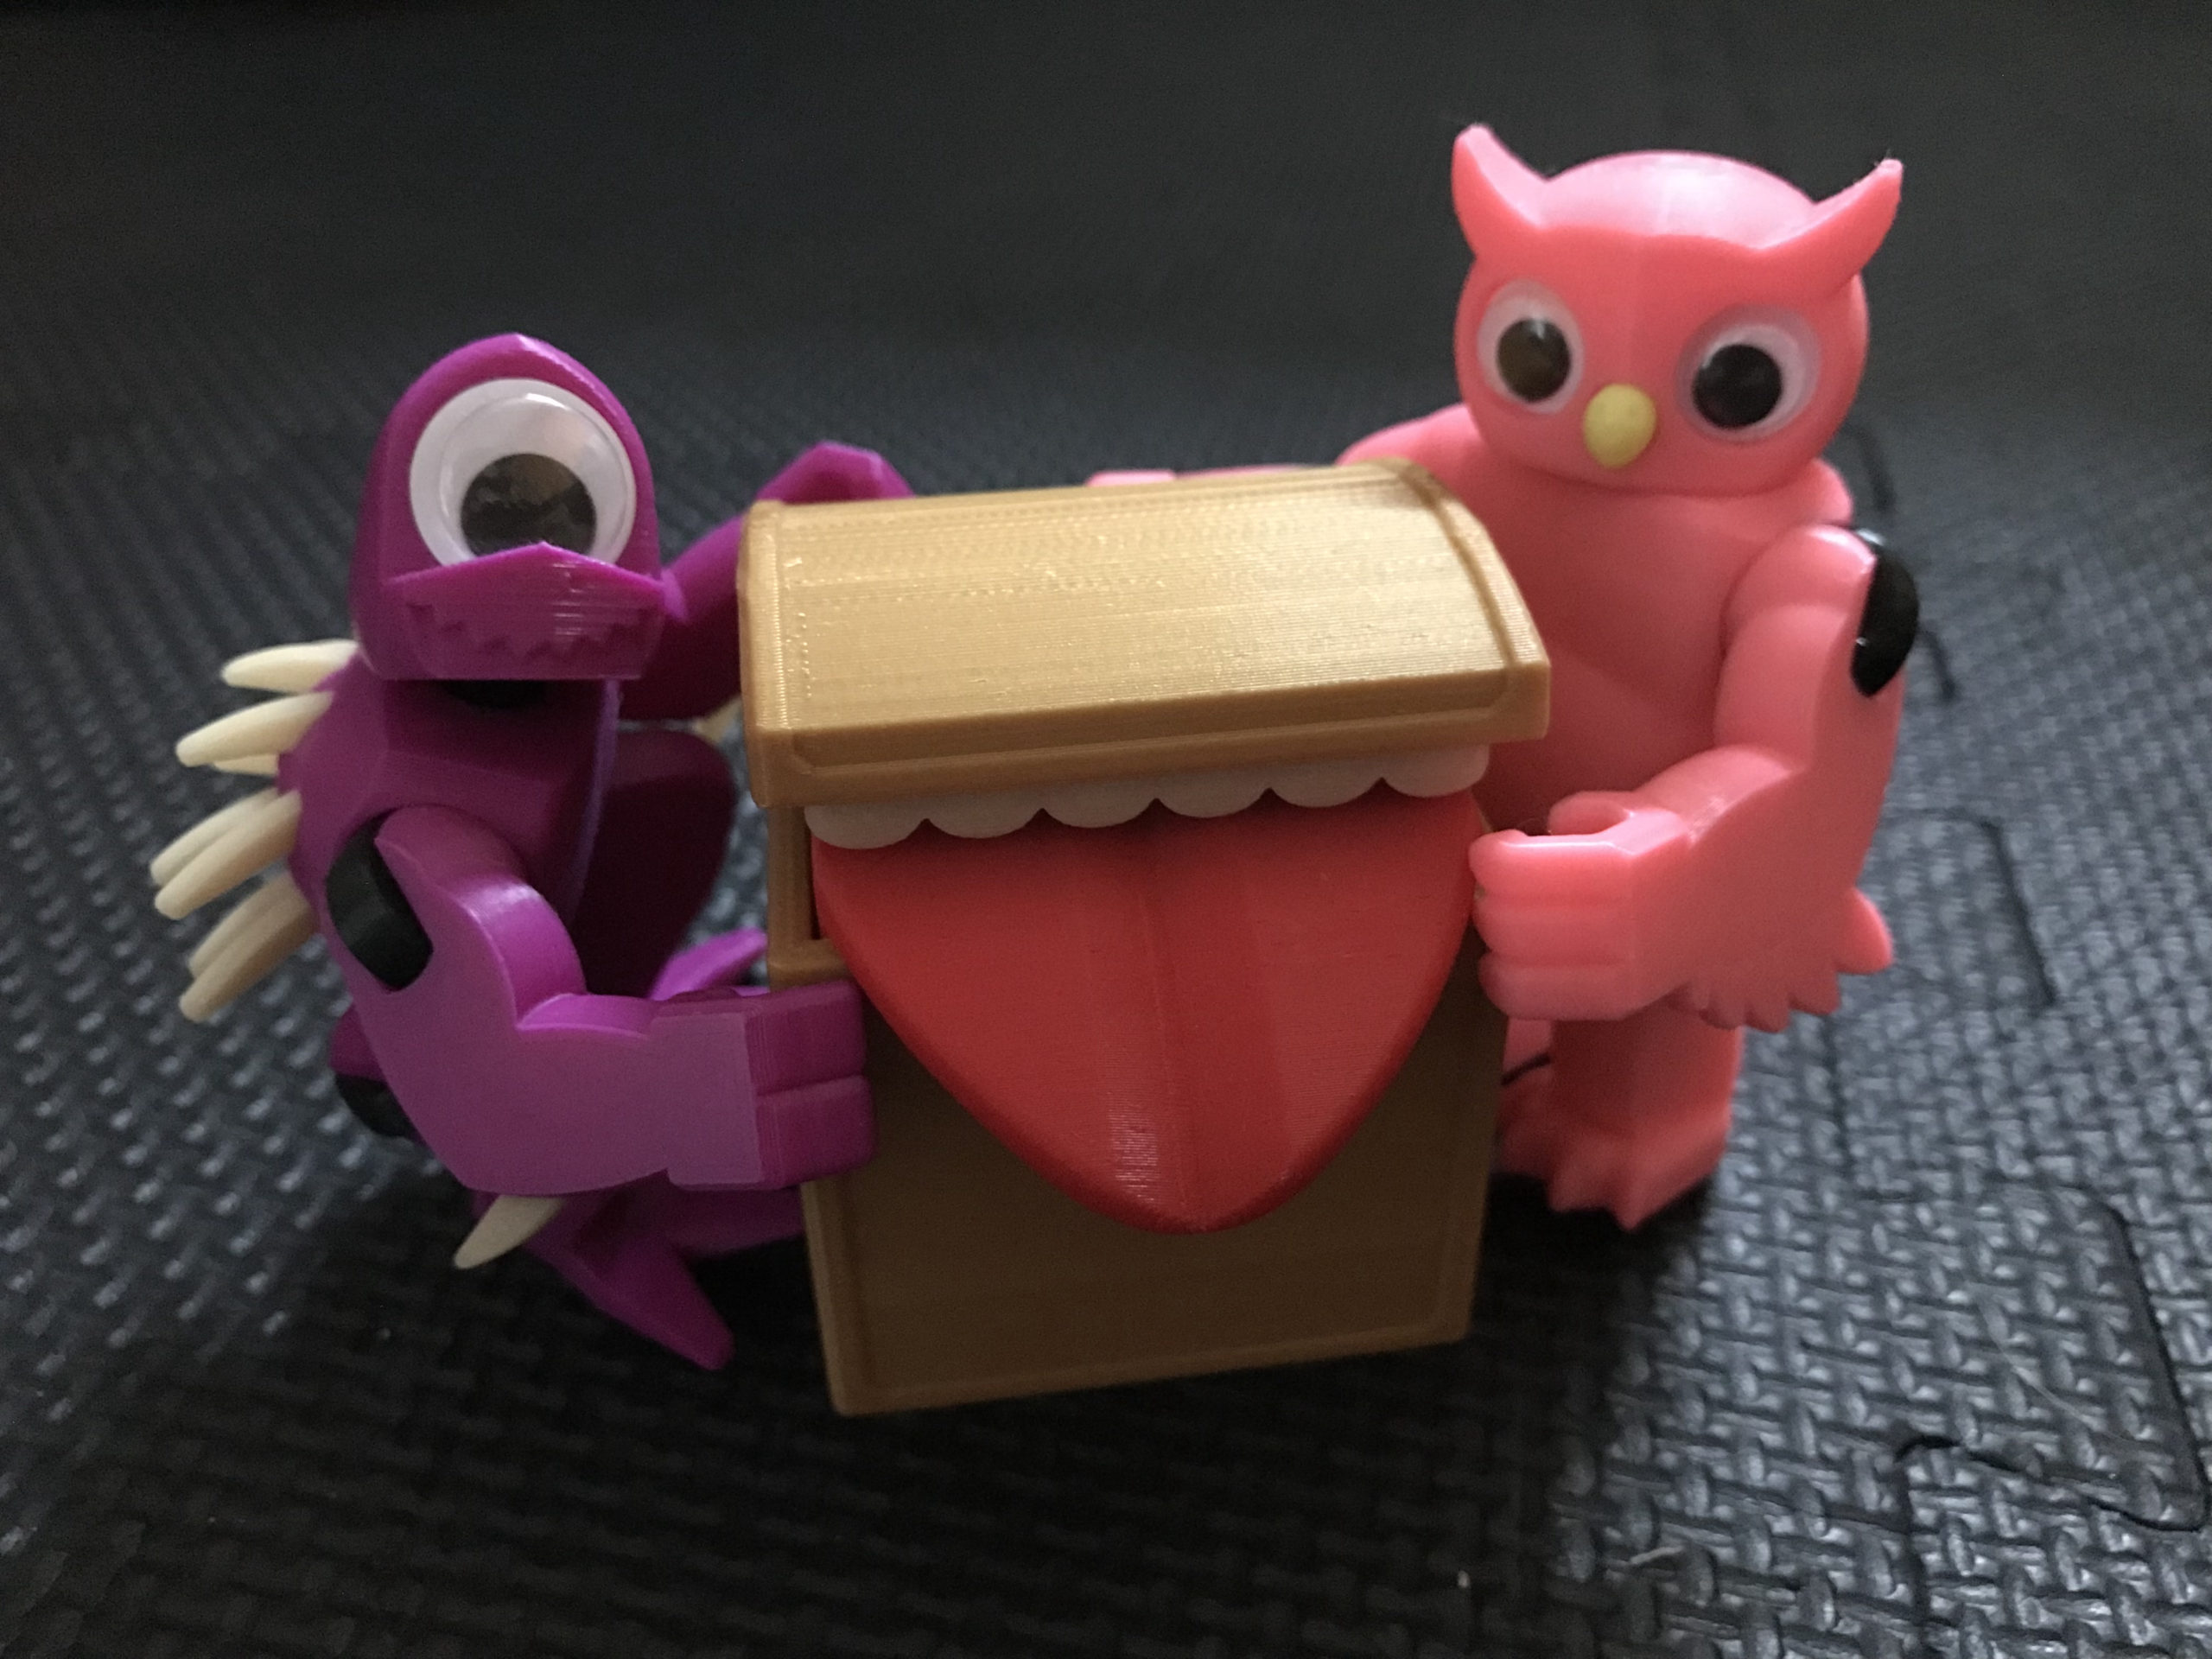
6. Guard the Treasure
Even if it does give the ability to straight-up punch blocks of wood out of trees, The Sword of Vox El is a danger to those who wield it! If an adventurer tries to use it, those sharp edges all over the hilt will cut into their hands and smart. Better keep everyone safe and away from this treacherous weapon.


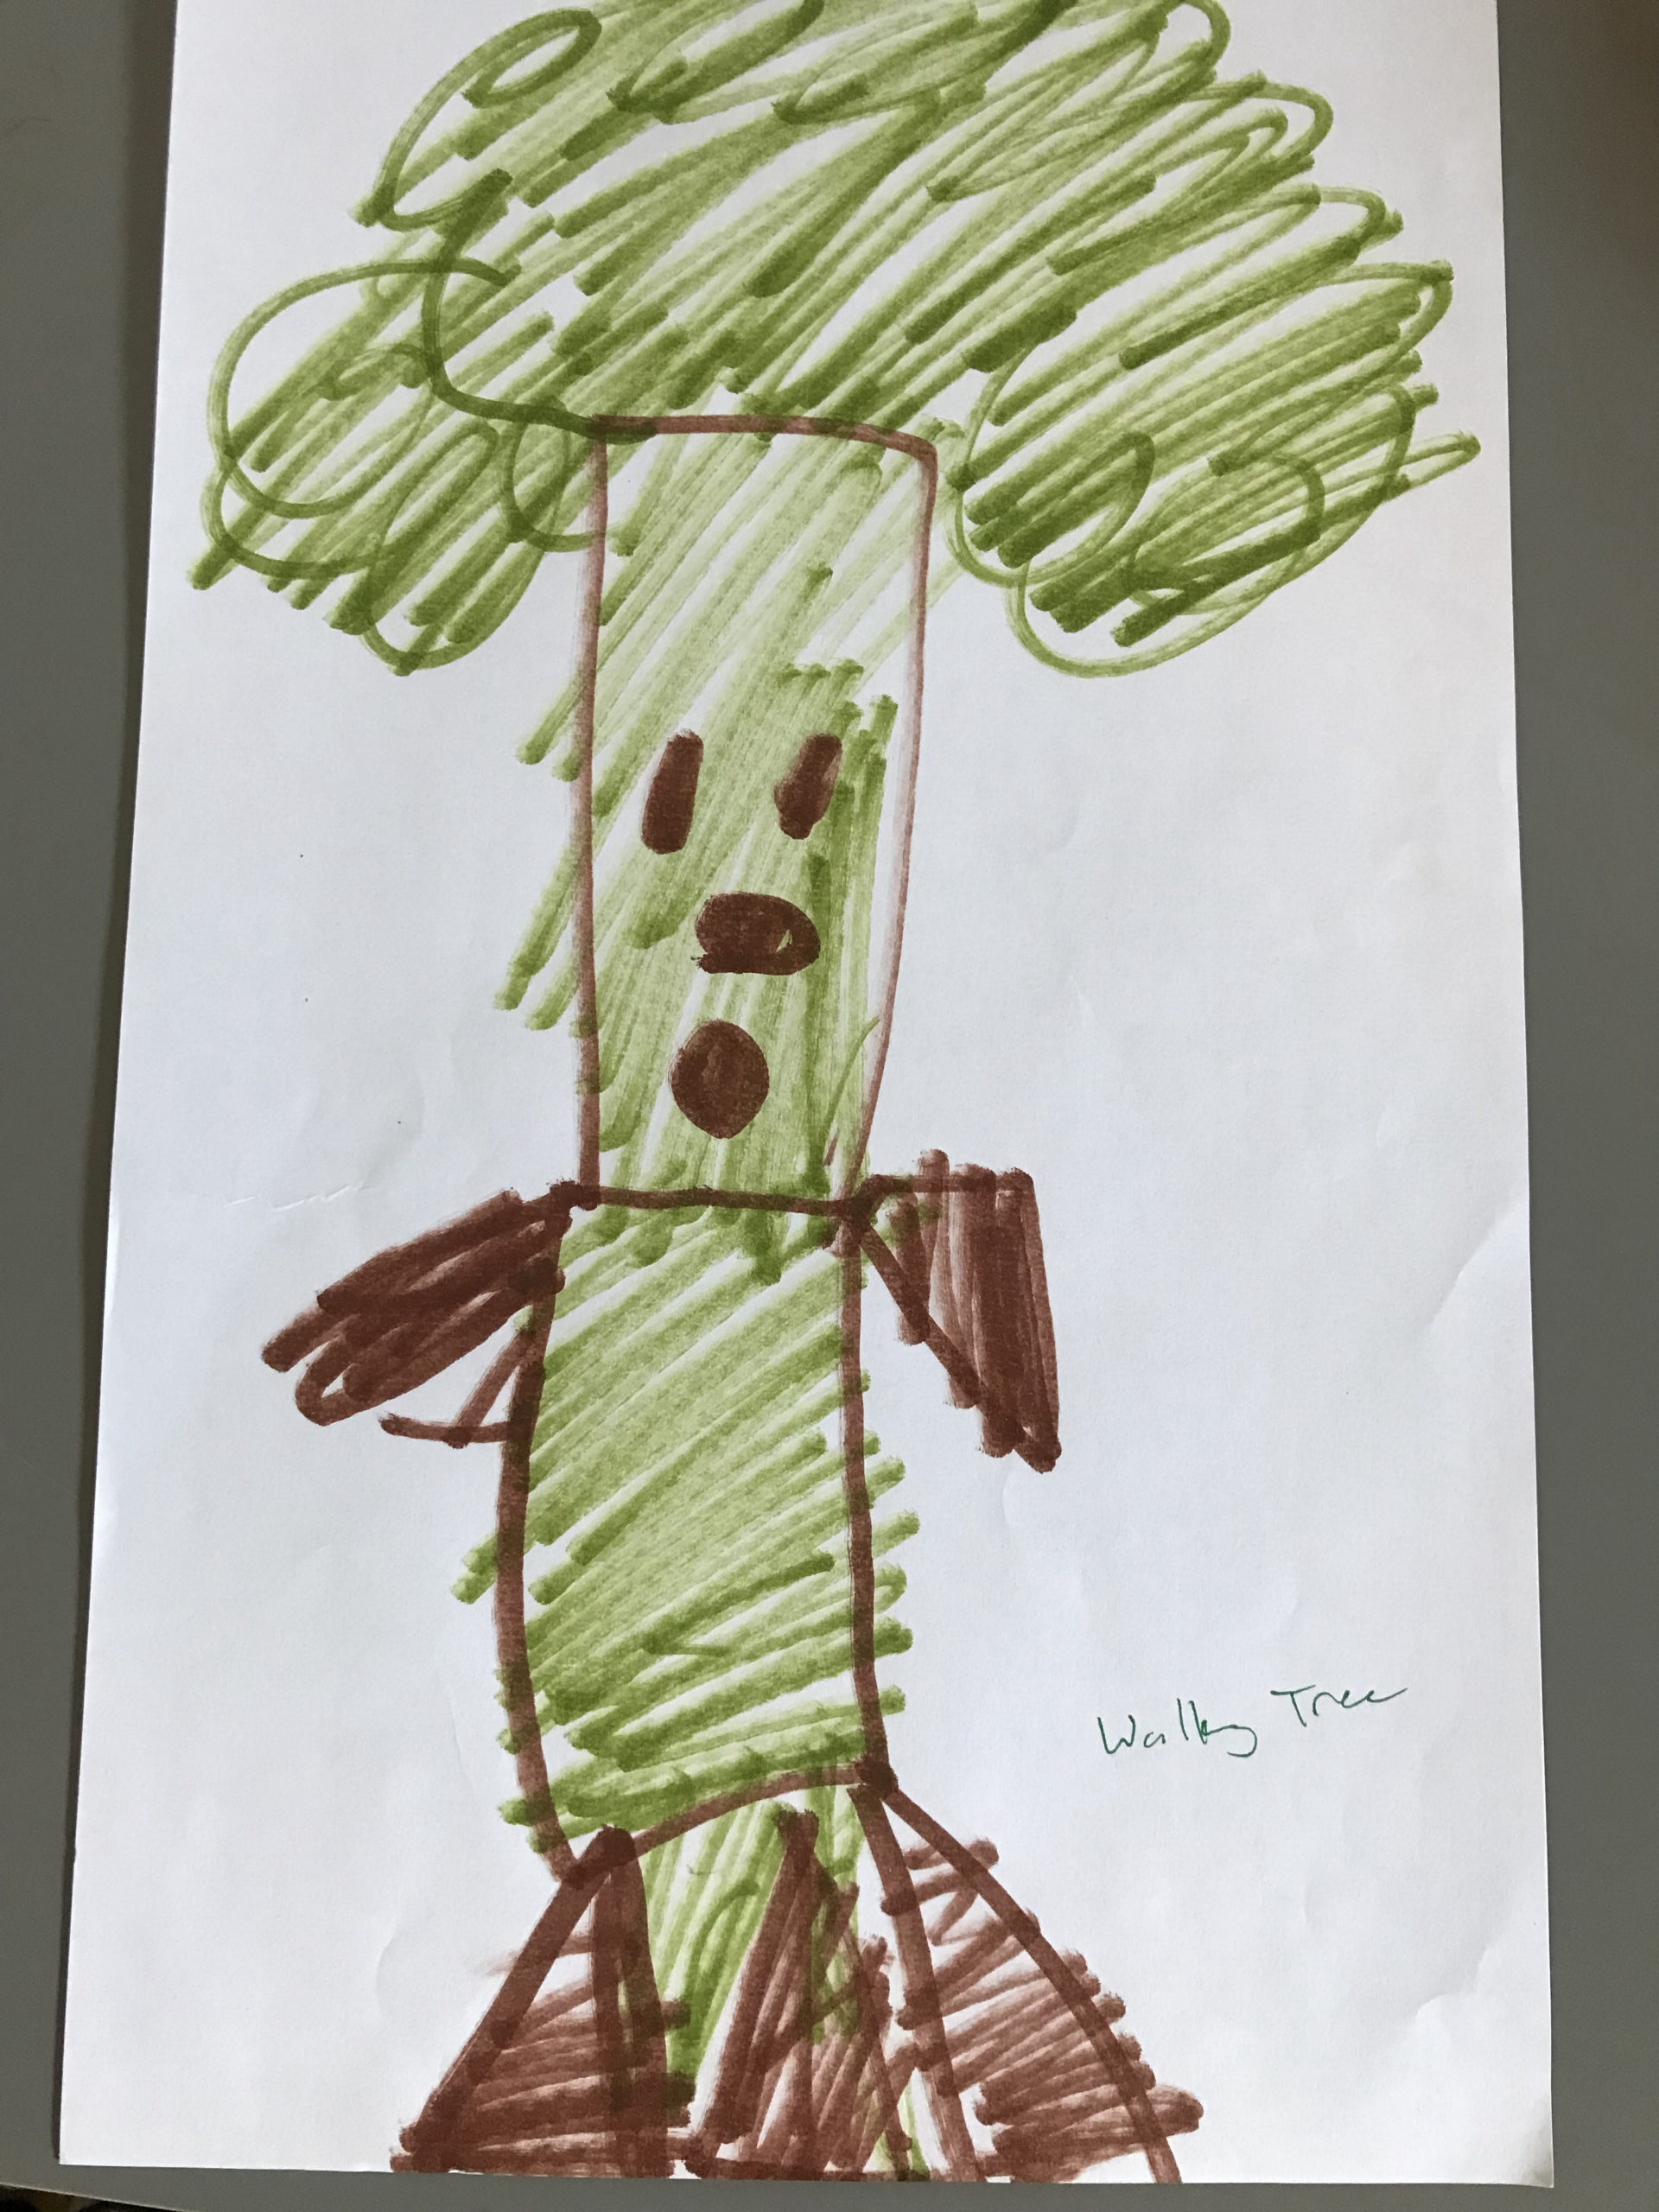
Side note: My kids and I are having a great time with the current trio, and we are all looking forward to more in the future. My daughter has been coming up with monster ideas of her own, independently inventing a Treant (Walking Tree) in the process.
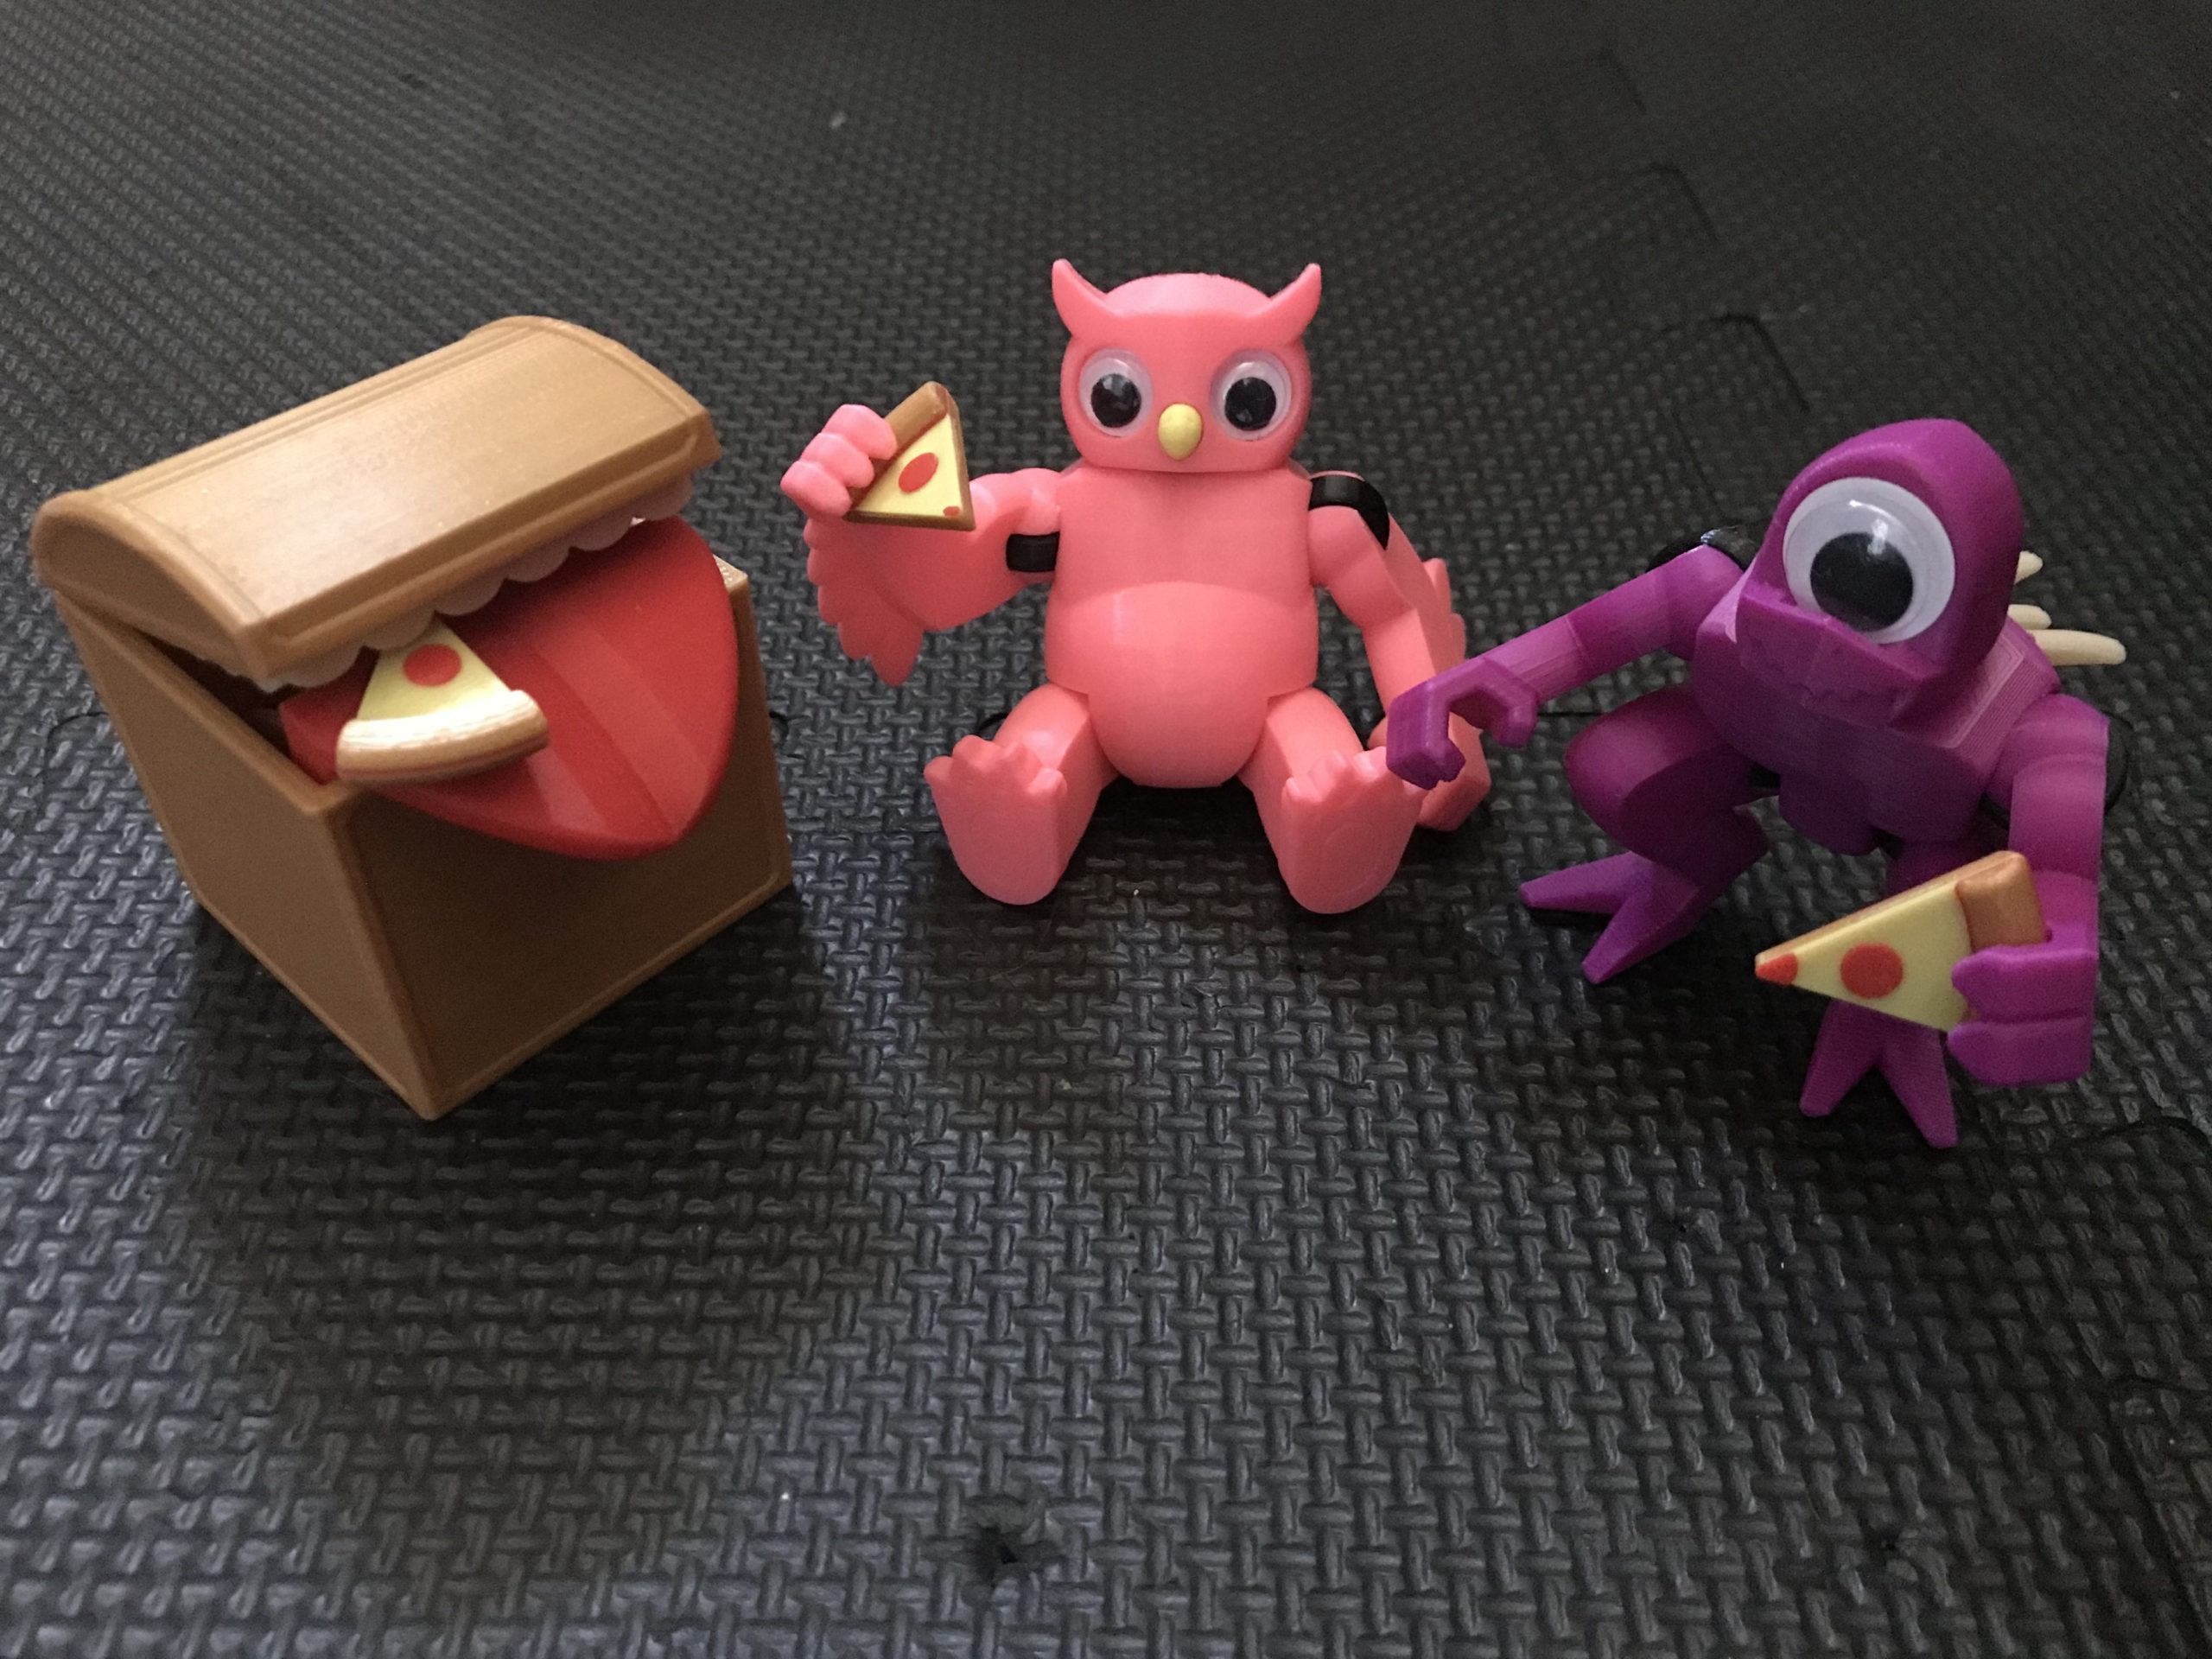
In case anyone was wondering, all of these derps have “real names” in our house: Clarence, Rupert, and now Gladys.
Files
Click the Download button below for a zip file with all the components.
Files are available under the Creative Commons BY-NC-SA license.
Like what you’re seeing here? Leave me a comment down below, follow me on Twitter @DragonMtnDesign, and/or say “hey” if you see me or my work out around on the internet.