Emergency Charger
.")
Between the learning experience of the Drachenbox One, and the DrachenberryPi configurations, I had a few parts left over, which was irritating. It pains me to have useful components like LiPo batteries and charging circuits sitting idly in storage until another project needing them comes along. It occurred to me later than I’d like to admit that a LiPo battery and charging circuit makes for a great project in and of itself.
And let’s be honest. We’ve all been in the situation where we suddenly find our phone or tablet down to 5% in the middle of the day with no outlet in sight, so this is also incredibly useful.
Parts List:
Mini LiPo Charger – Adafruit 1905
Powerboost 500 Basic – Adafruit 1903
3.7V 2200mAh LiPo Battery – Adafruit 1781
SPDT Slide Switch – Aafruit 805
Heat Shrink Tubing – Adafruit 1649
24 GA wire – Wherever wire is sold
Helpful Tools:
Soldering Iron
3D Printer (or printing service)
Rubber Mallet (This might get rough)
Build the Circuit
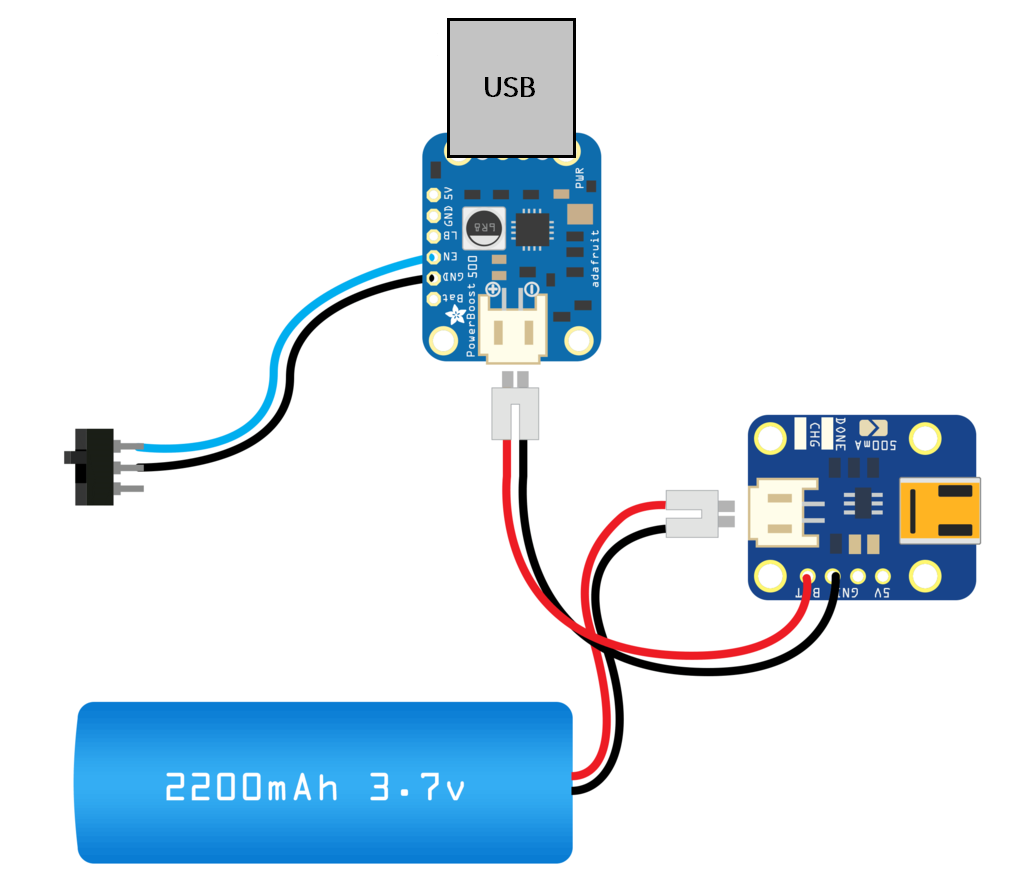
Solder the connector/wires that came with the boards, the extra wire to the SPDT switch (maybe wait on the switch until it is secured in the housing), and the female USB connector as shown in the diagram below. Heat-shrink where heat-shrink is needed.
3D Print Housings
Print out the housings found on
Thingiverse, andYouMagine(I have two locations now!)11/13/2015 UPDATE: Files are now also on
Cults3D! If you’ve been enjoying this project, consider leaving me a donation over there. No pressure though.5/26/2016 UPDATE: Honored to have this up on MyMiniFactory now too! Grab them for free, and tip me if you feel like doing so.
4/11/2018 UPDATE: Consolidating the number of places hosting the files. More changes to come, but they’re still available for free.
March 2020 UPDATE: Files can be downloaded directly from this site at the bottom of the page. They are also available on Prusa Printers!
Assembly
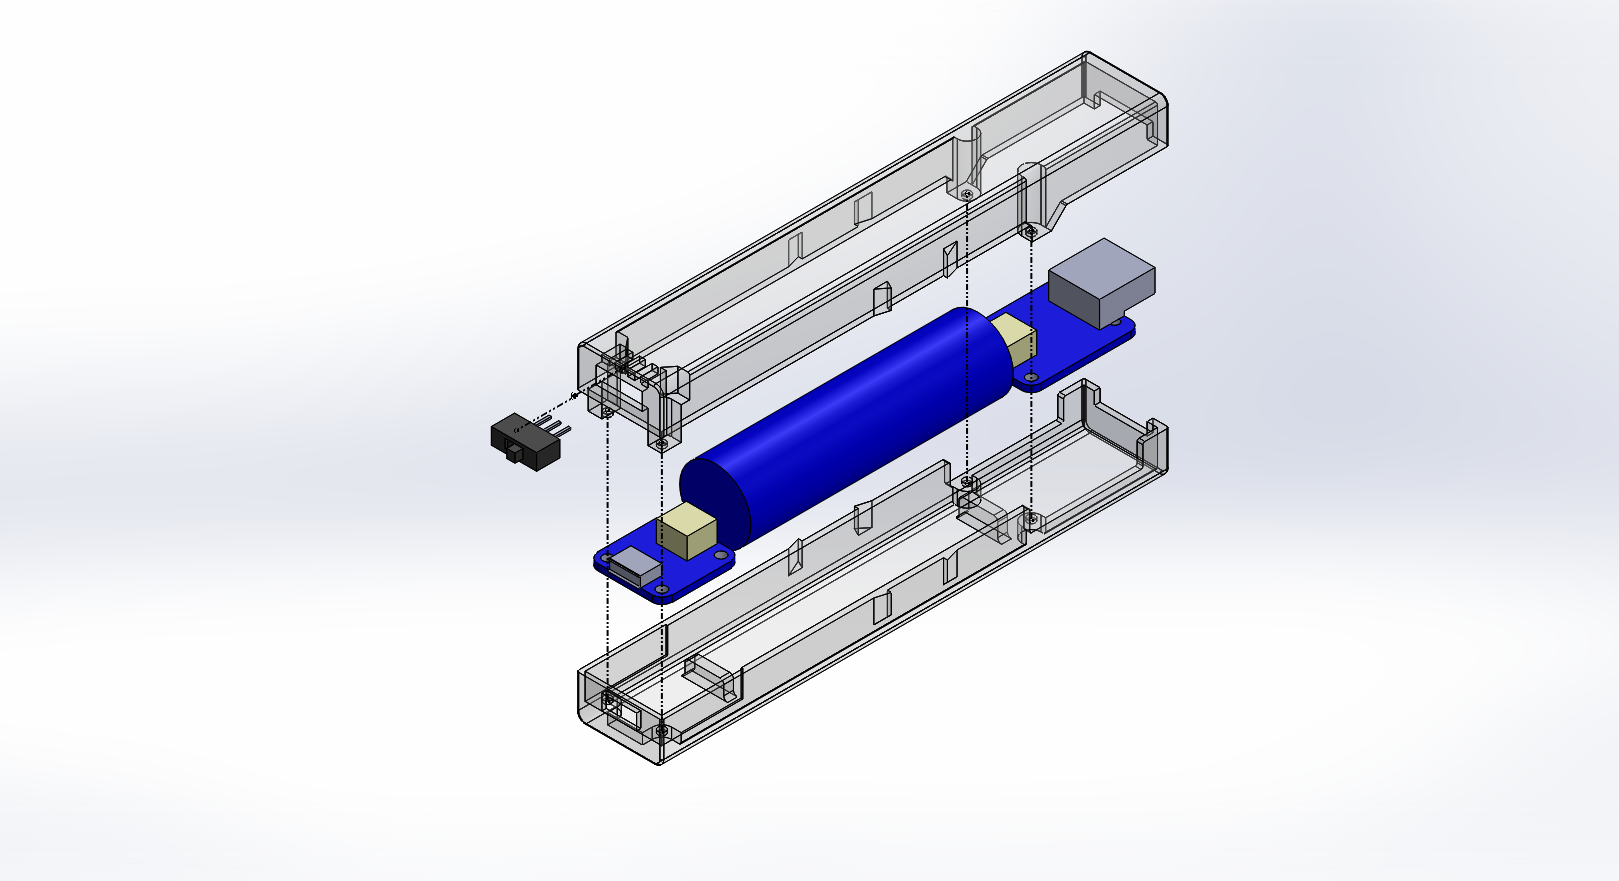
Fit the SPDT switch into the top housing (finish soldering at this point if you haven’t), and position the boards over the bumps on the bottom. Fit the battery between them, making sure to lay all wires in the housing corners as best as possible, and sandwich the components between the top and bottom housings.
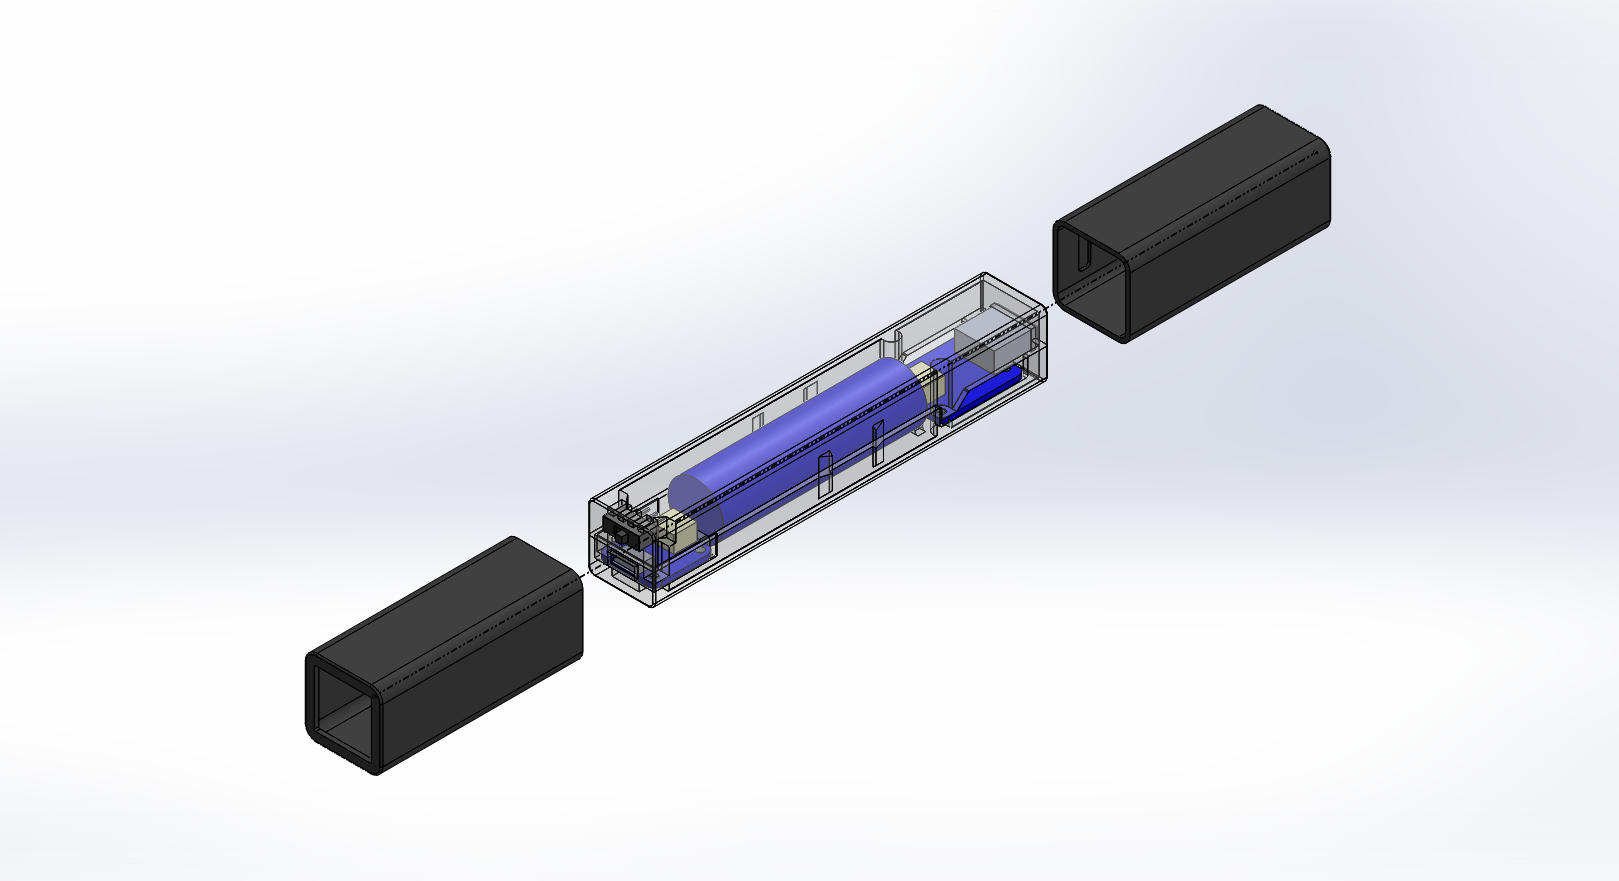
Press the outer housings over the top and bottom components so that they lock into position over the rest of the assembly (this is where the rubber mallet may come in handy, and uh, good luck trying to get those things apart again if you make a mistake).
Charge
And charge your devices simultaneously. Cool thing about this is that it can be connected in series with your computer, wall adapter, what-have-you, so everyone gets power!

.
.
.
March 2020 UPDATE: Files are available here! Click the Download button below for a zip file.
Files are available under the Creative Commons BY-NC-SA license
1 Comment