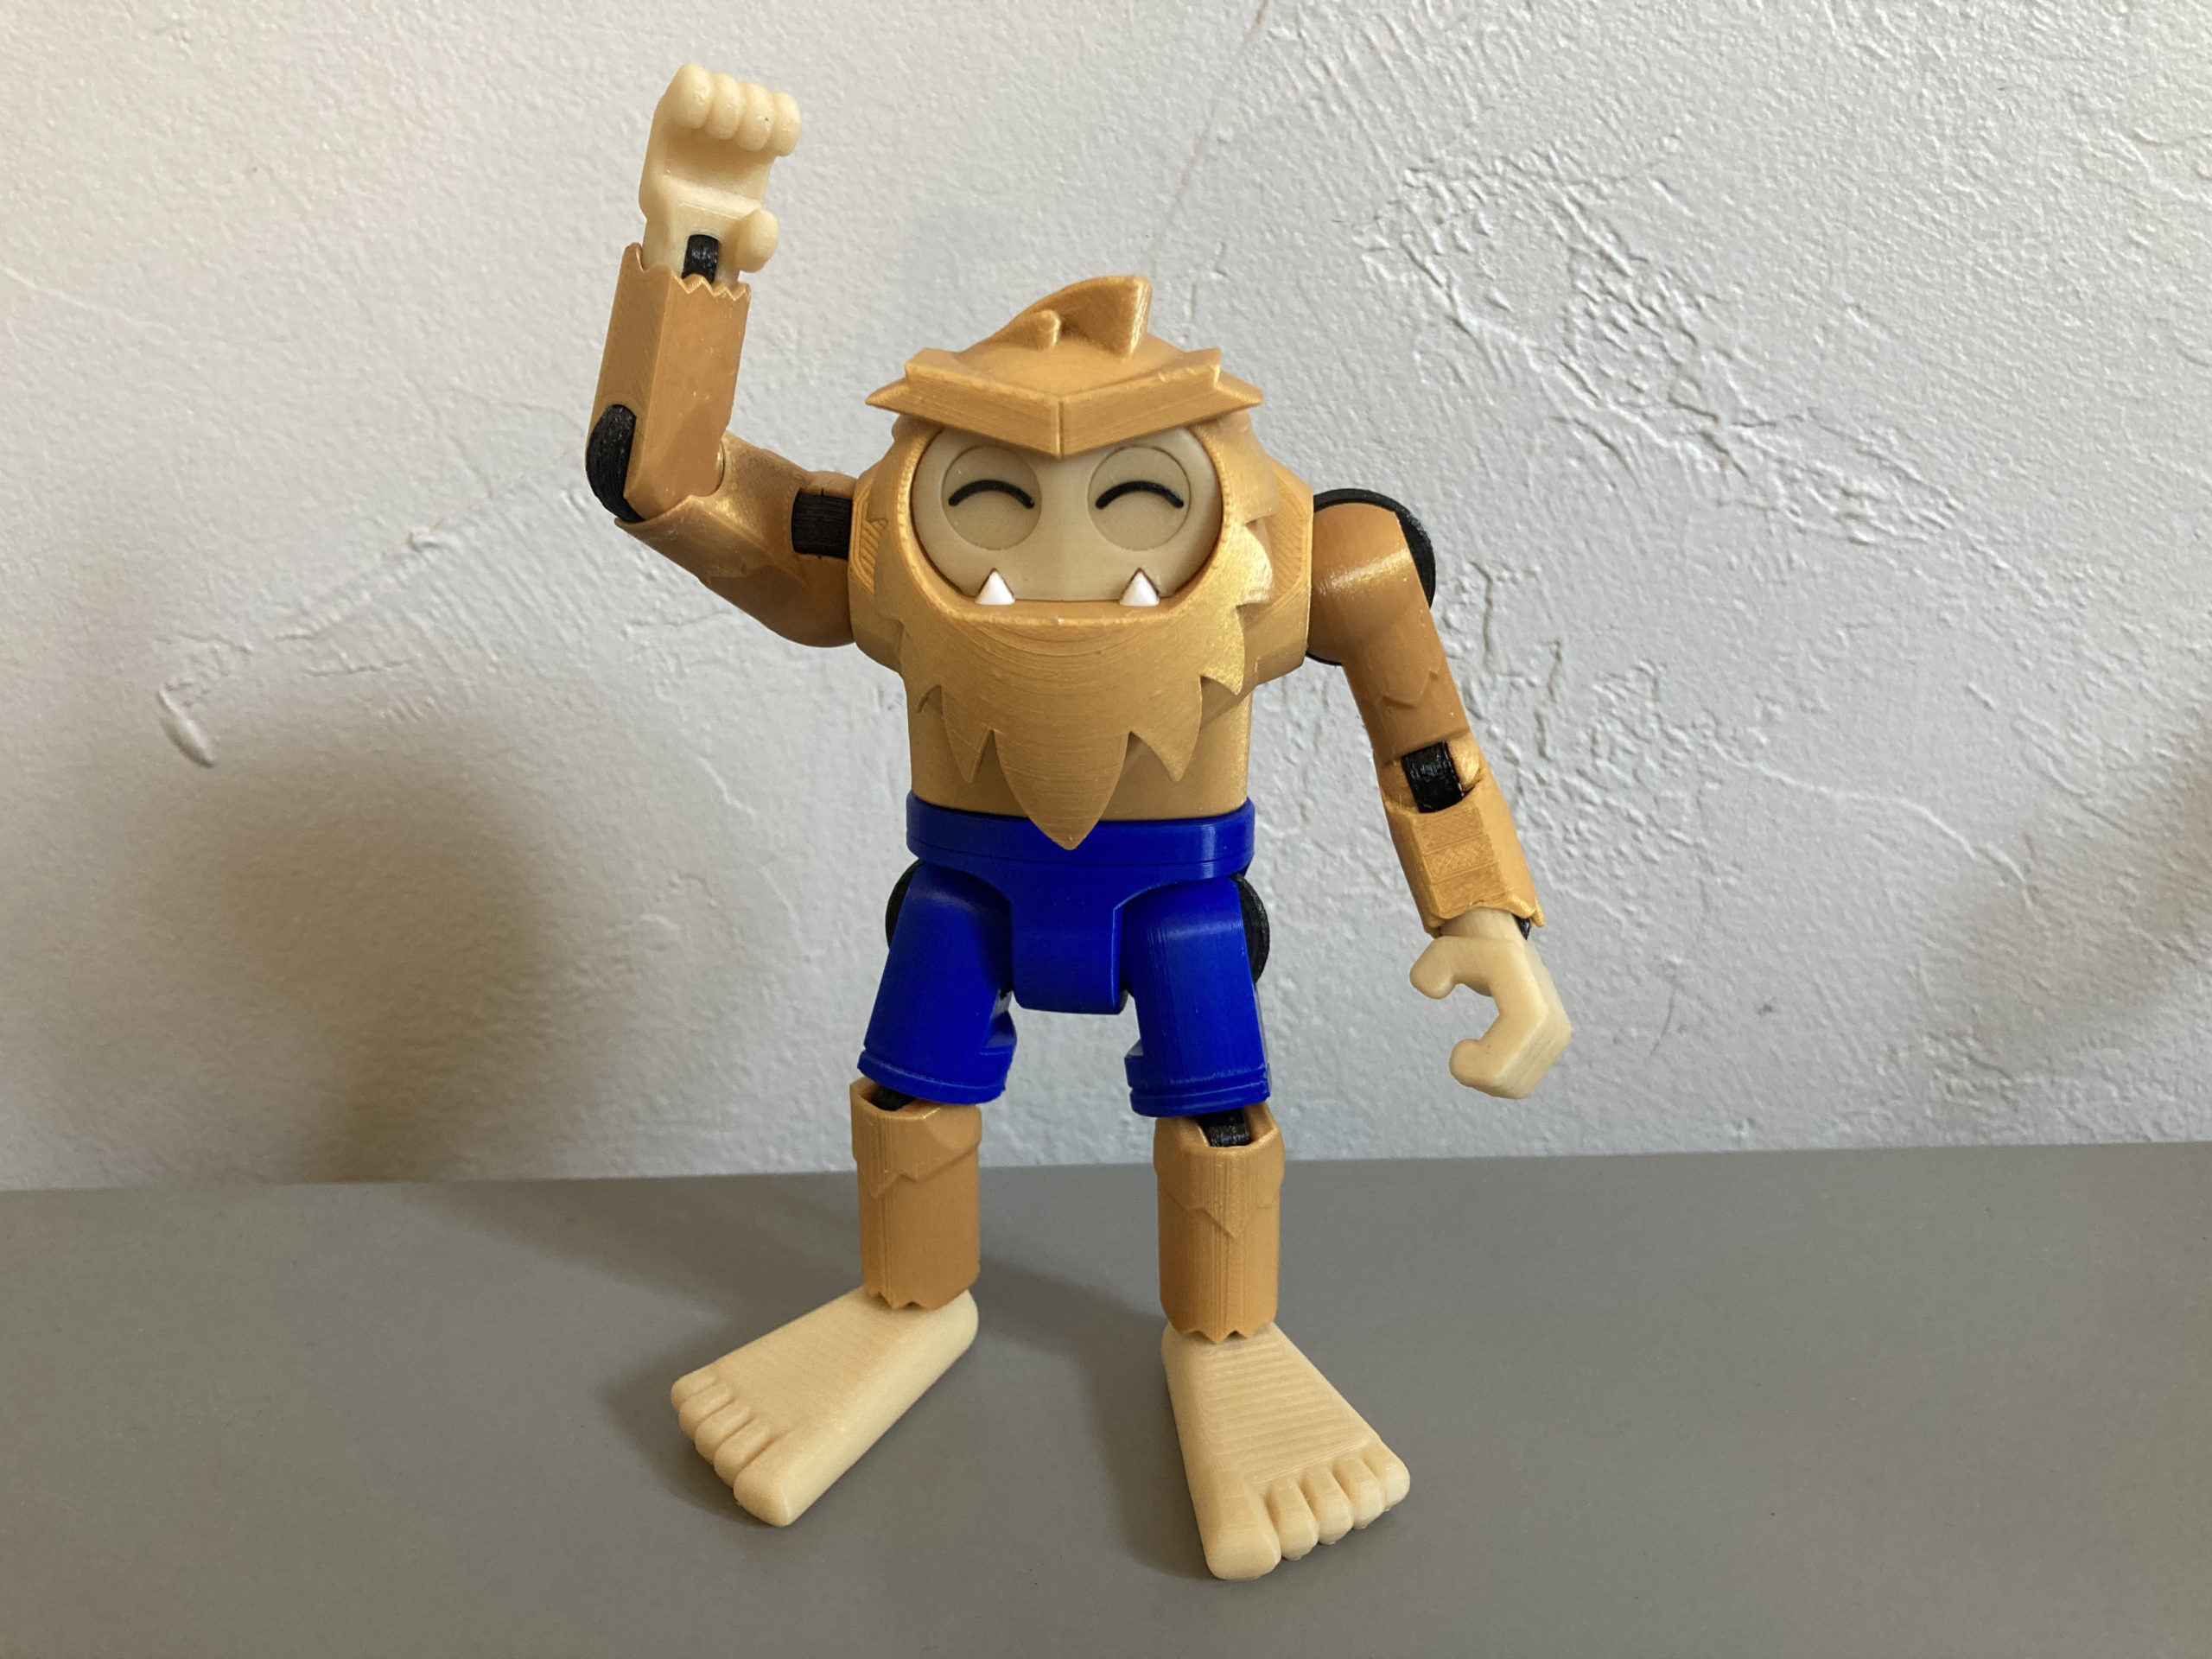
Crisp Cryptids: Sasquatch
Crisp as in fresh!
Design Notes
Drawing inspiration from the Lego Yeti and Wampa figures, I started out tinkering with the head design in FreeCAD 0.20. The eyebrows had me stuck for a while, so progress was slow. The proper look just couldn’t quite come together until I busted out the crayons with my son and we got to doodling.

Once the overall concept was established on paper, the rest of the design process came together much easier. I’ll take that as a sign that I should probably draw out my ideas first before staring at a screen in vain for hours at a time.
This is my most complex design since the changeover to FreeCAD, and it also marks the first time attempting wrist and ankle joints. The project was started as part of a birthday gift for my father-in-law, and was I was so pleased with the outcome that I had to share the model with a wider audience.
Helpful Tools
3D Printer capable of working with flexible materials and material changes
Needle Nose Pliers
Super Glue
1. Print out Parts
Two sets of files can be found at the bottom of the page
Sasquatch:

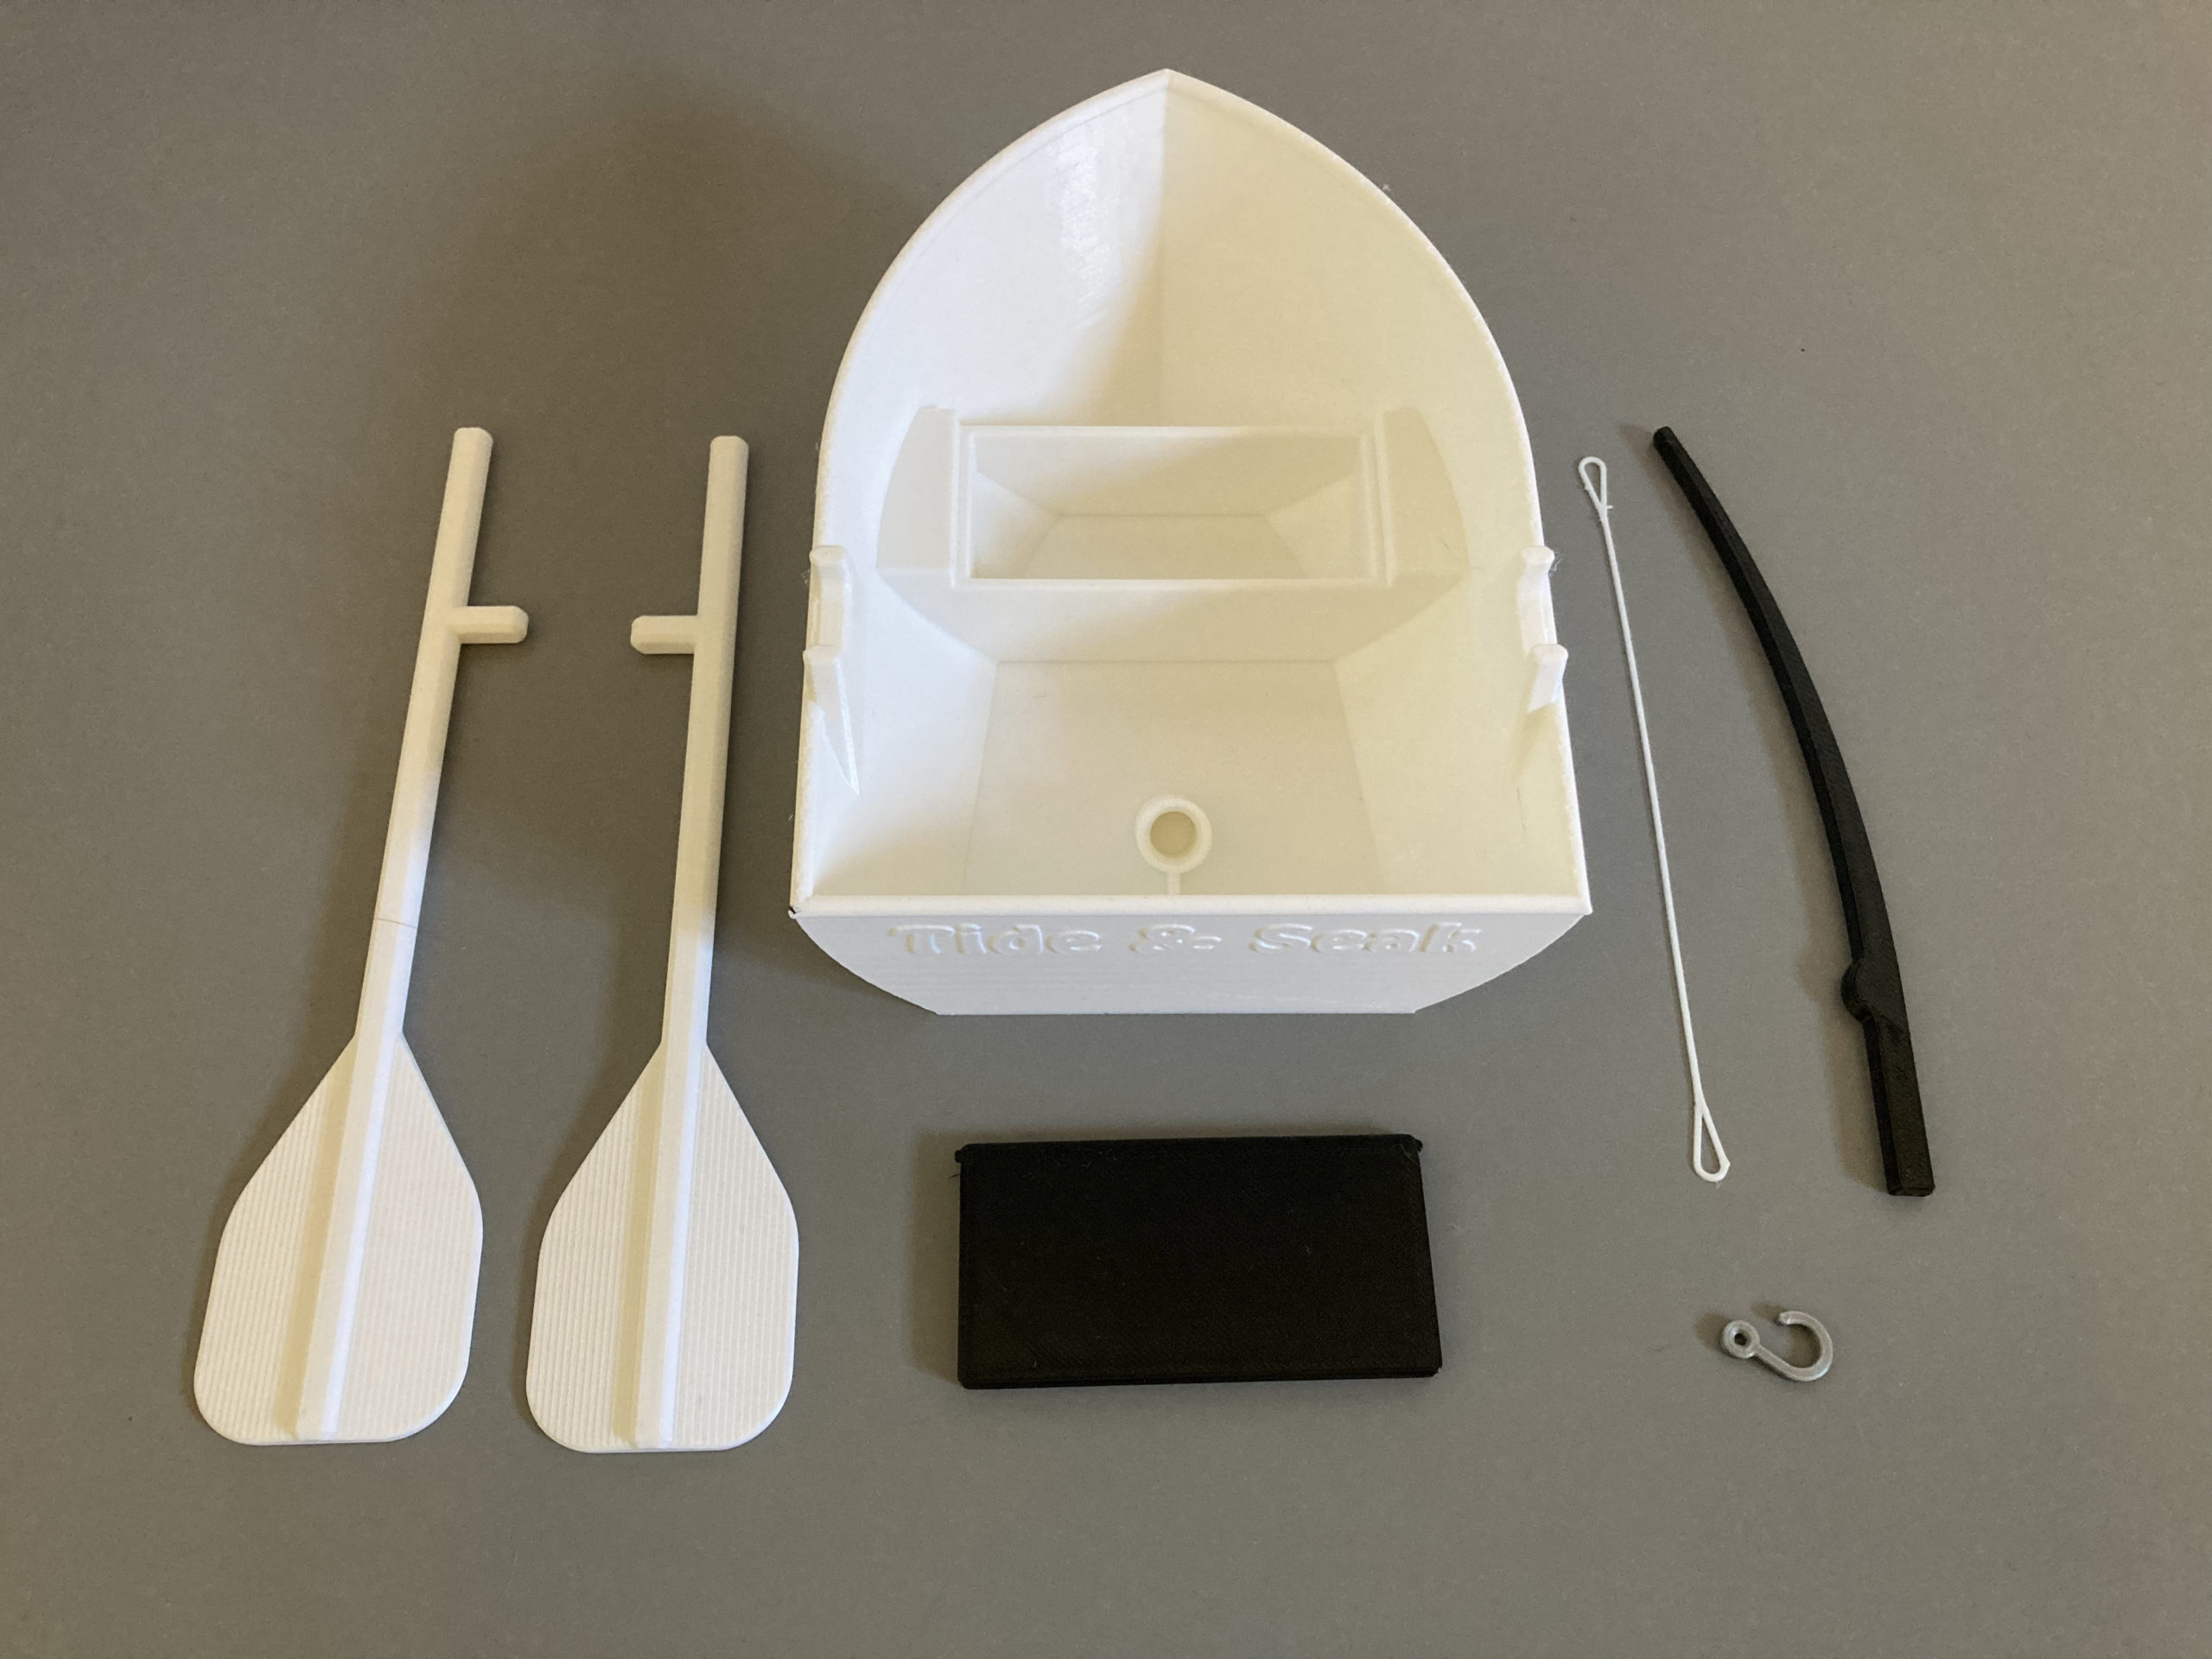
The Tide and Seak:
AFJ-FreeCAD (x4), AFJ-Large-FreeCAD (x6), AFJ-Small-FreeCAD (x4), FishingPole-Line
Material: Flex (98A)
Infill: 15-20%
Supports: No
Brim: No
10mm Closed Eyes (x2)
Material: PLA, with color change at specific layers as shown
Infill: 15-20%
Supports: No
Brim: No
Everything else
Material: PLA
Infill: 15-20%
Supports: No
Brim: No
2. Assemble Head
Get all the head pieces together to start
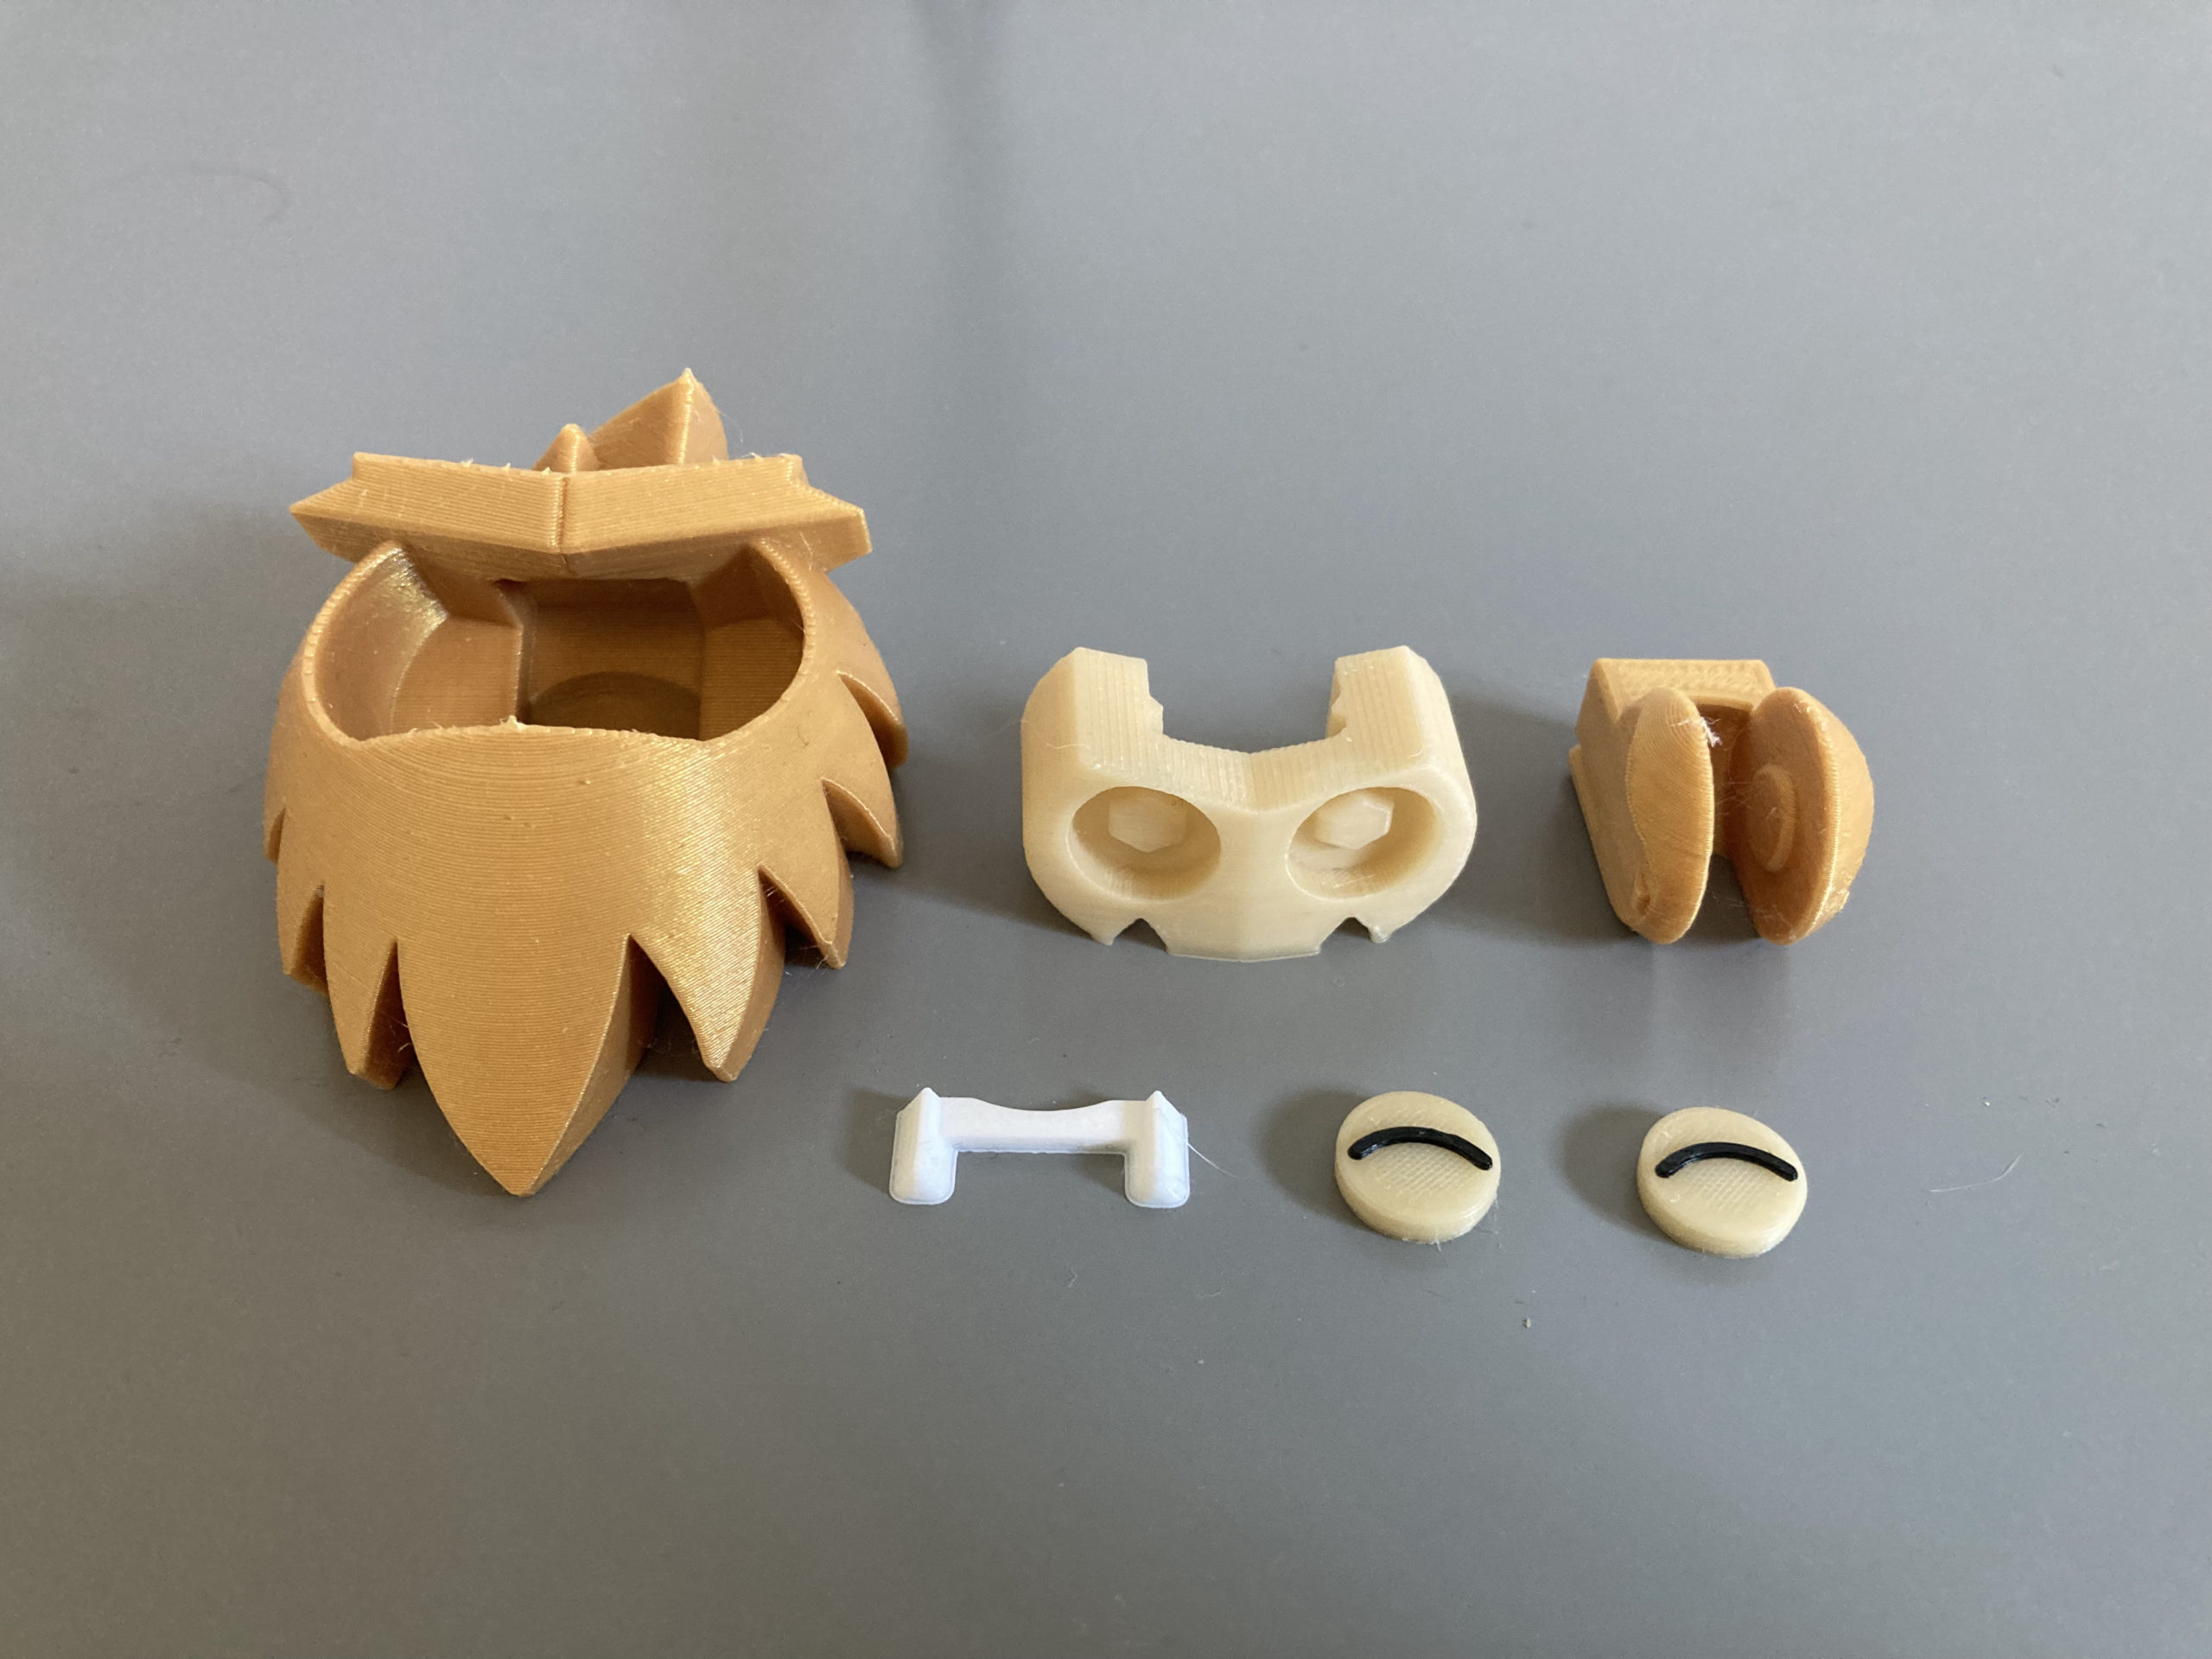
Fit SasquatchHead-Teeth into SasquatchHead-Face as shown

Fit face and teeth assembly into SasquatchHead-Head as shown (coming up with part names is challenging some times).

Fit SasquatchHead-Neck into assembly as shown until the snaps lock into place.

Press fit 10mmClosedEyes as shown (you can absolutely use the 10mm “cutesy” eyes if you so desire). Use a little glue if necessary.

3. Assemble Body Joints
Fit AFJ-Large-FreeCAD into SasquatchBody-UpperBody and SasquatchBody-Shorts as shown.


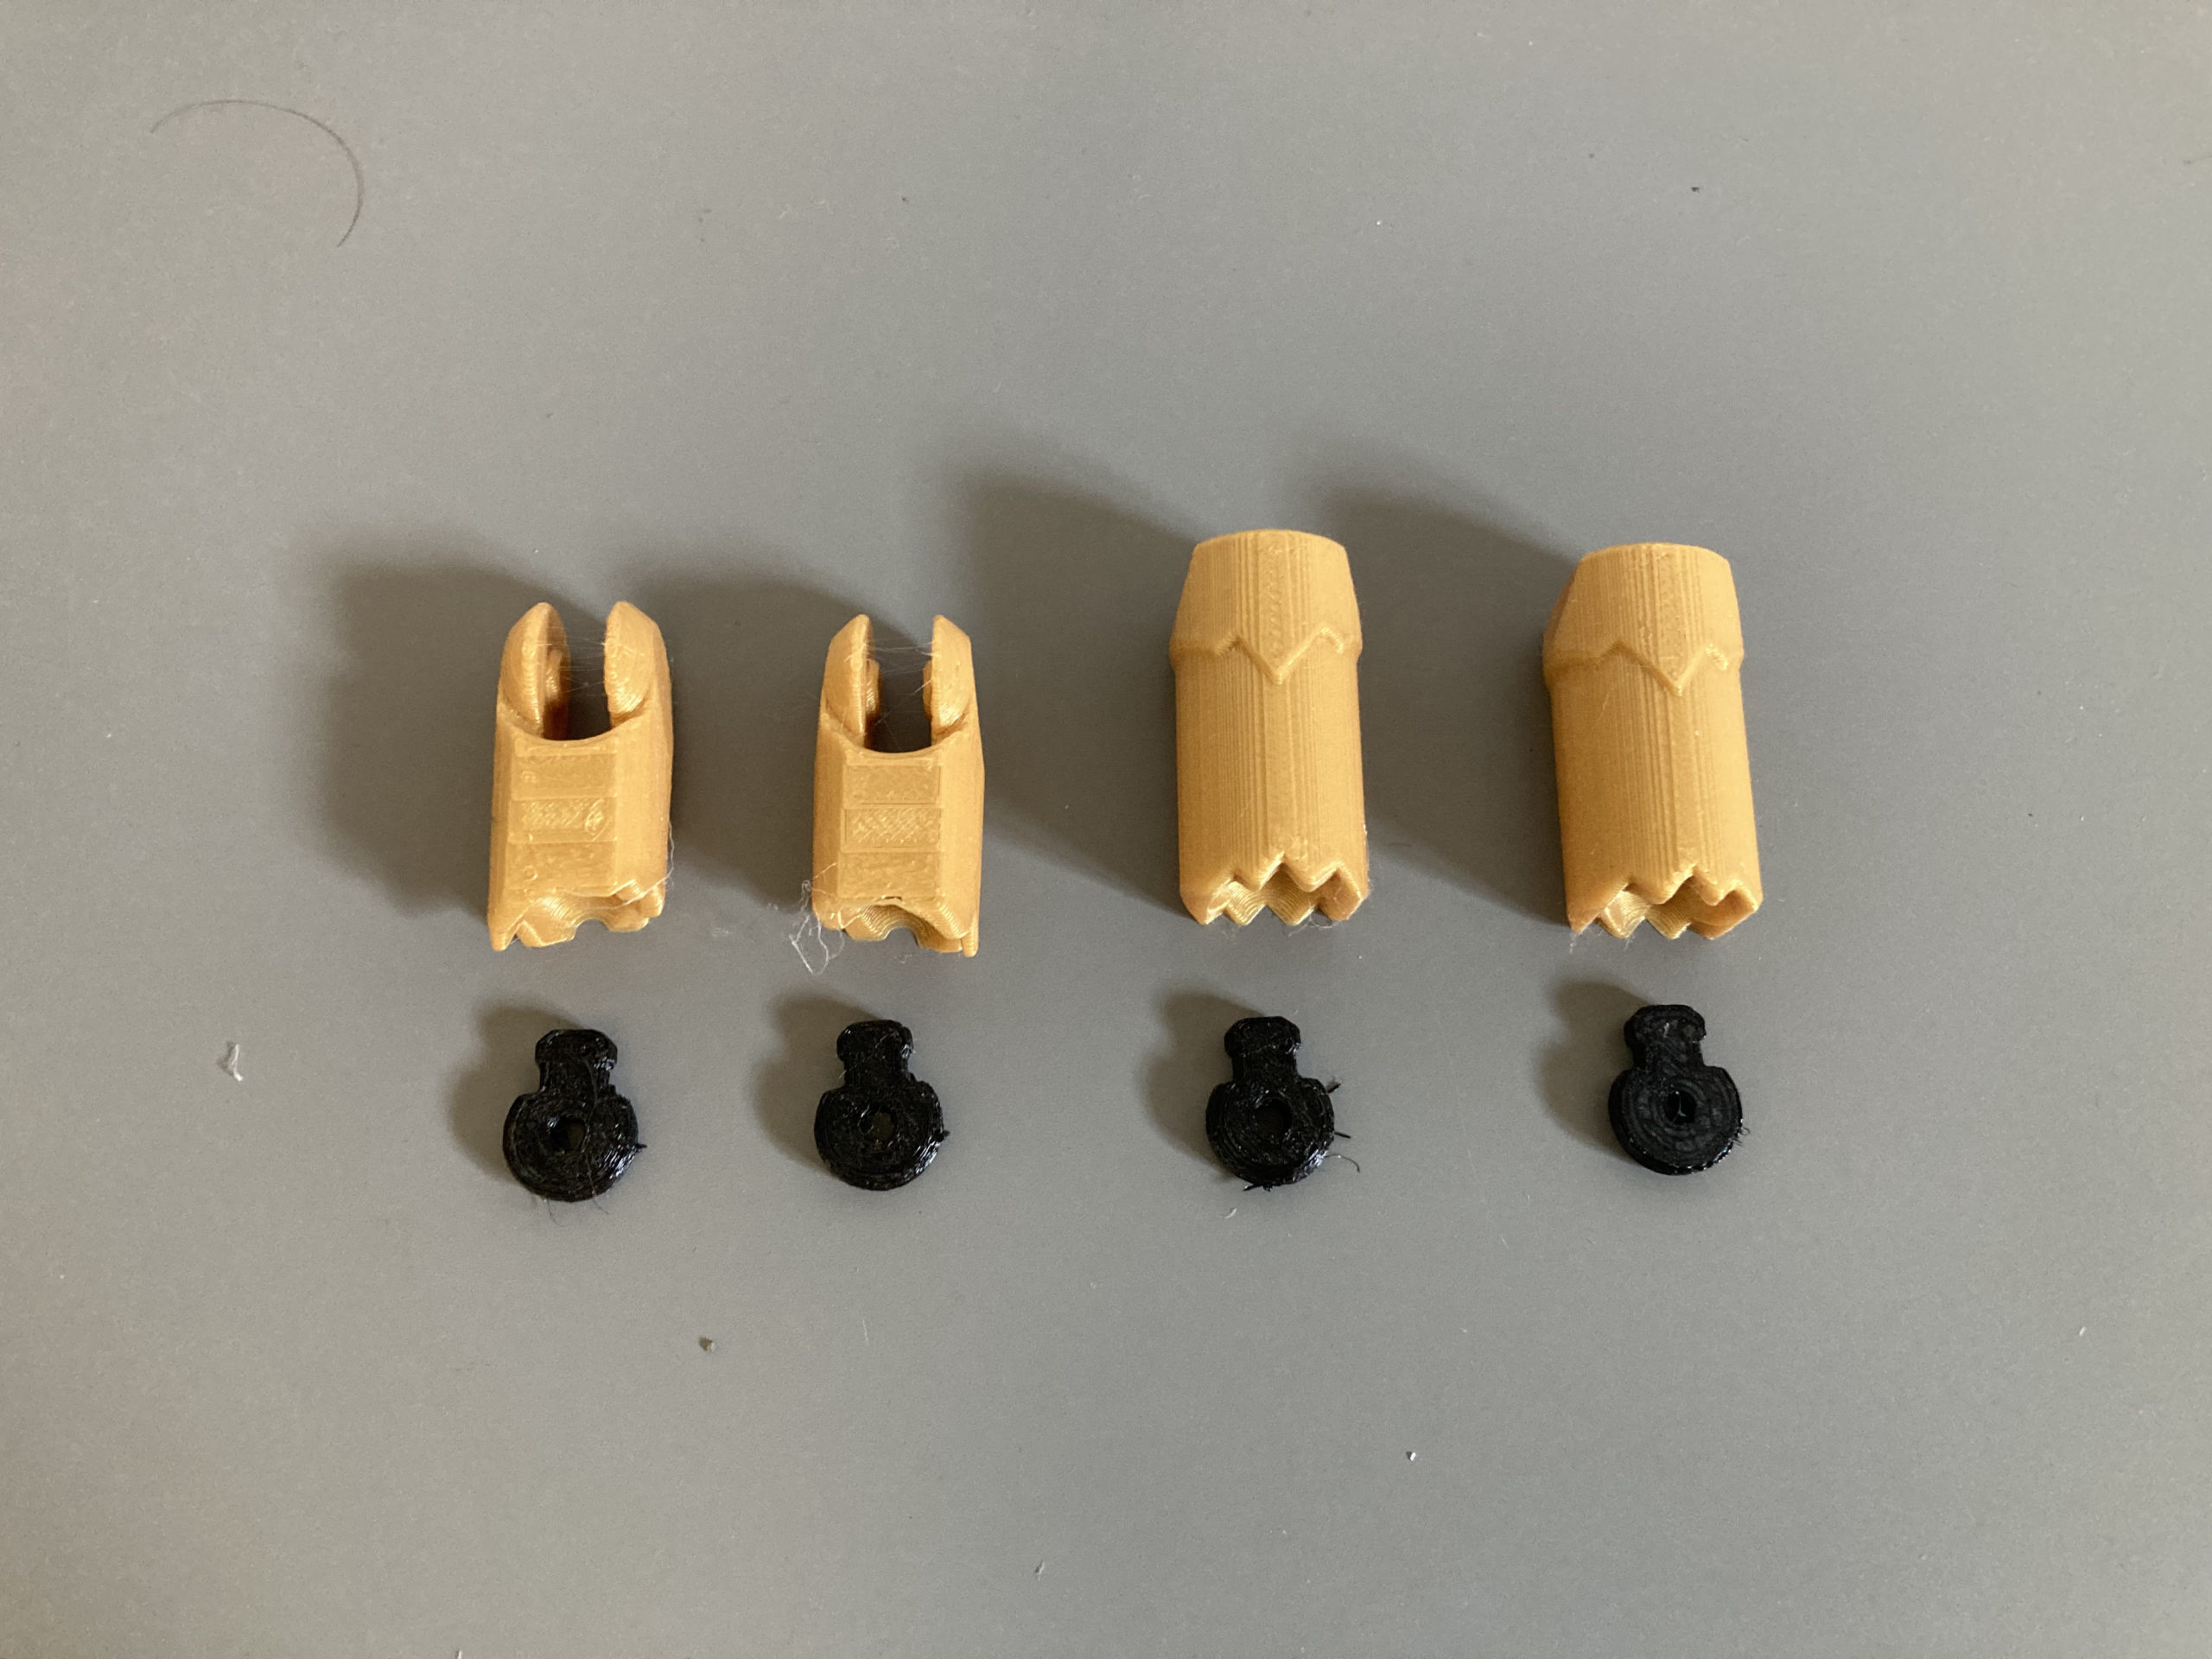
4. Assemble Upper Limb Joints
Fit AFJ-FreeCAD into the SasquatchArms-UpperRight/UpperLeft and SasquatchLegs-RightShort/LeftShort as shown.


5. Assemble Lower Limb Joints
Fit AFJ-Small-FreeCAD joints into SasquatchArms-LowerRight/LowerLeft and SasquatchLegs-RightCalf/LeftCalf as shown. Use needle nosed pliers if necessary.

6. Final Assembly
Fit all the joint components together as shown


7. Fishing Pole
Thread and loop FishingPole-Line onto the FishingPole-Hook as shown, and then thread and loop the subassembly onto FishingPole-Pole as shown.


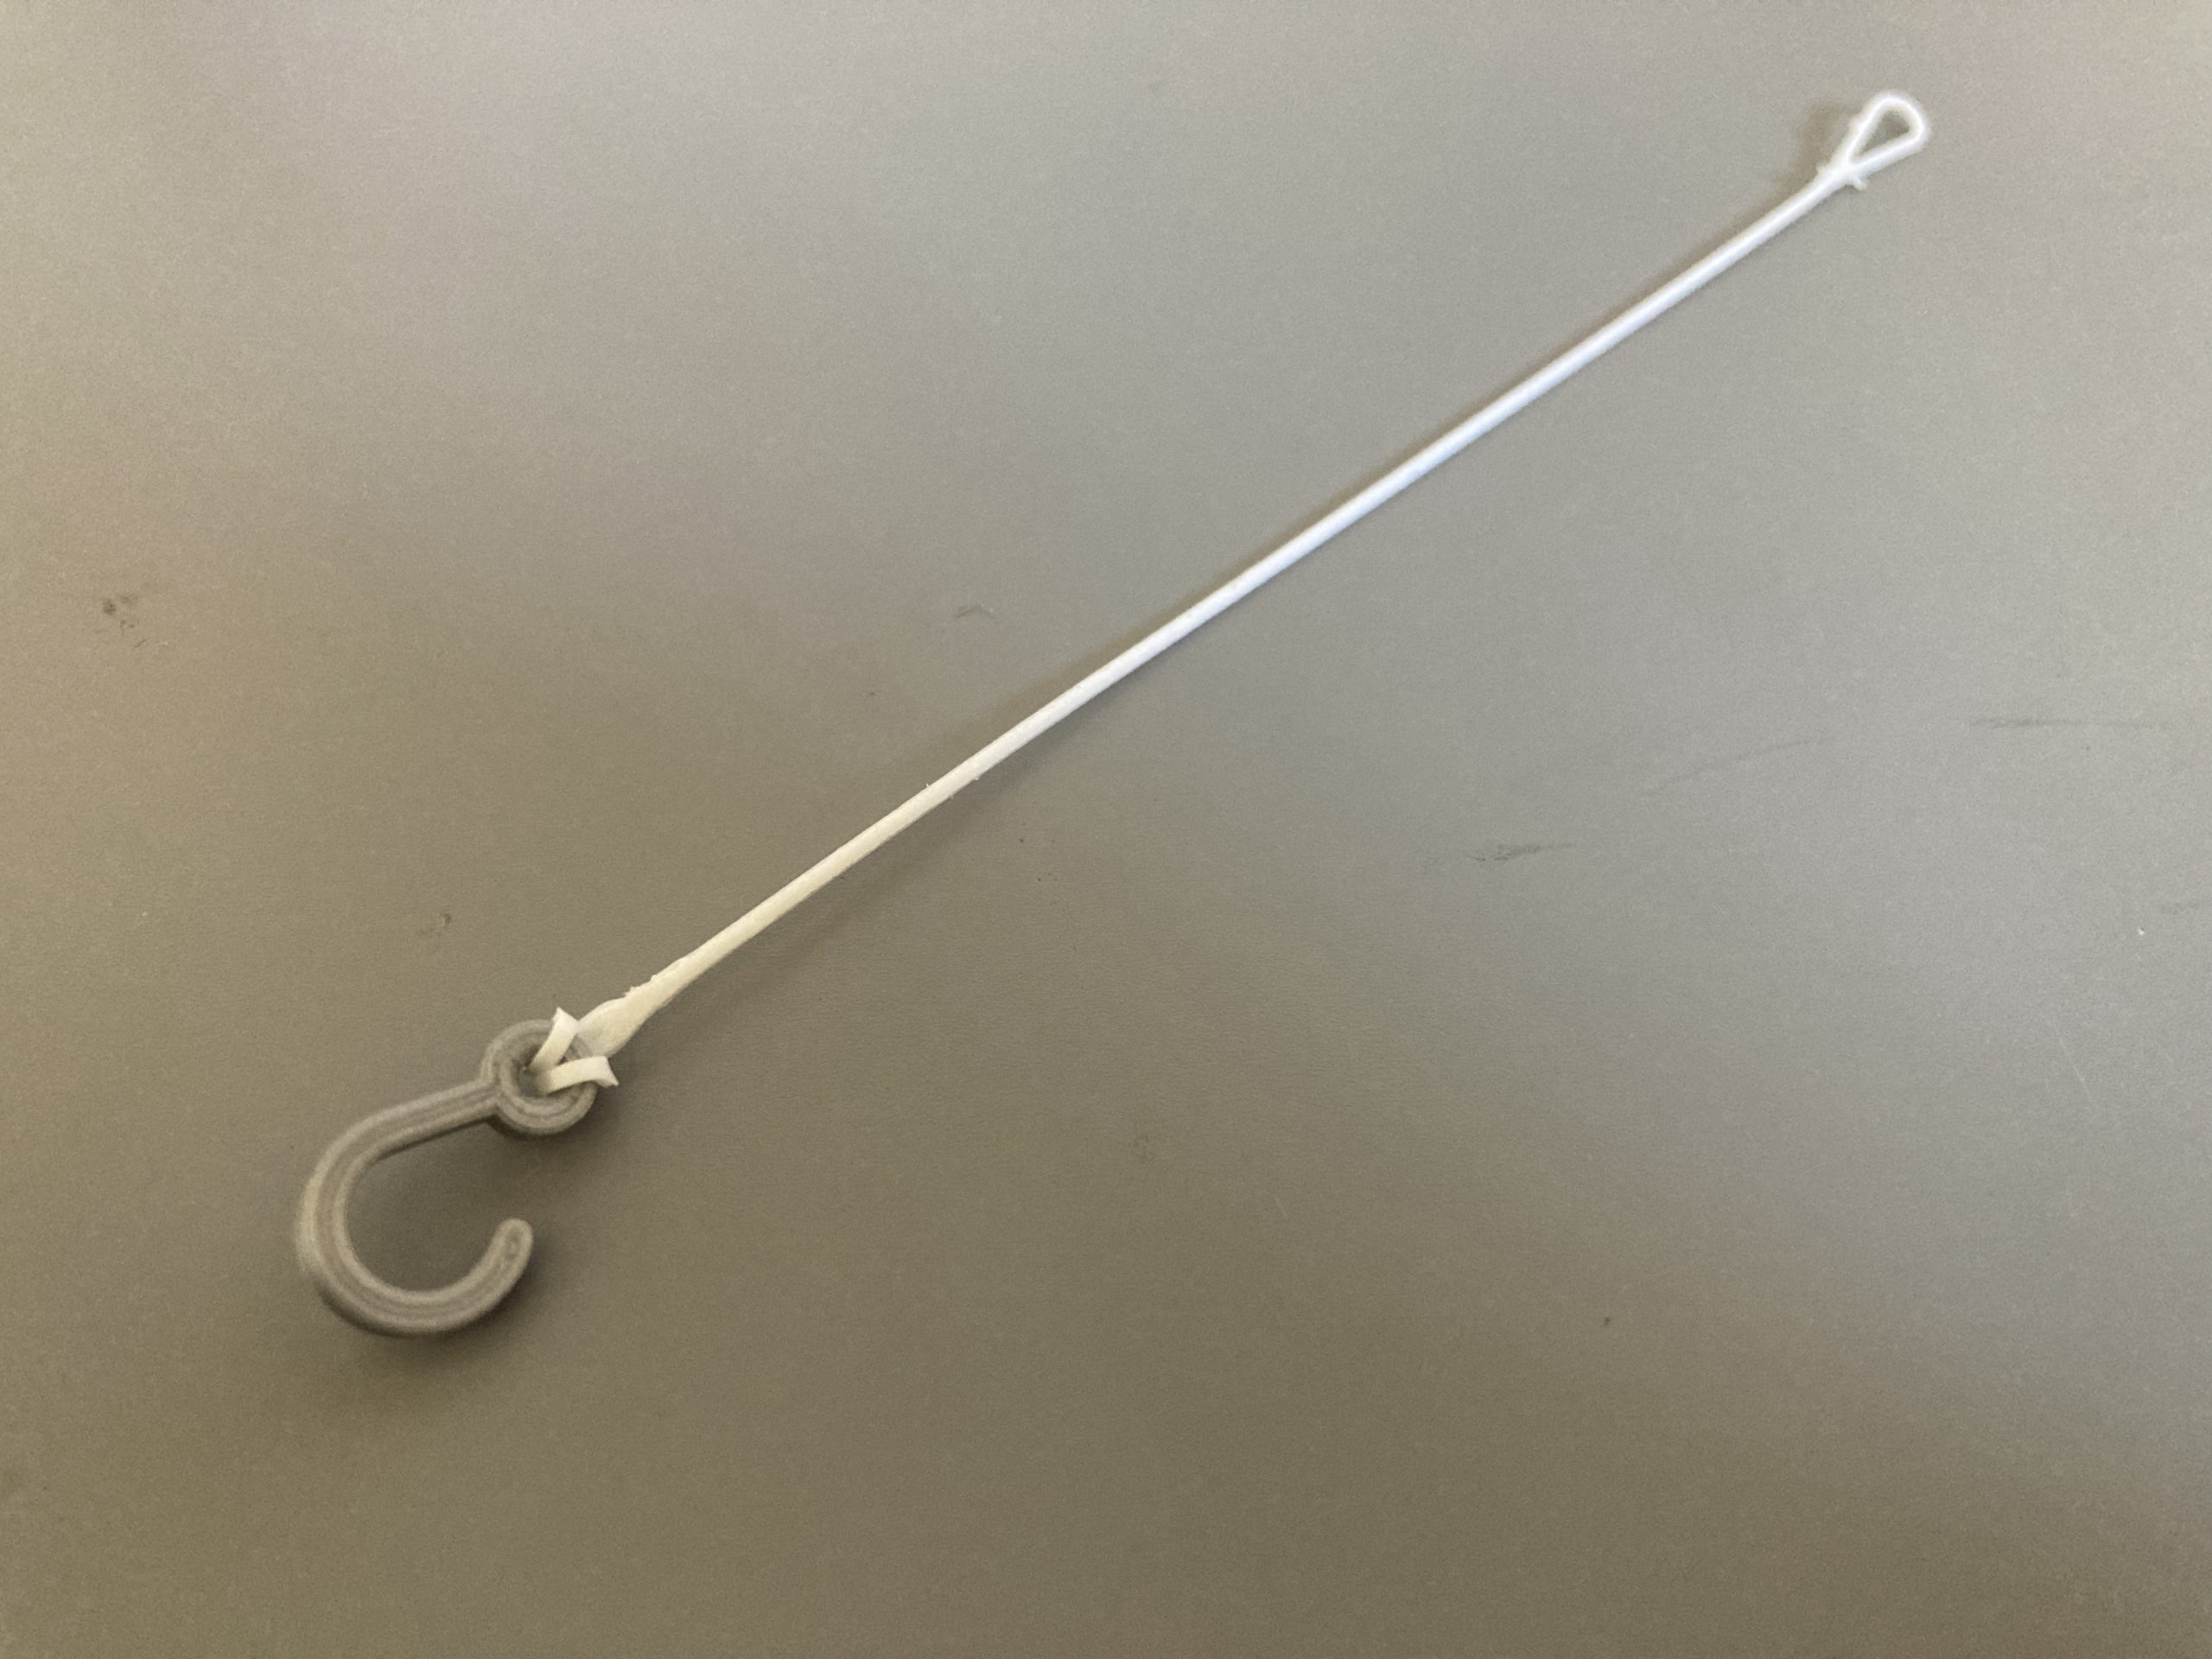


Could I have just used string for this? Yes. Did that occur to me while I was in a design flow? No.
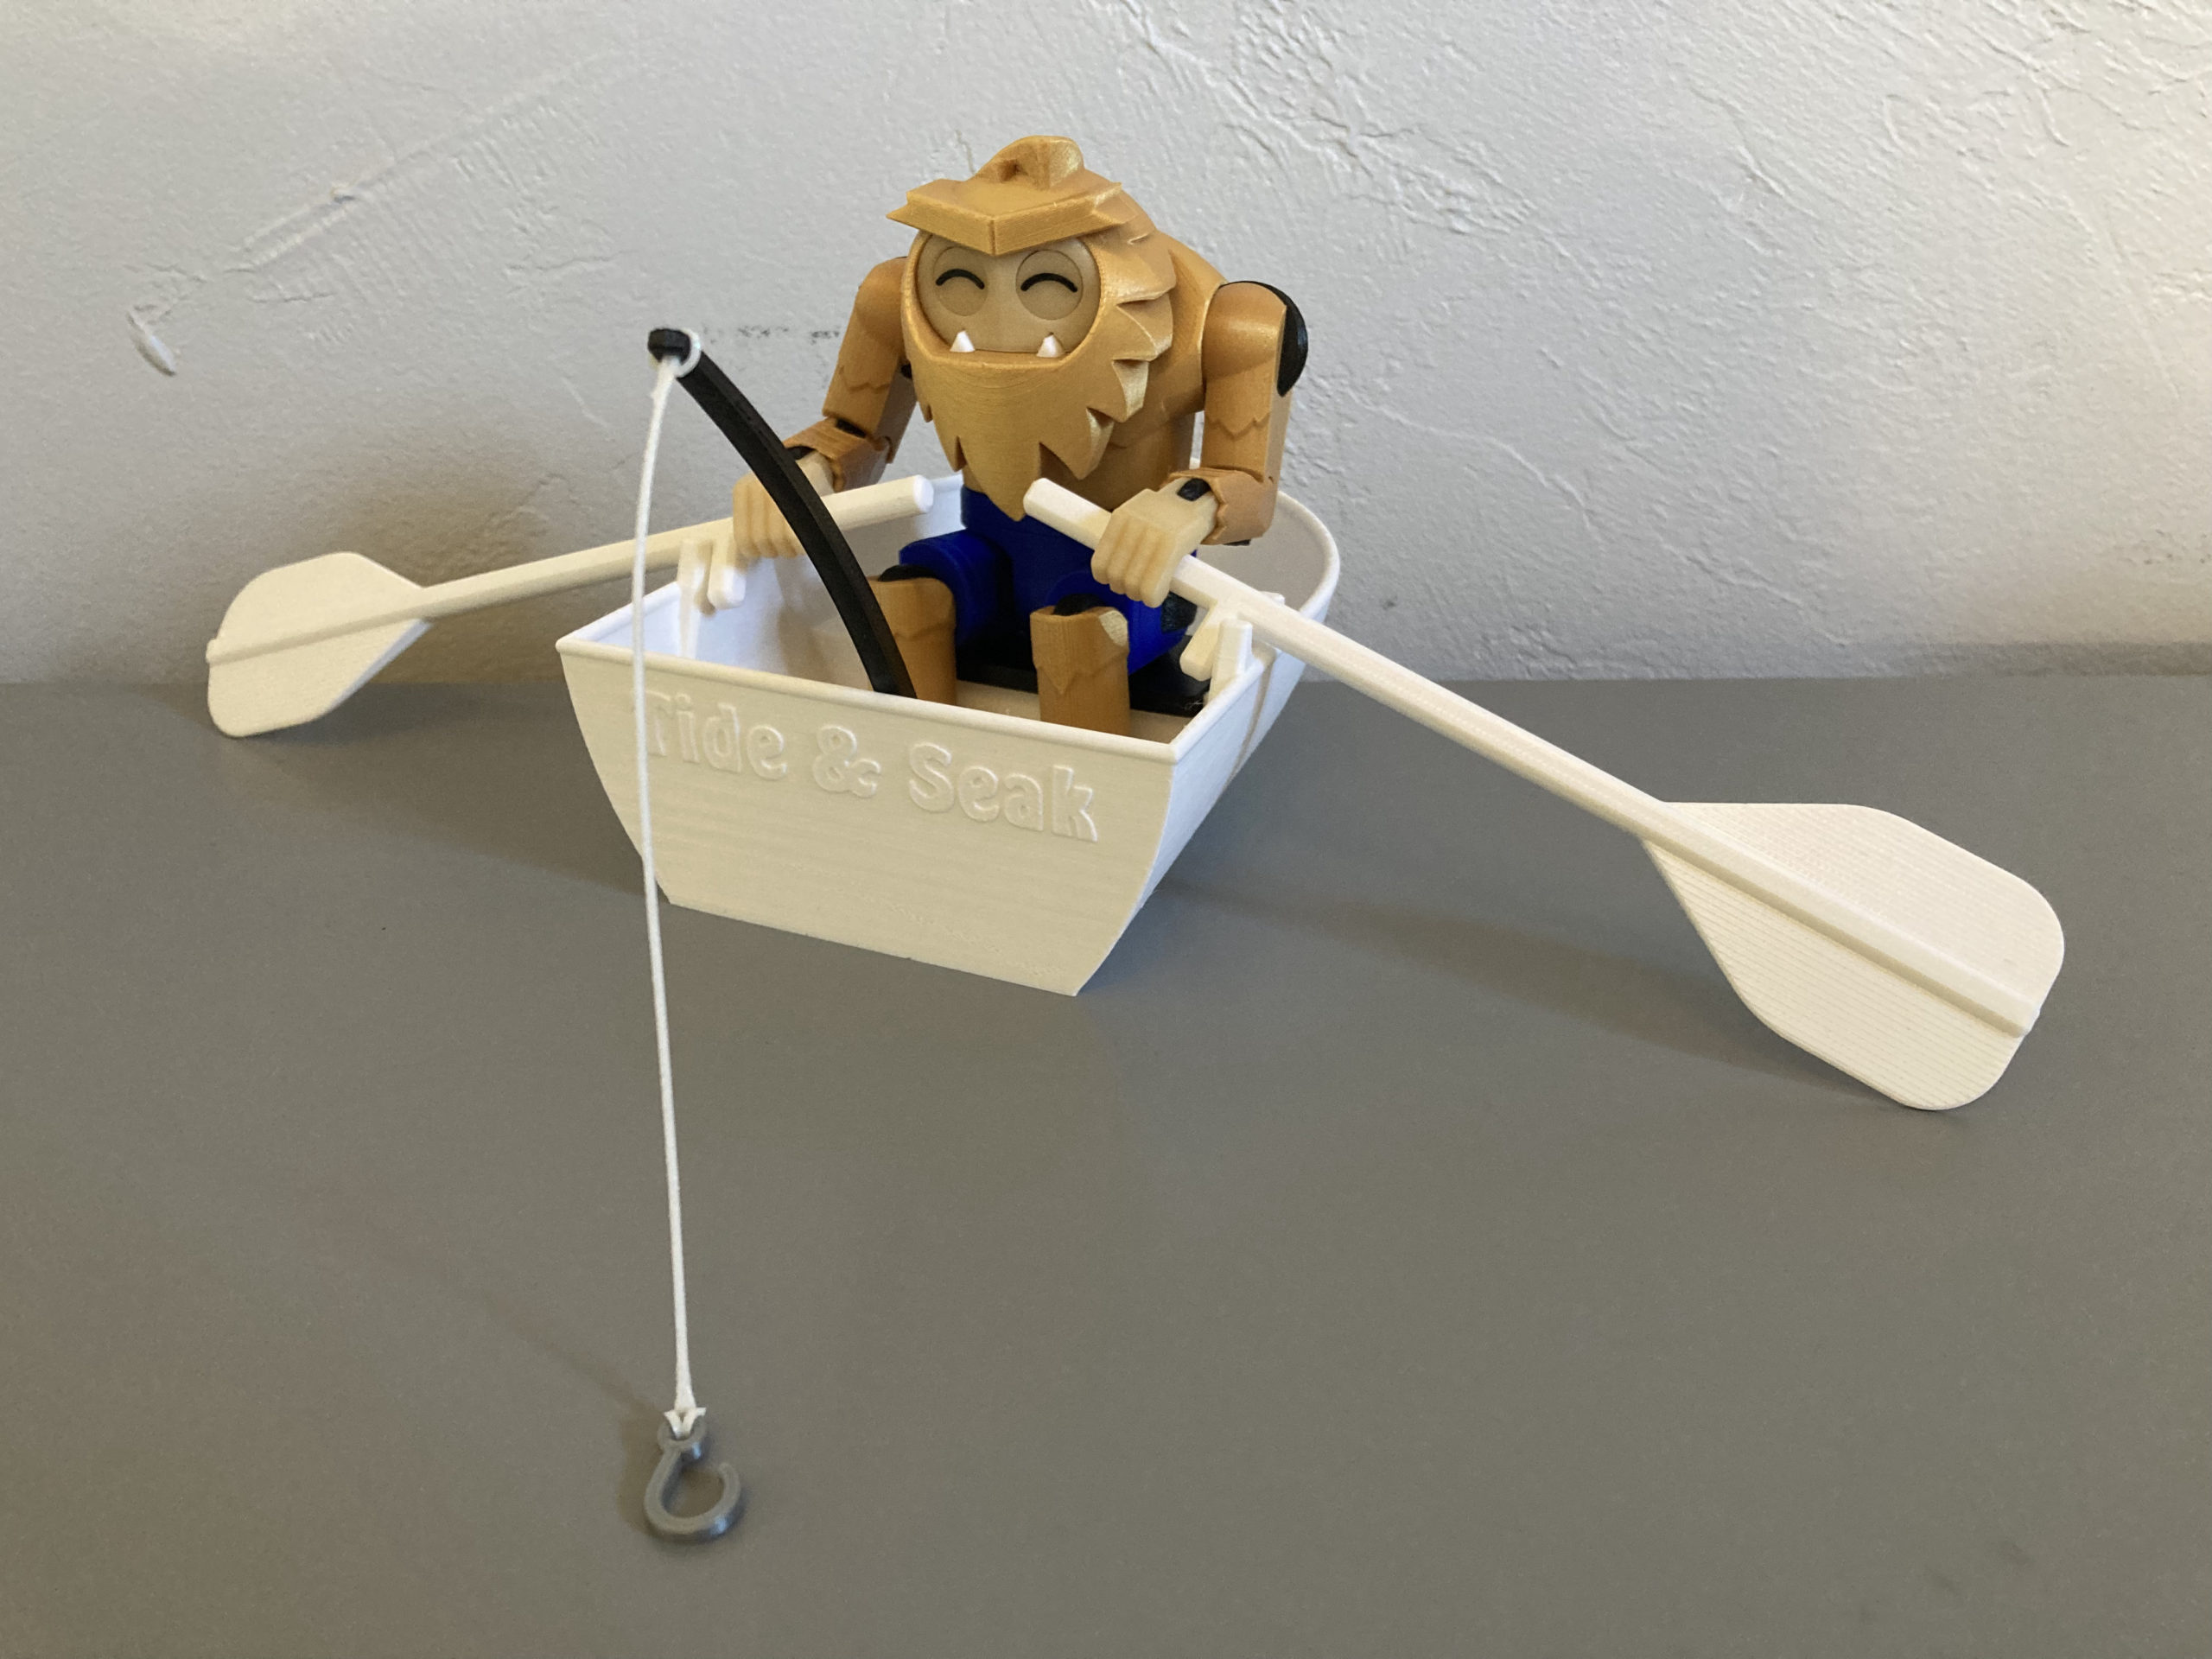
8. The Tide & Seak
A terrible pun makes for a fantastic boat name for a Sasquatch.
Assemble TheTideAndSeak-Seat onto TheTideAndSeak as shown.


9. Relax
Enjoy the peace and tranquility of being completely off the grid where no one can find you…

Files
Click the Download buttons below for zip files containing all the components
Files are available under the Creative Commons BY-NC-SA license.
Like what you’re seeing here? Leave me a comment down below, follow me on Mastodon @DragonMtnDesign@fosstodon.org, and/or say “hey” if you ever see me or my work out around on the internet.