Simple Streaming Remote
Our family room TV is essentially a computer monitor, as it’s mainly used to stream movies and shows. It does a great job, and we’ve only had one complaint with the setup to date: There’s no remote.
This usually isn’t too much of a problem, until my wife and I are watching something with the kids and there’s a scene that’s a bit above their pay grade. One (or both) of us flies to the wired keyboard on the shelf to pause or fast forward, and it’s not the most fun way to be relaxed and entertained as a family…
Online searches hadn’t turned up anything even remotely close to a solution, and the representative at a brick-and-mortar store left me feeling like I was from another planet. I had to take matters into my own hands and do something.
Looking into DIY options, an older Adafruit project came to mind that used a Bluetooth Low Energy module to create a small wireless keyboard gamepad. It was the perfect launching point. Based on my experiences with the wired keyboard attached to the computer, there were only three buttons that were essential: the space bar (play/pause), the right arrow (skip forward), and the left arrow (skip back).
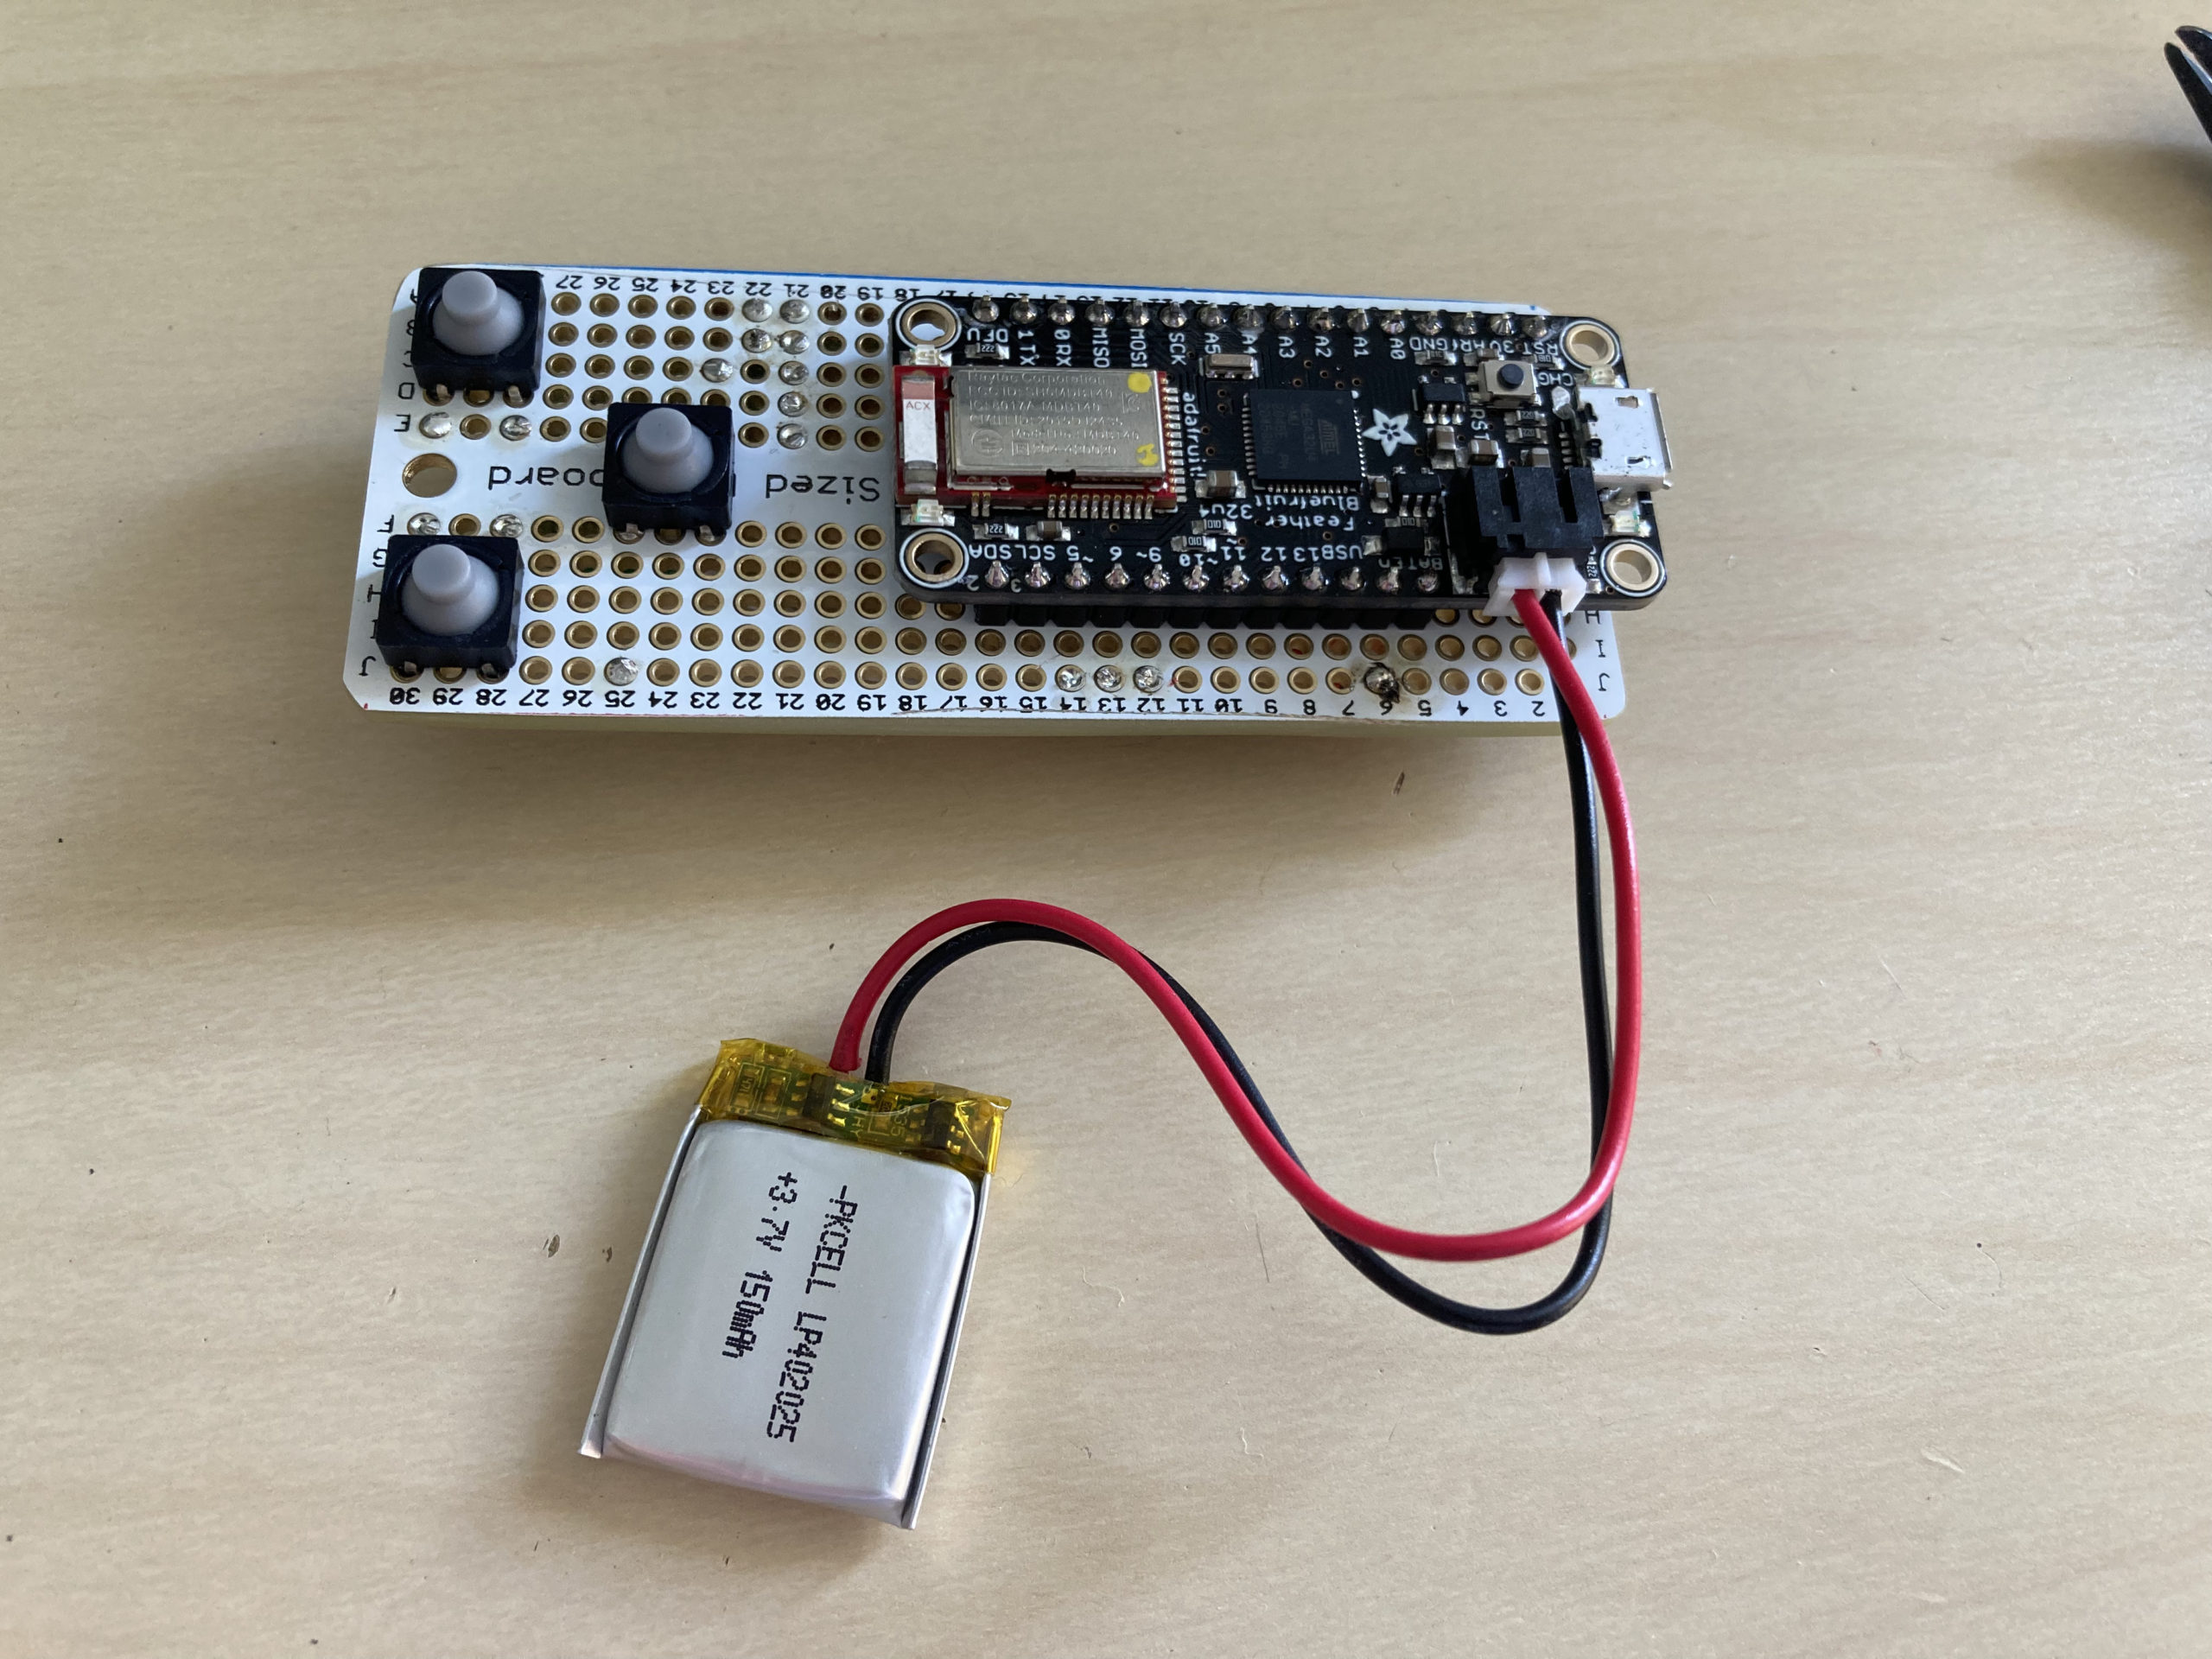
Most of the parts were available in storage from other projects and experiments, but a BLE feather board was the key to bringing everything together.
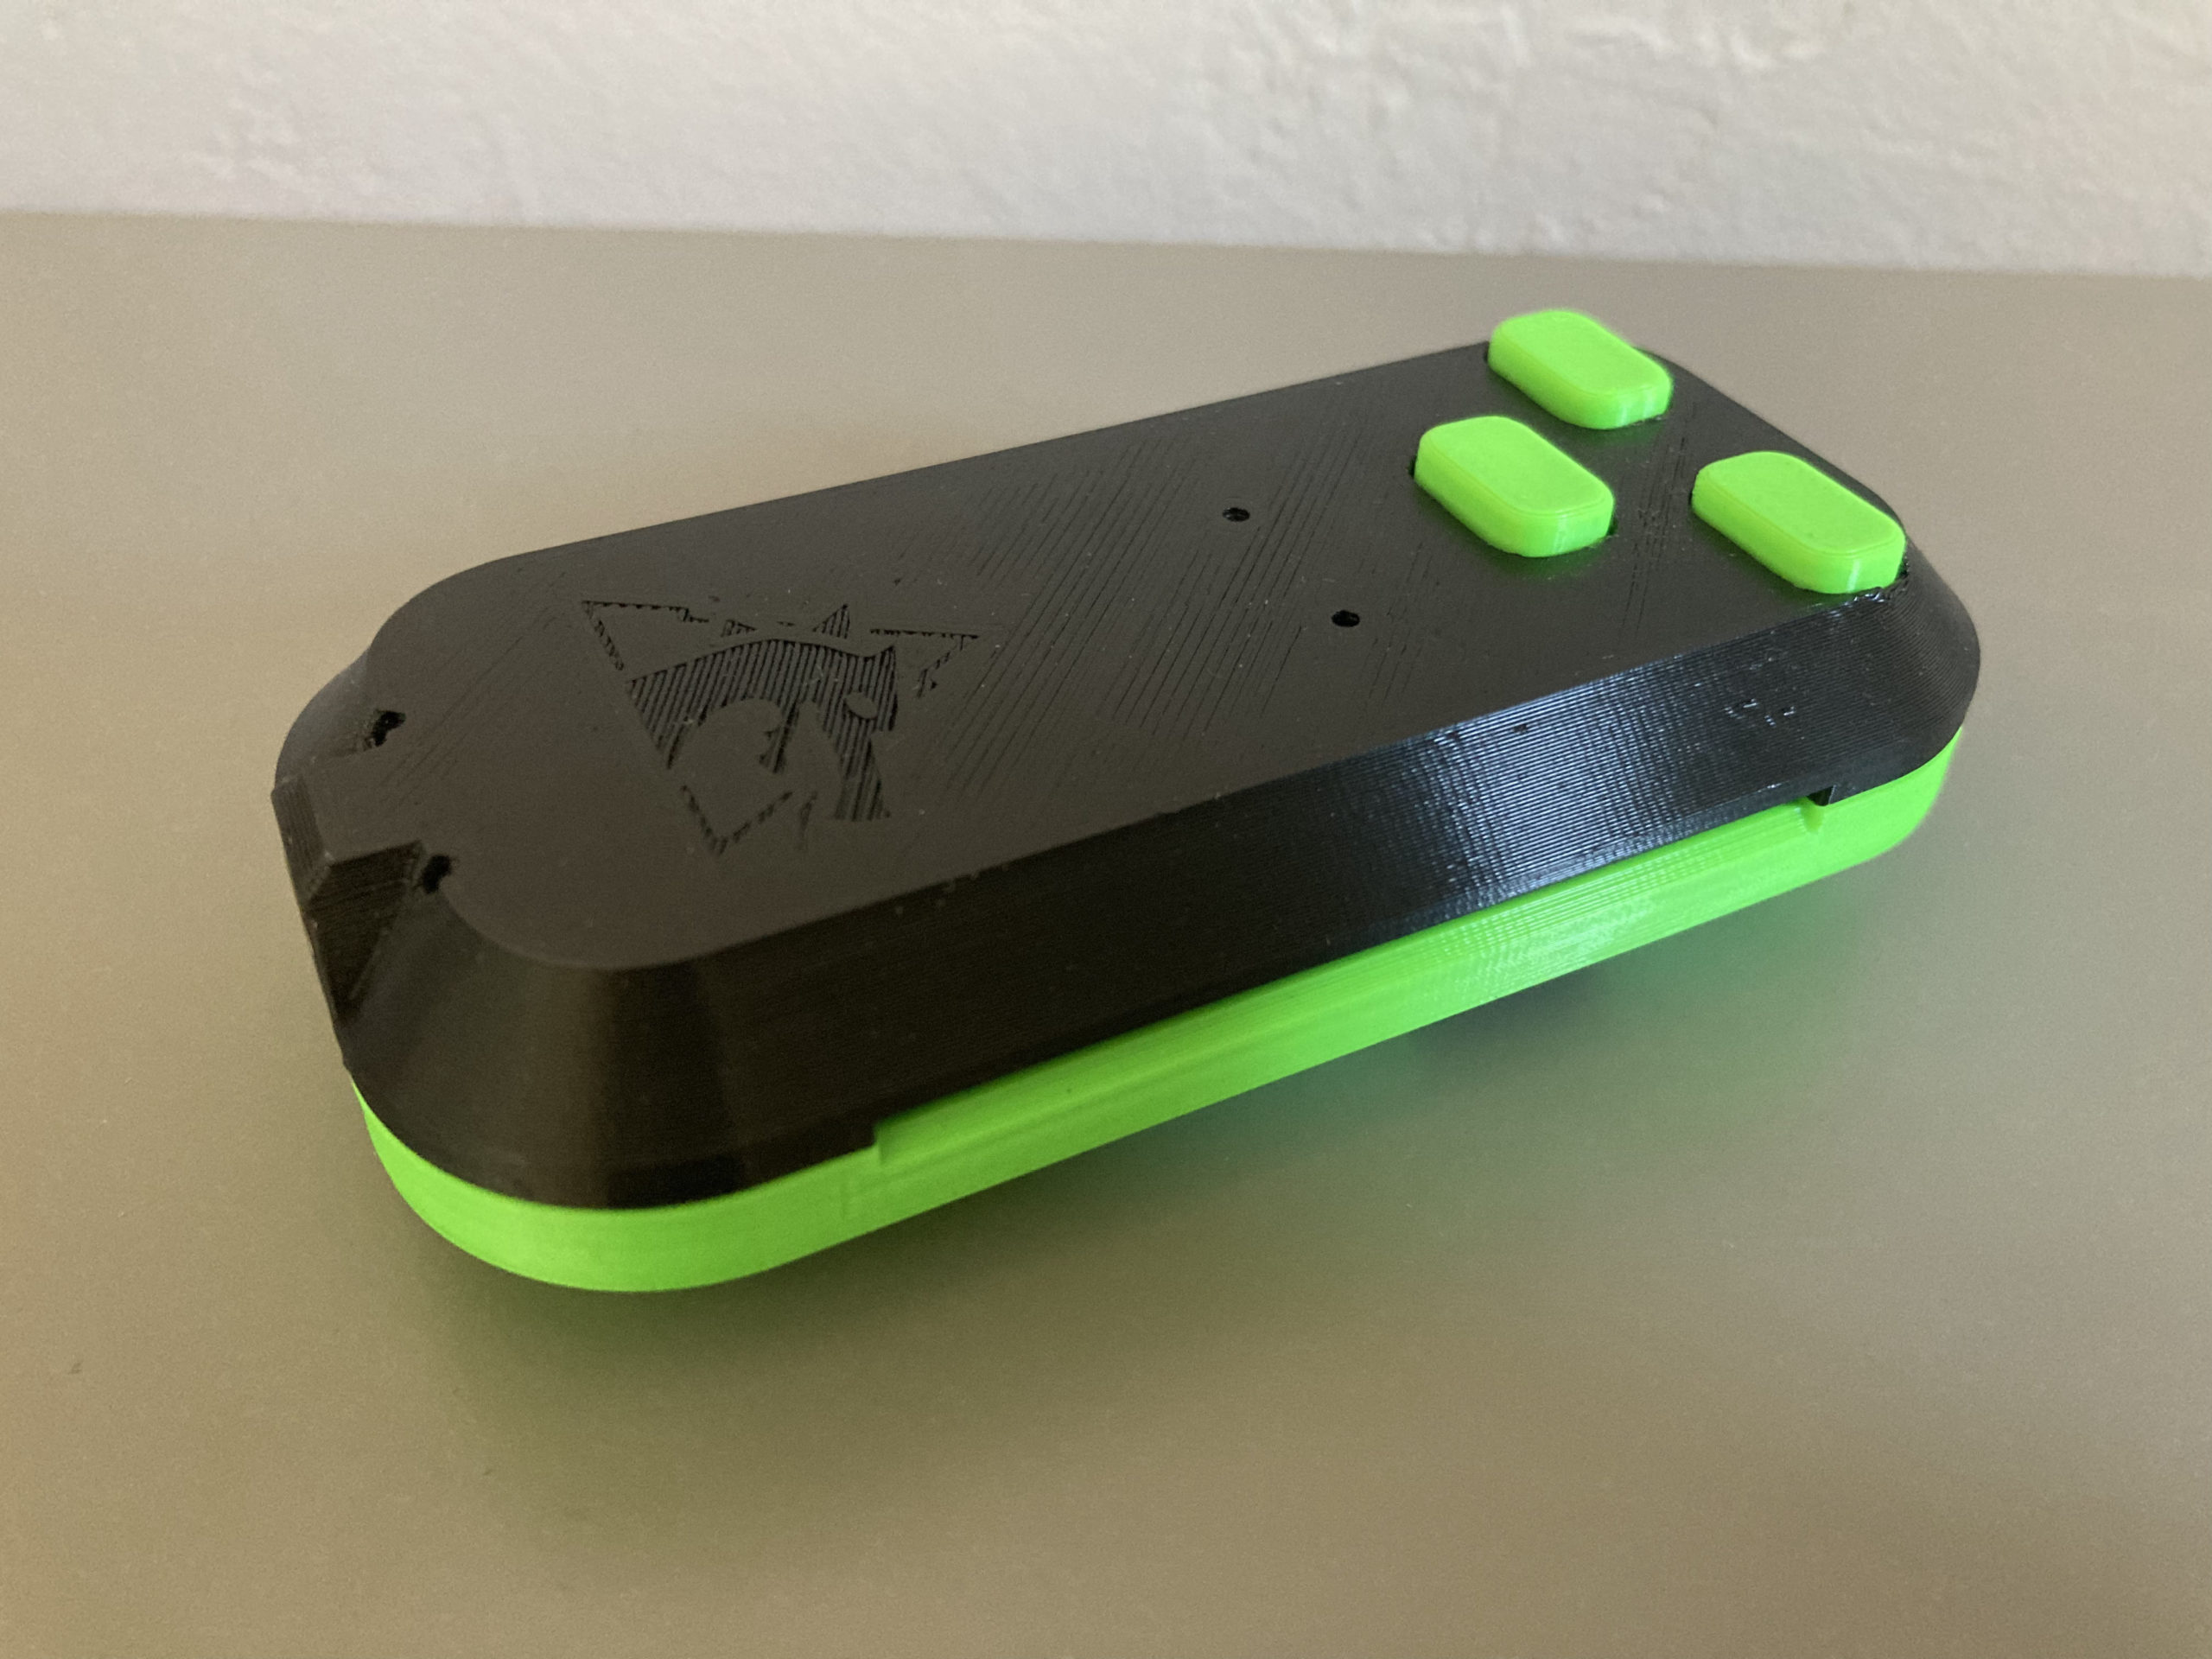
The housing and buttons were designed in FreeCAD v0.19, and time was taken to finally start throwing the Dragon Mountain Design logo onto projects again.
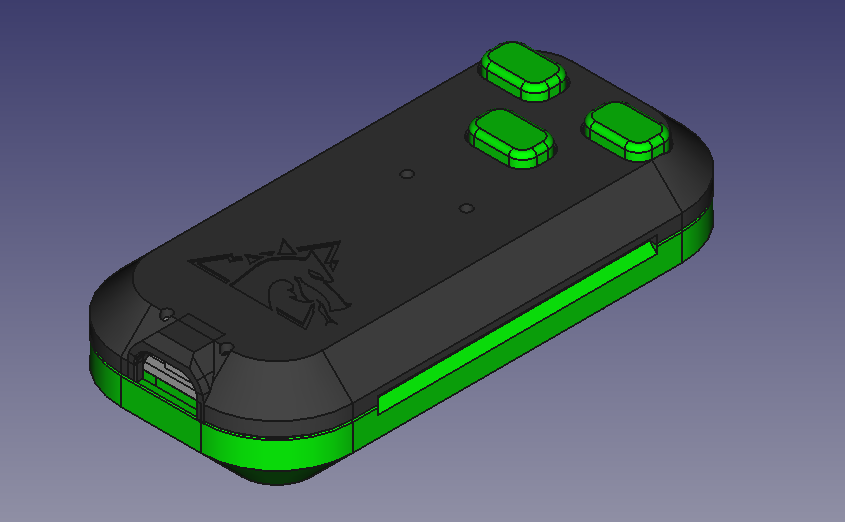
Special shoutout to Noé Ruiz for the excellent 3D printed snap-fit design that was appropriated for this project.
Parts List
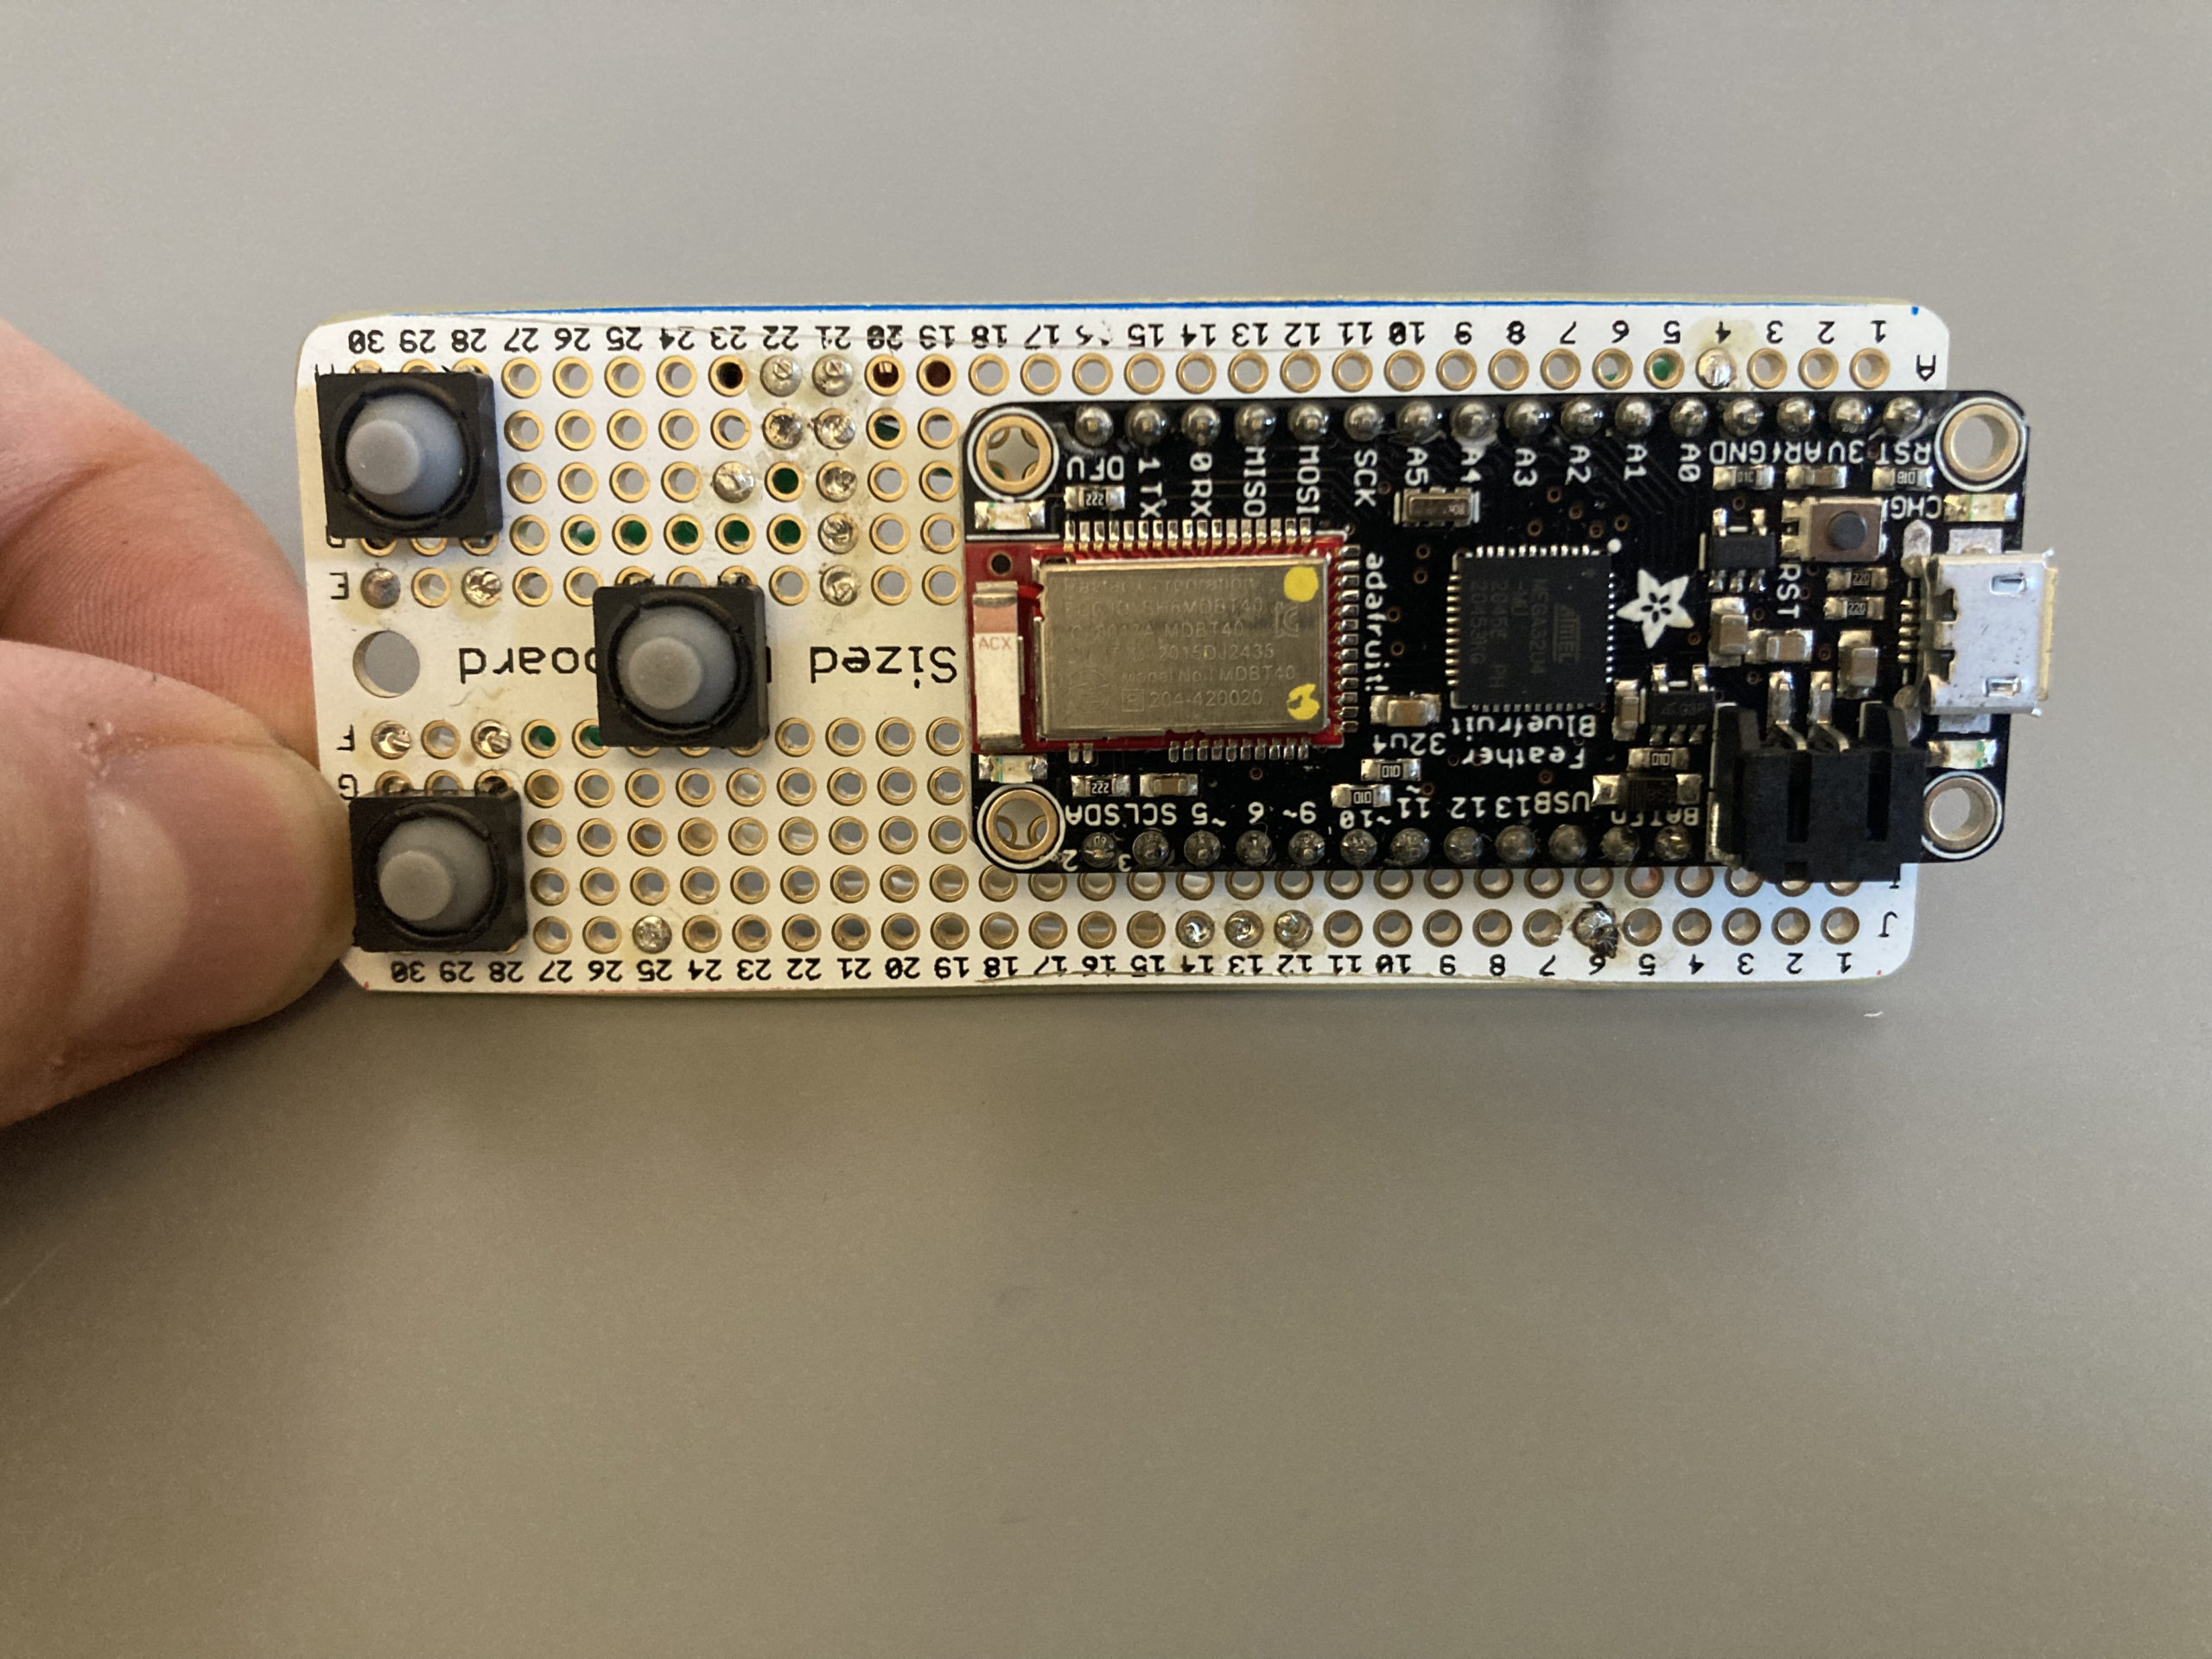
Feather 32u4 Bluefruit LE with headers – Adafruit 3379
Soft Tactile Button (8mm) x 10 – Adafruit 3101 (use three for the project)
Perma-Proto Half-Sized Breadboard PCB 3-Pack – Adafruit 571 (one needed, but good to have extras)
Breadboard-Friendly SPDT Slide Switch – Adafruit 805
Lithium Ion Polymer Battery – 3.7V 150mAh – Adafruit 1317
Silicone Cover Stranded-Core Wire – 2m 26AWG White – Adafruit 1882 (data)
Silicone Cover Stranded-Core Wire – 2m 26AWG Red – Adafruit 1877 (power)
Silicone Cover Stranded-Core Wire – 2m 26AWG Green – Adafruit 1880 (ground)
OPTIONAL NetDot Gen 10 Magnetic Connector/Cable (I love these things)
Helpful Tools
3D Printer
Dremel (or other controlled cutting tool)
Sandpaper / Small File
Soldering Iron
Flush Cutters
Proper PPE! (Hearing / Vision / Breathing protection)
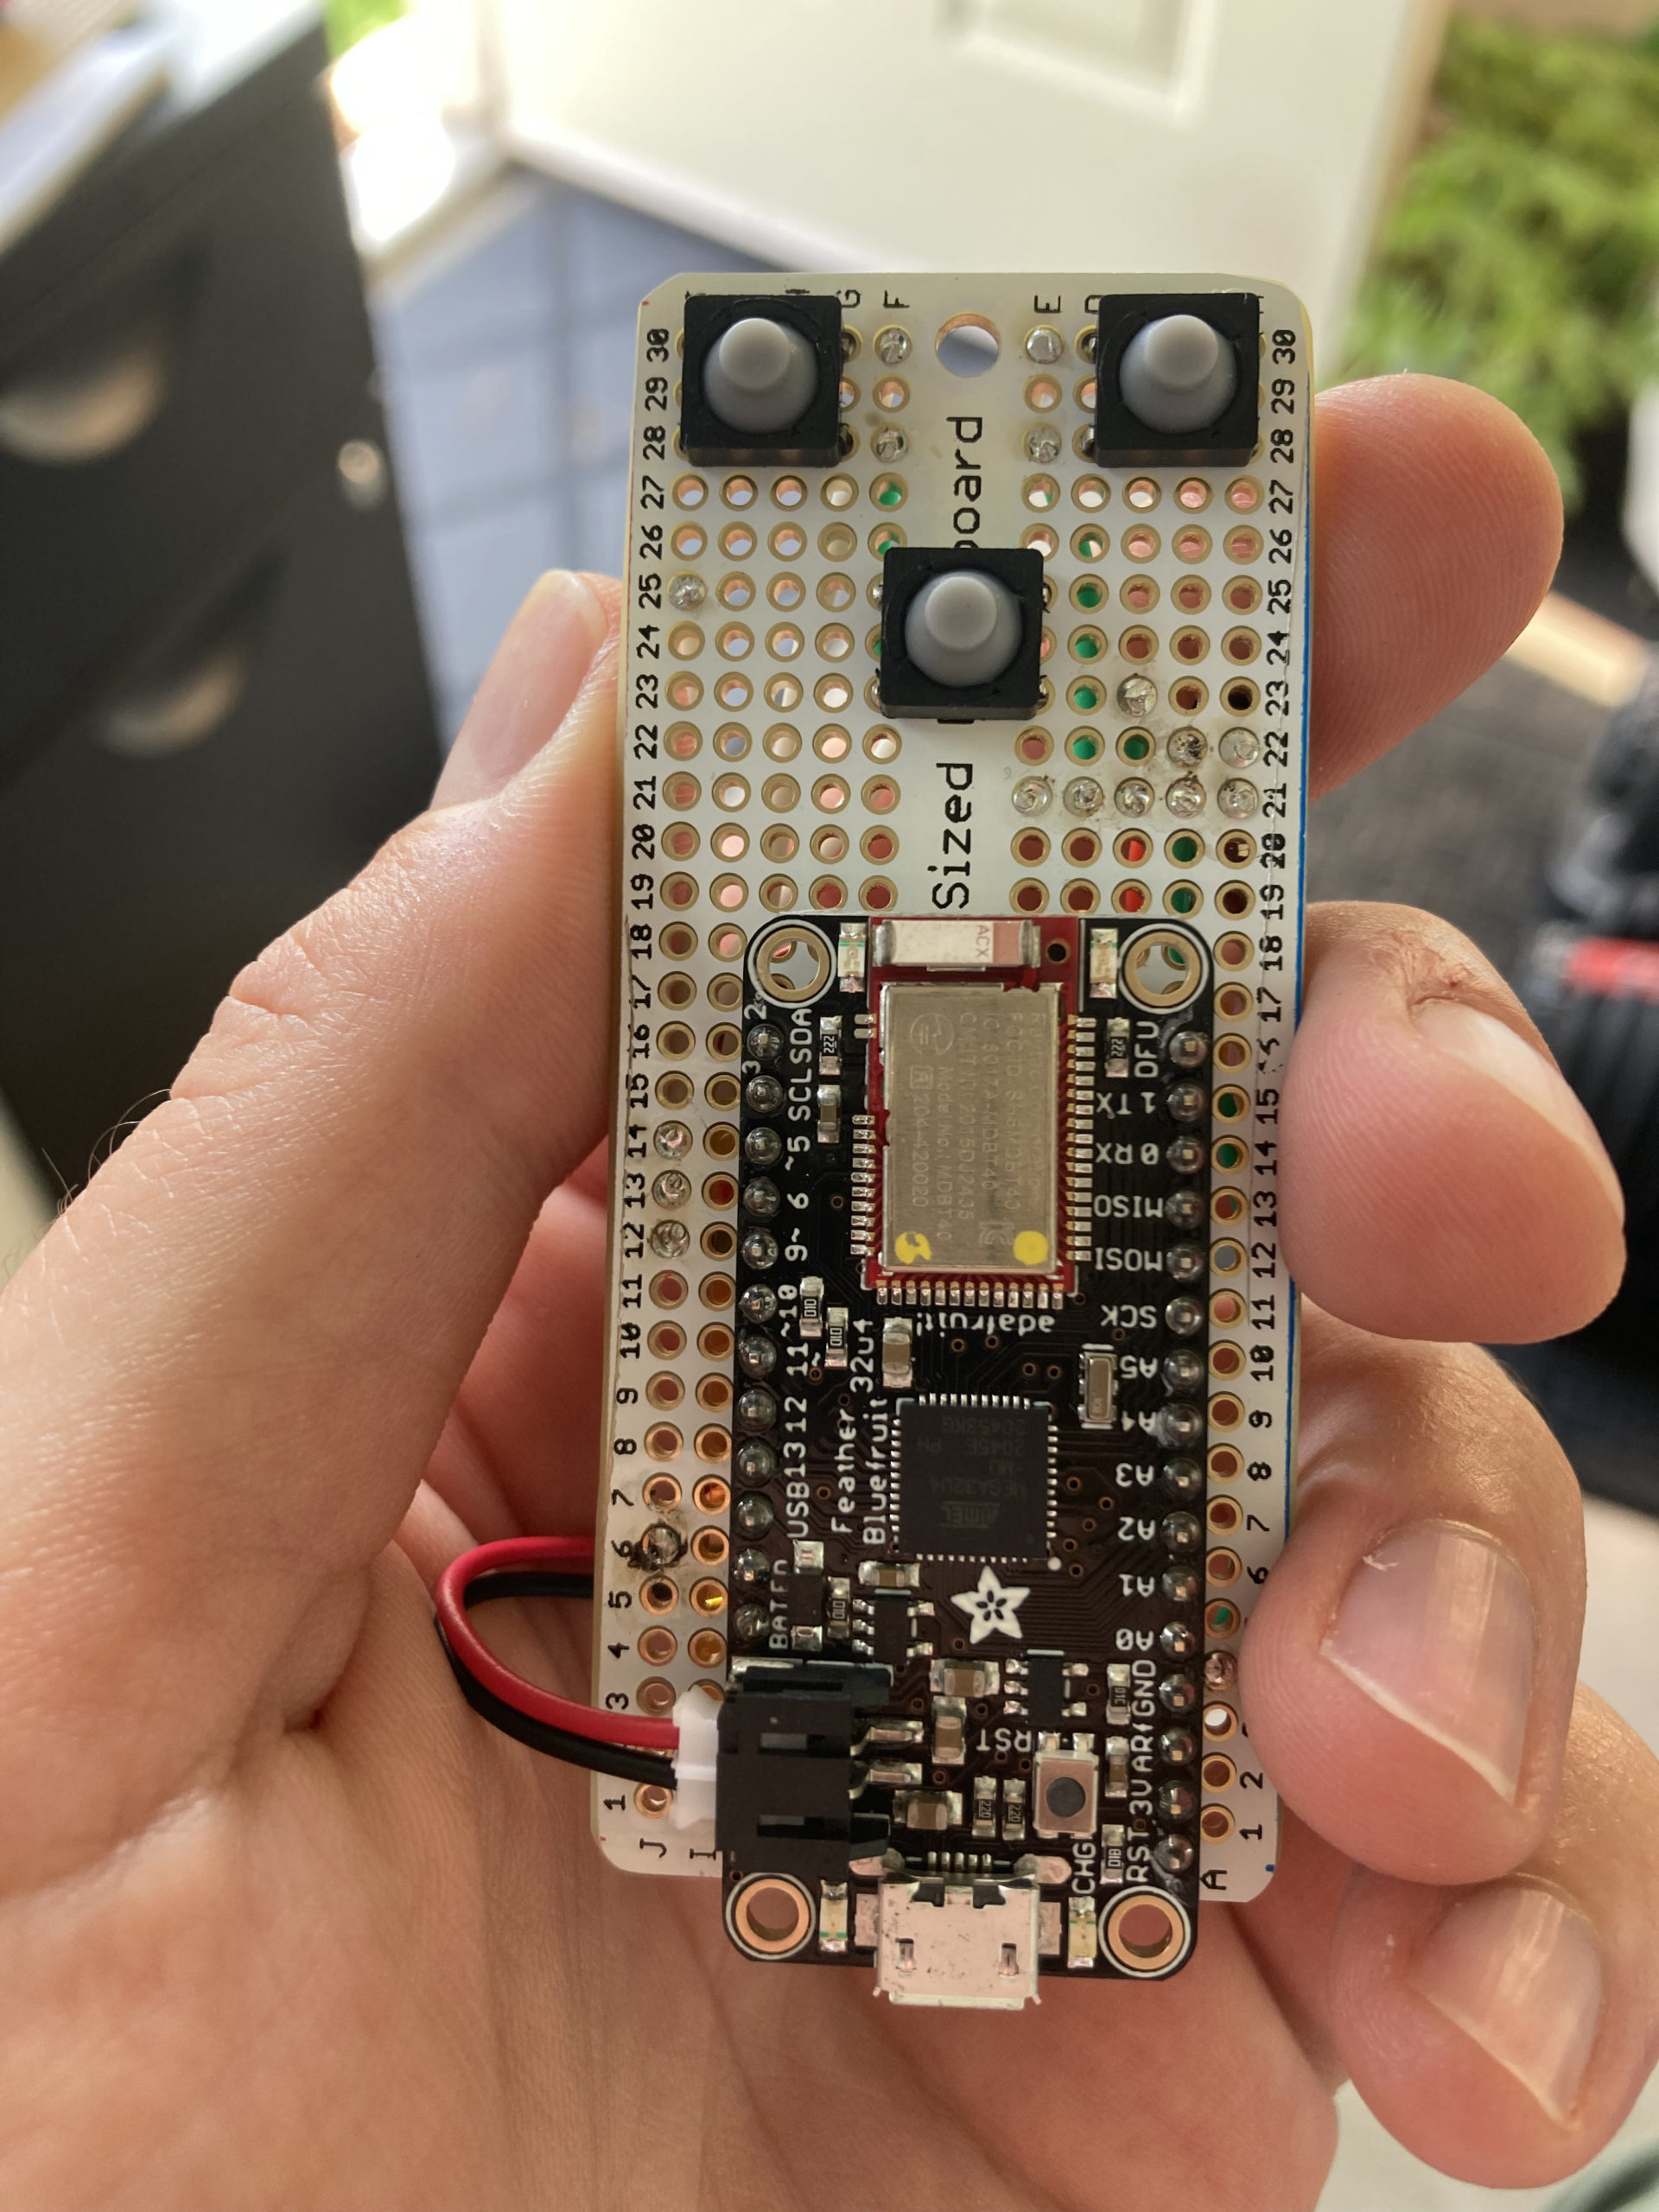
1. Trim Board
Using a Dremel, cut the + and – rows off of both sides as shown. Use some sandpaper to clean up any burrs or sharp edges.

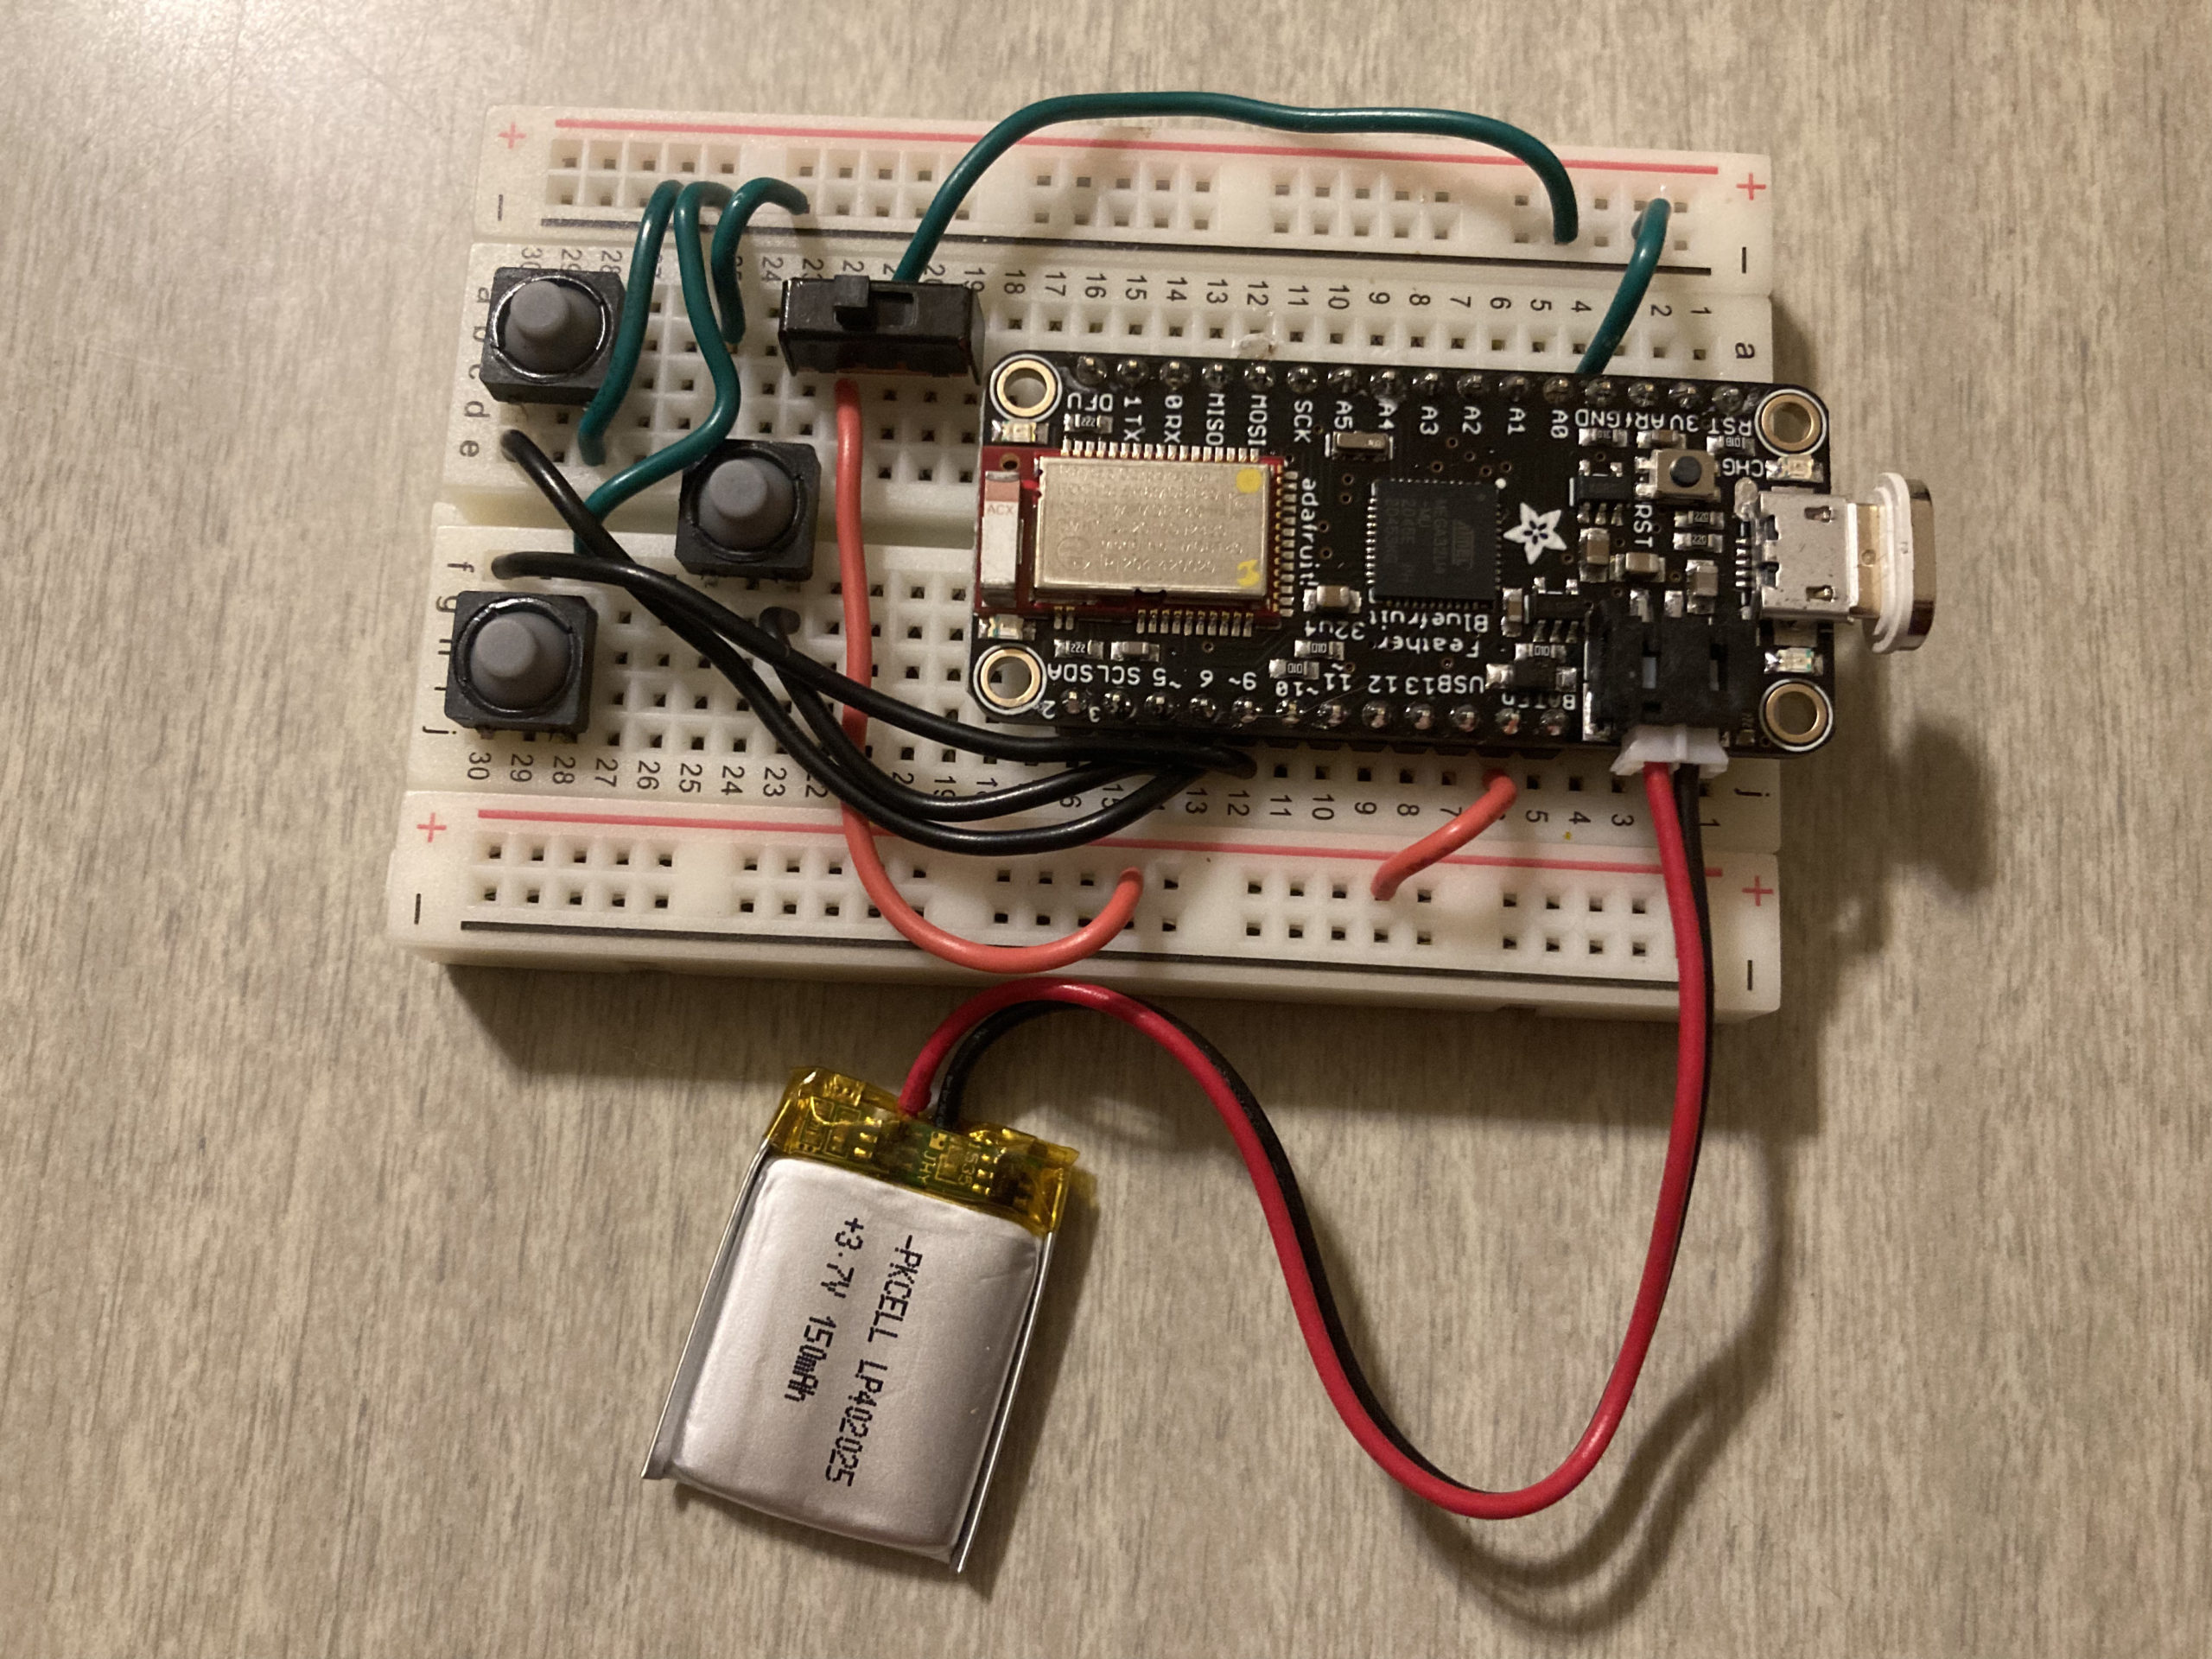
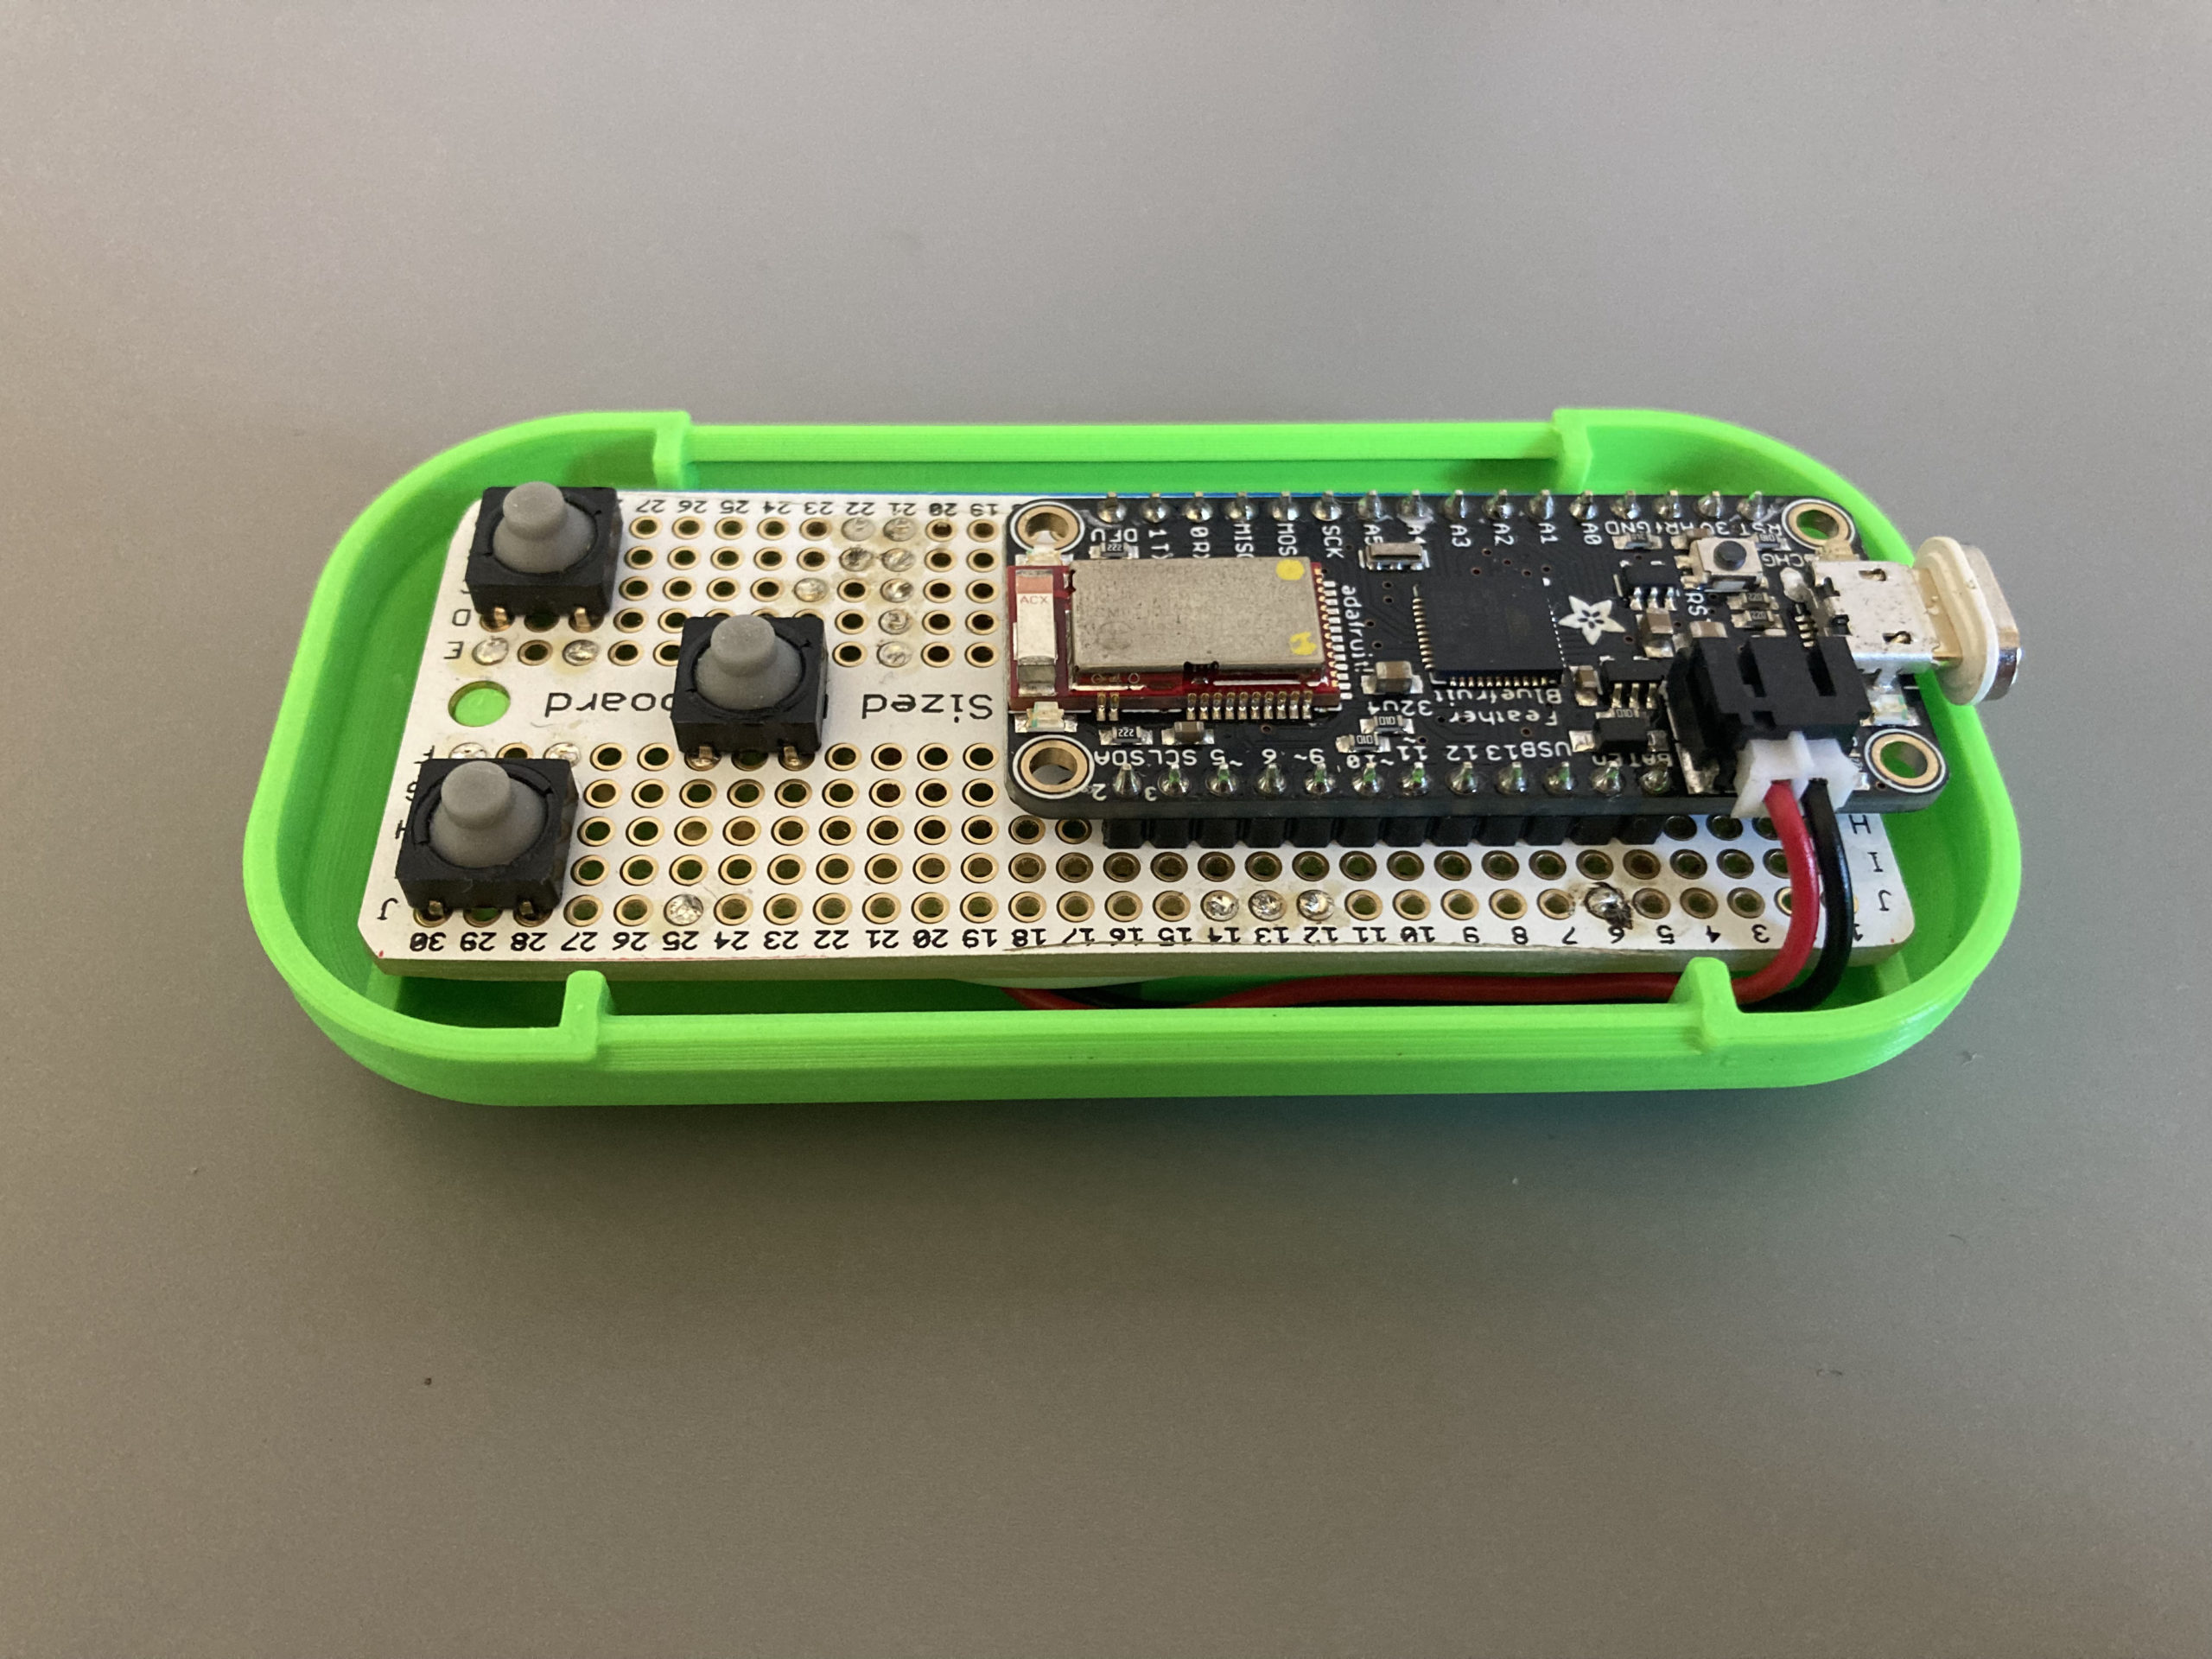
2. Mount and Solder Components
“Skip Back” button to J30/G30 and J28/G28 – Top of board.
“Skip Forward” button to A30/D30 and A28/D28 – Top of board.
“Play/Pause” button to F25/E25 and F23/E23 – Top of board.
SPDT Slide Switch to A20 through A22 (only need to solder A21 and A22) – Bottom of board.
Bluefruit Feather to H5 through H16 and B1 through B16 (only need to solder H6/En, H12/GPIO 9, H13/GPIO 6, H14/GPIO 5 and B4/GND) – Top of board.
Use the flush cutters to trim all protruding pins.
3. Wire Up
Using white wire, connect E30 to J13 (GPIO 6), F30 to J12 (GPIO 9), and J25 to J14 (GPIO 5).
Using green wire, connect B21 to A4 (GND), and then E28, F28, and C23 to C21, D21 and E21 in order to get all the buttons connected.
Using red wire, connect B22 to J6 (En)
Connect the battery once completed.

4. Arduino Sketch
Follow Adafruit’s setup guide, and modify lines 108 and 109 of their sketch as shown, or load the pre-modified sketch from the Files section below.
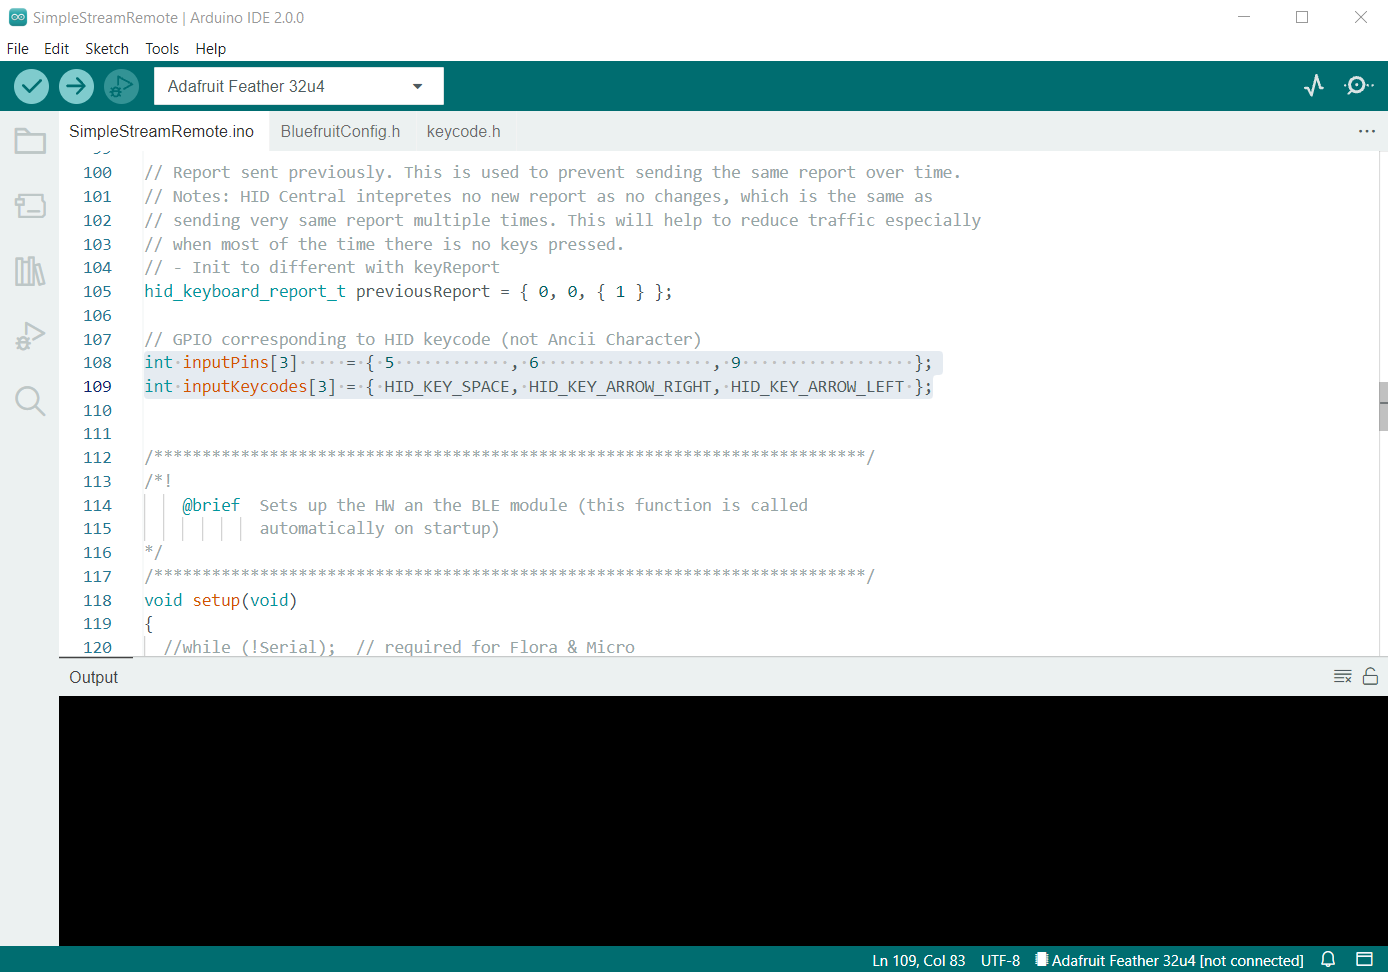
Give the board a test run to ensure everything works properly.
5. Print out Parts
Files can be found at the bottom of the page
Material: PLA
Infill: 15-20%
Supports: No
Brim: No
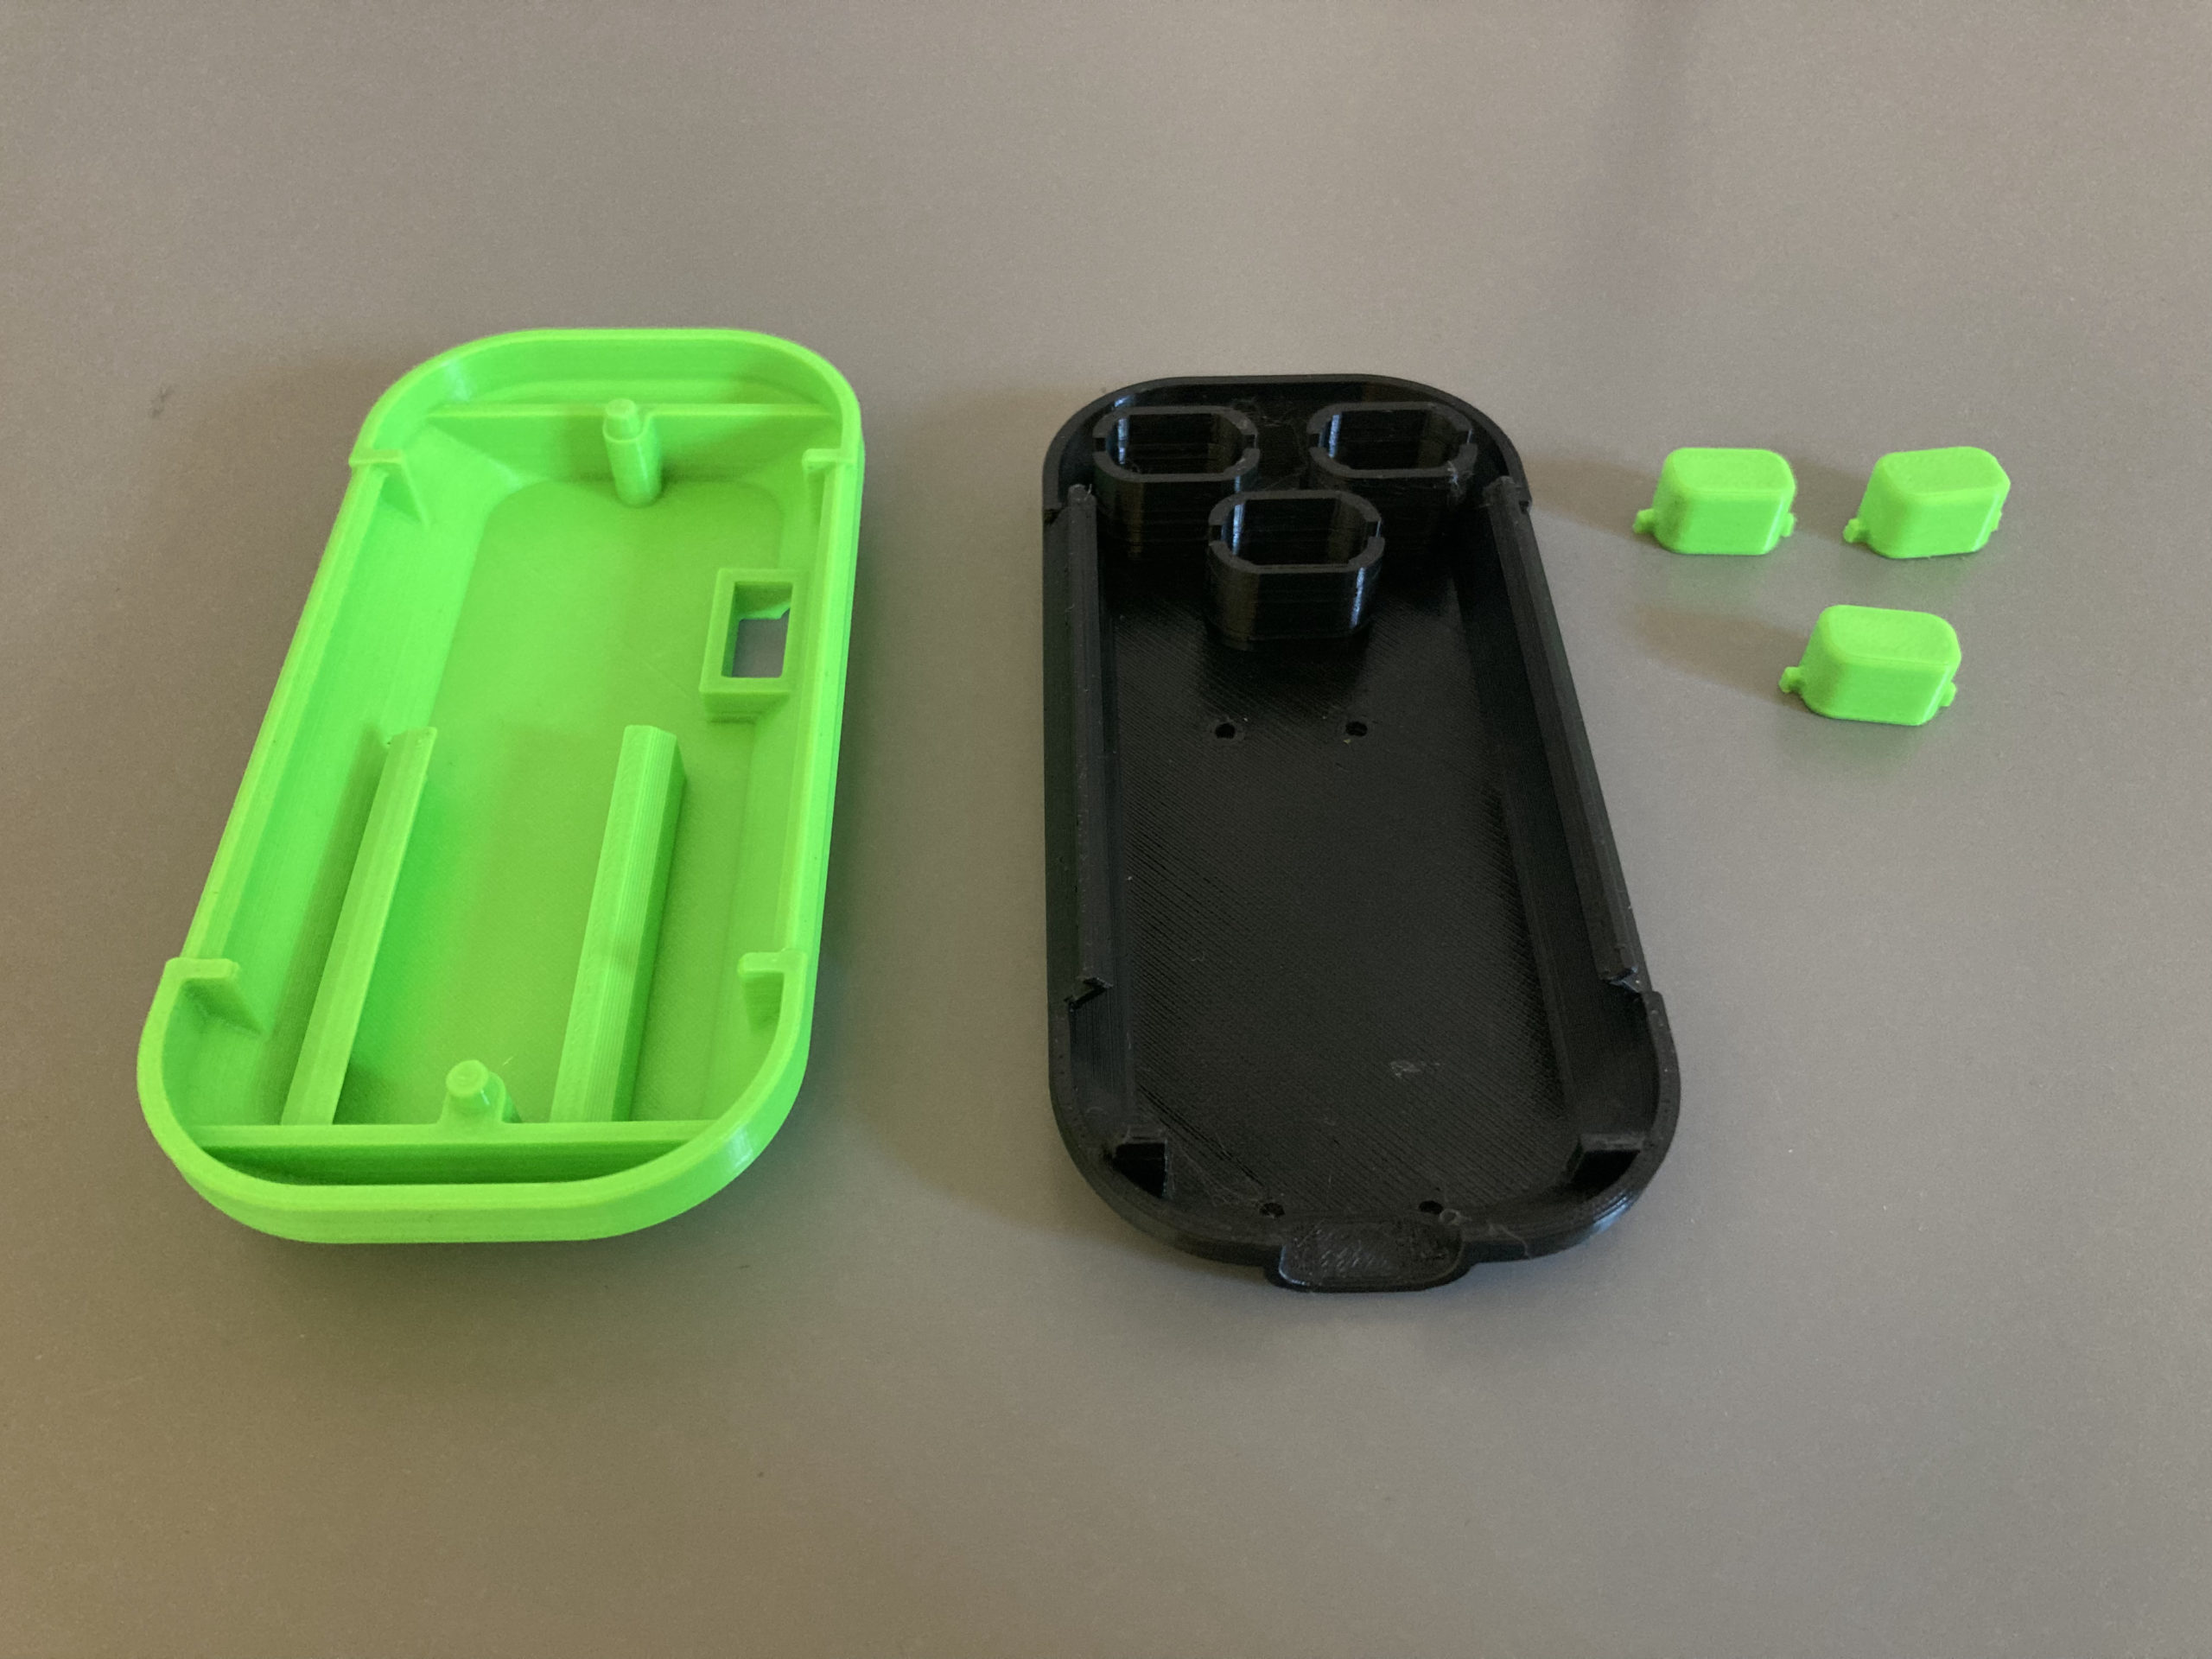
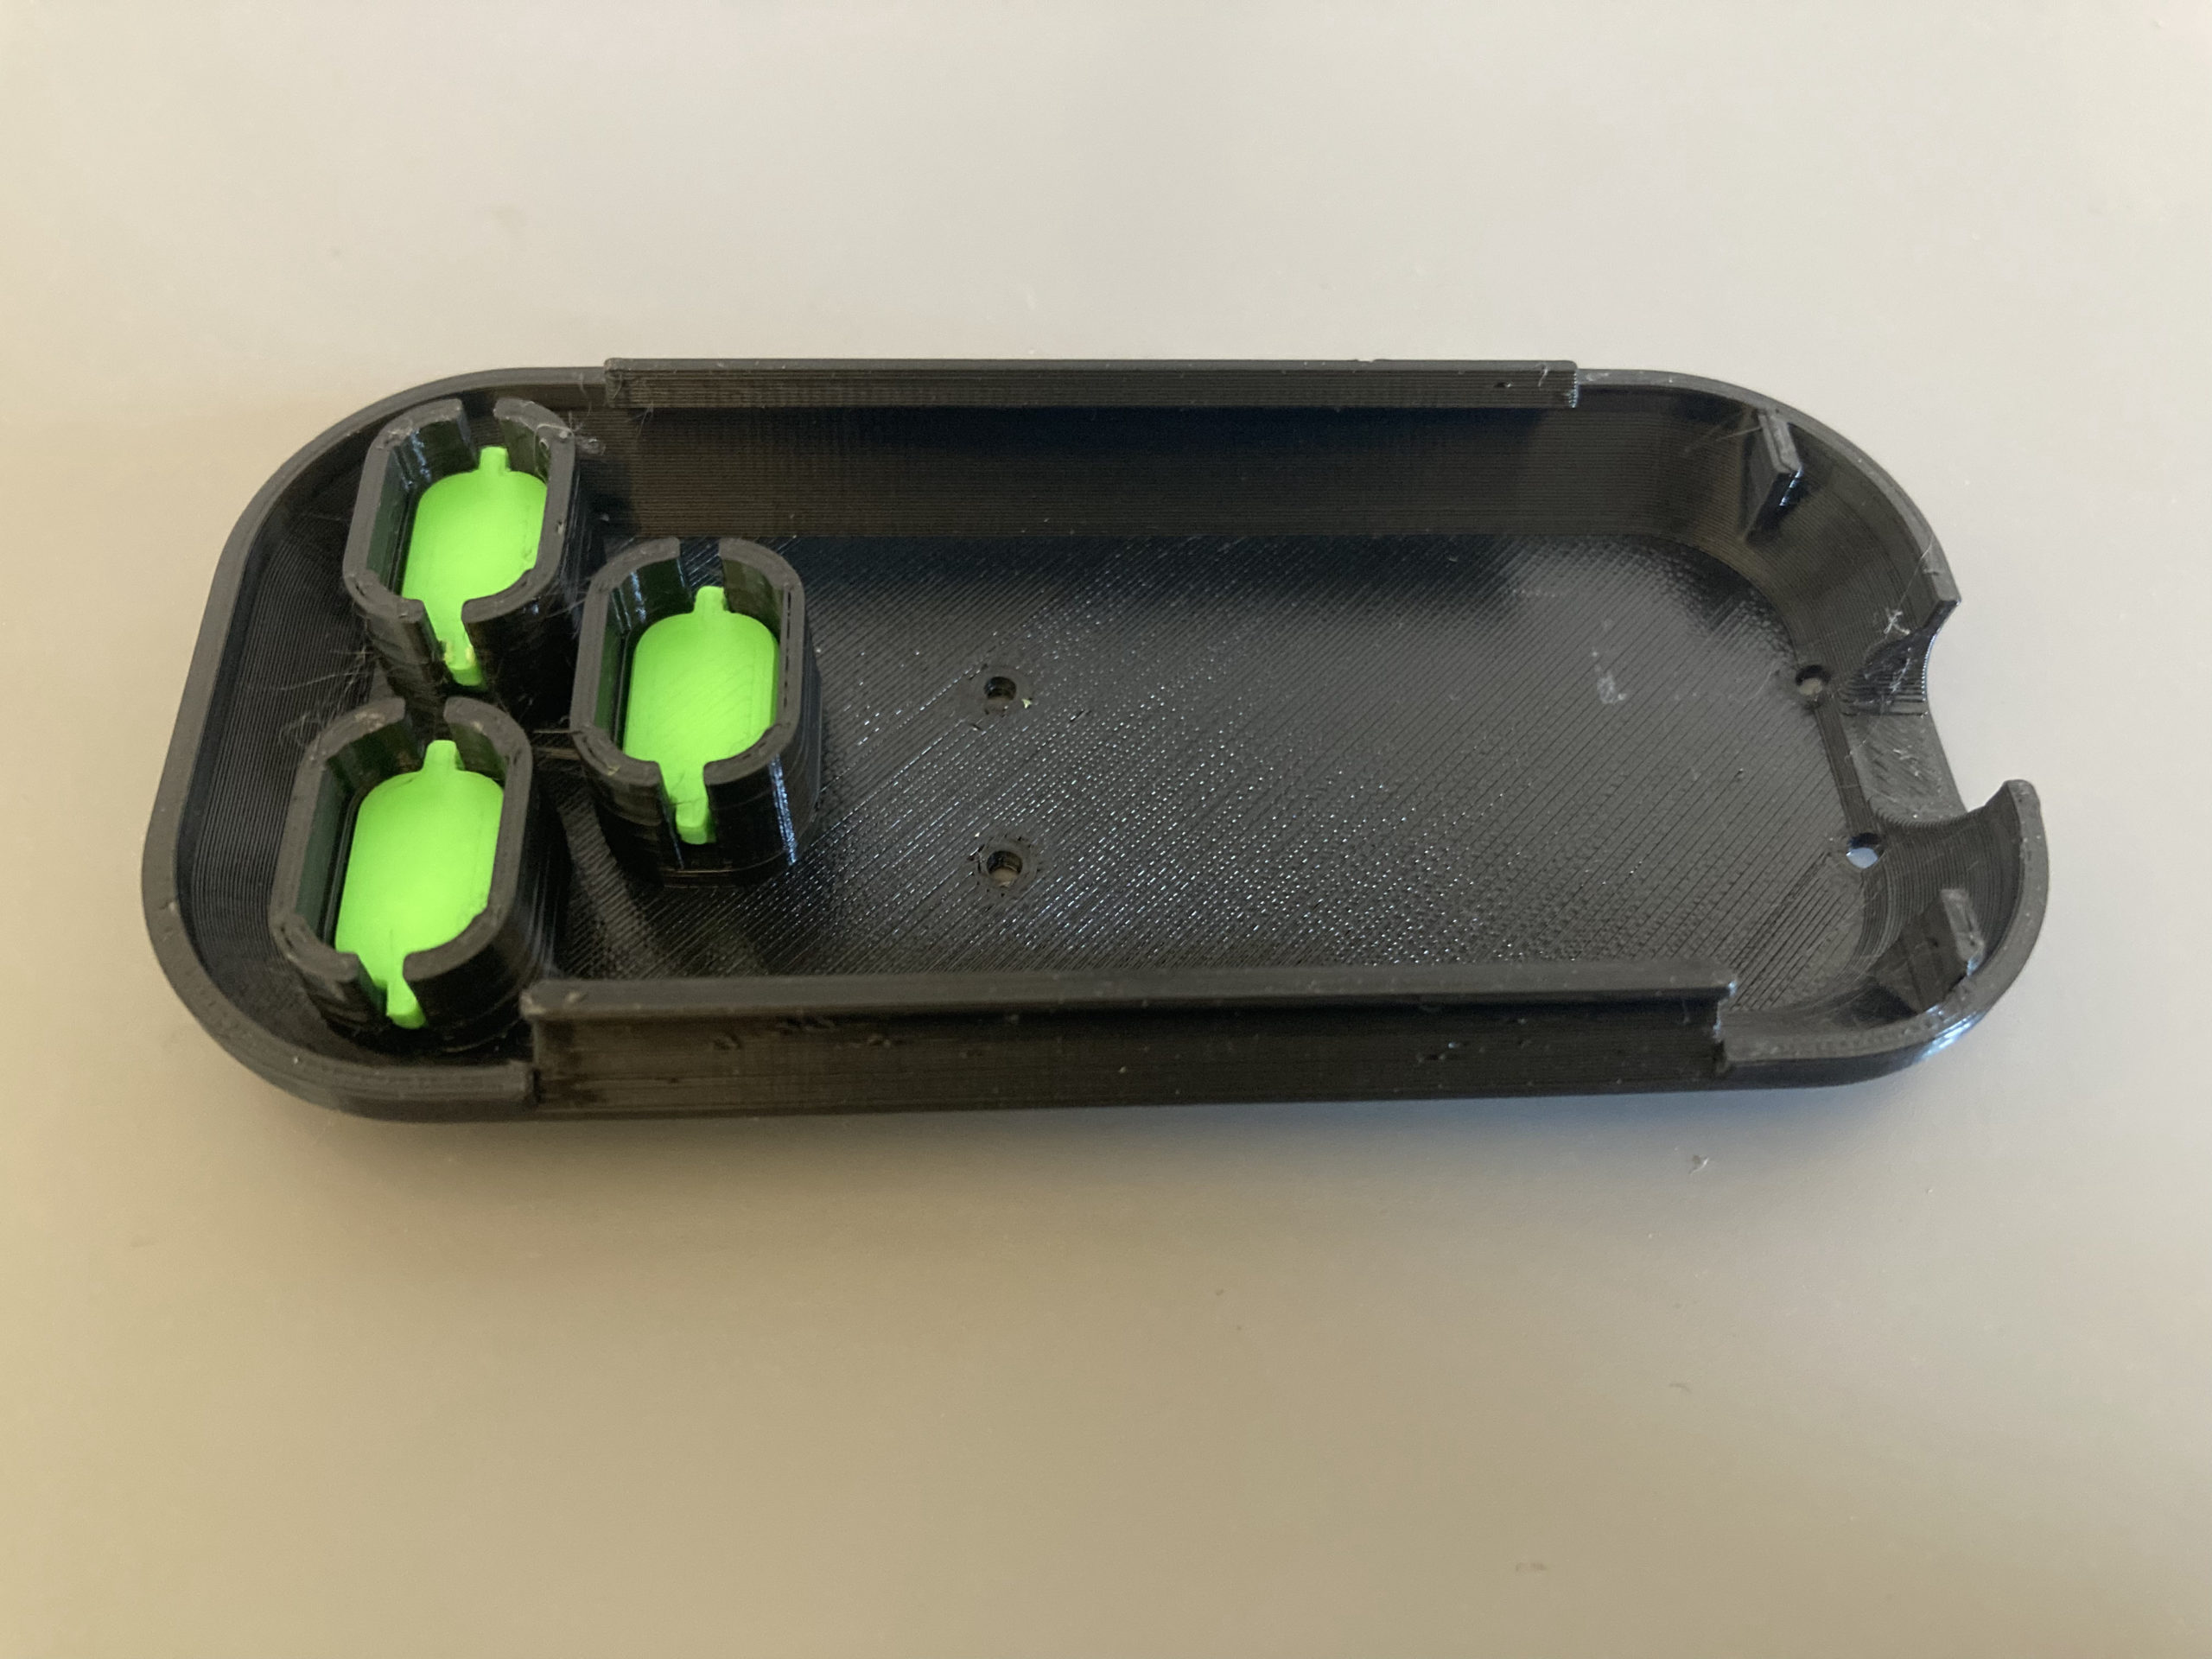
6. Fit Electronics Into Lower Housing
Slide the battery into the provided features as shown.

Taking care to avoid crushing or pinching any wires, fit the mounting holes from the Perma-Proto board onto the posts.
7. Assemble Upper Housing
Place the buttons into the Upper Housing as shown. Test to see if they move freely, and if not, use a small file or some sandpaper to improve clearances.
Snap-fit onto the lower housing when ready.

8. Take Command
At least, as much as three buttons can offer. May or may not explore how to implement a joystick-as-mouse situation at some point in the future, but am quite happy with this for now.

Files
Click the Download buttons below for zip files containing all the printable components and Arduino sketch files.
Files are available under the Creative Commons BY-NC-SA license.
Like what you’re seeing here? Leave me a comment down below, follow me on Mastodon @DragonMtnDesign@fosstodon.org, and/or say “hey” if you ever see me or my work out around on the internet.
Full disclosure: this project was designed and completed in like, November of last year, and I’ve just not been in the proper headspace to write and post for a bit. If you’re following me on Mastodon, you know I haven’t been completely out of the making game. I did a small project with my son that I’ll post about sometime in the near future, but have mostly been working on another Gameboy game that I’m having a lot of fun with.