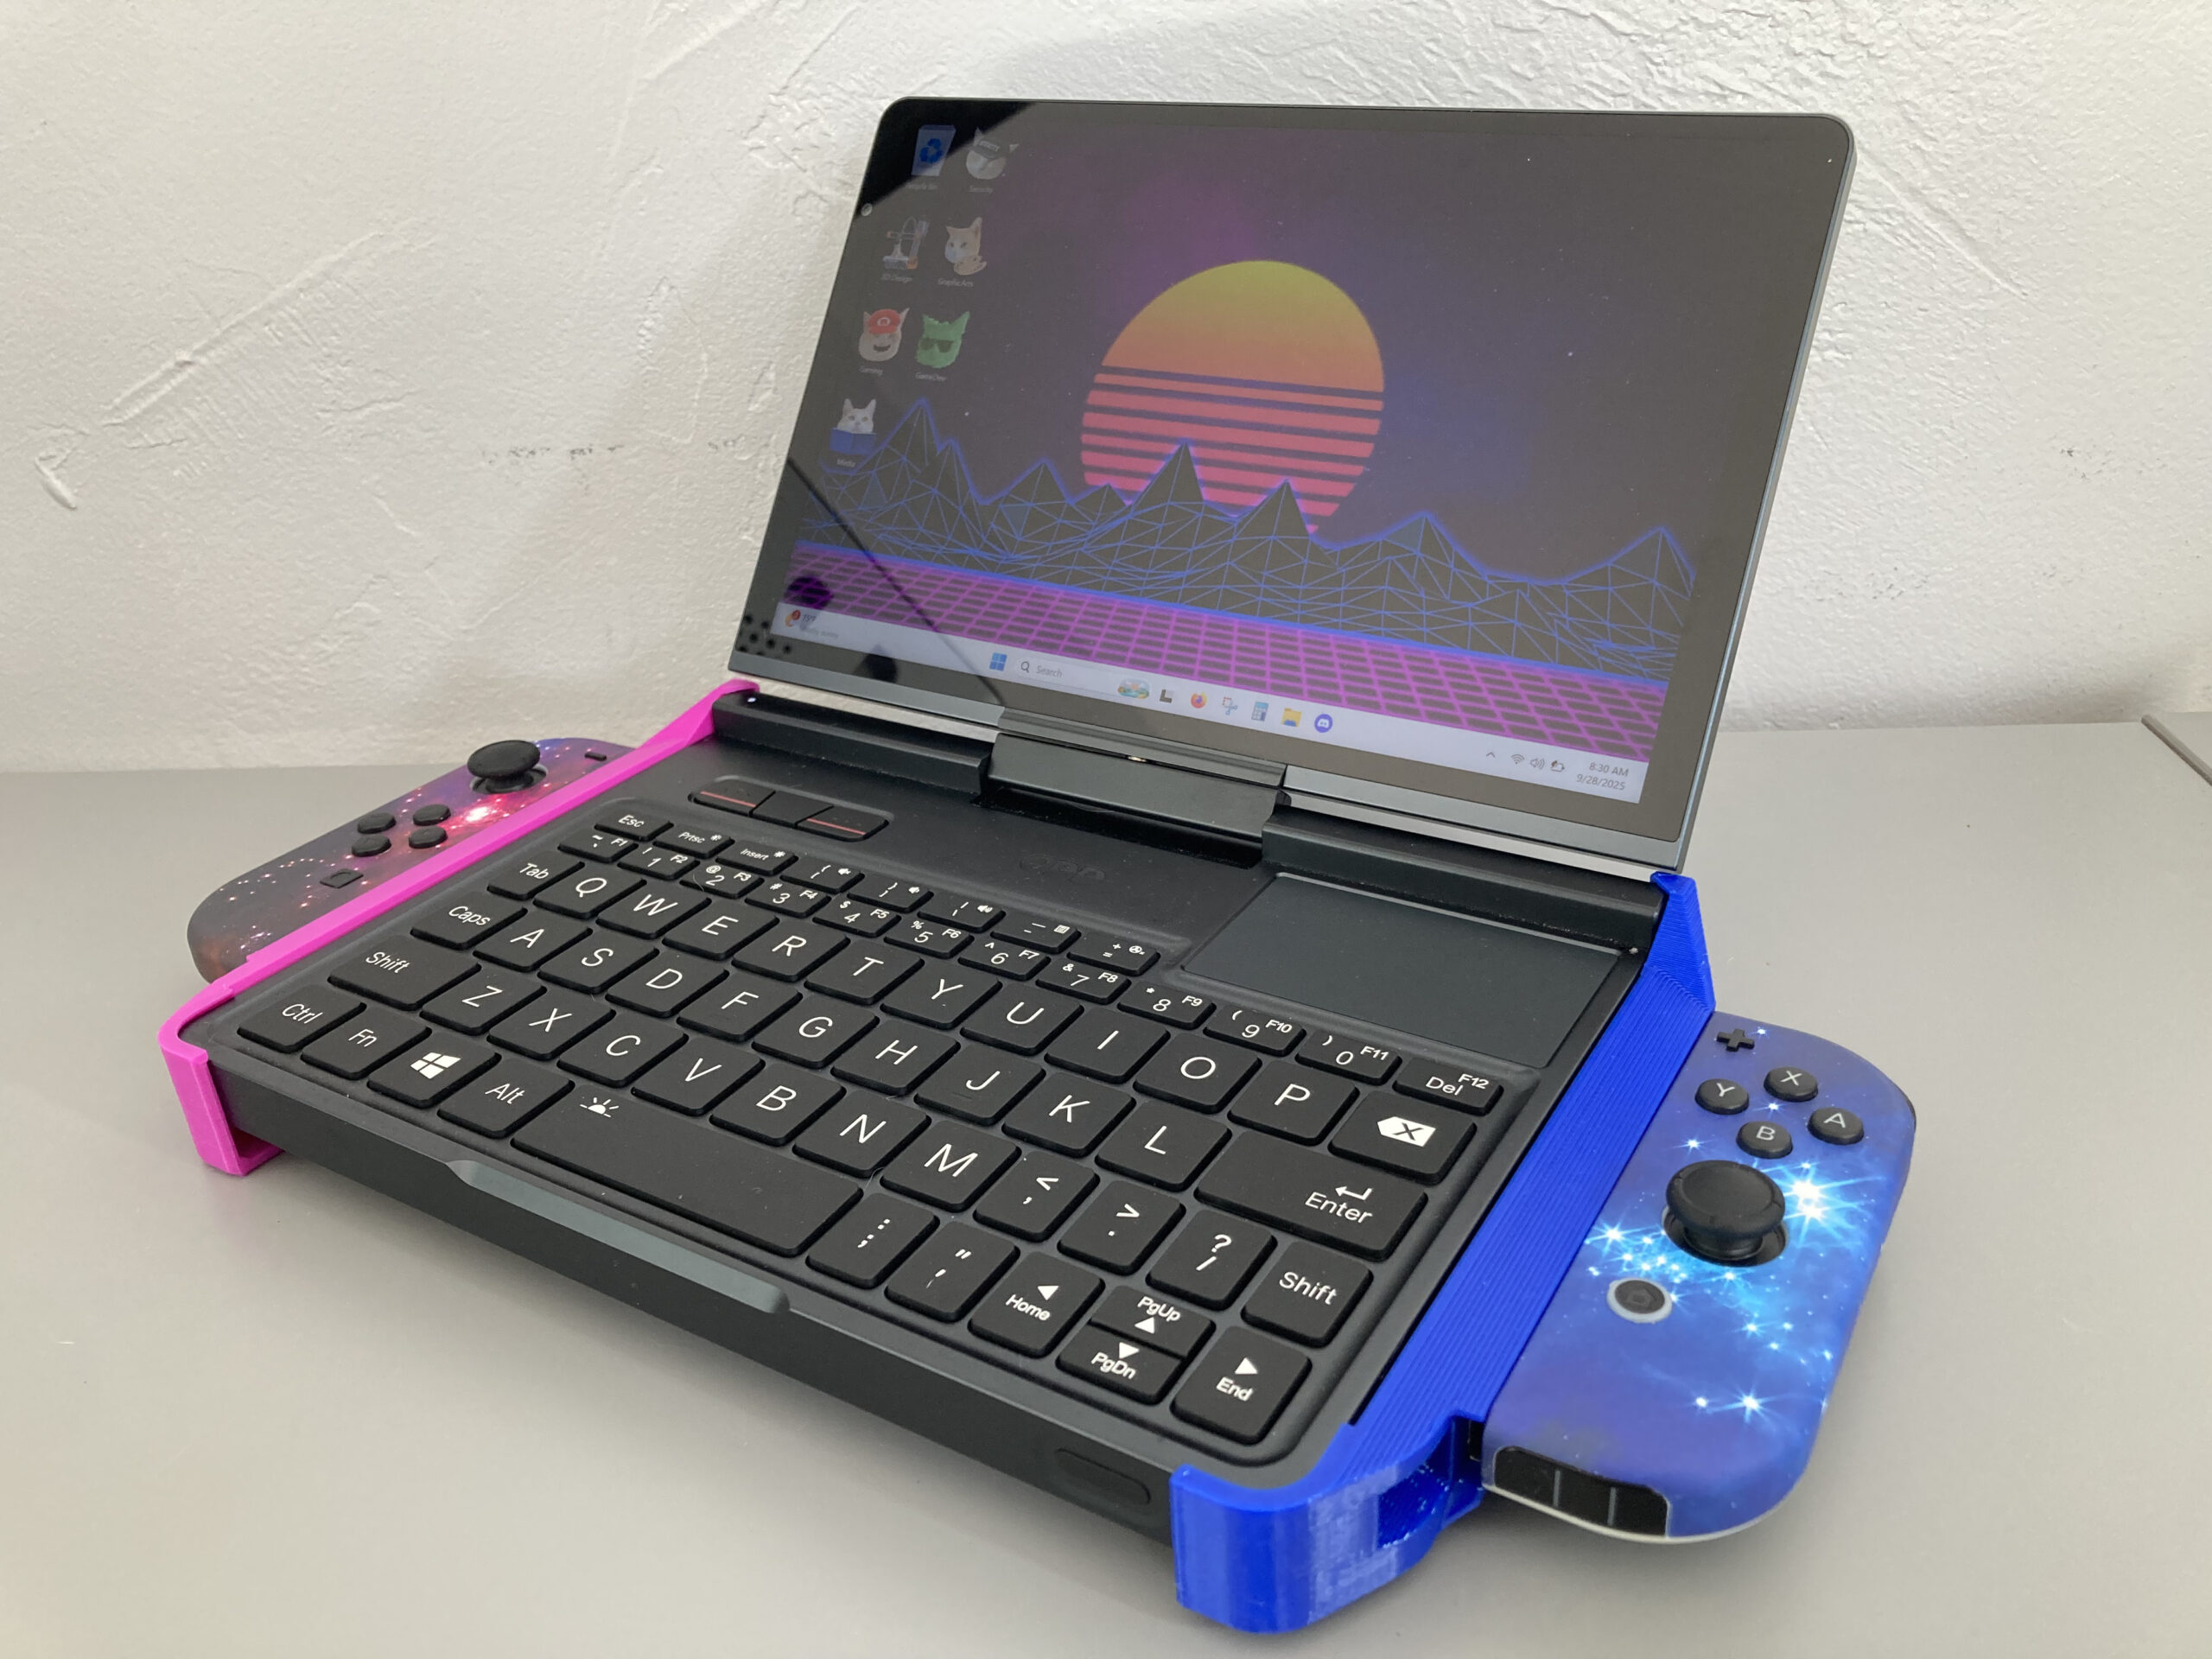
GPD Pocket 4 Telescoping Joycon Adapter
Whew… that’s a whole lot of words there (but wait, there’s more!)
For a bit of background on this one, earlier this year I realized that I probably needed to get a new laptop. My old Acer Predator had been with me far longer than any other laptop I’d had before, but became more sluggish and started sounding like a jet engine every time I opened an email.
As I researched options to replace it, I was just not impressed with the majority of what I’ll call “mainstream offerings.” Laptops were all comically massive or severely under-powered for my needs and desires. I had considered getting a Windows-based gaming handheld to consolidate my laptop and Steam Deck, but realized that the lack of physical keyboard would make it less portable, and really put a damper on being productive day-to-day.
For months, I searched, compared, and landed on the GPD Pocket 4. Almost every review I came across would gush over the power, flexibility, and portability, but would ultimately tell the reader/viewer to just buy a high-powered laptop and a Steam Deck and ask, “who is this product for?”
…Me!
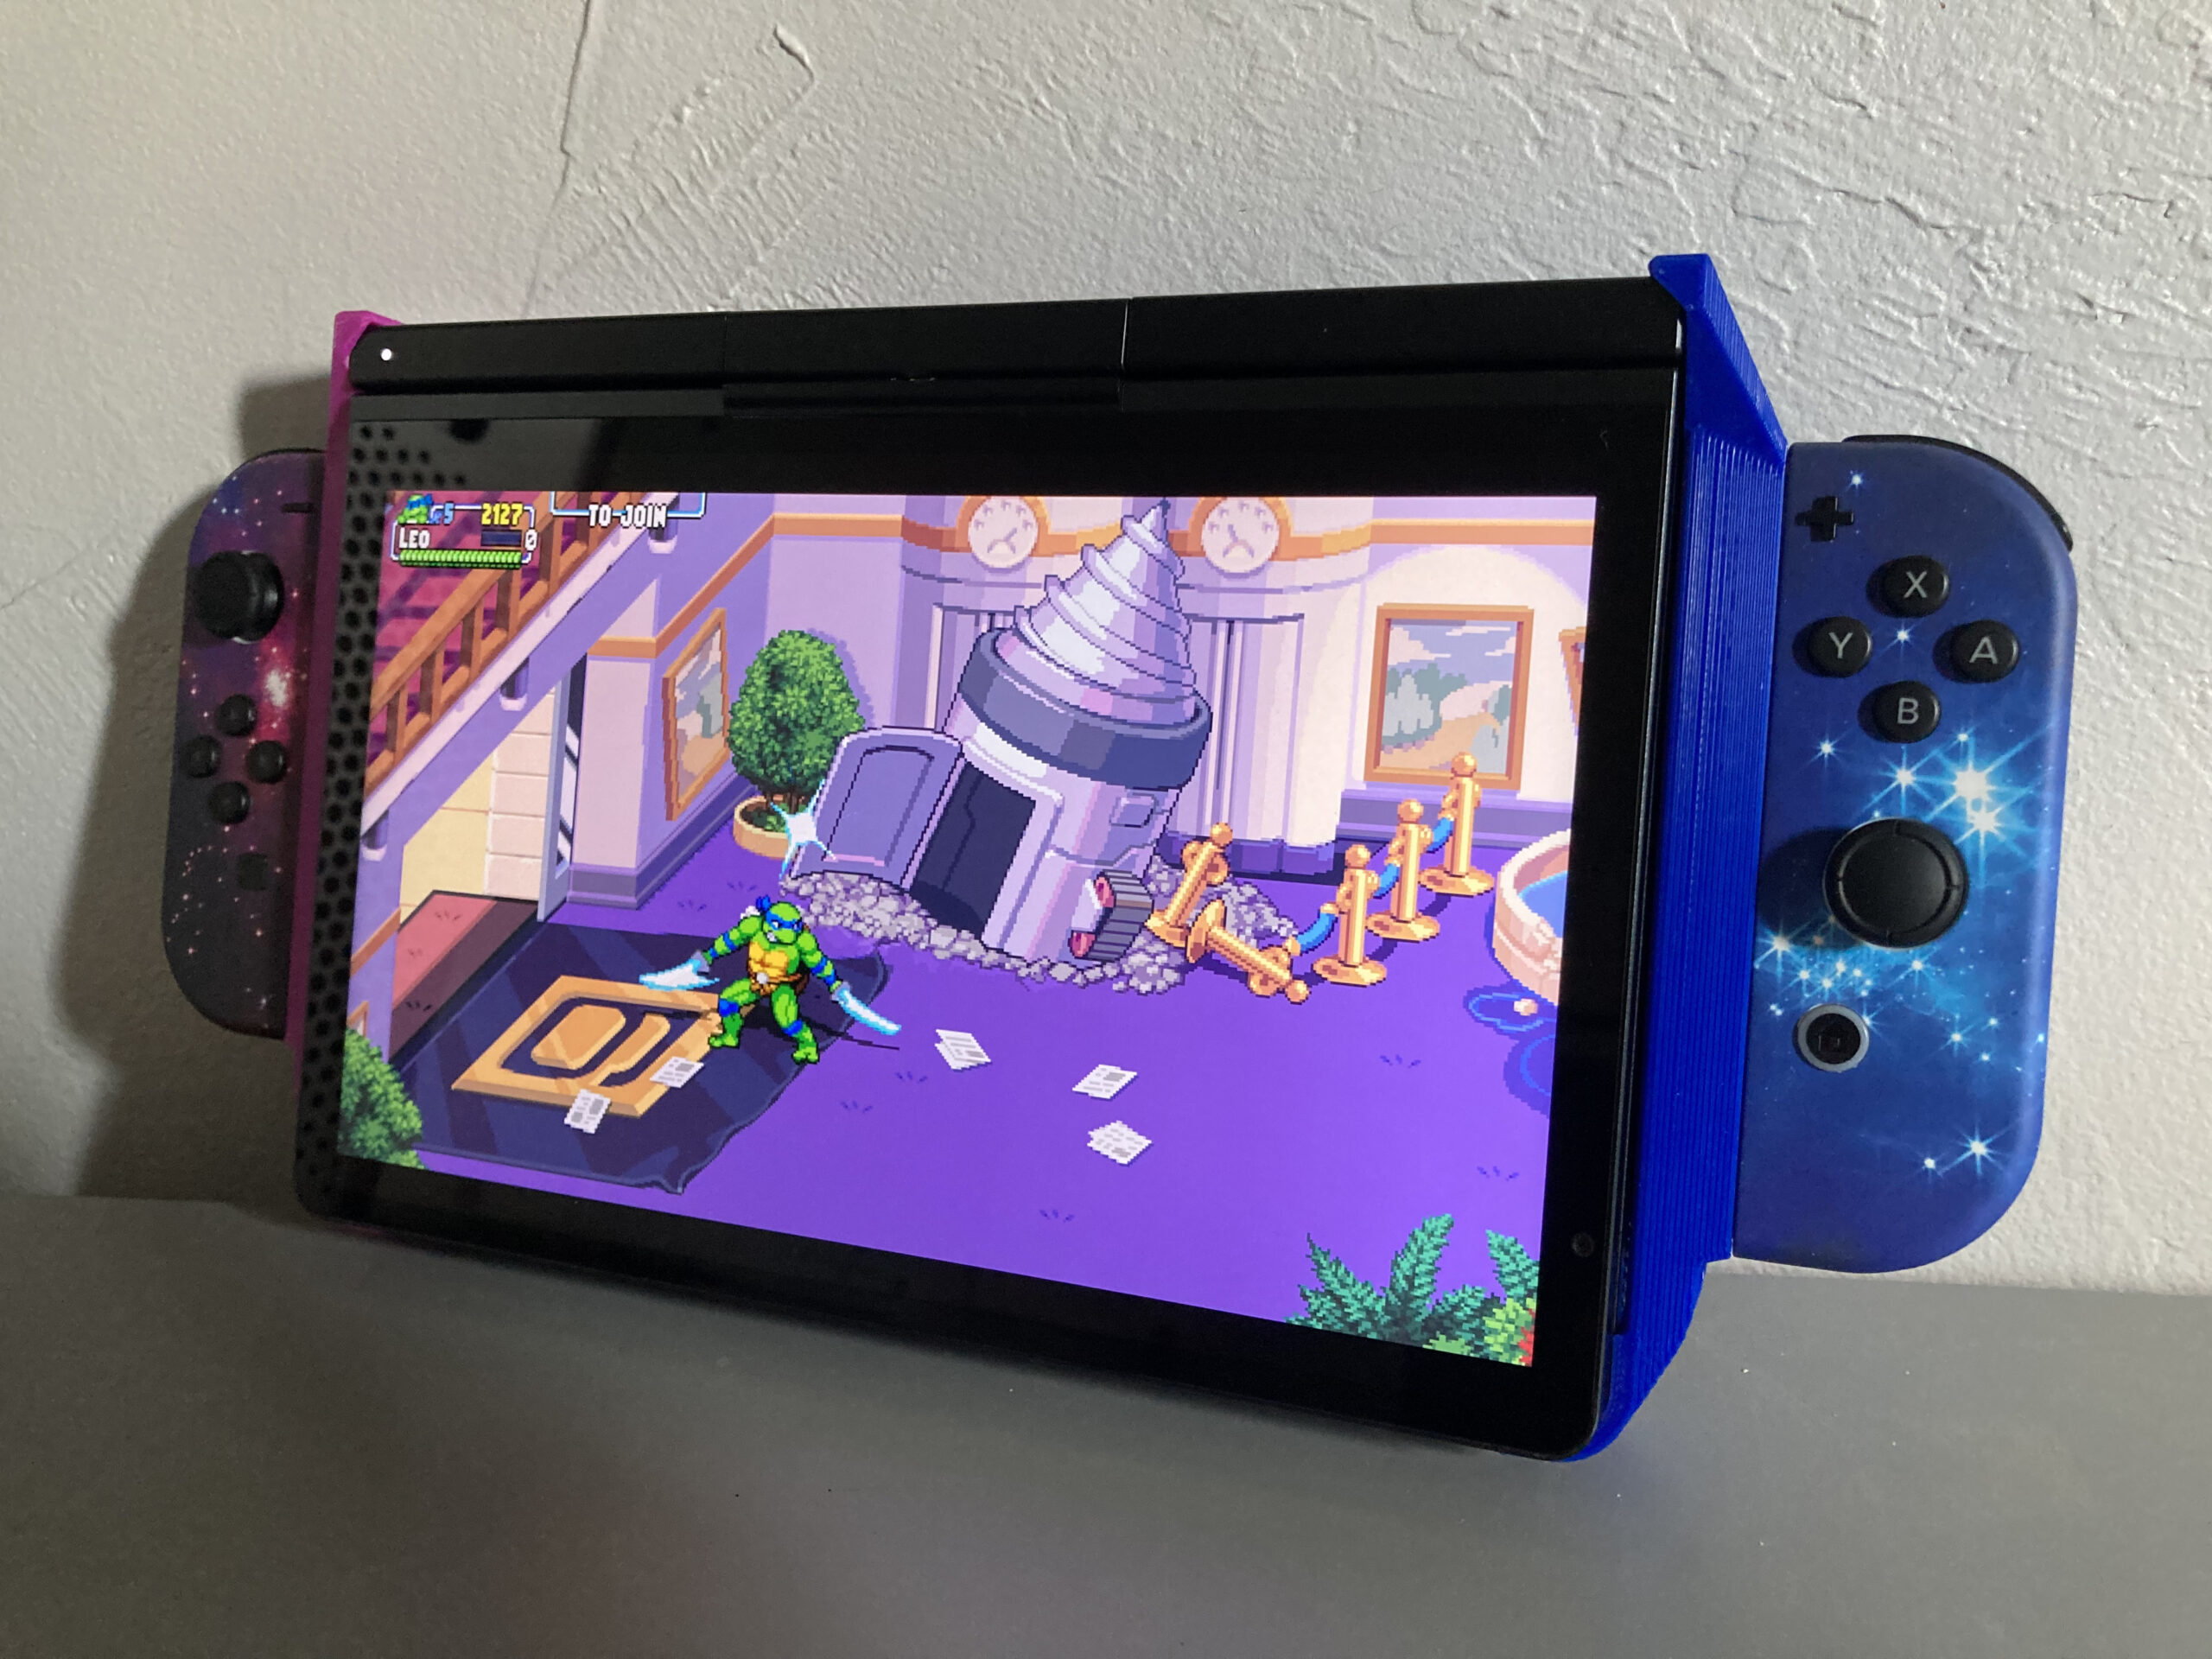
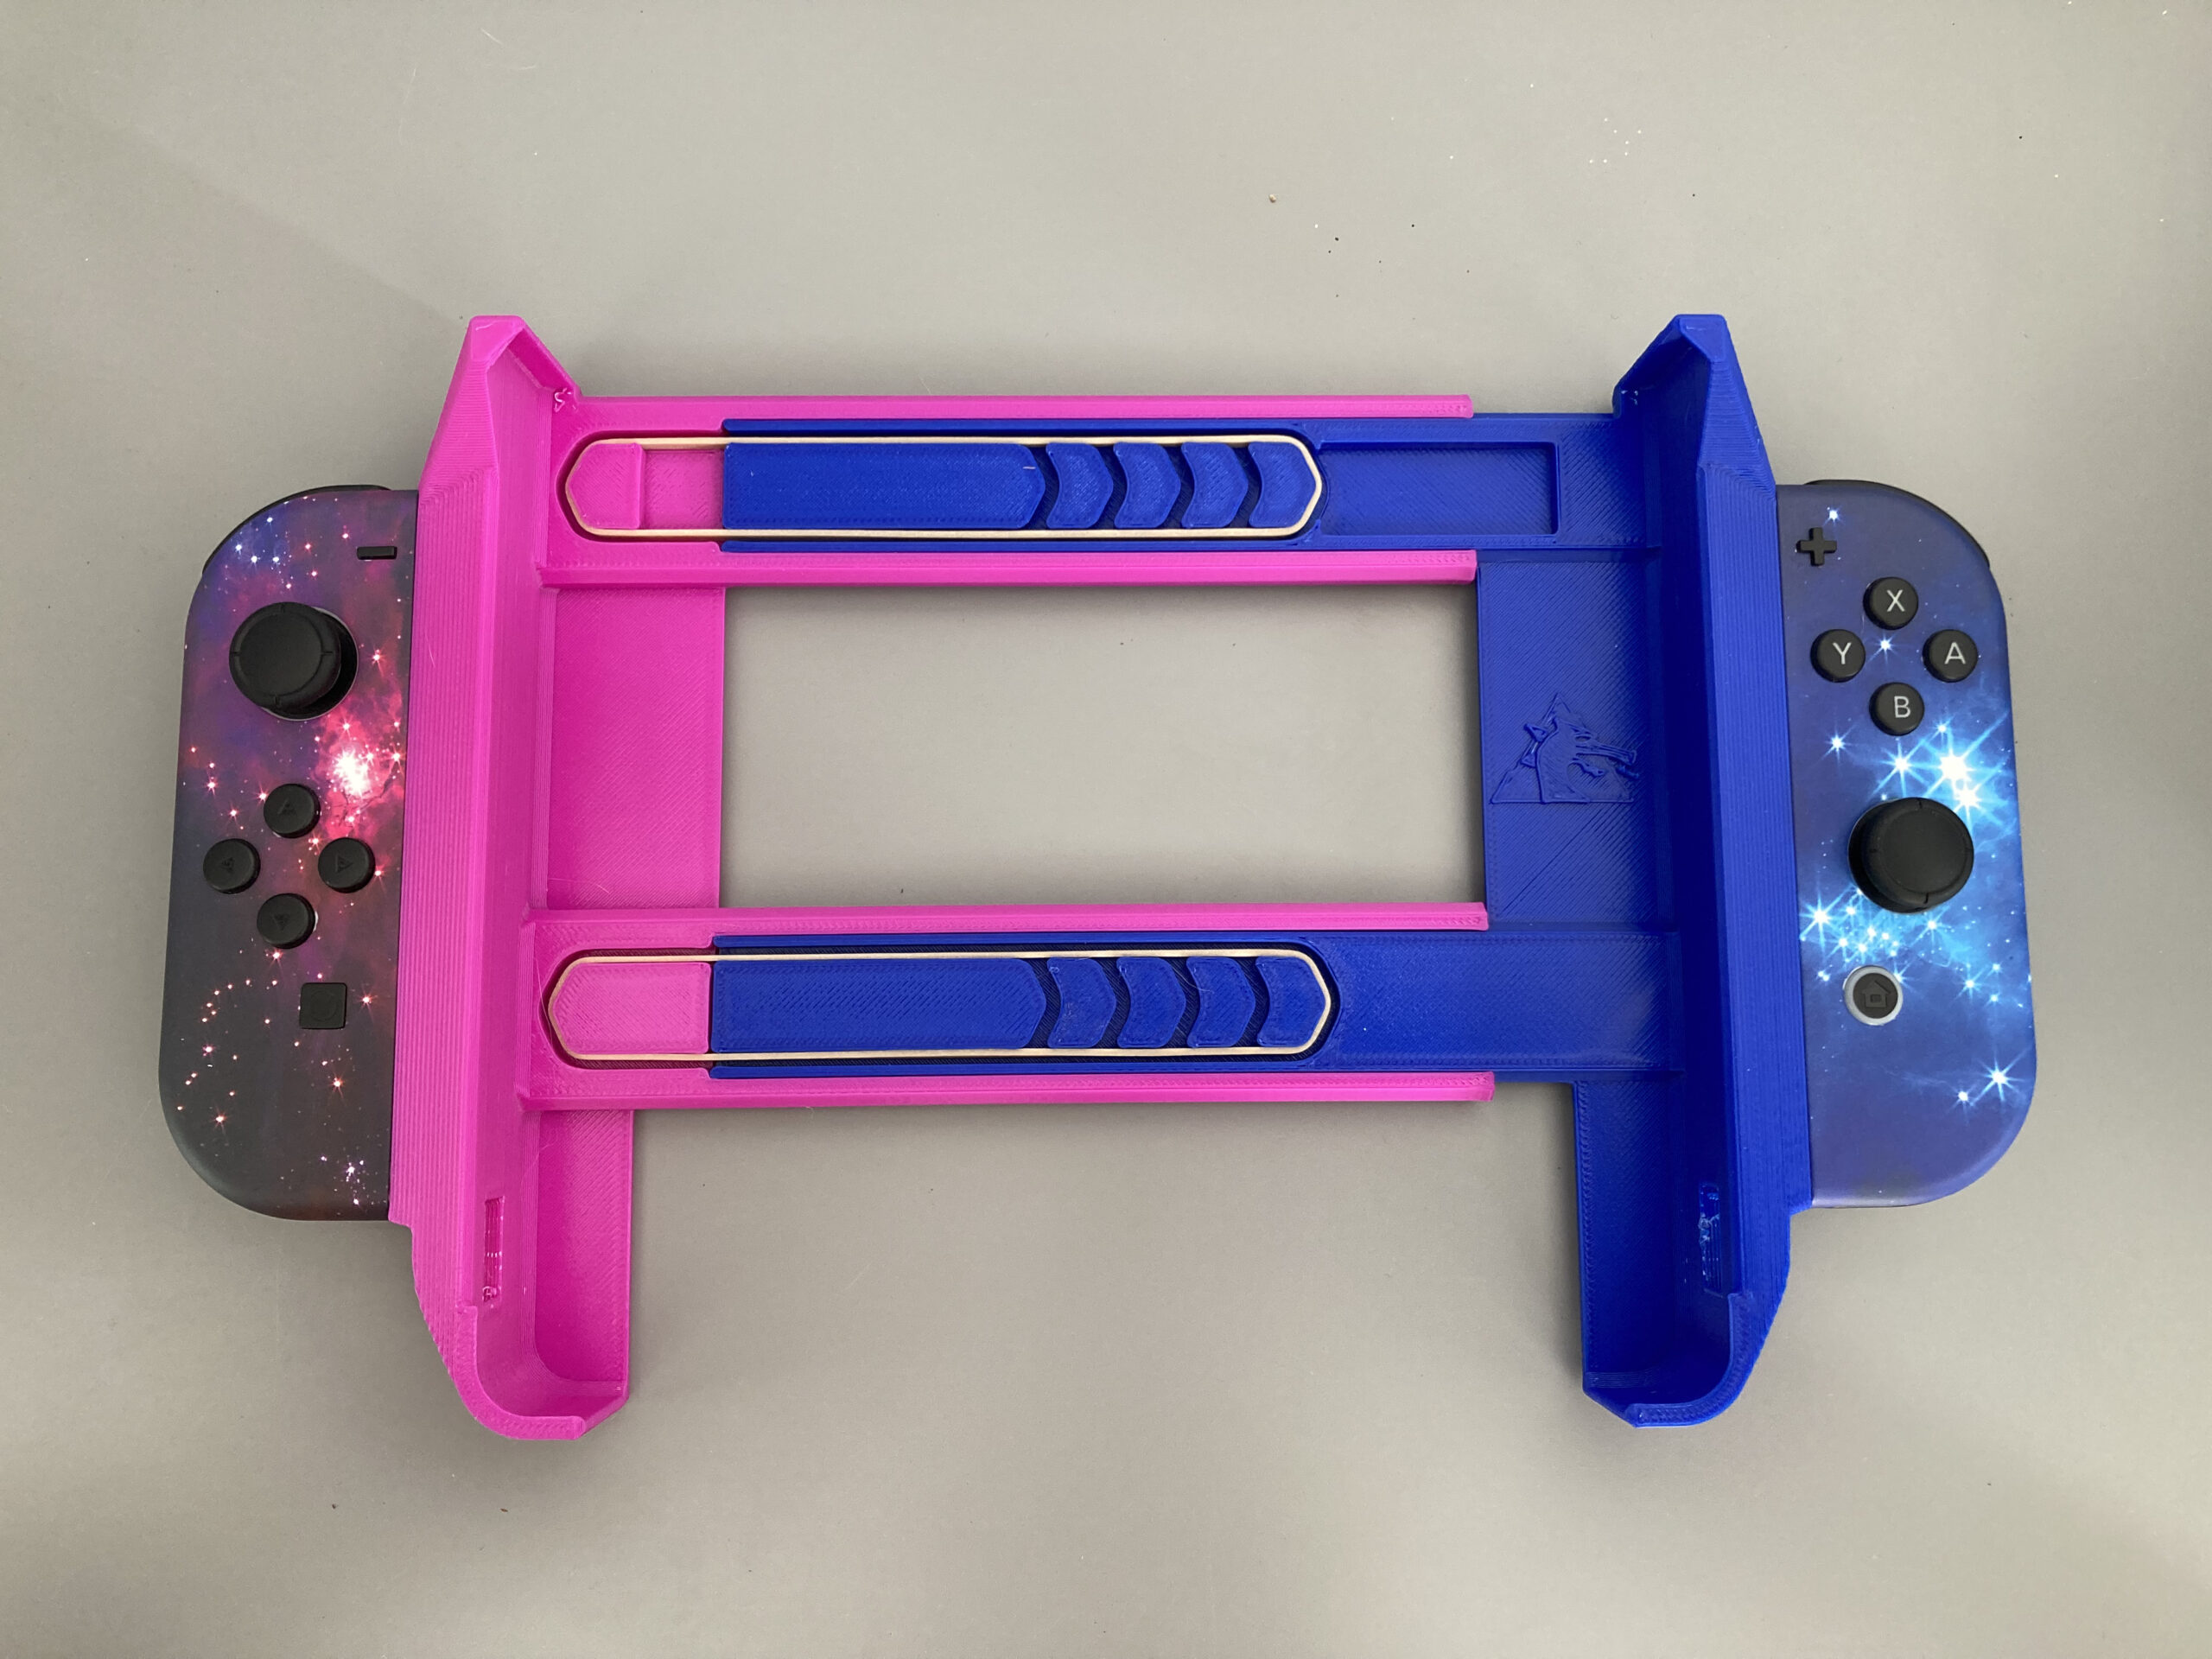
With this little computer and the help of a couple Switch Joycons, I’ve been able to consolidate laptop, Steam Deck, and tablet into one device.
Design Notes
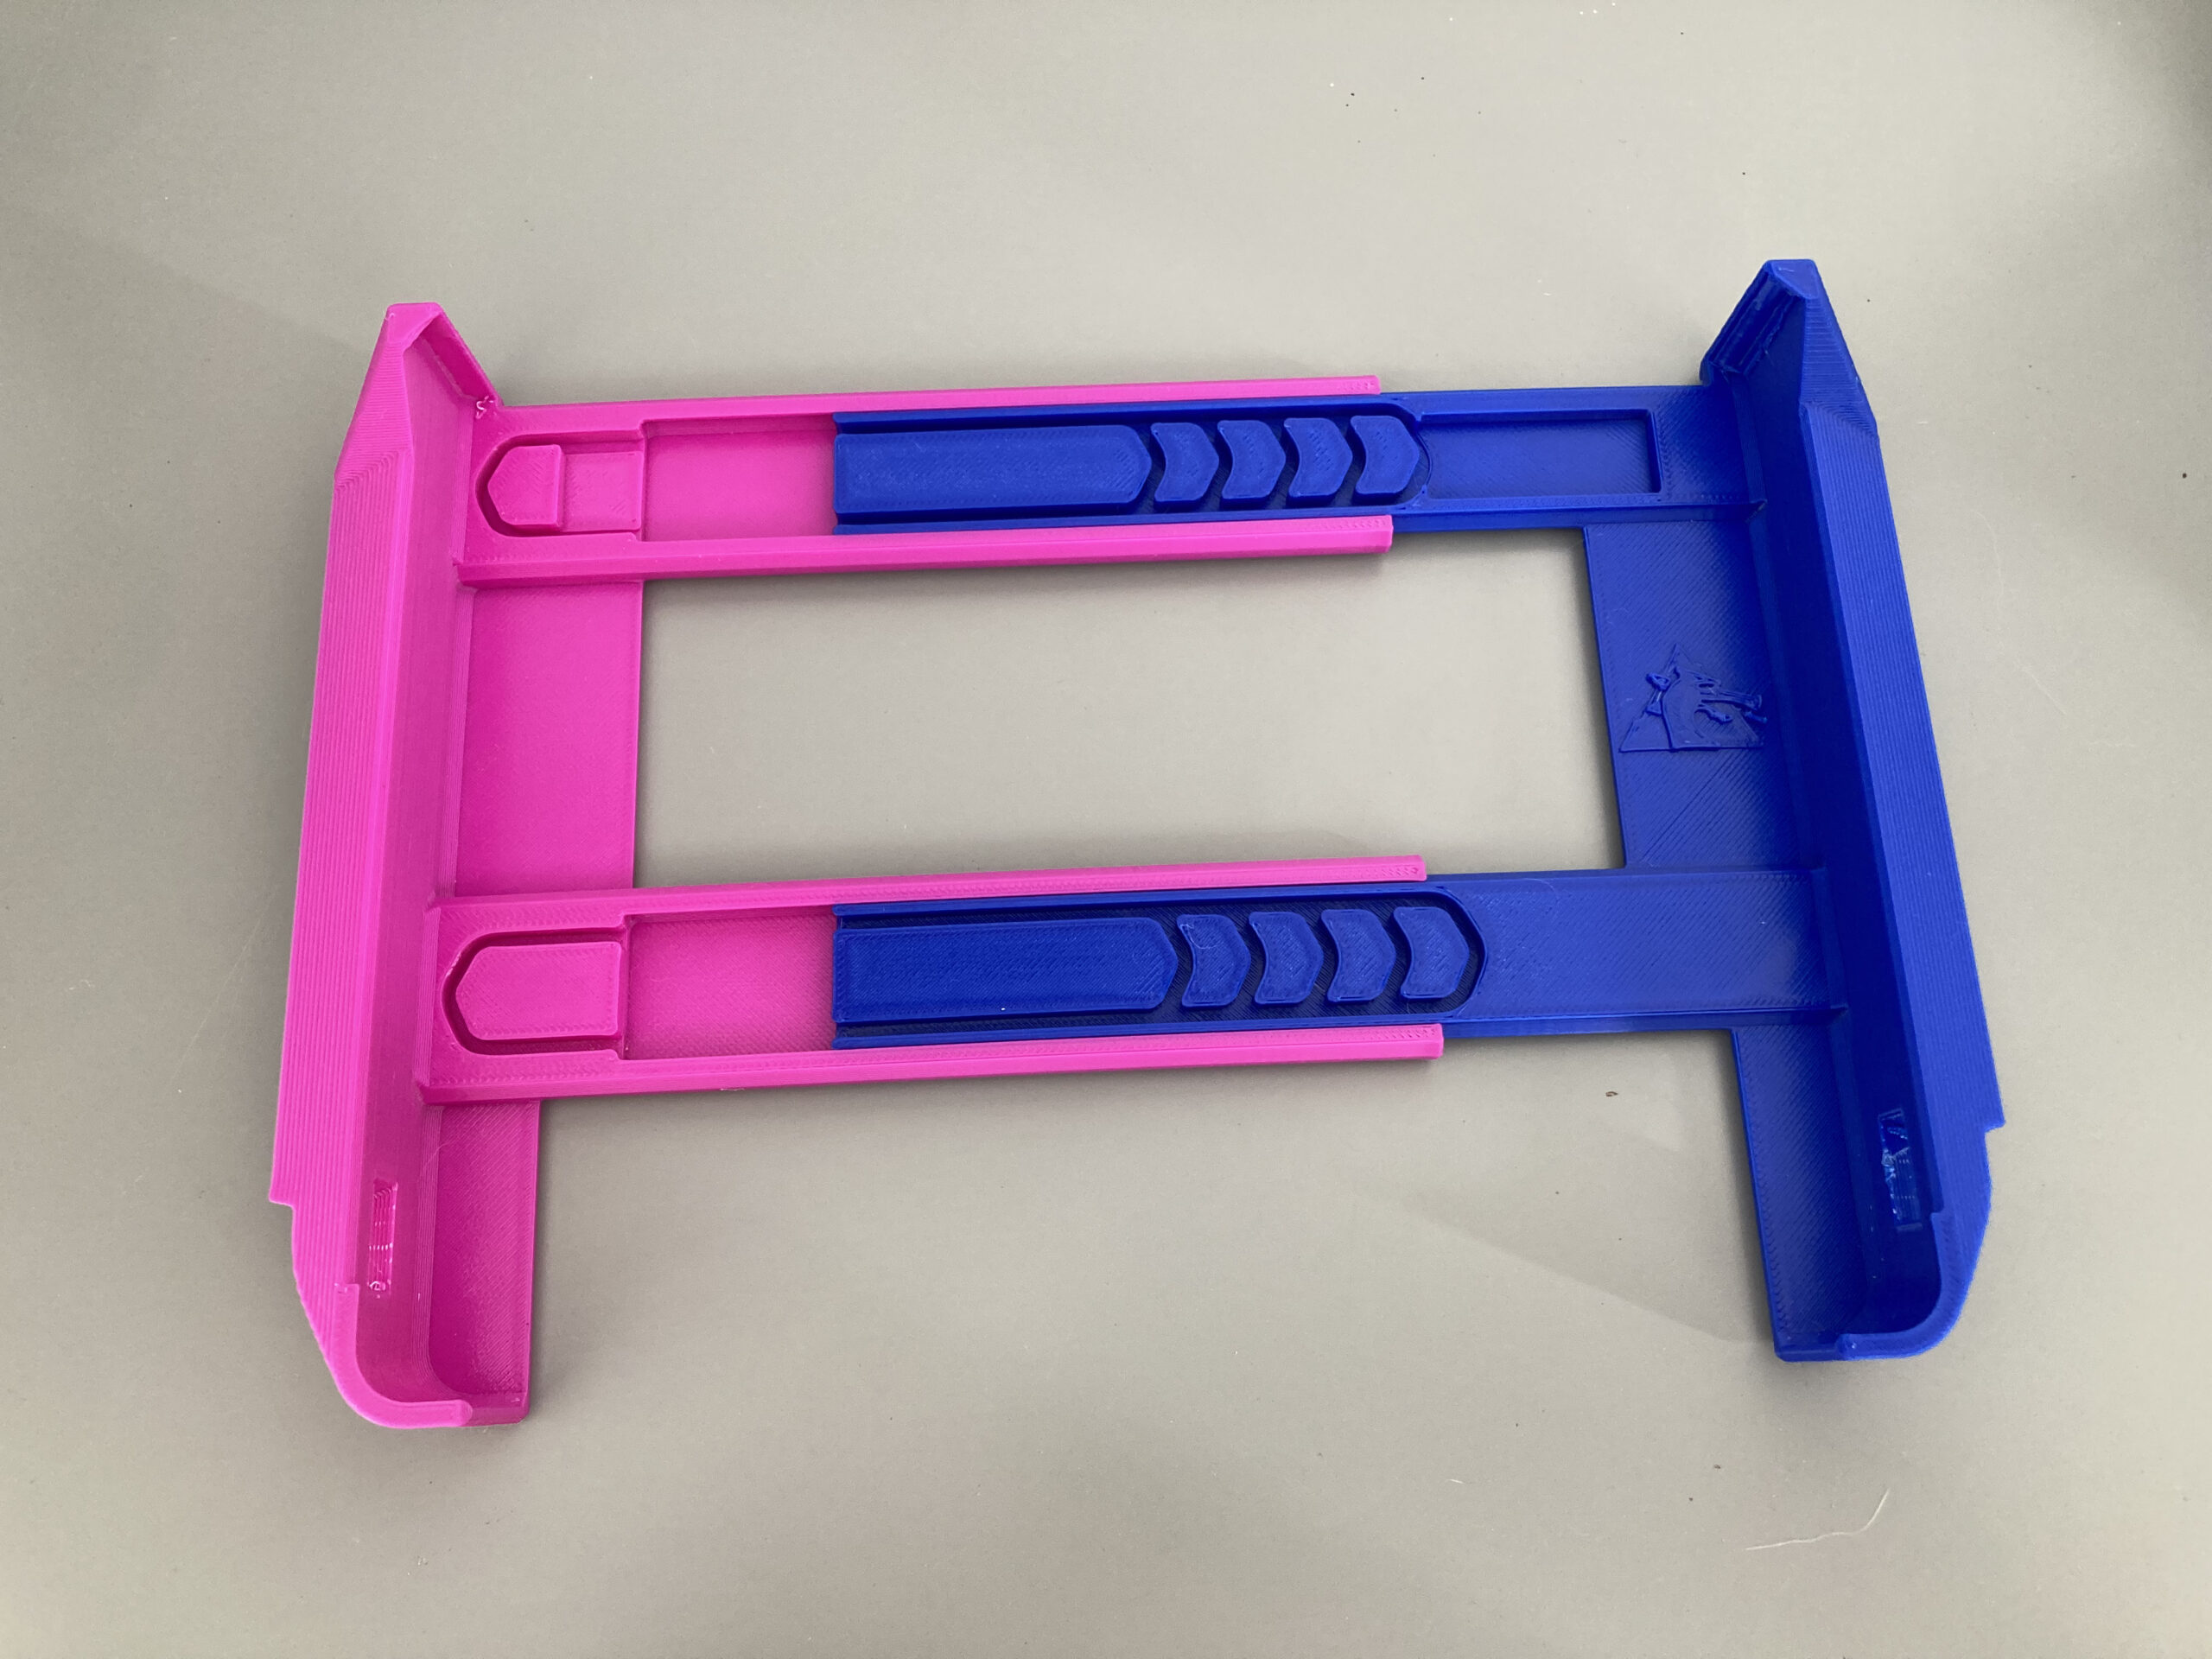
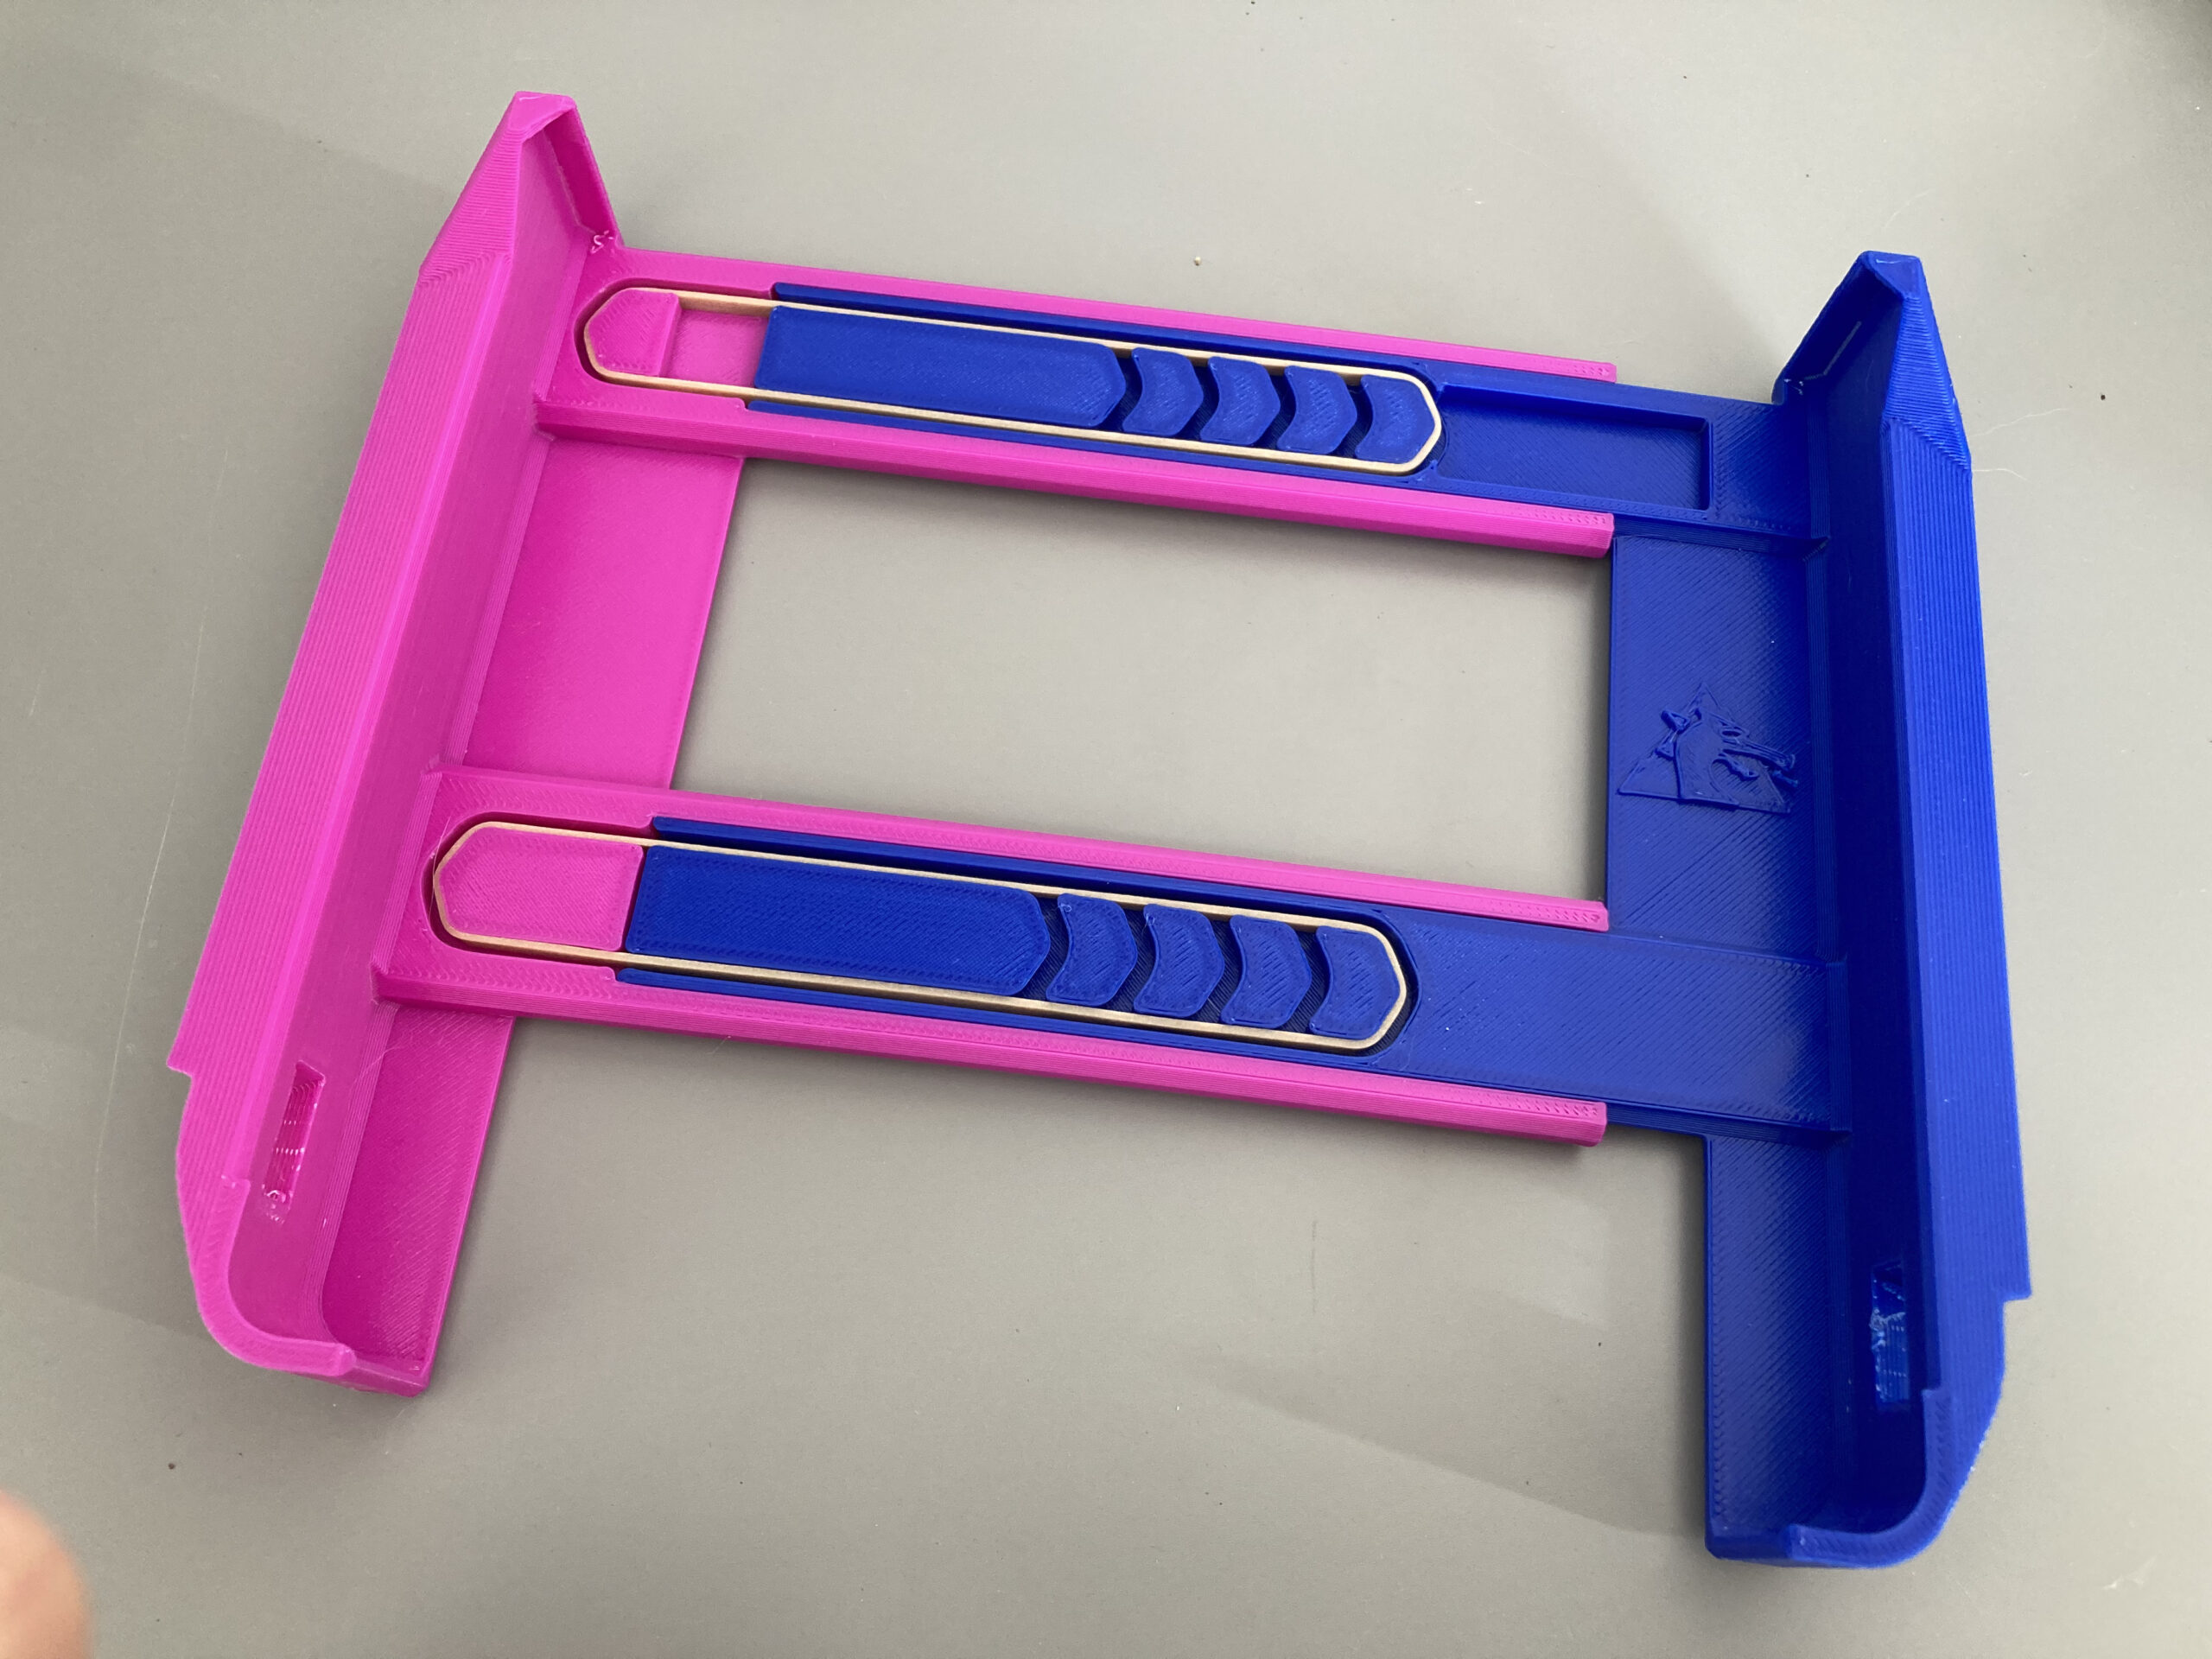
Designed in FreeCAD v1.0, this took a few iterations before coming to the “right” form. First draft was to ensure I had the right overall proportions correct, and to explore a telescoping mechanism. The original thought was to use some constant-force springs, but they would be quite expensive and would really increase the size of everything to ensure proper fit and function. A subconscious brainstorm one day struck on rubber bands being inexpensive, easily sourced, and low-profile.
A quick and dirty test proved the rubber band idea, the concept was further fleshed out, and the Joycons were attached for a form/fit/function test in a second print. Having them so far back made holding the device incredibly uncomfortable on my wrists as gravity would work to rotate the assembly toward me instead of away like an original Gameboy or DS.
Pulling the Joycons a bit more toward the center, and wrapping up the design made for a good final print.
Alright, we’ve got to get on with things now. This is as bad as a recipe website at this point.
Parts List
Right and Left Switch Joycons (Original Switch. I’m not fancy enough for a Switch 2, and my Joycons are 3rd party I got as a gift a couple years ago)
A set of Switch Joycon Wrist Straps
#33 Rubber Bands (try others if you have something on hand)
Helpful Tools
PH00 Screw Driver
1. Print out Parts
Files can be found at the bottom of the page

Material: PLA
Infill: 15-20%
Supports: Unfortunately, yes
Brim: No
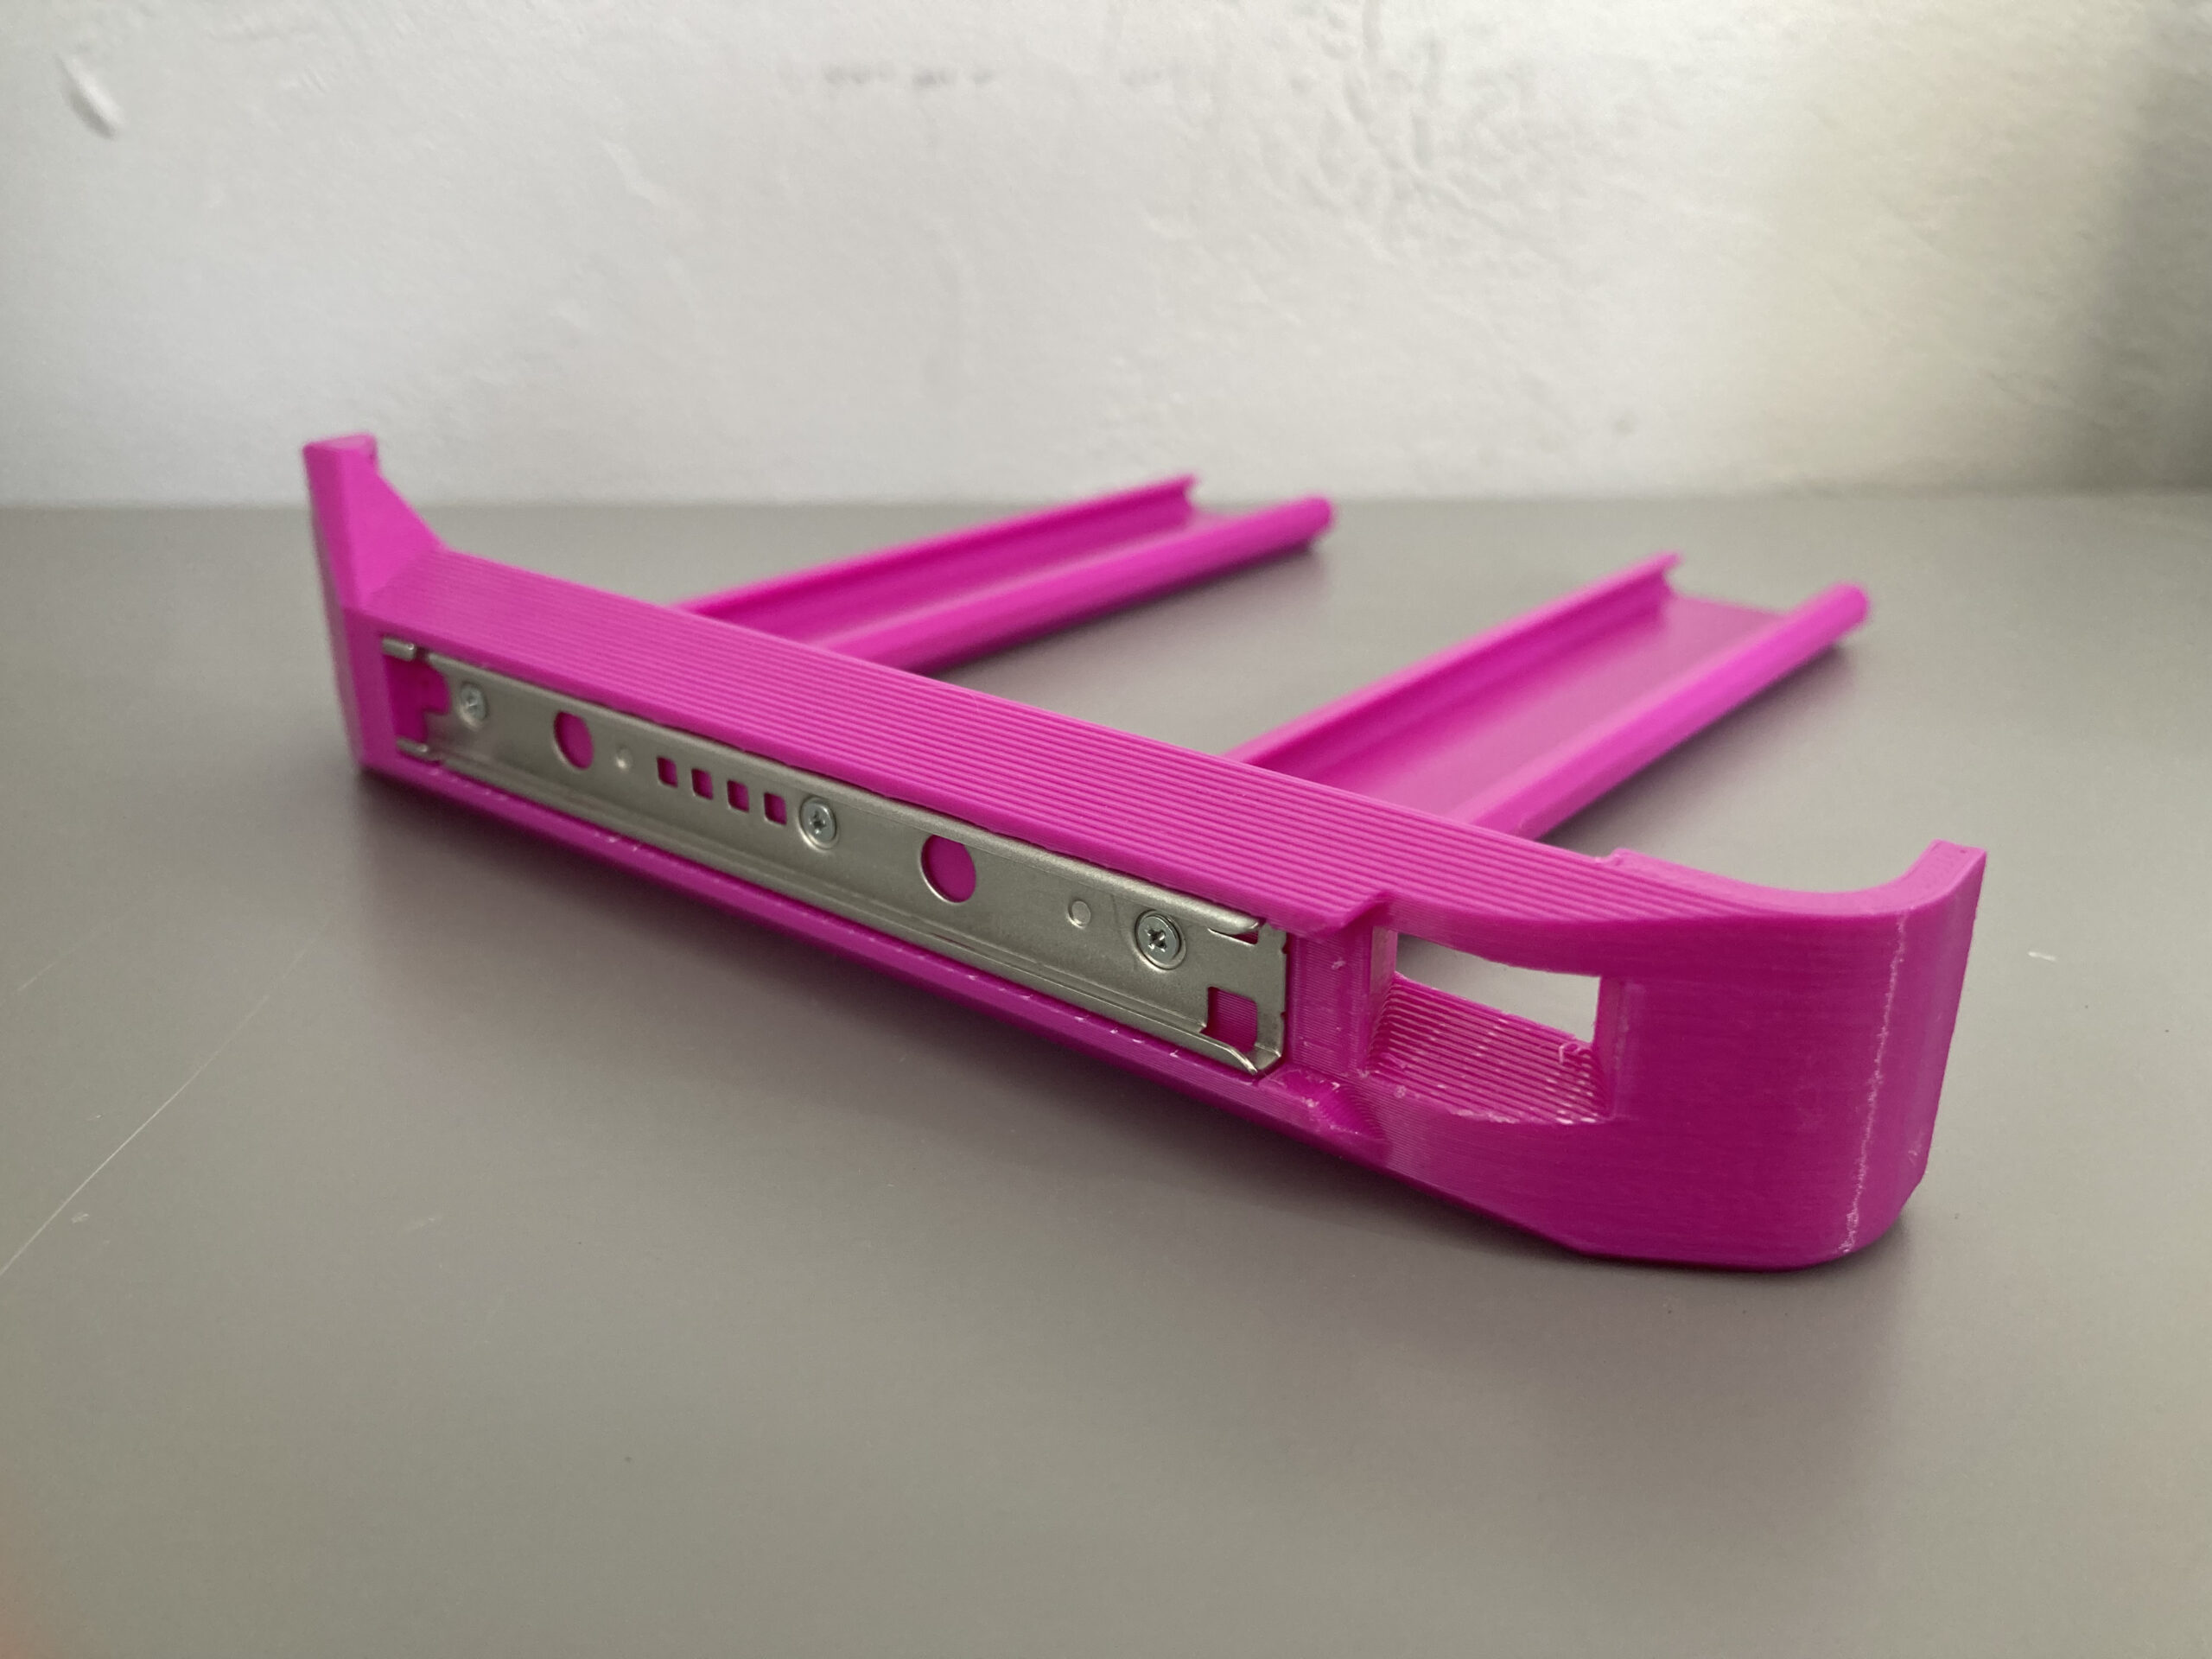
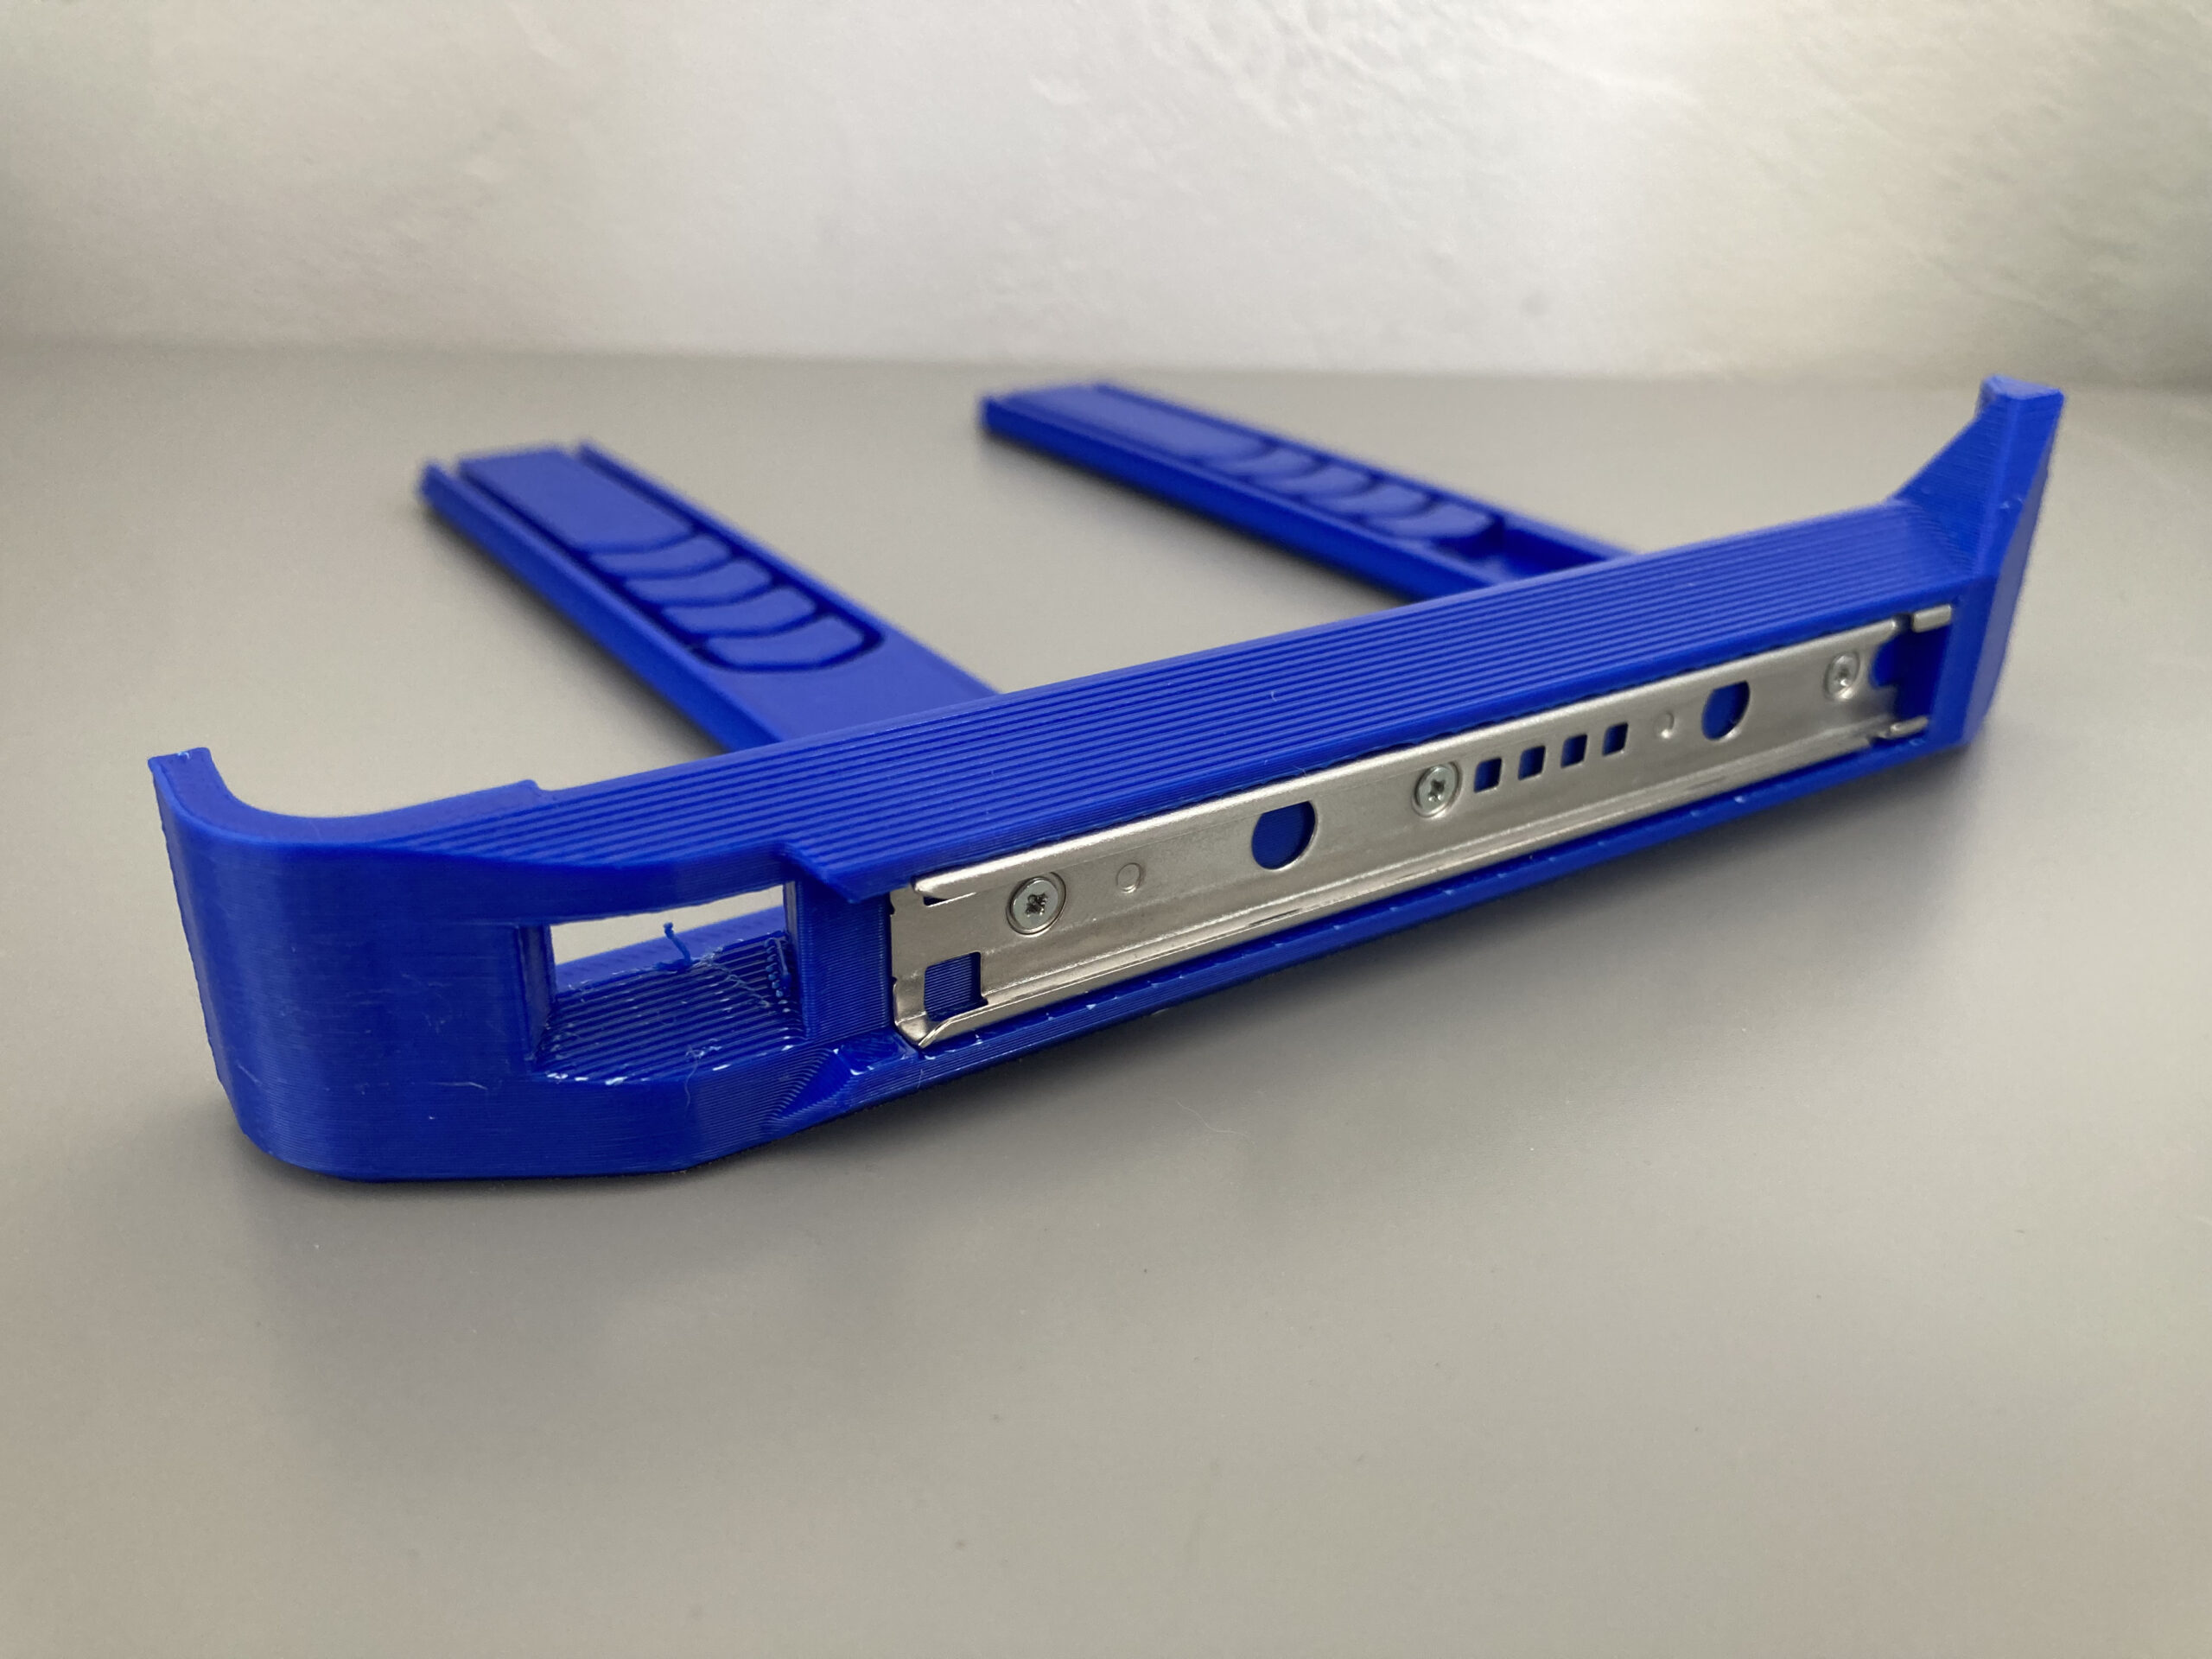
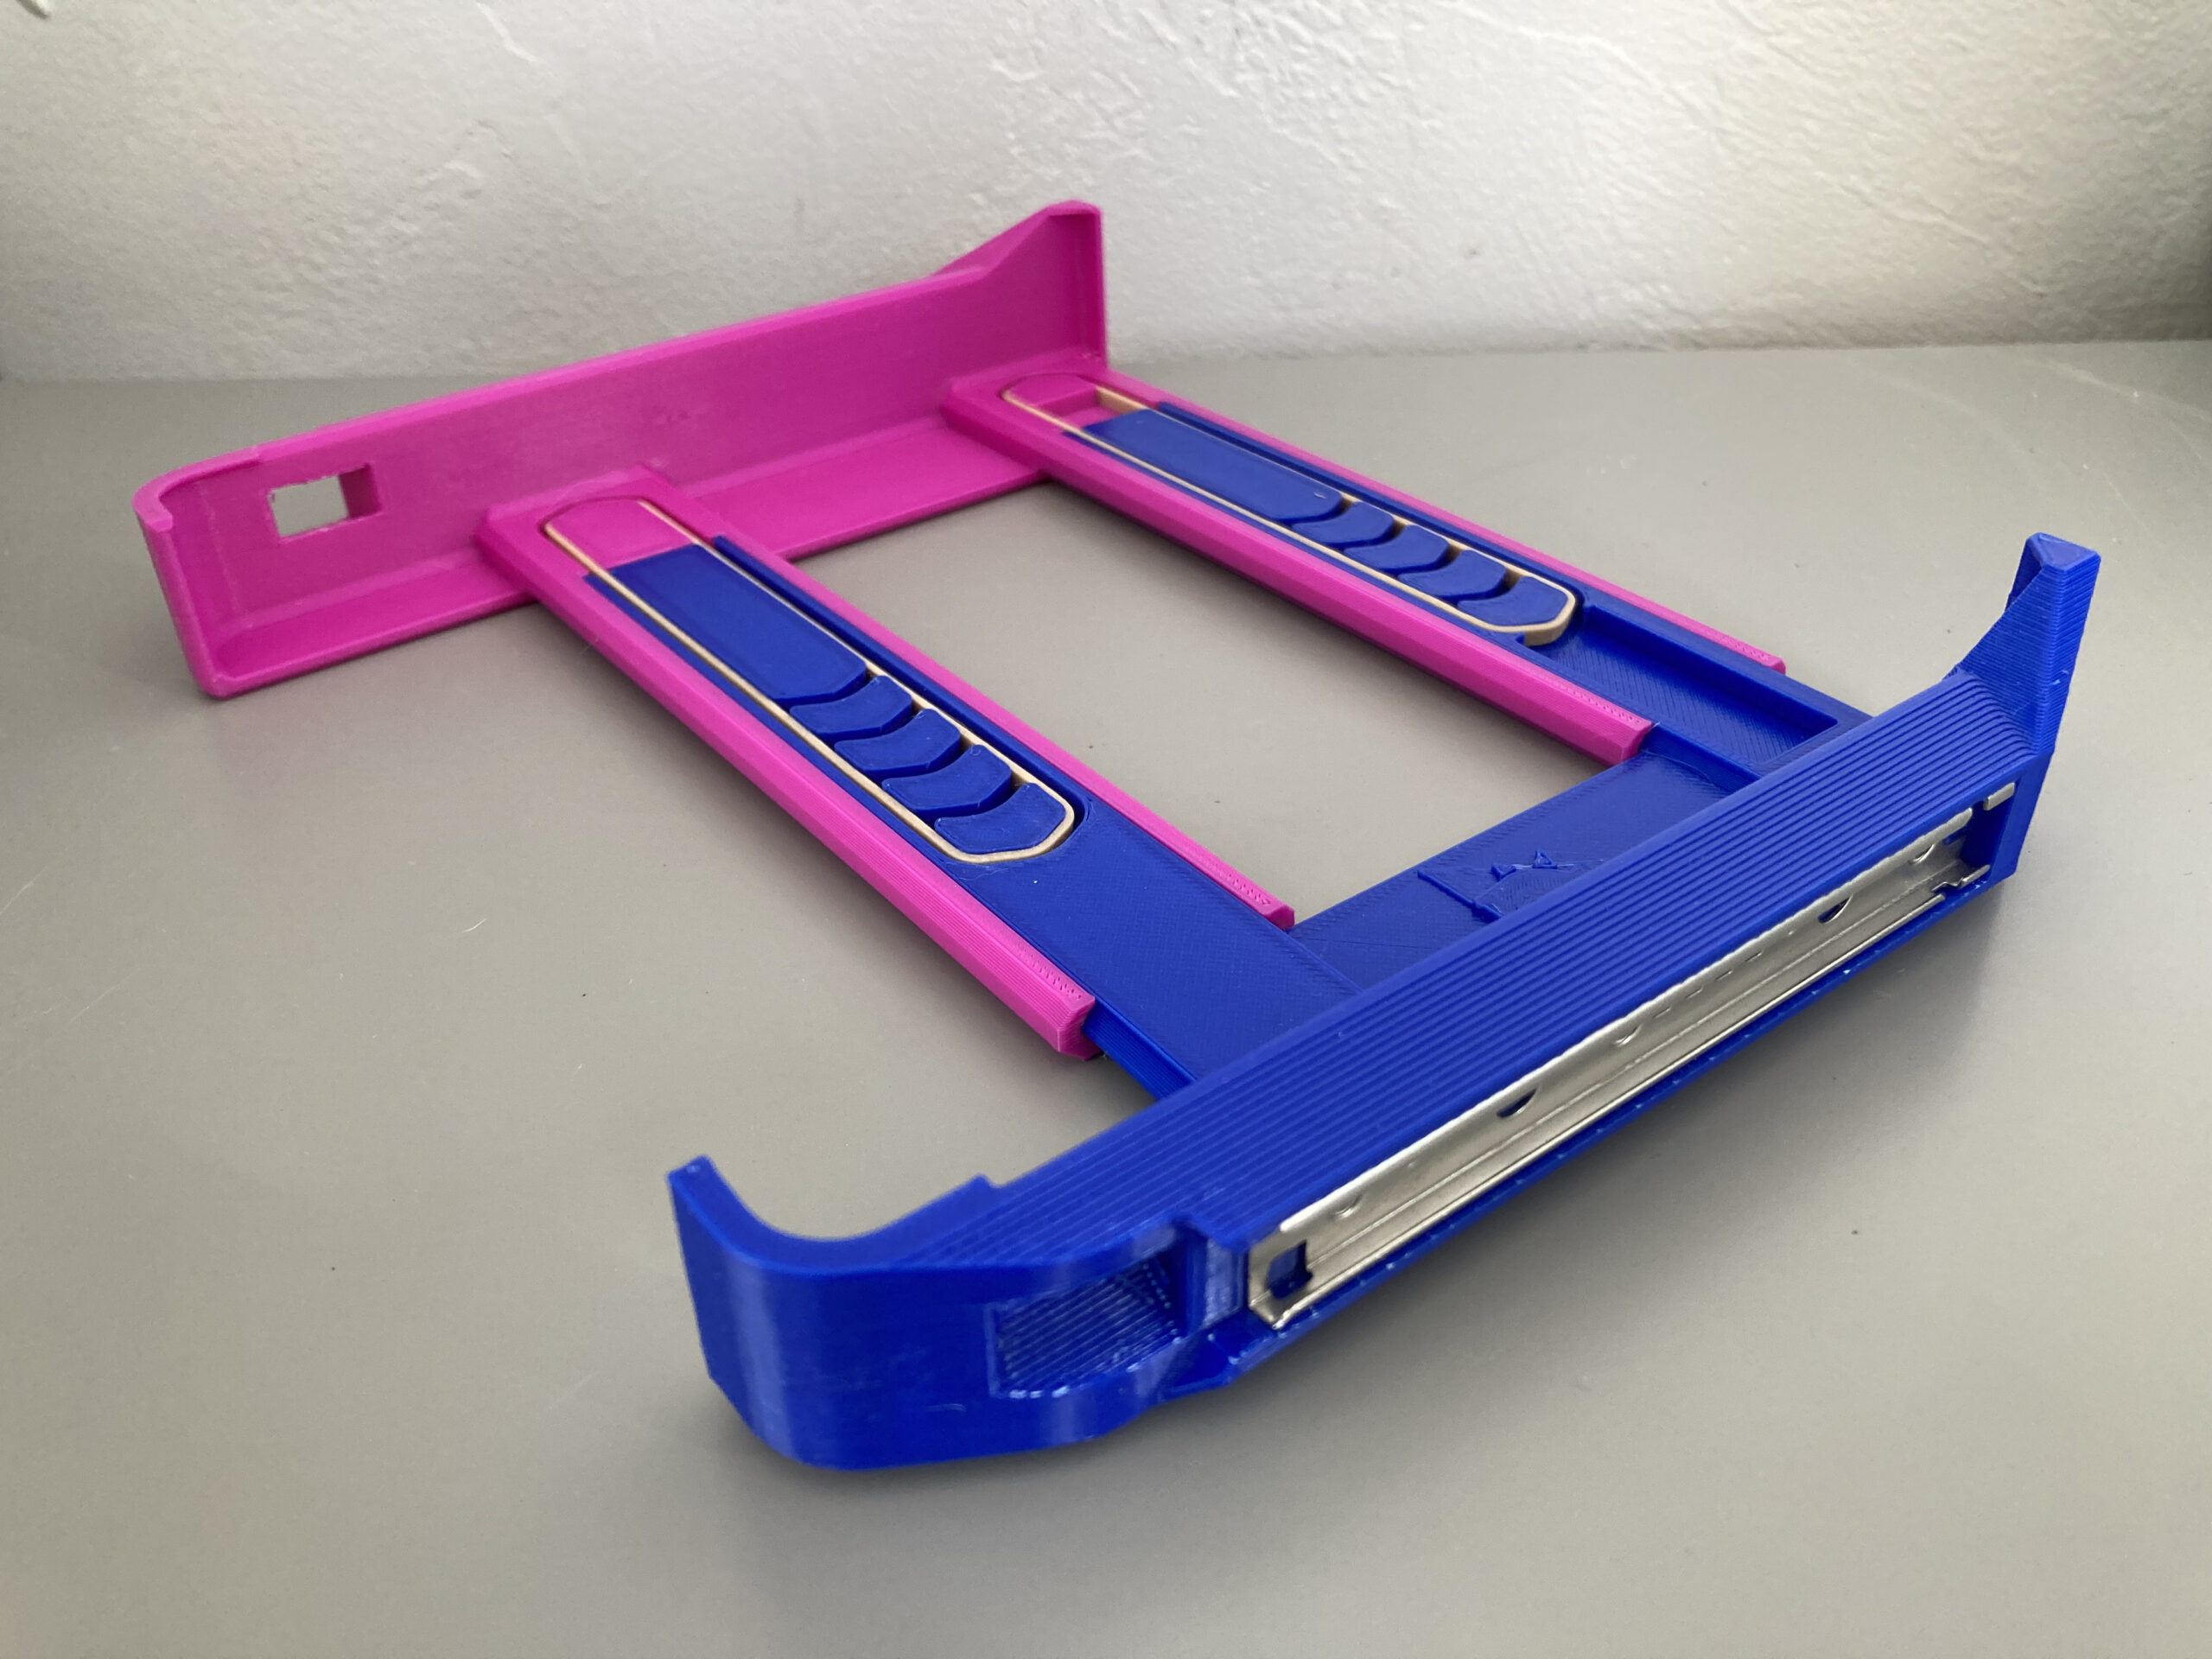
2. Joycon Rails
Using the PH00 screw driver, remove the rails from the wrist straps, and attach them to LeftTeleMain and RightTeleMain as shown. Make sure to be careful not to strip the screw heads.
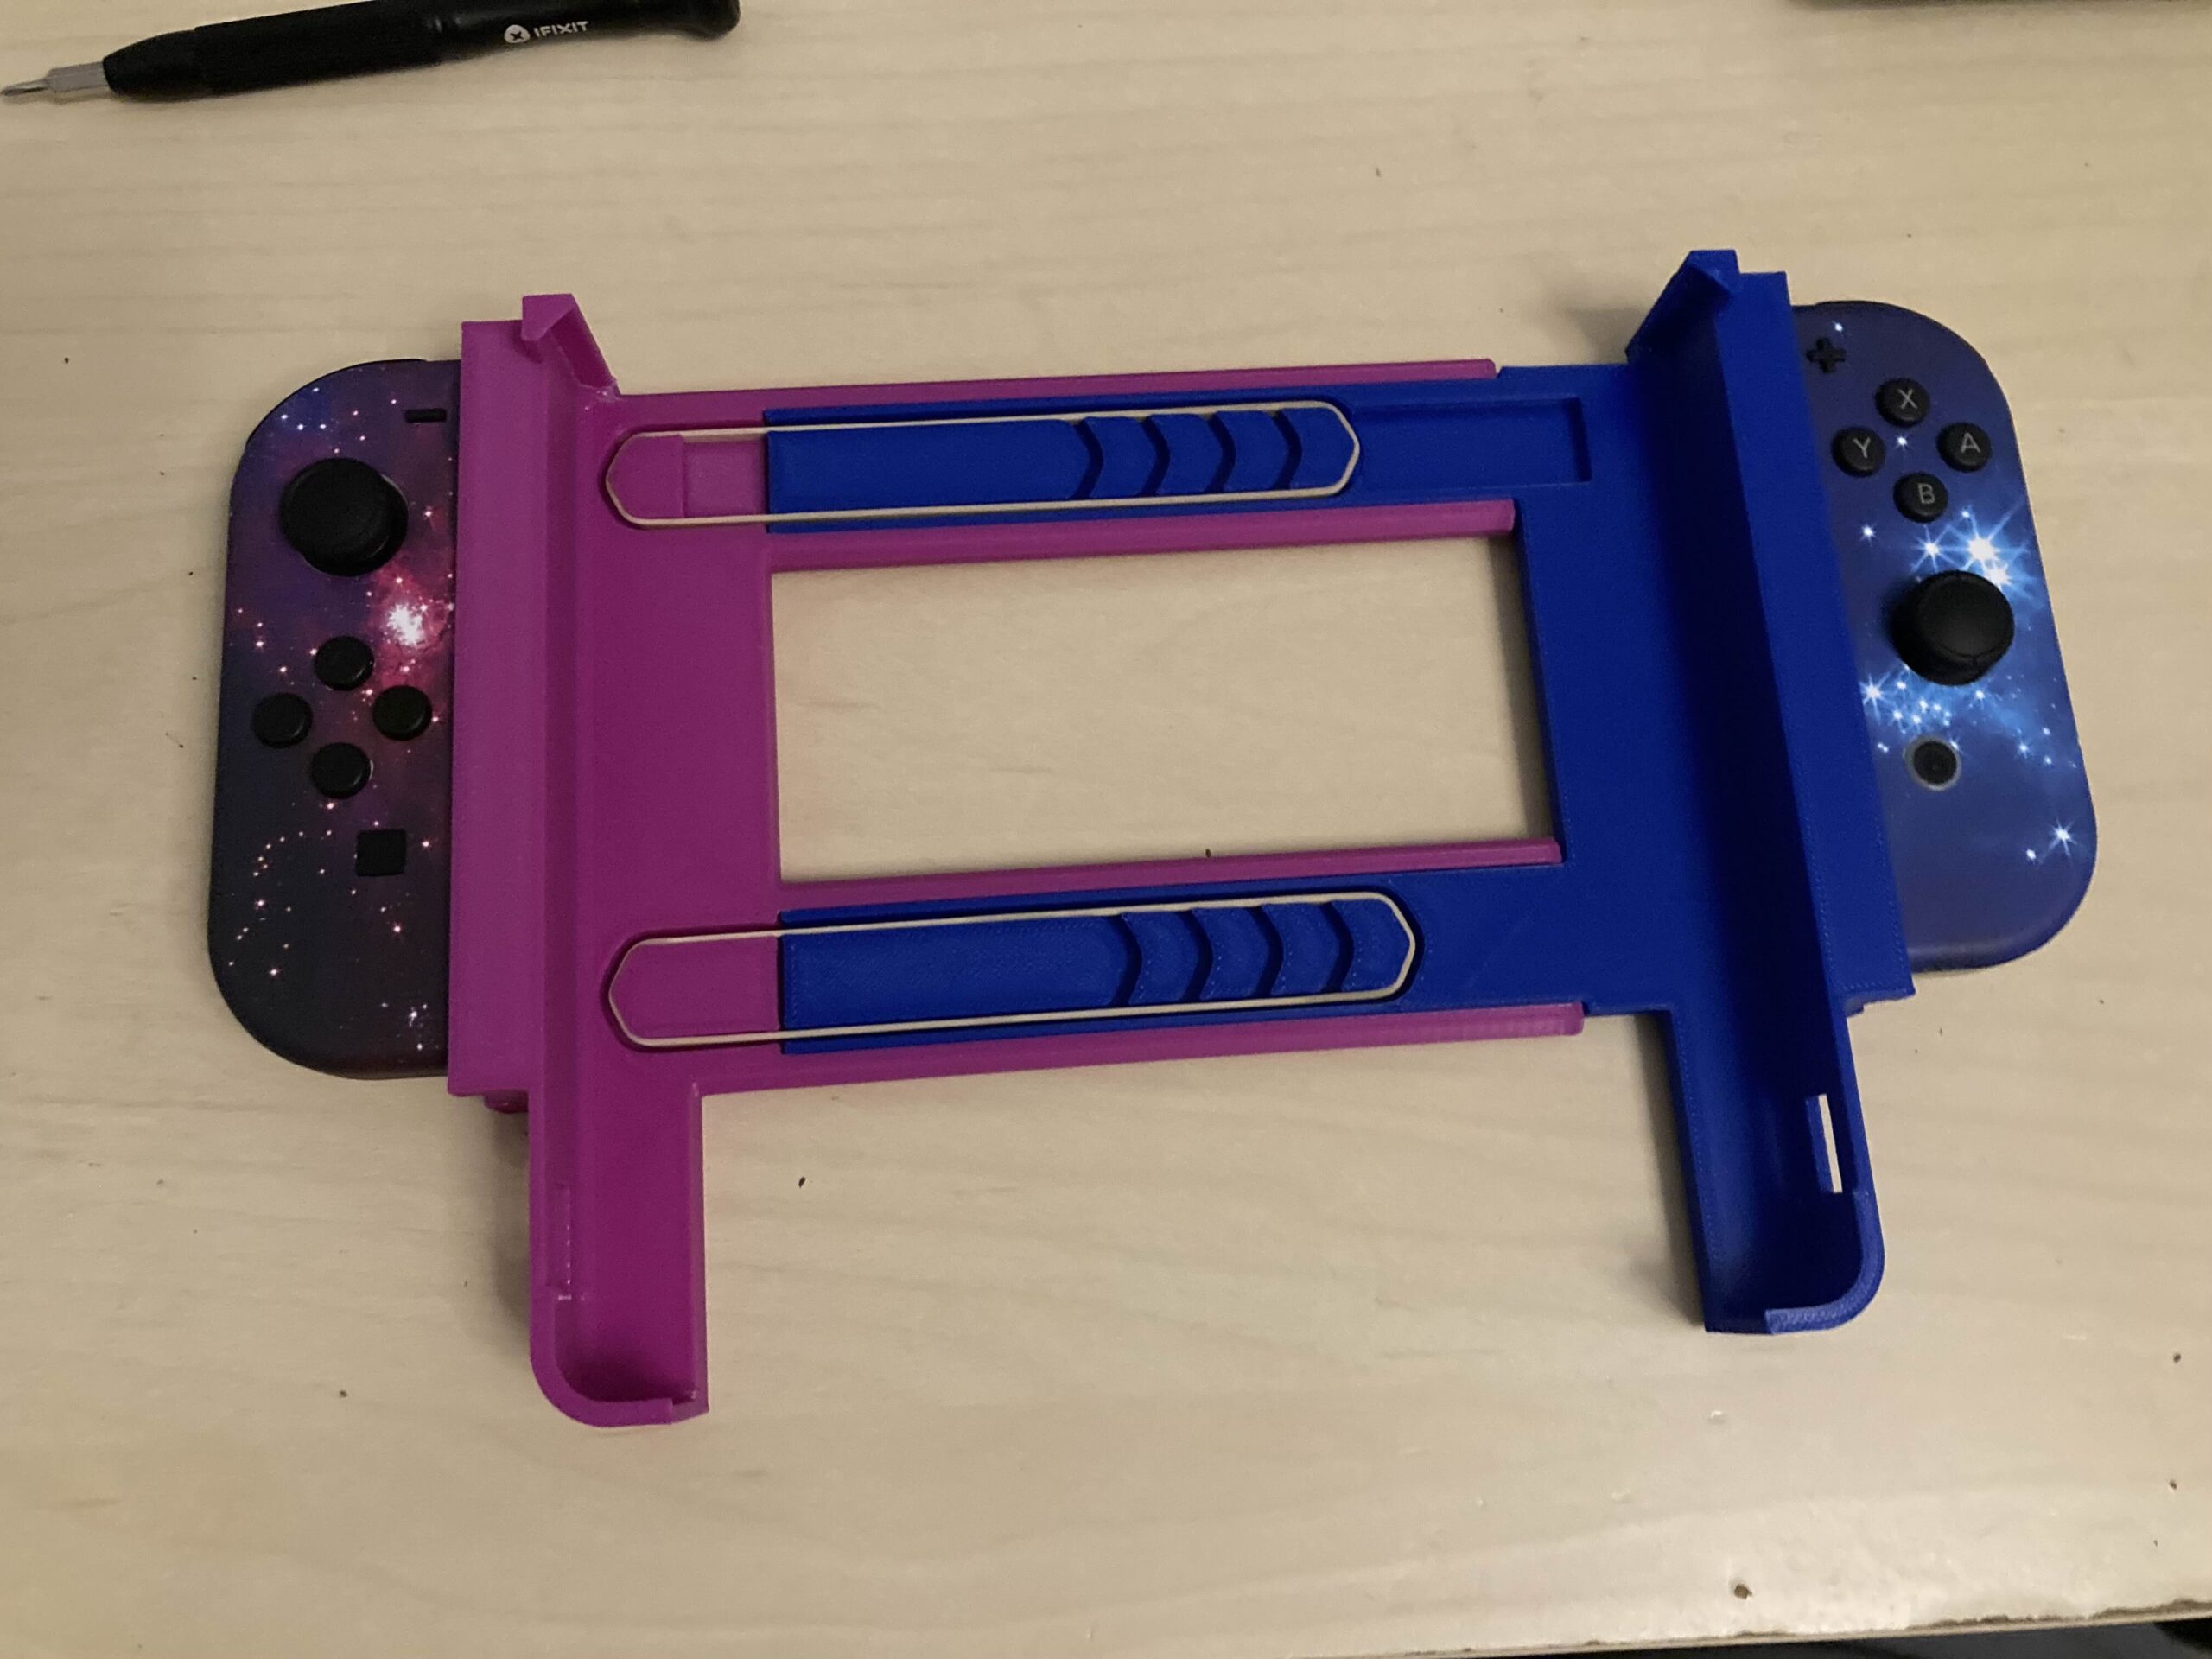
3. Join Sides
Fit the legs of RightTeleMain into the corresponding legs of LeftTeleMain and bring the two sides together. Linear motion between the two should be smooth and easy.
4. Retraction Action
Fit #33 rubber bands into the channels of LeftTeleMain and stretch to an appropriate channel of RightTeleMain as shown.

5. Get it Together
Slide Joycons into place, expand to accept the laptop, and flip the screen around when ready to play.
Steam can natively connect to Switch Joycons, which is awesome. For anything else, I’ve been using BetterJoy.
Files
Click the download button below for a zip file containing all the components
Files are available under the Creative Commons BY-NC-SA license.
Like what you’re seeing here? Leave me a comment down below, follow me on Mastodon @DragonMountainDesign@mastodon.social (I barely use it myself, to be honest though), and/or say “hey” if you ever see me or my work out around on the internet.