TMNT Action Figures Vol. II

My kids loved them so much they needed MORE!
Specifically my daughter, who has asked for Slash every day since giving them the original five. With the current state of the world due to the COVID-19 pandemic, getting their designs wrapped up has taken longer than I’d like, but we got there in time to deliver the goods for her birthday.
…My son wants MORE characters for HIS birthday, so 2020 may be dominated by TMNT action figures around here.
We’ll see.
Anyways, let’s get down to business. Oh! And before we get too deep into this, I’m trying to simplify things by having direct downloads to the STLs down at the bottom. Any links to websites hosting files will appear there too, so scroll like the wind to skip to the goods.
Helpful Tools
3D Printer (or printing service) capable of printing flexible materials.
Superglue
Pliers
1. Print out Parts
So there are two different packages of models: TMNT-MetalHead and TMNT-Slash. The files and building instructions associated with TMNT-MetalHead are very similar to those of the original designs, so we’re going to focus on TMNT-Slash here. He’s a big boy, and I’m really happy with how he turned out.
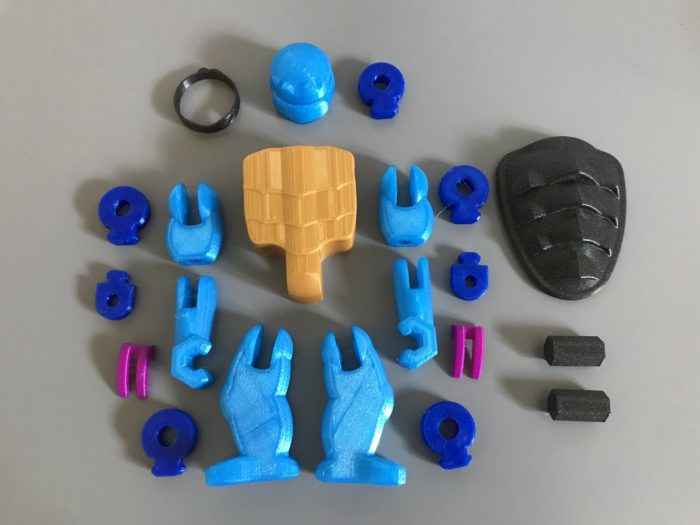
AFJ-Large (x5) and AFJ-LargeElbow (x2)
Material: Flex 98A
Infill: 20%
Supports: No
Brim: No
Slash-Claw (x2)
Material: PLA
Infill: 50% or higher
Supports: No
Brim: No
Everything else
Material: PLA
Infill: 15%-20%
Supports: No
Brim: No
Colors are really up to you. I got lucky and had just enough of the “right” materials to get pretty close on colors to the Slash action figure from the 90’s.
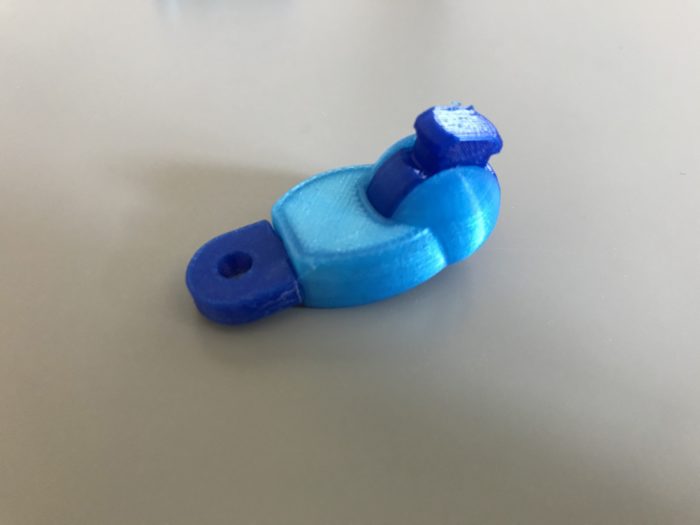
2. Assemble Body
Press-fit Slash-AssemblyPin (x2) into Slash-Shell, and then press-fit together with Slash-Body. Use a little glue if necessary.

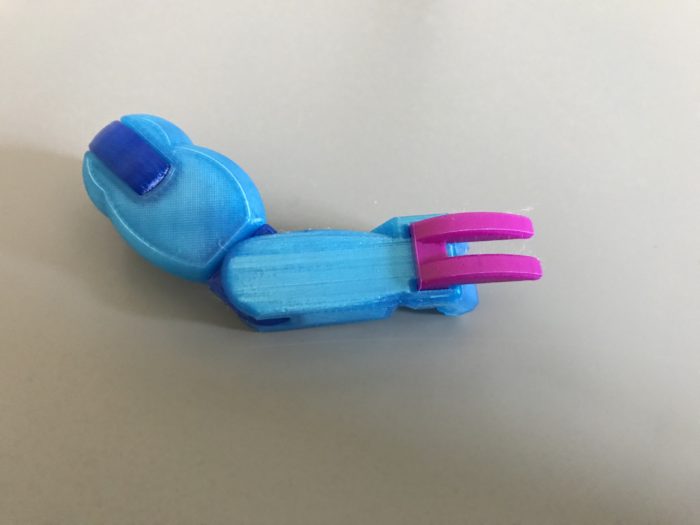
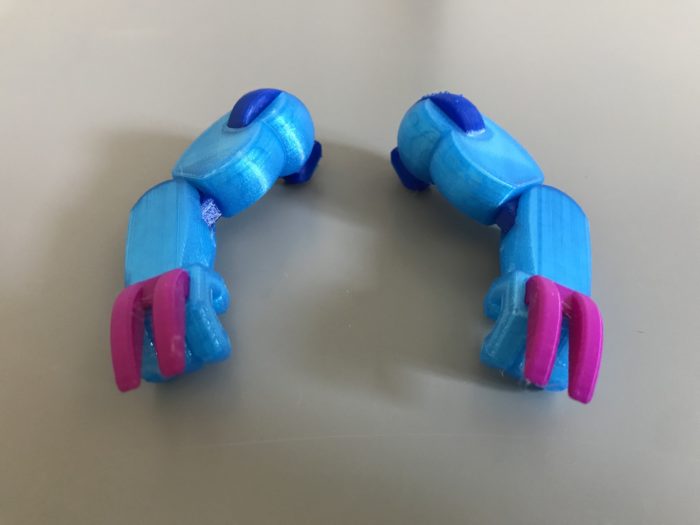
3. Assemble Arms
Press-fit the AFJ-Large, and AFJ-LargeElbow components into the upper arm components as shown.
Press-fit the lower arm components onto the assemblies as shown.
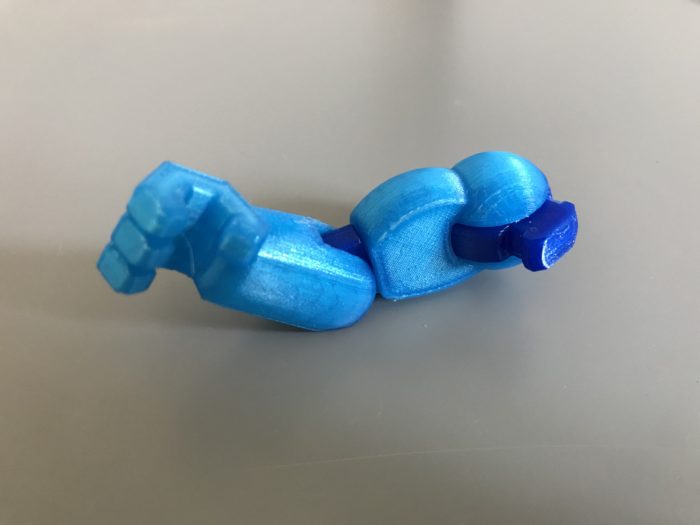
Snap-fit the Slash-Claw components onto the arm assemblies as shown.
4. Assemble Legs
Press-fit the AFJ-Large components into the corresponding features of the legs as shown.
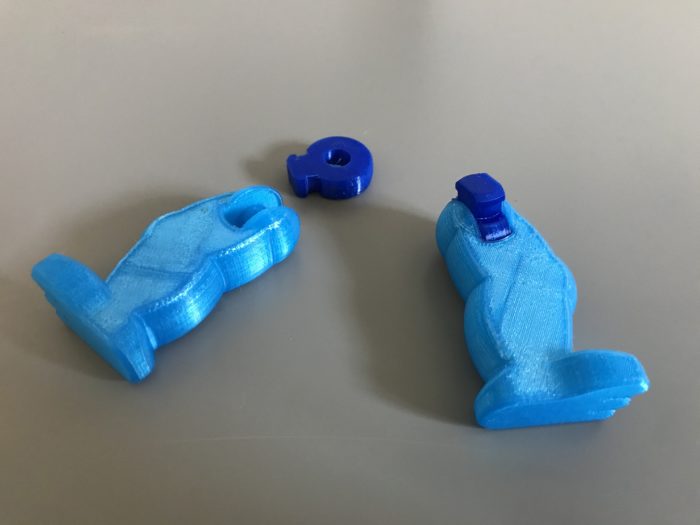
5. Assemble Head
Press-fit AFJ-Large into Slash-Head as shown. Use pliers if necessary.

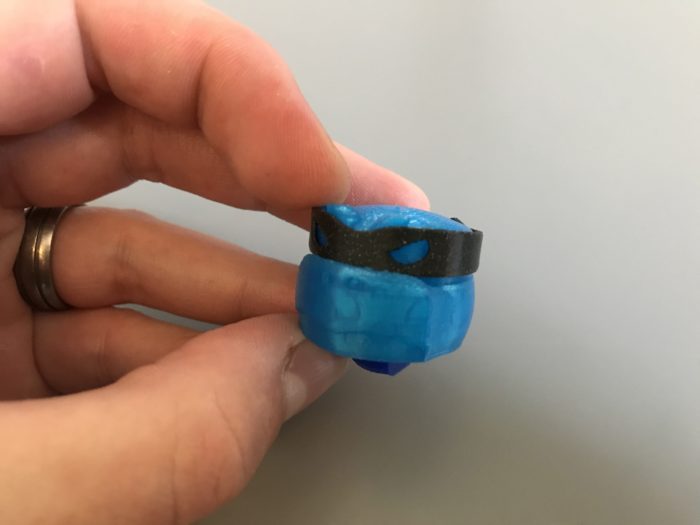
Press-fit Slash-Bandana over the head assembly as shown. Use a little glue to keep everything in place if necessary.
6. Put Him All Together
Press-fit all of the flex joint components into the corresponding features on the body.
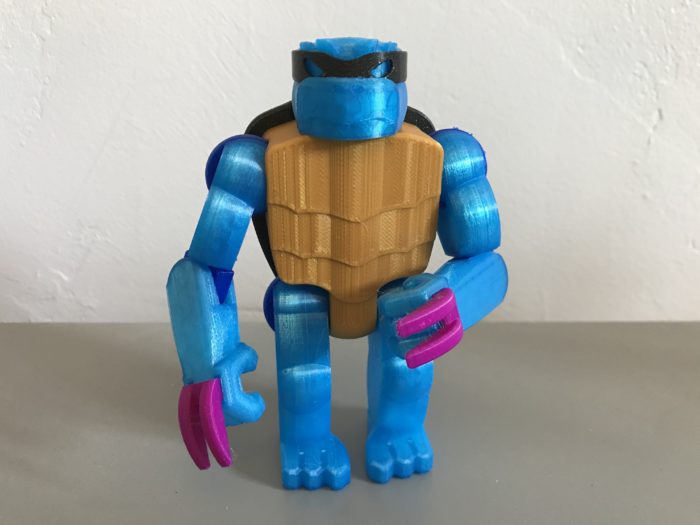
7. Play
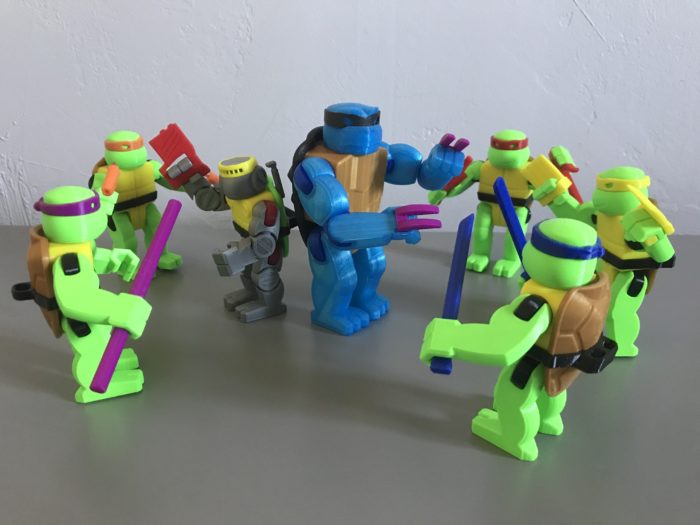
Now it’s up to you to decide if they are allies of The Turtles…

Or enemies.
Files
Yes, what you’ve all been waiting for! Click the Download buttons below for zip files of all the 3D printable components.
Files are available under the Creative Commons BY-NC-SA license.
Like what you’re seeing here? Leave me a comment here, follow me on twitter @DragonMtnDesign, or say “hey” if you see me or my work around on Reddit (u/DragonMountainDesign).