Lightsaber (Block-Style)
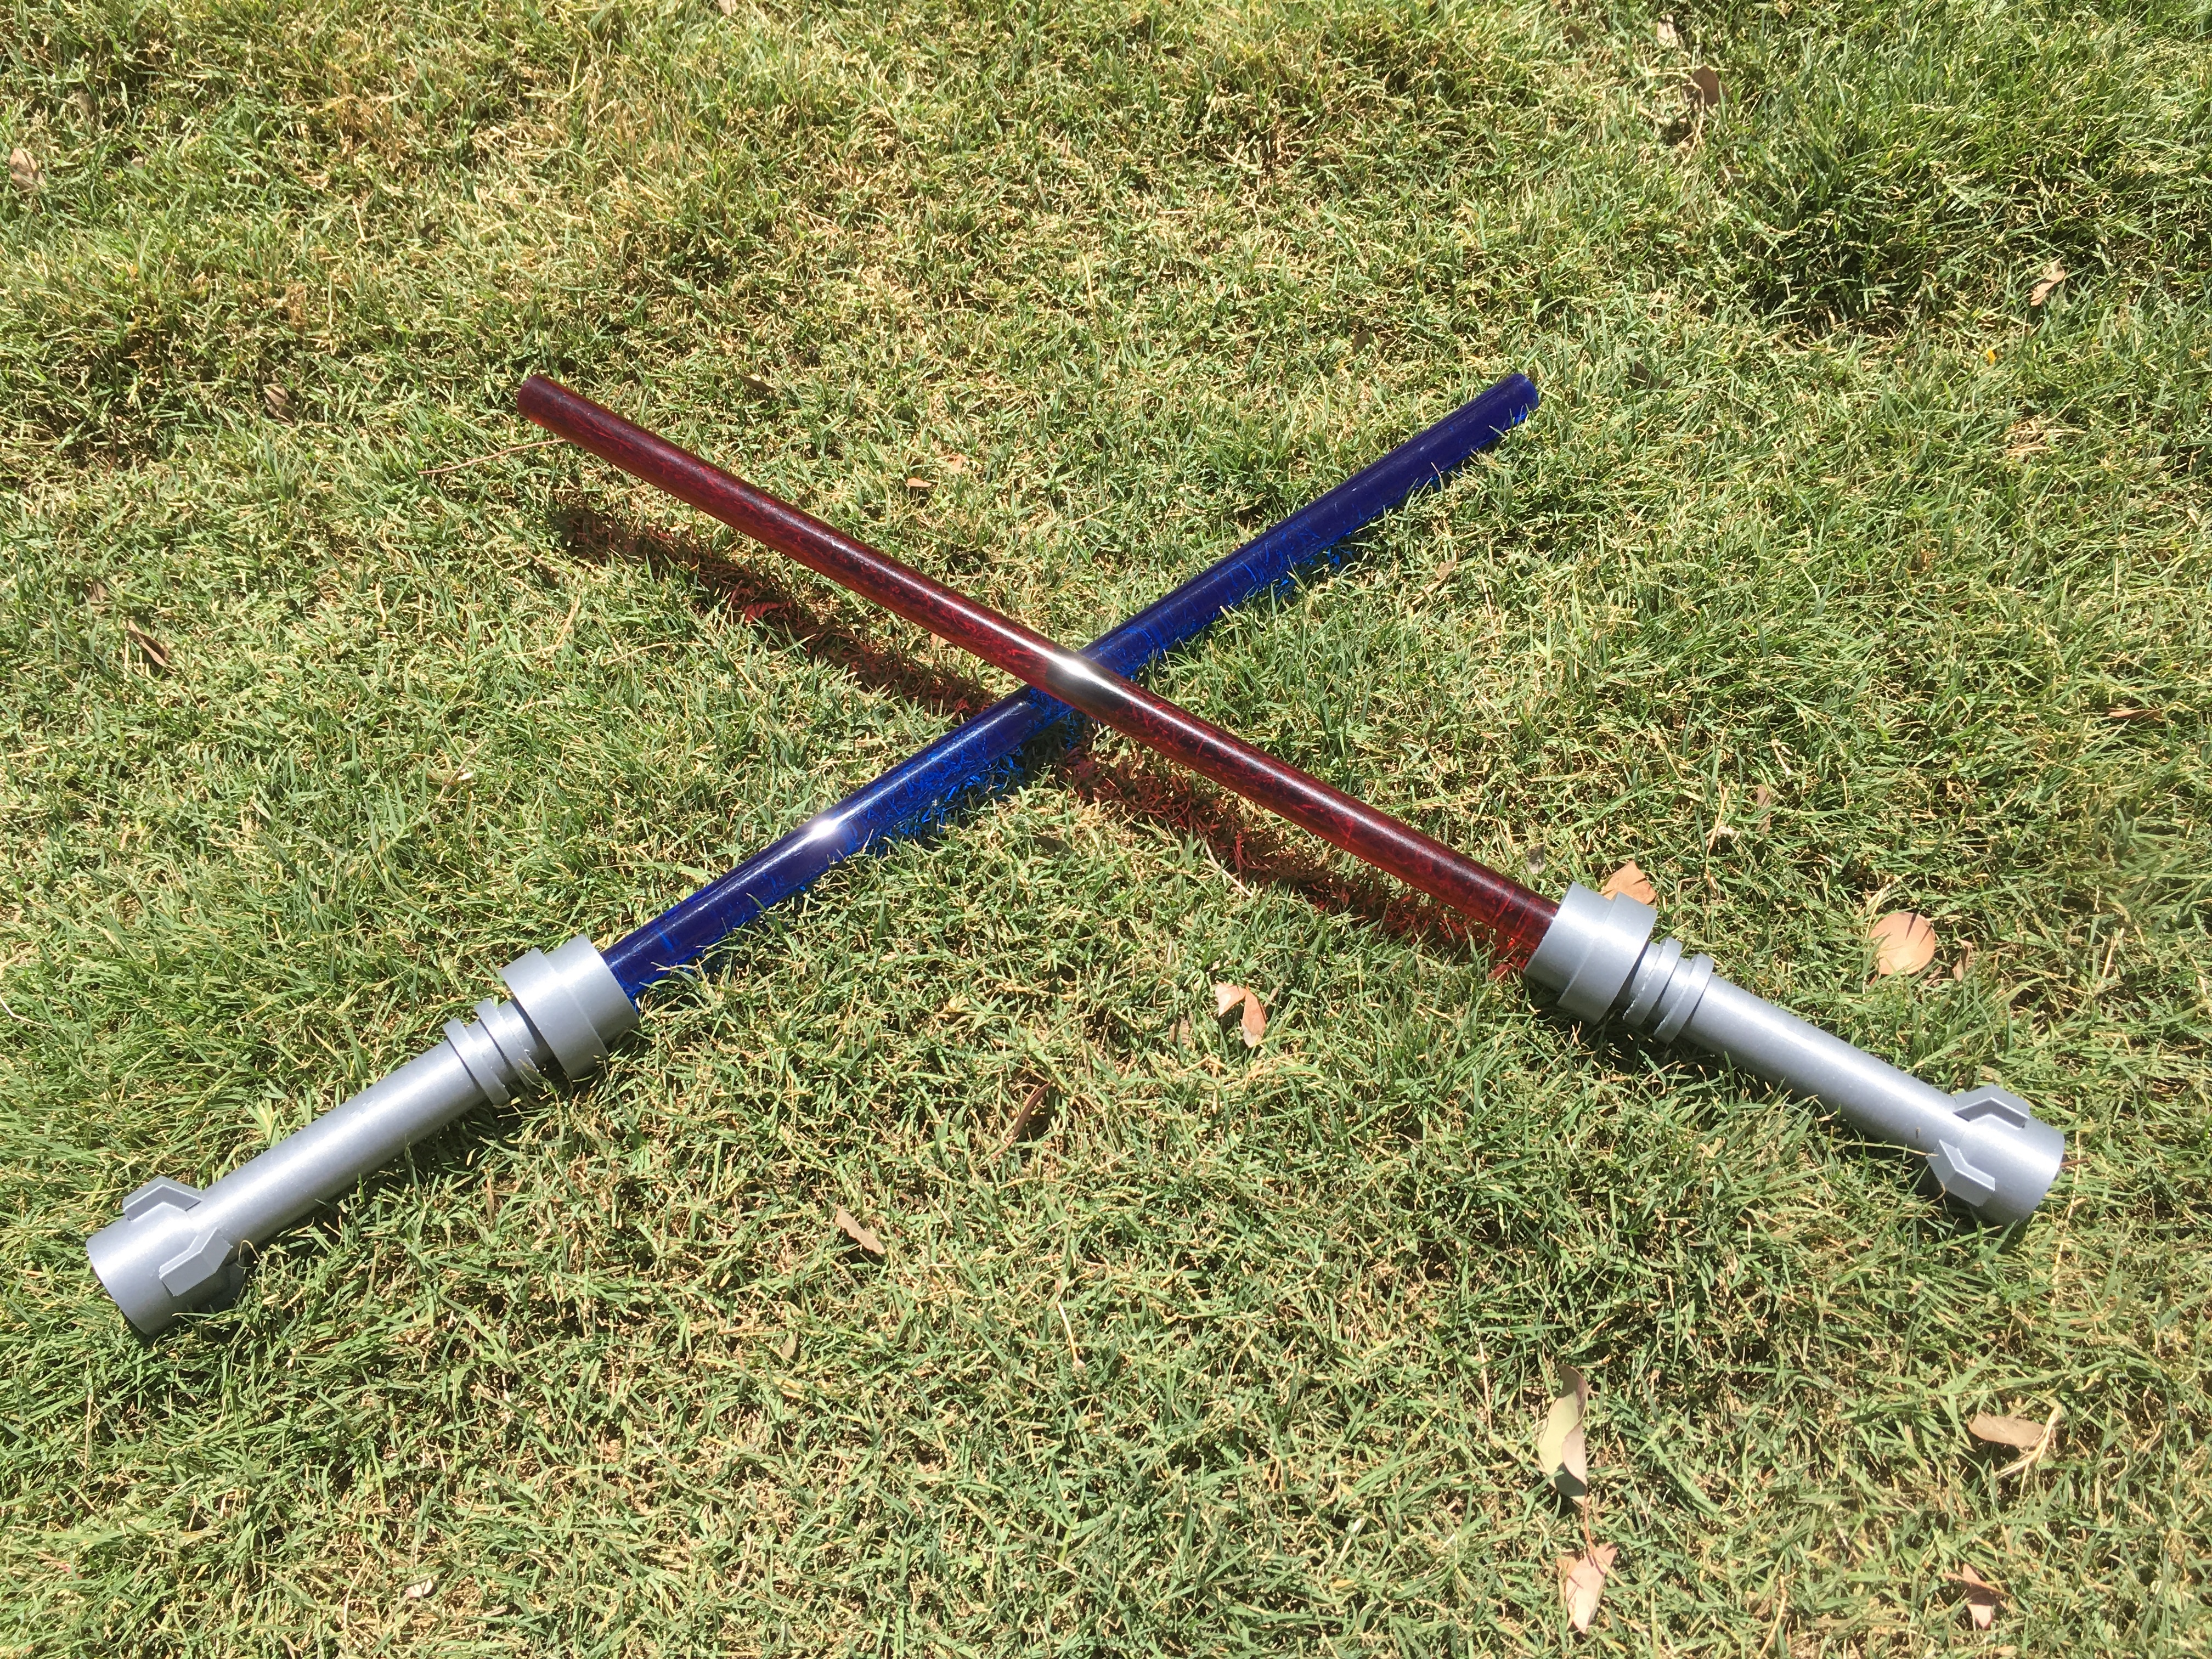
Friends, we’re currently at an odd in-between moment after the home release of The Last Jedi and before the upcoming Solo film. In the meantime, you can complete your training by constructing a new lightsaber.
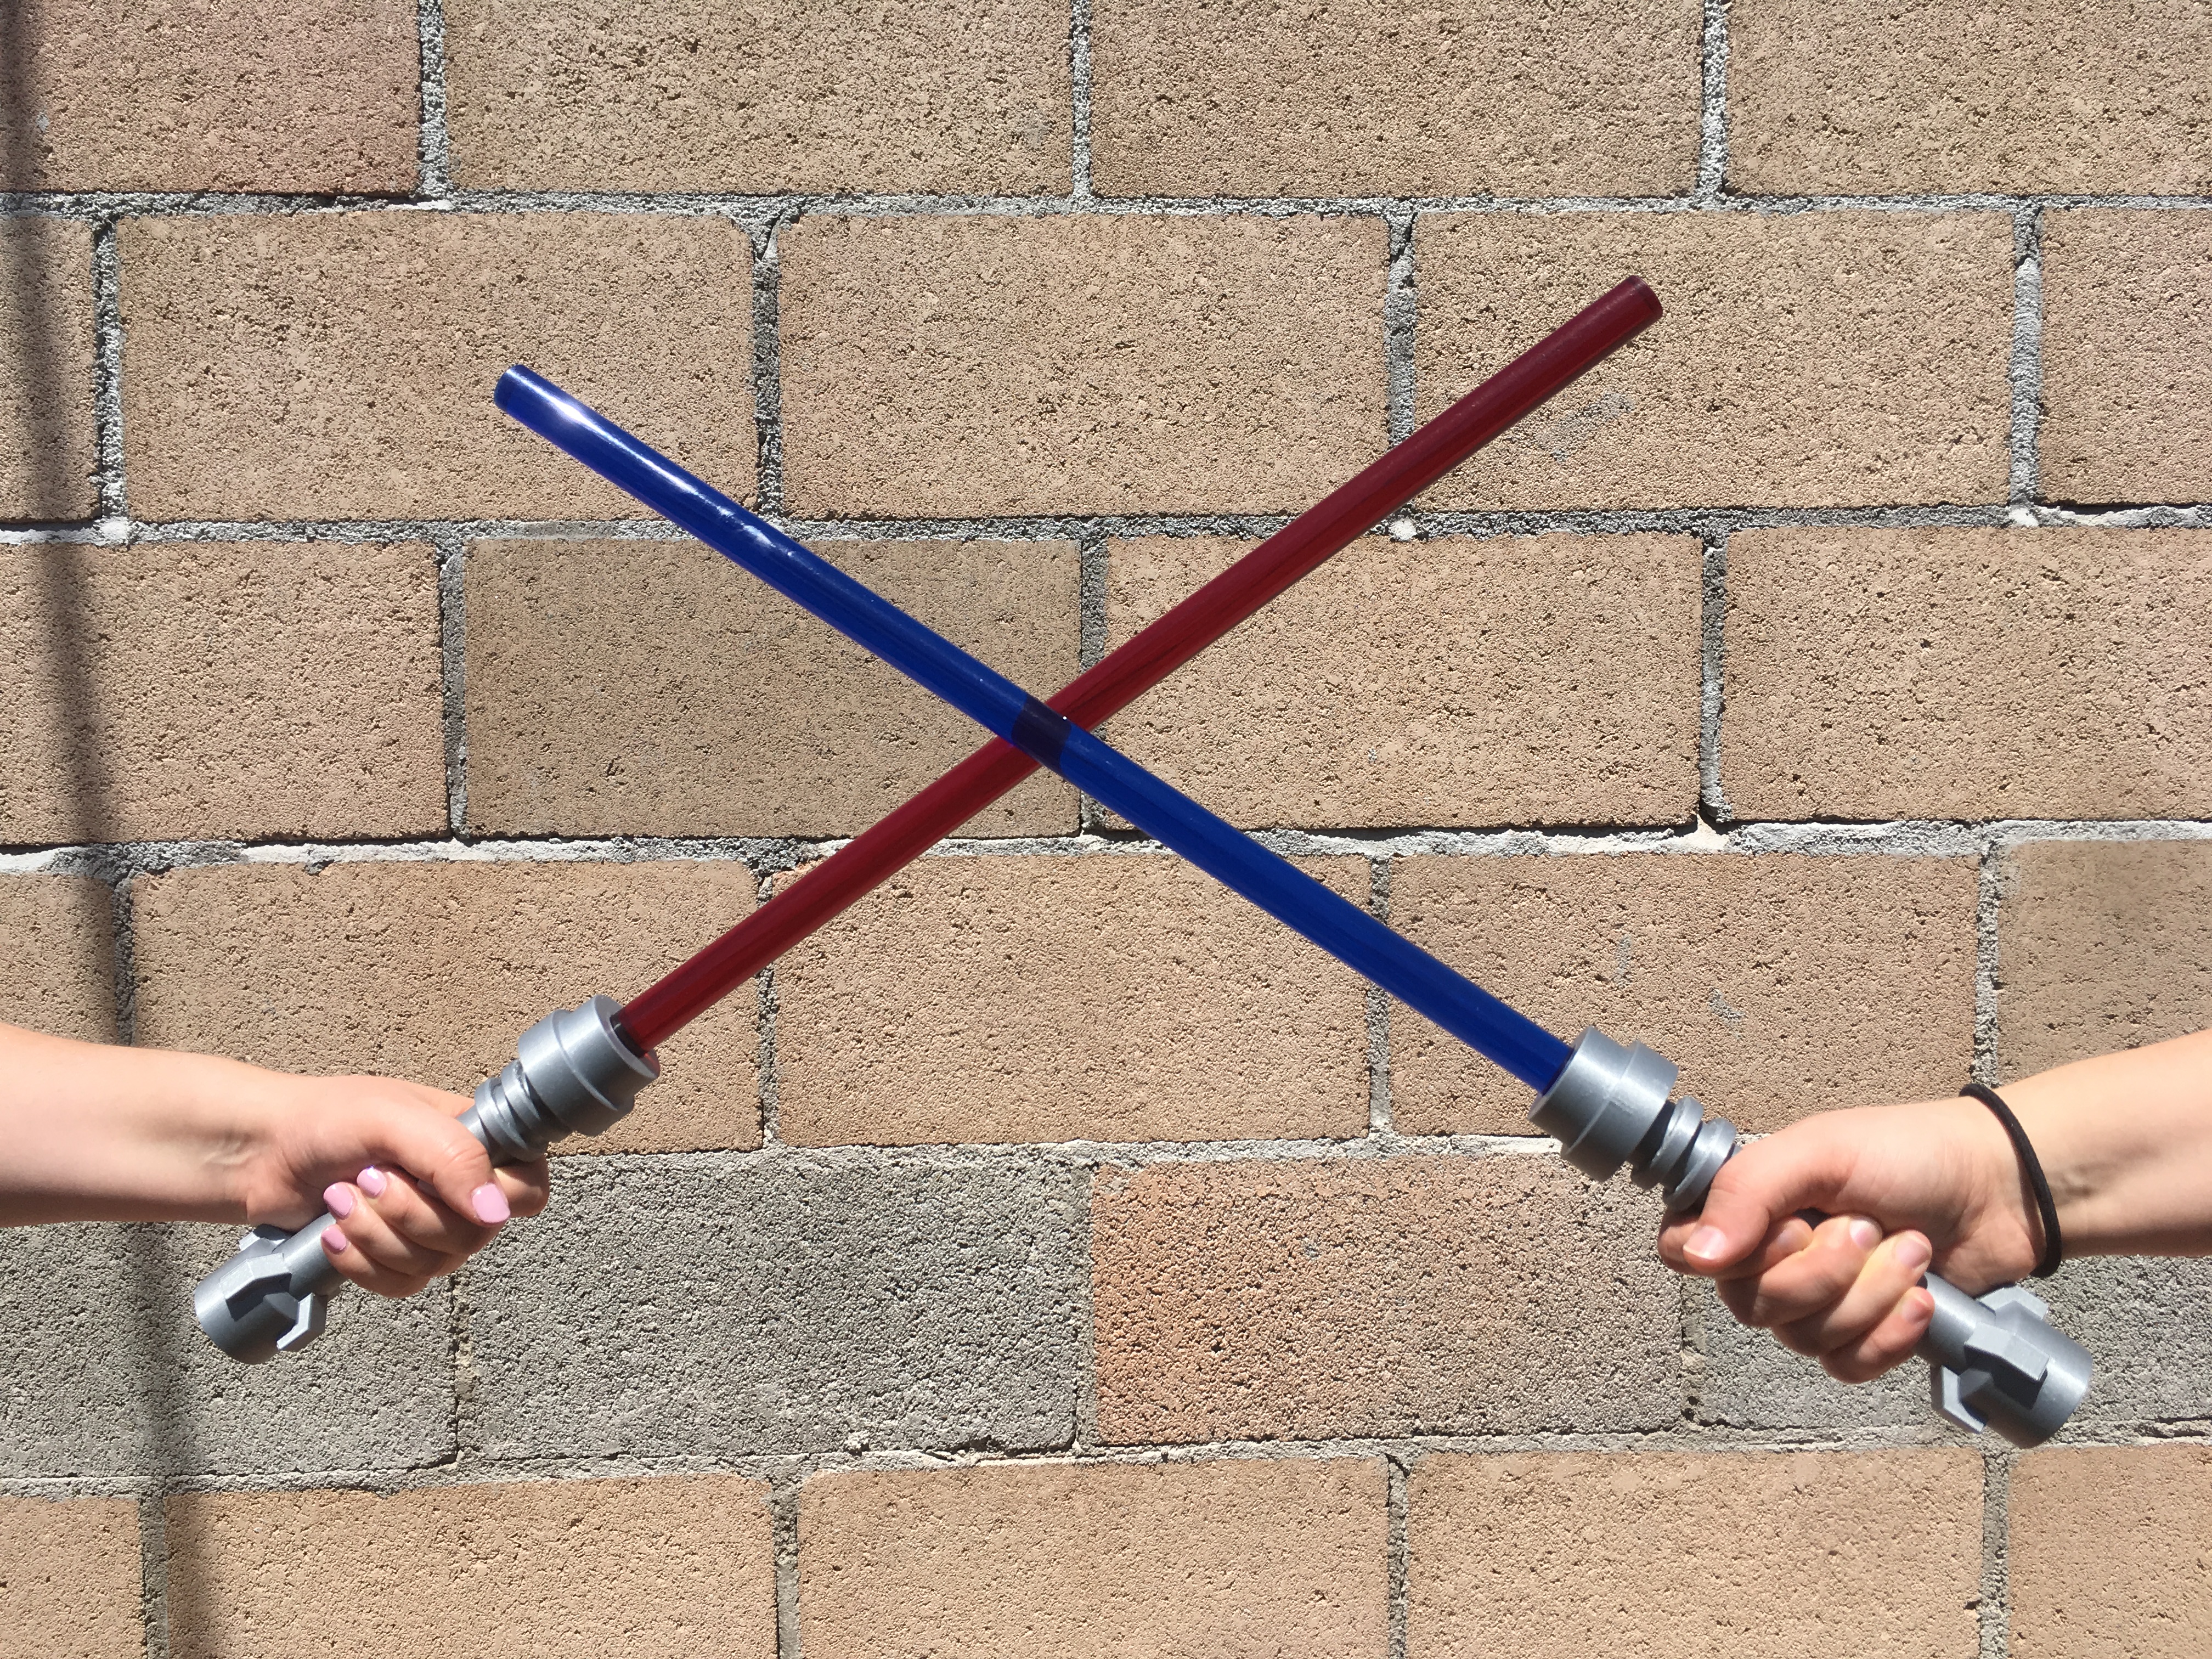
If you couldn’t already tell, it’s inspired by the Lego version. The main difference being that the grip portion is about 50mm longer than what the scale should call for. Without that extra length, it’s very uncomfortable to hold.

Parts List:
0.75″ OD x 2′ Fluorscent Blue / Red / Green Acrylic Rod – Amazon or McMaster 84925K21 **IMPORTANT NOTE: Acrylic rods look fantastic in this build, but have low impact strength. Do not actually practice dueling with these. Also, DO NOT hit people or animals.**
4-40 x 1/2″ Button Head Cap Screw – McMaster 92949A110
Helpful Tools:
3D Printer (or printing service)
Drill and 3/32″ drillbit
4-40 Tap
1/16″ Hex Wrench
Sandpaper – the higher grit the better (400 or better)
Calipers (To get as accurate a point as possible).
E6000 Glue
Paper Towels (for glue wipe-up)
Print out Parts
There are only three components: LS-HiltA, LS-HiltB, and LS-HiltC, and they are available at MyMiniFactory.
March 2020 UPDATE: Files can be downloaded directly from this site at the bottom of the page. They are also available on Prusa Printers!
Material: PLA
Infill: 20%
Brim/Raft: No.
Supports: Yes. All of these parts have overhang.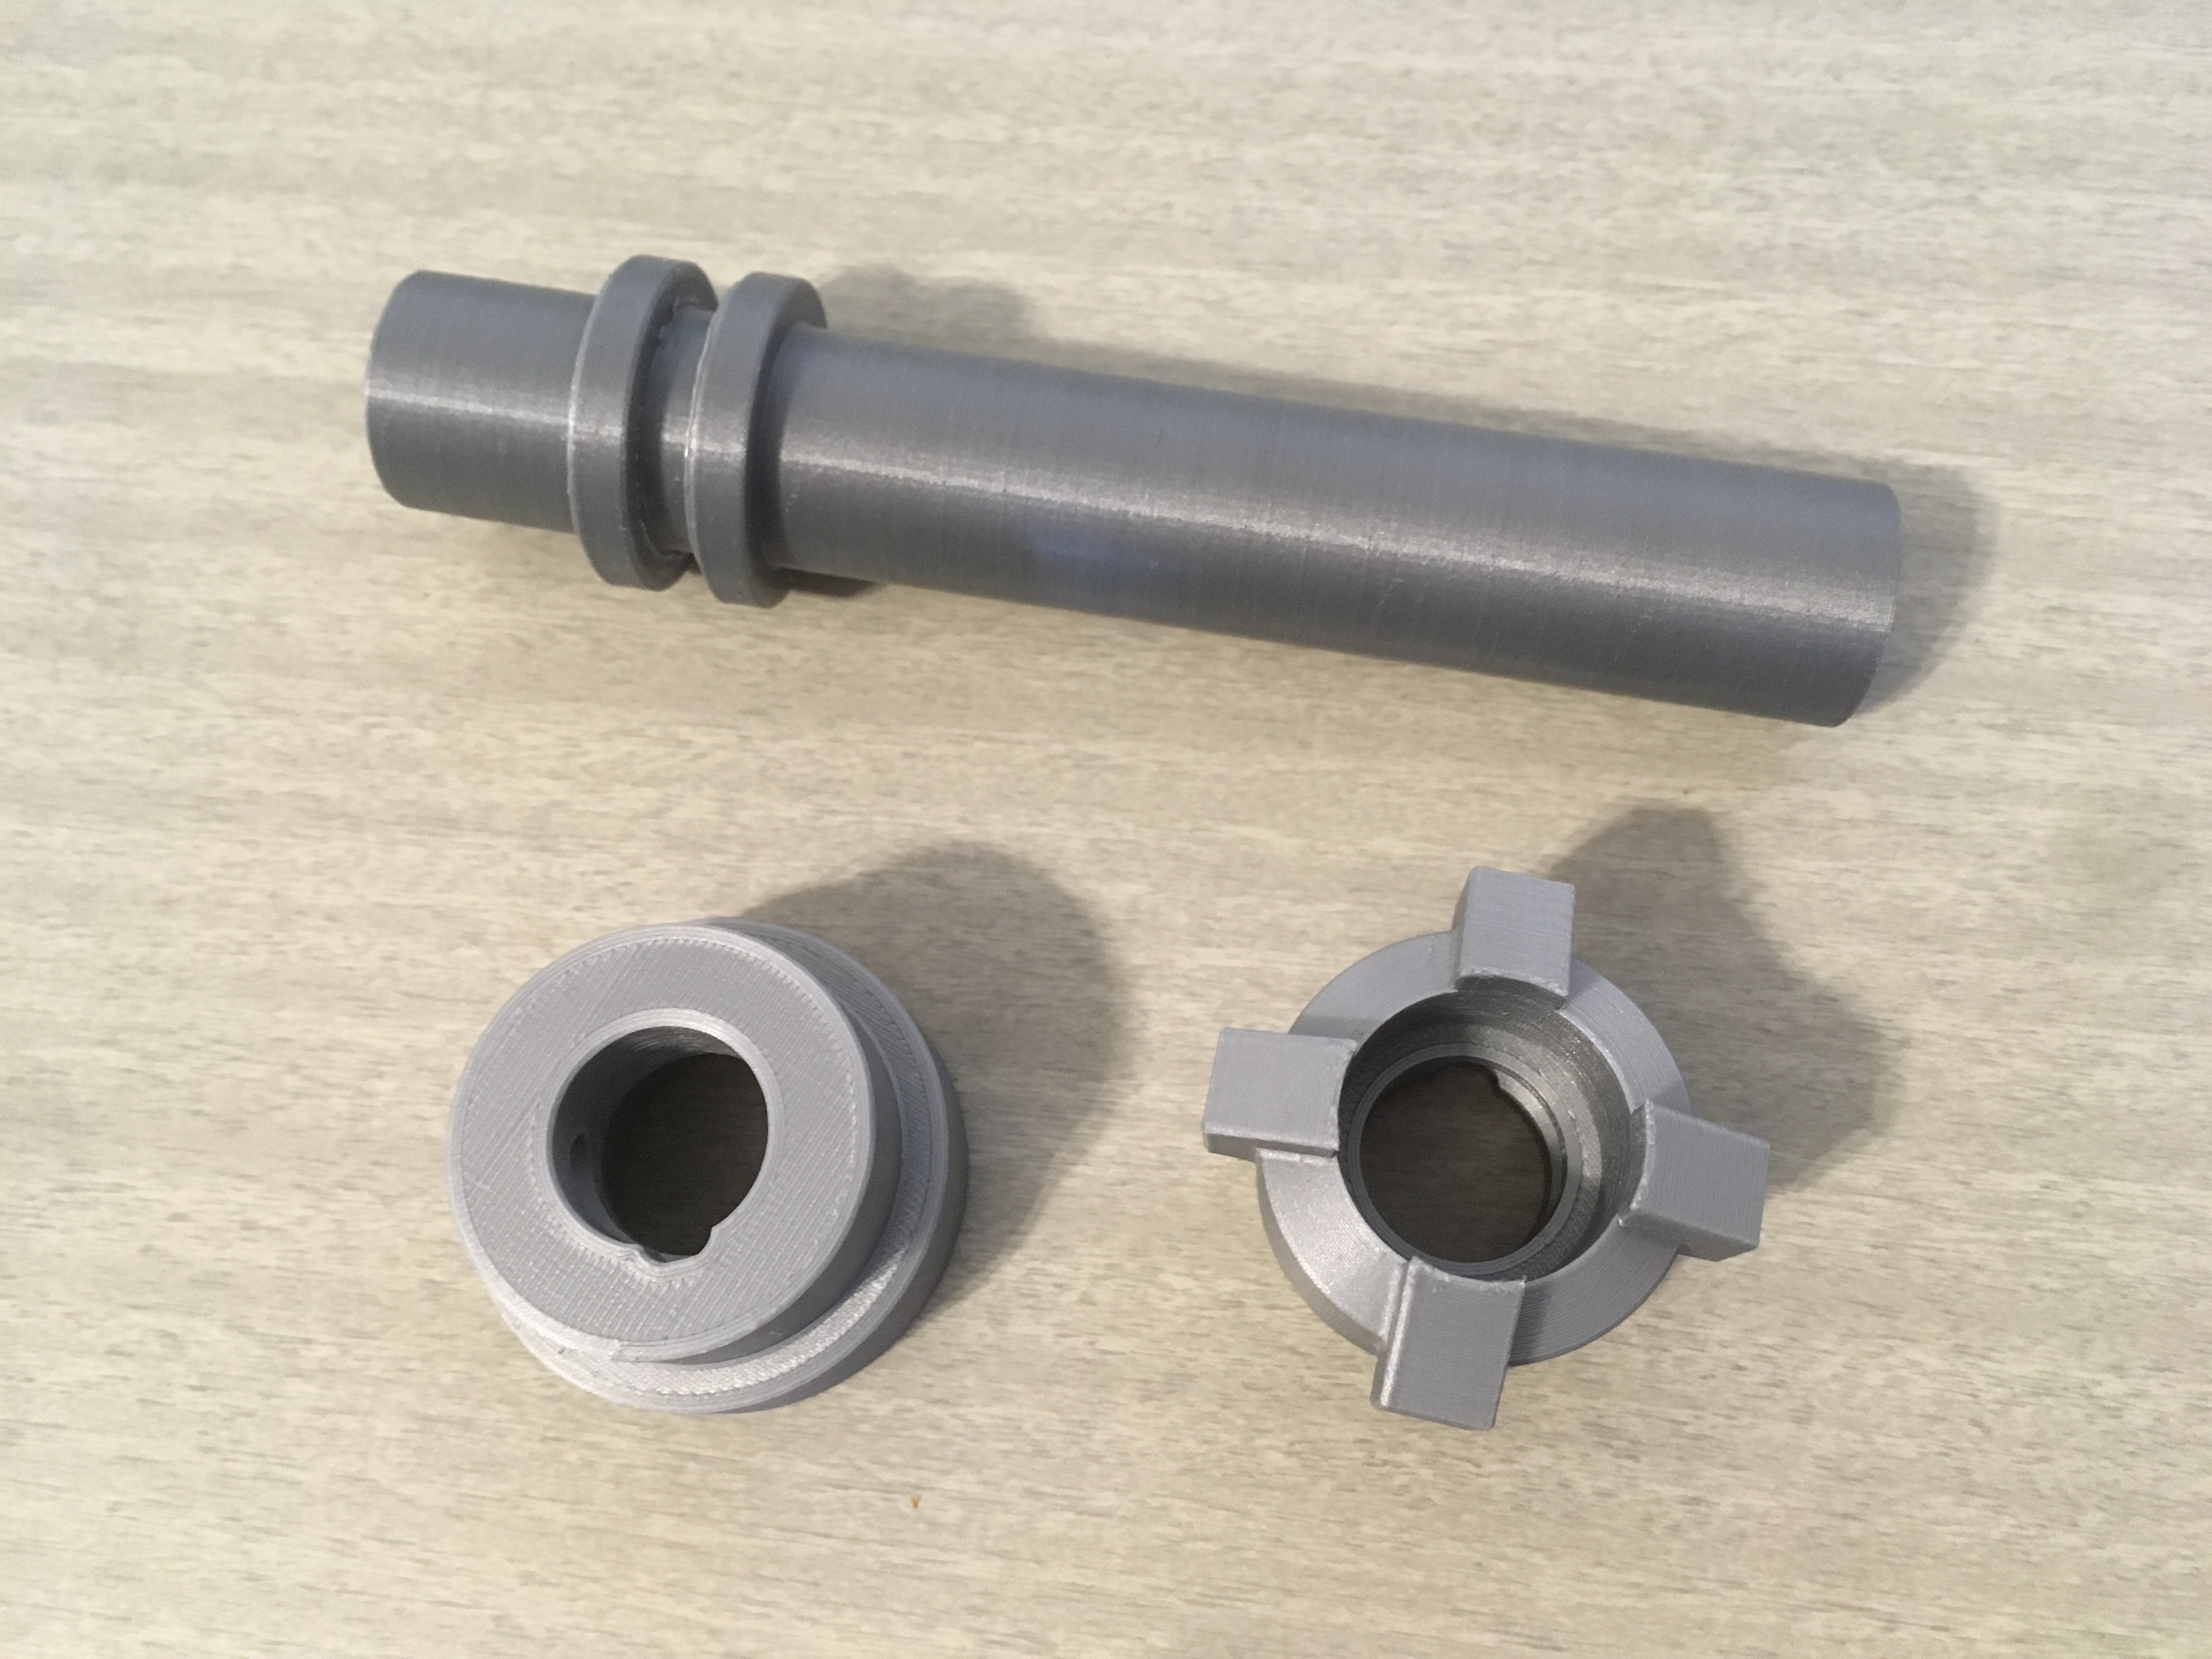
Assemble Hilt
Add some E6000 glue to the inside mating surfaces of LS-HiltA and LS-HiltC. Press both ends onto LS-HiltB (they are keyed to prevent rotation once assembled).

Wipe up any residual glue seen on the inside diameter.
Sand Rod Ends
The rods arrive looking like the ends were cut crudely with a saw, so you’re going to want to clean up both sides and take the edges off. The 400 grit sandpaper works well at making everything feel smooth, but it does not polish the surface, so if you want to go finer, by all means.
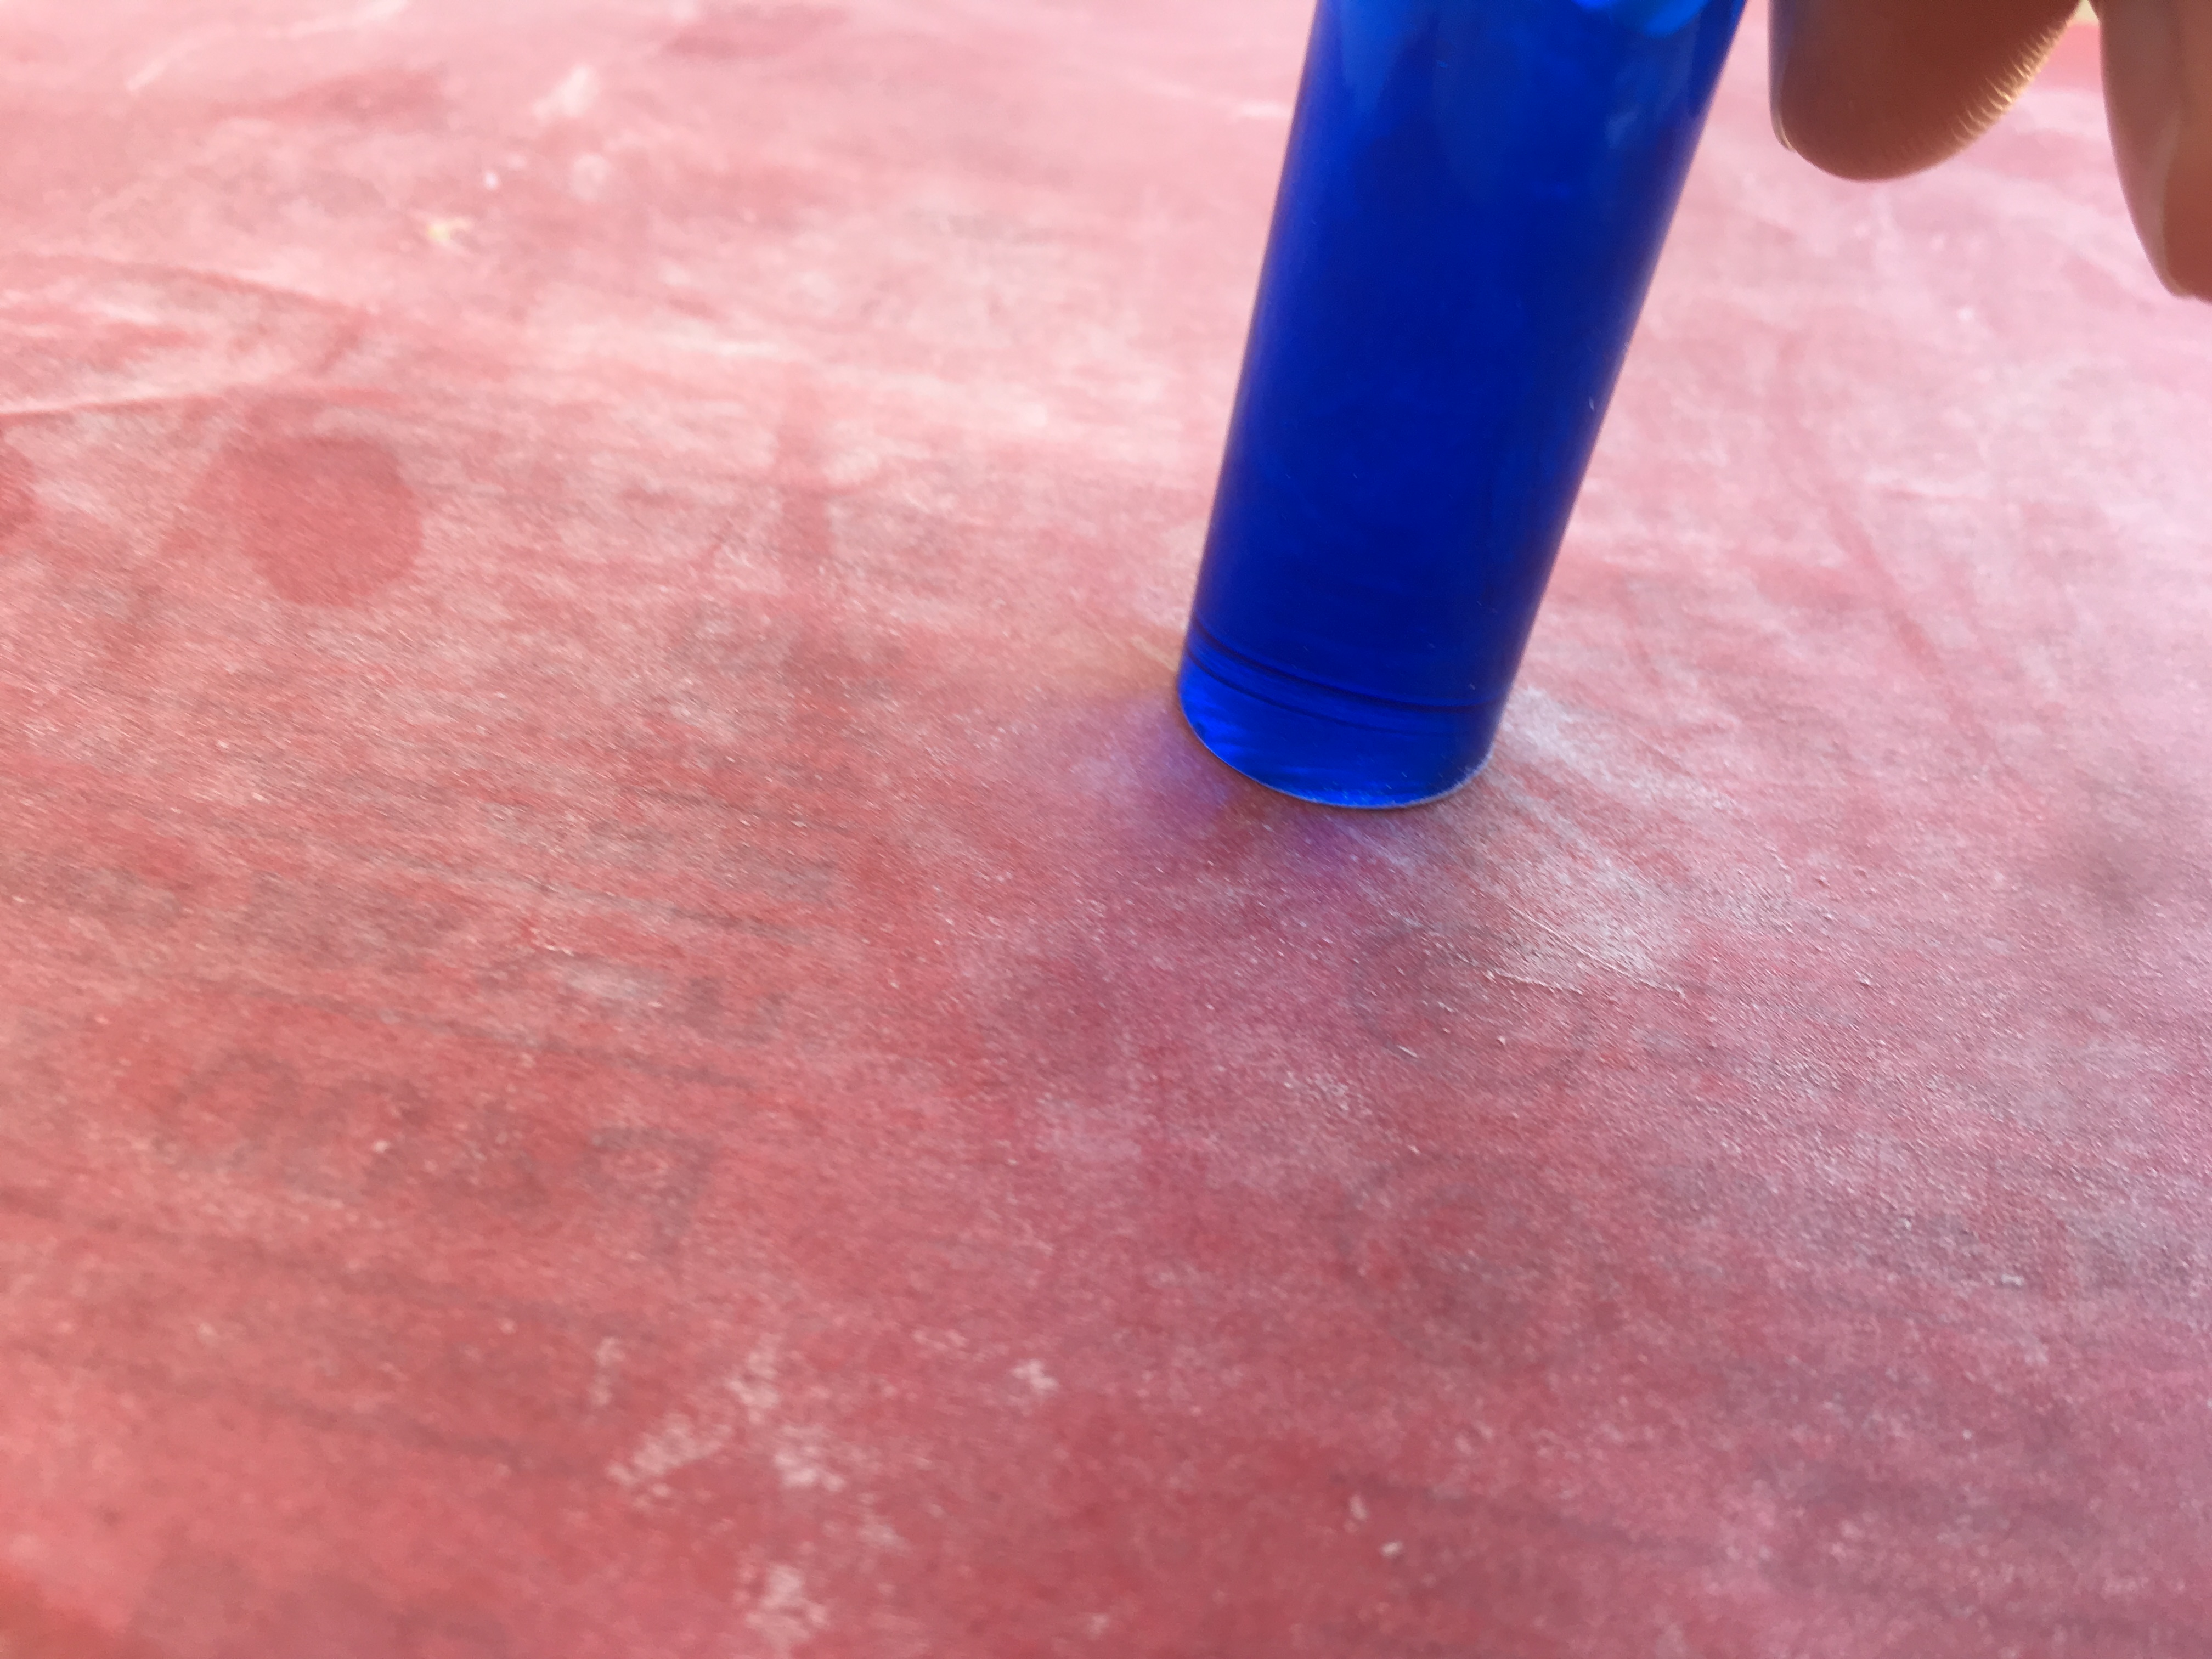
Measure and Drill
Using the calipers, measure and mark 130mm from one of the ends. Take the drill and put a hole in that location.

Make sure to drill slowly or the friction will melt the acrylic surrounding your intended hole.
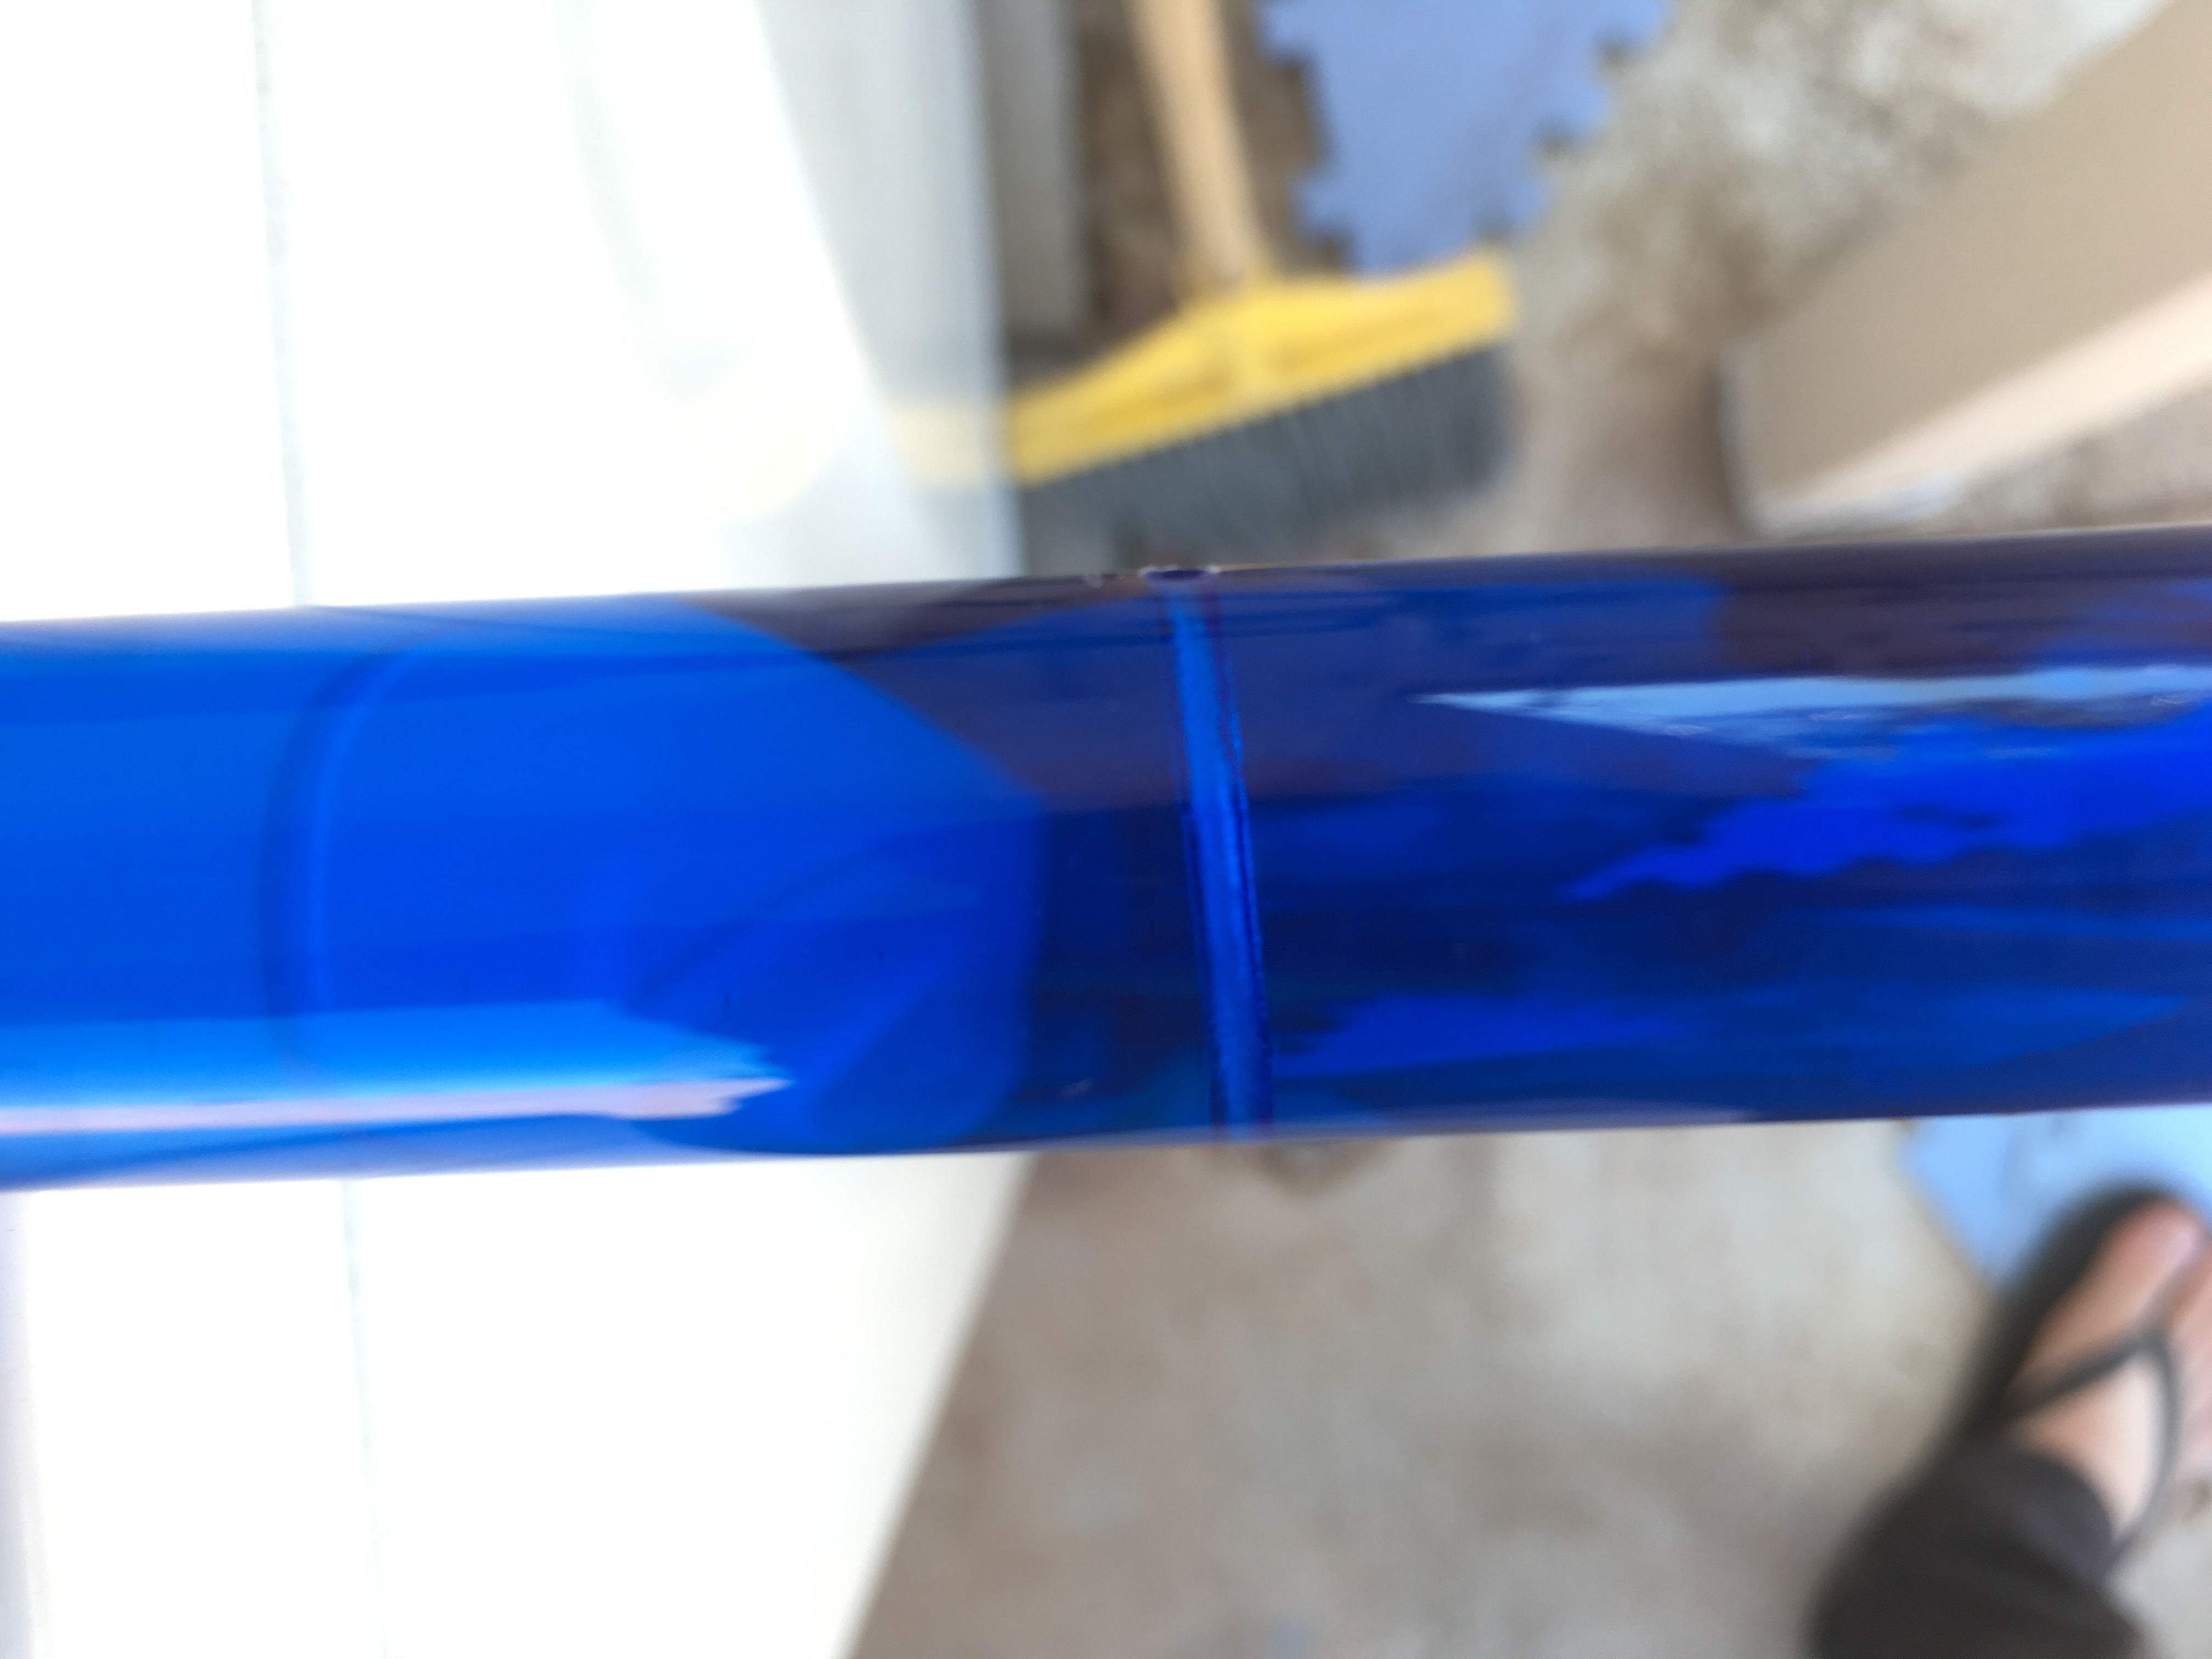
Tap and Thread
Add threads with the 4-40 tap. Insert the 4-40 screw using the hex wrench.

Fit Blade
Insert blade. The screw head fits into the notch in either end. Twist to lock into position.

In a perfect world, the blade will fit snugly into the hilt with no further intervention. If it is too tight, sand the area below the screw until it feels loose enough to insert, but tight enough that it won’t rattle around or slip out. I got lucky with the blue rod, but the red one needed some work in that respect.
And similar to the lightsabers they take inspiration from, you can assemble this either way you desire.


Follow the Ways of The Force
My daughter (almost a three year old now!) was so excited when she learned she could have a red lightsaber. It made me a tad bit uncomfortable at first, but when she wields it, she says that “we are Jedi,” so she is clearly following her own path.
Like what you’re seeing here? Follow me on twitter @DragonMtnDesign where I post updates, teasers, and whatnot. Also, feel free to leave me a comment here or where the models are.
.
.
.
March 2020 UPDATE: Files are available here! Click the Download button below for a zip file.
Files are available under the Creative Commons BY-NC-SA license.