Mjölnir

Your ancestors called it magic, but you call it science. I come from a land where they are one and the same.
-Thor (2011)
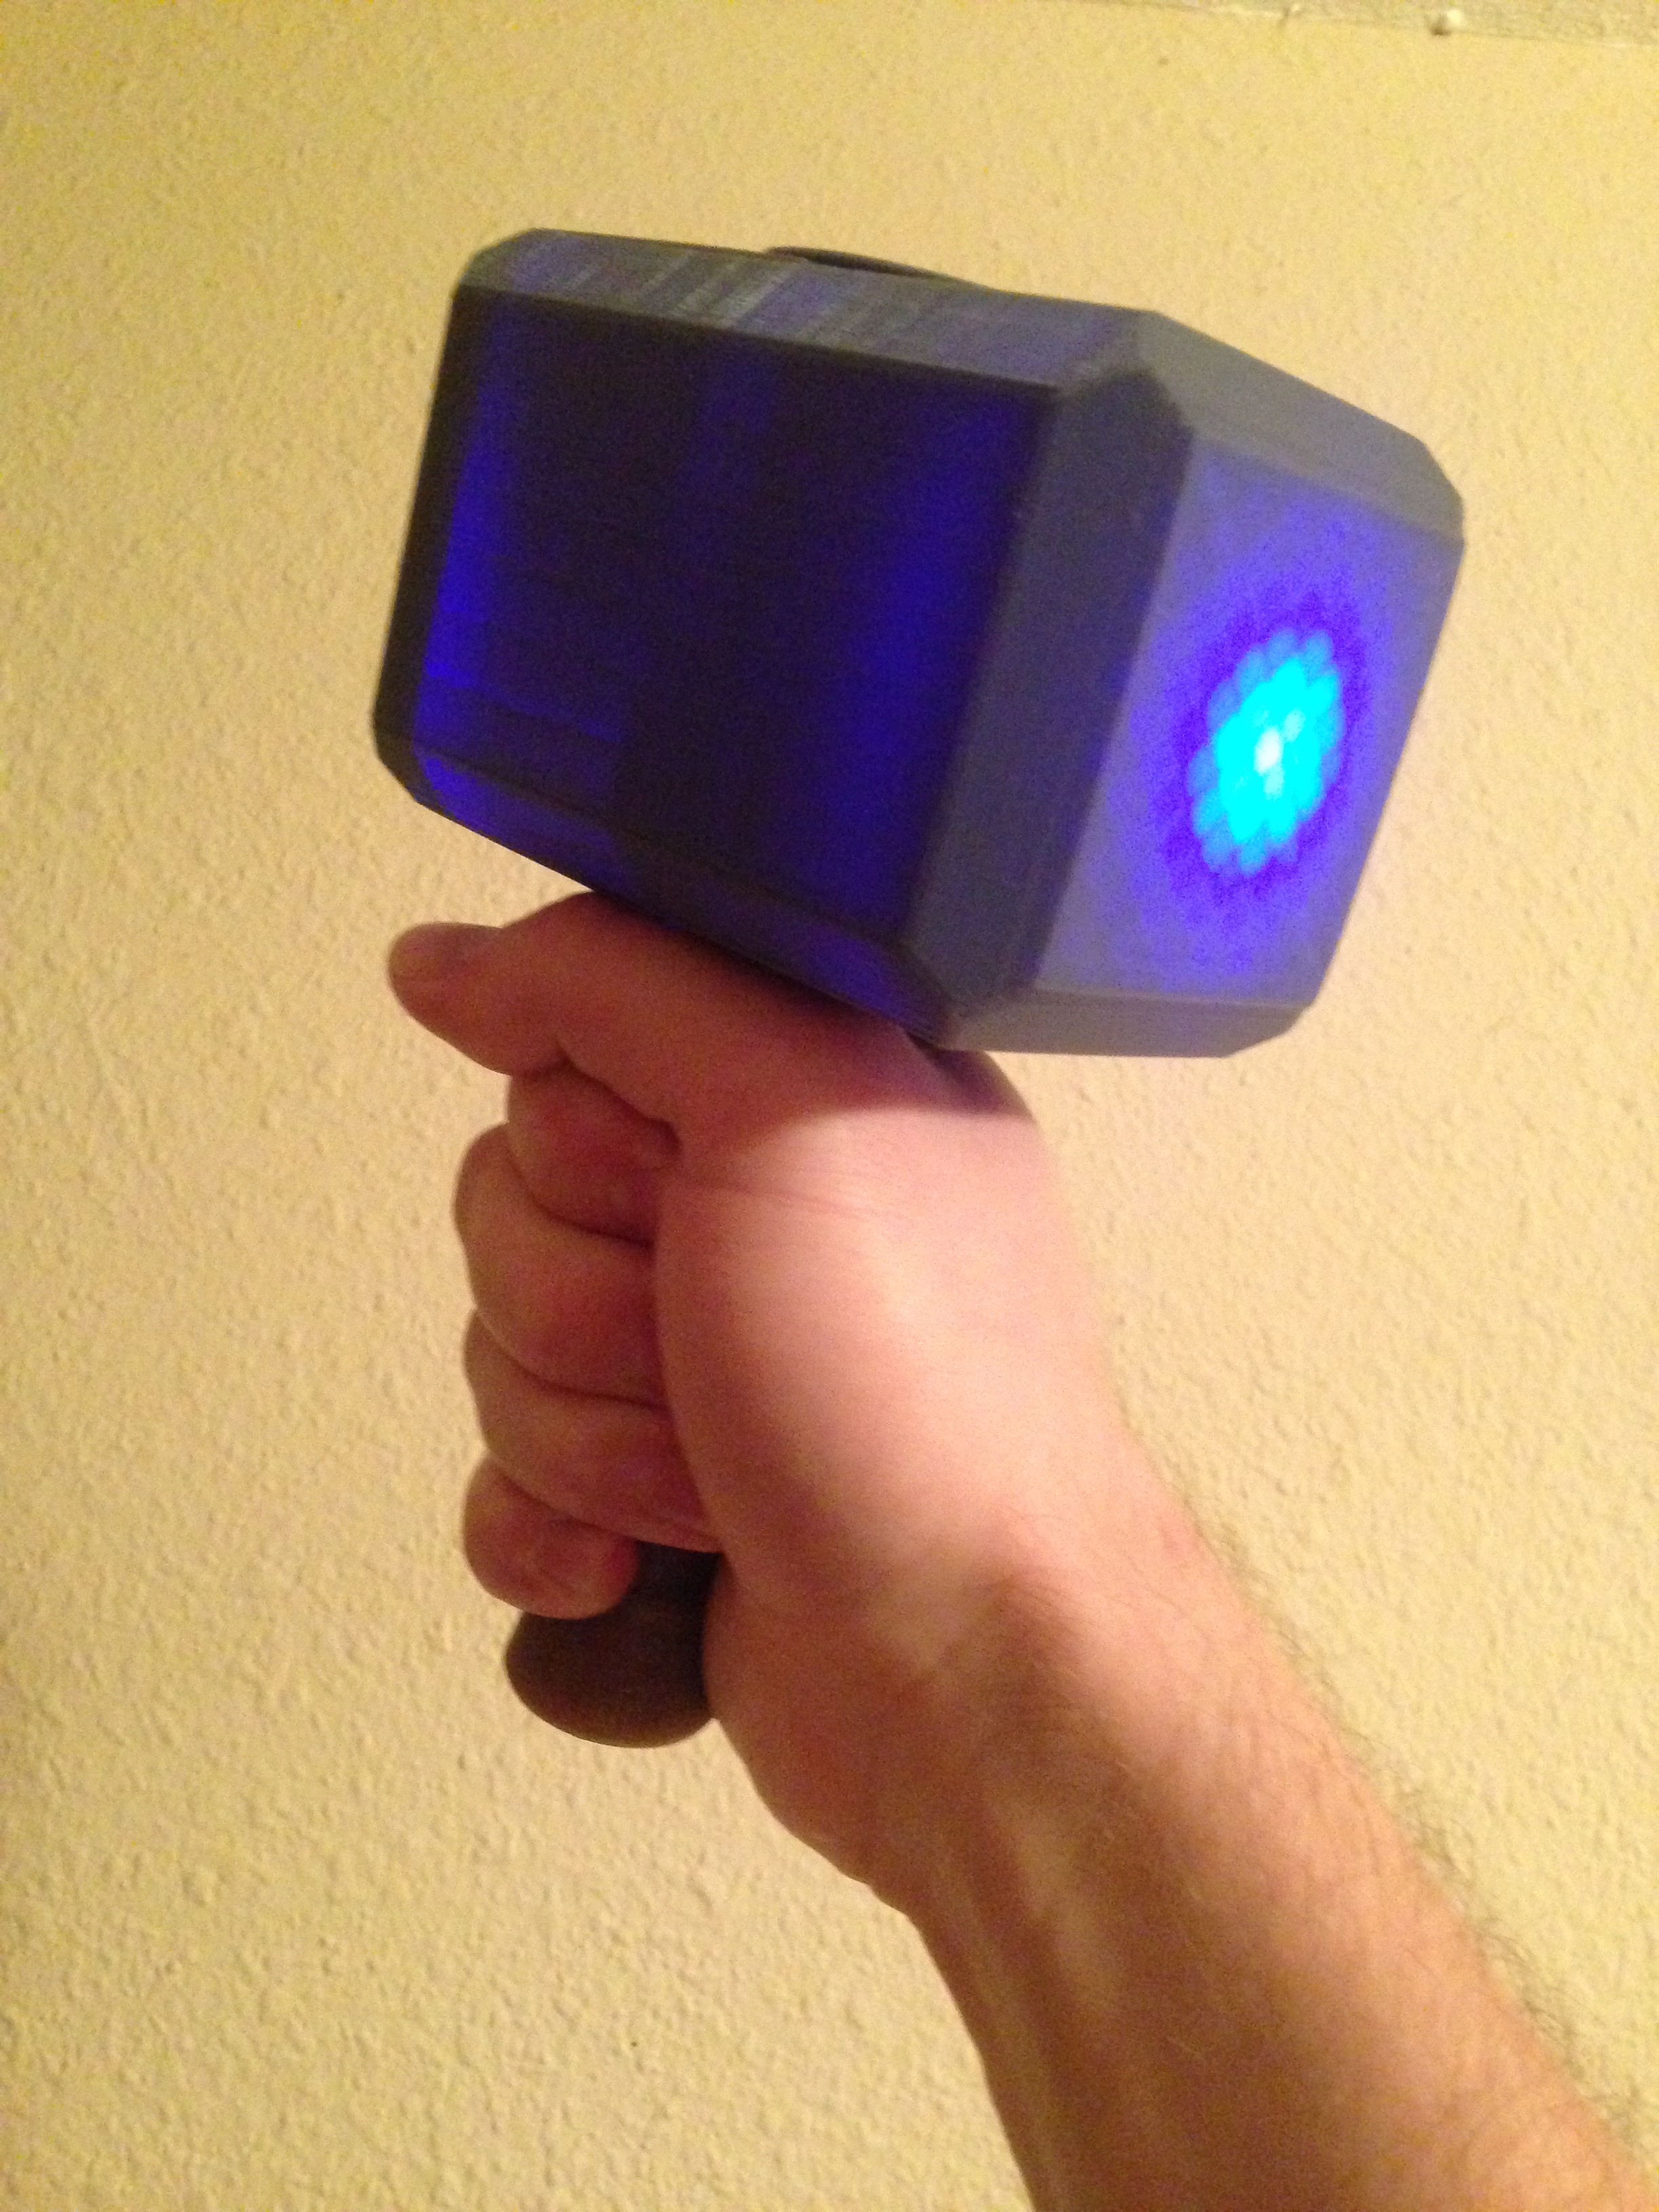
That feeling of magic and science is what I wanted to invoke when taking hold of this hammer and watching it light up. No visible plugs, switches, or any other indication of functionality thanks to inductive charging and reed switches.
Let’s get to sciencing!
Parts List:
5V 500mA Inductive Charging Set – Adafruit 1407
Micro LiPO Charger – Adafruit 1904
3.7V 150mAh LiPO Battery – Adafruit 1317
Super Bright Blue 5mm LED – Adafruit 301
USB Micro B DIY Connector Shell – Adafruit 1390 (You’re not going to need the housing. It’s too beefy.)
Insulated Reed Switch – Sparkfun COM-10601
Panel Mount DC Barrel Jack – Sparkfun PRT-10785
9V DC 650mA Wall Adapter Power Supply – Sparkfun RTL-10273
1/4″ OD x 1/8″ THK NdFeB, Grade N42 Magnet – K&J Magnetics D42 (How do they work?!)
Heat Shrink Tubing (Large enough to cover the exposed end of the Micro USB Connector from Adafruit).
24 GA wire – Wherever wire is sold.
NO SCREWS – Because I like a challenge.
Helpful Tools:
3D Printer (or printing service)
E6000 Glue (Optional)
Small Crescent Wrench
Print Housings
Files for Mjölnir can be found on
Thingiverse,YouMagine, andCults3D. I was aiming to have everything printable without supports, and succeeded on all counts with exception of the ring, which was a spectacular failure the first time I tried.5/31/2016 UPDATE: Mjölnir has been vetted & approved, and is now also on MyMiniFactory!
4/11/2018 UPDATE: Consolidating the number of places hosting the files. More changes to come, but they’re still available for free.
March 2020 UPDATE: Files can be downloaded directly from this site at the bottom of the page. They are also available on Prusa Printers!
The hammer internals can fortunately both be printed at the same time. 15% infill will work well.
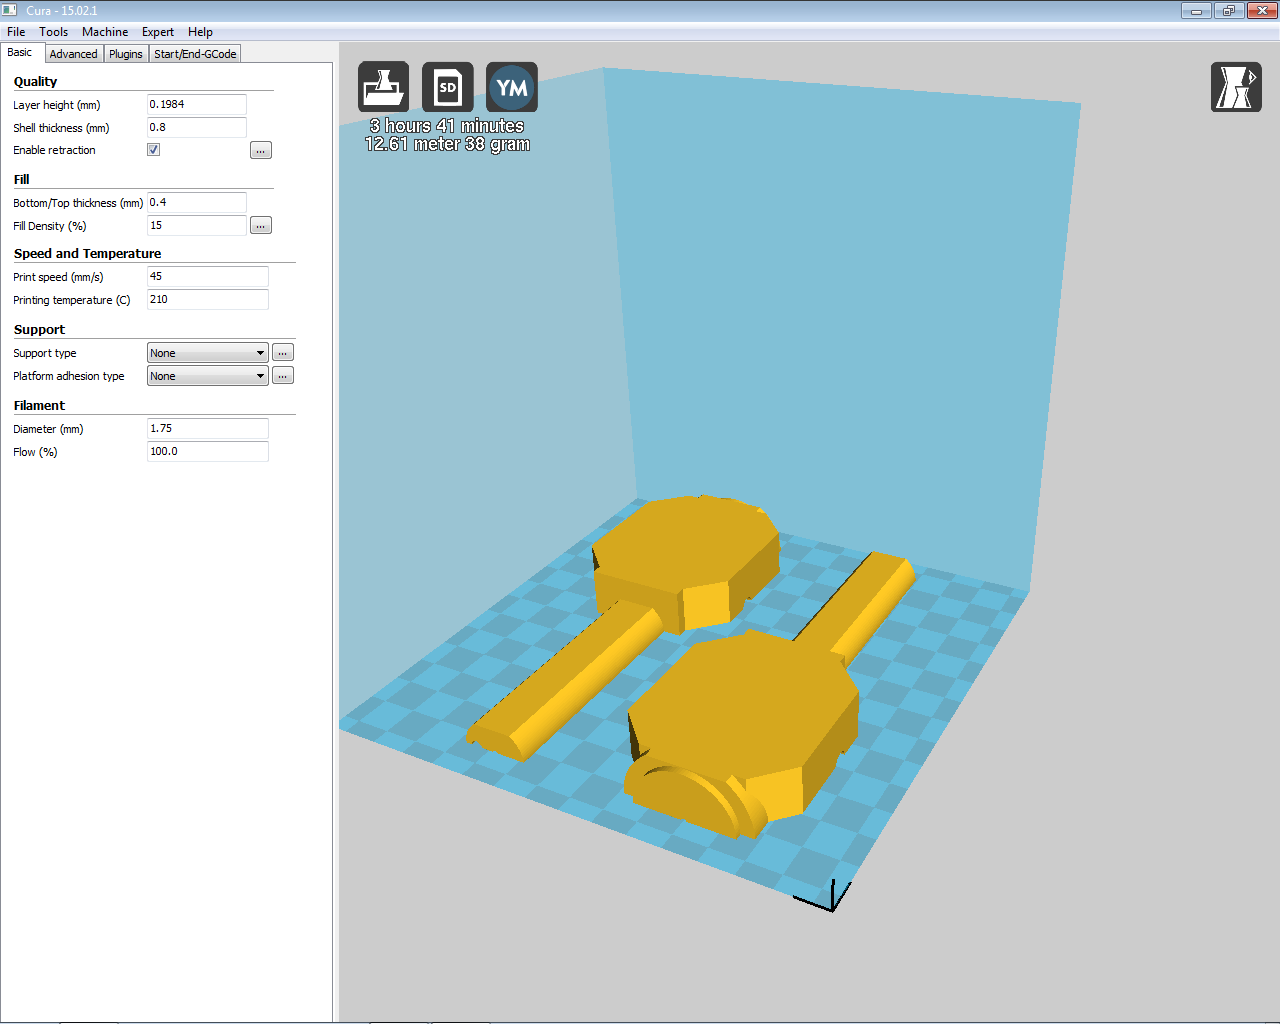
Both sides of the hammer can be printed with 15% infill in the orientation shown.

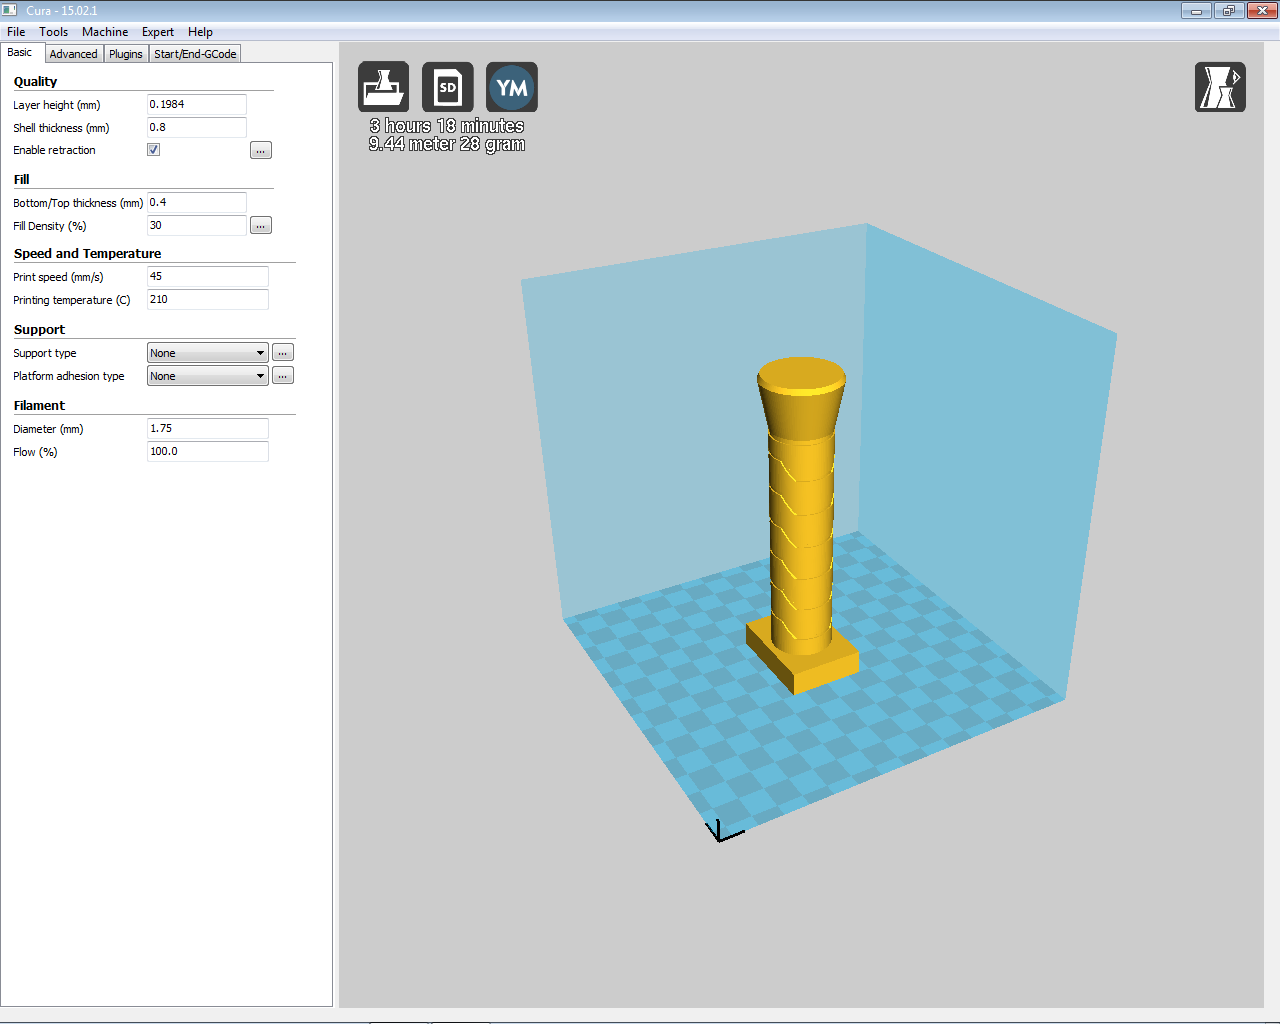
While not completely necessary, I used 30% infill on the handle. Used Wound Up by 3Dom USA, and the finish turned out really nicely at this percentage.
The charging station parts were tricky to design without the need for supports, but were successful in the end. Infill at 15% again, and you may want to give it a brim setting to hold all the edges down to the bed. Orient them as shown.

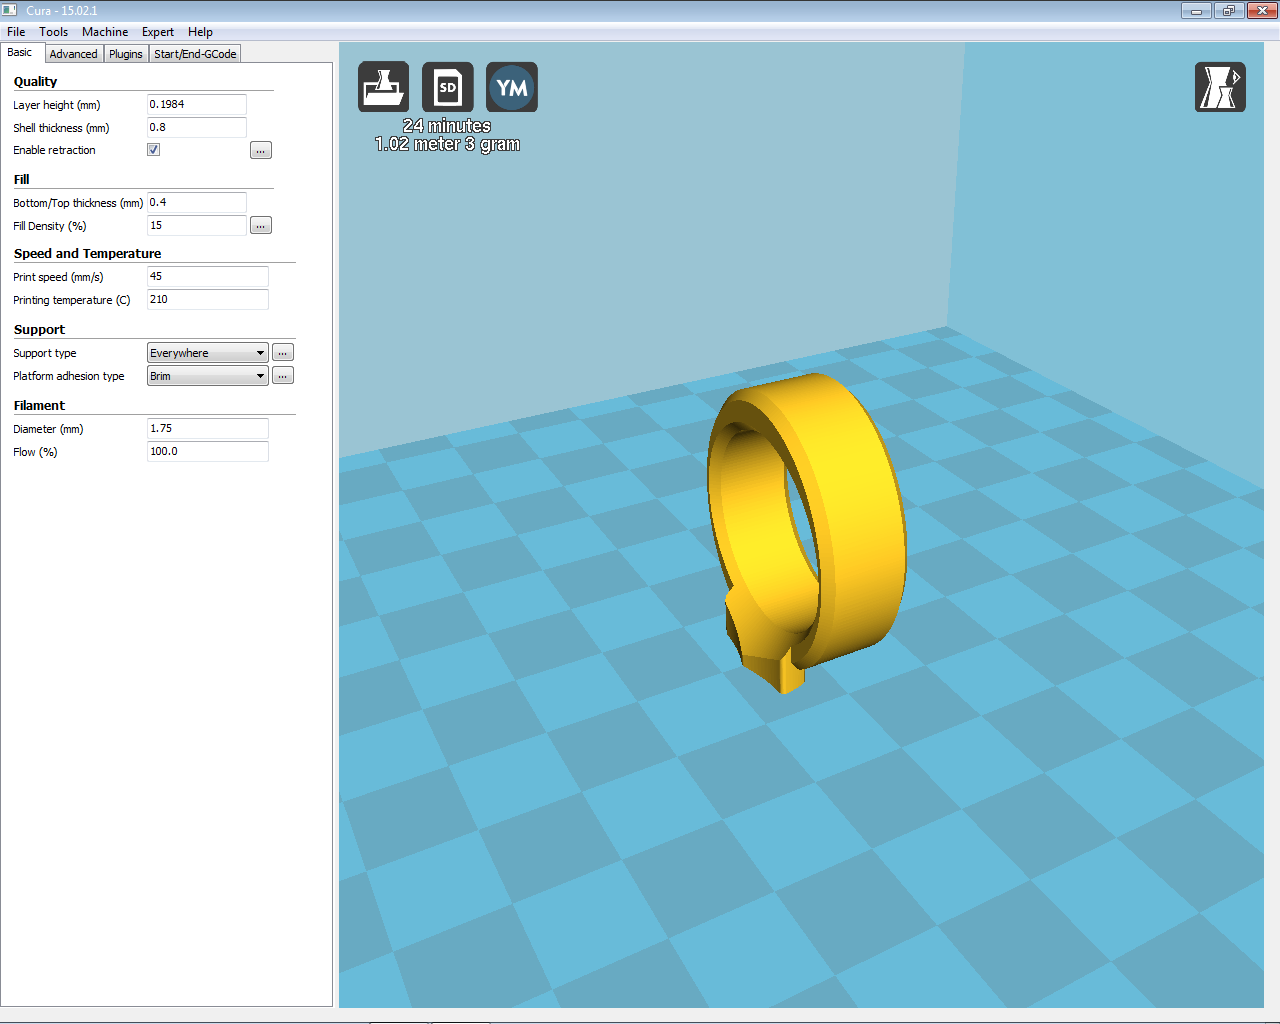
The ring is by far the quickest component to print out, but was also the trickiest, and I caved and threw supports and brim settings on it. 15% infill will work just fine.
Background and Prep on LEDs
Adafruit has a great overview on LEDs, that along with their Circuit Playground app, gave me the guidance I needed before embarking on this quest.

To keep things simple, the chosen LEDs have only an anode and cathode. Trim the cathode and solder the resistor to it.
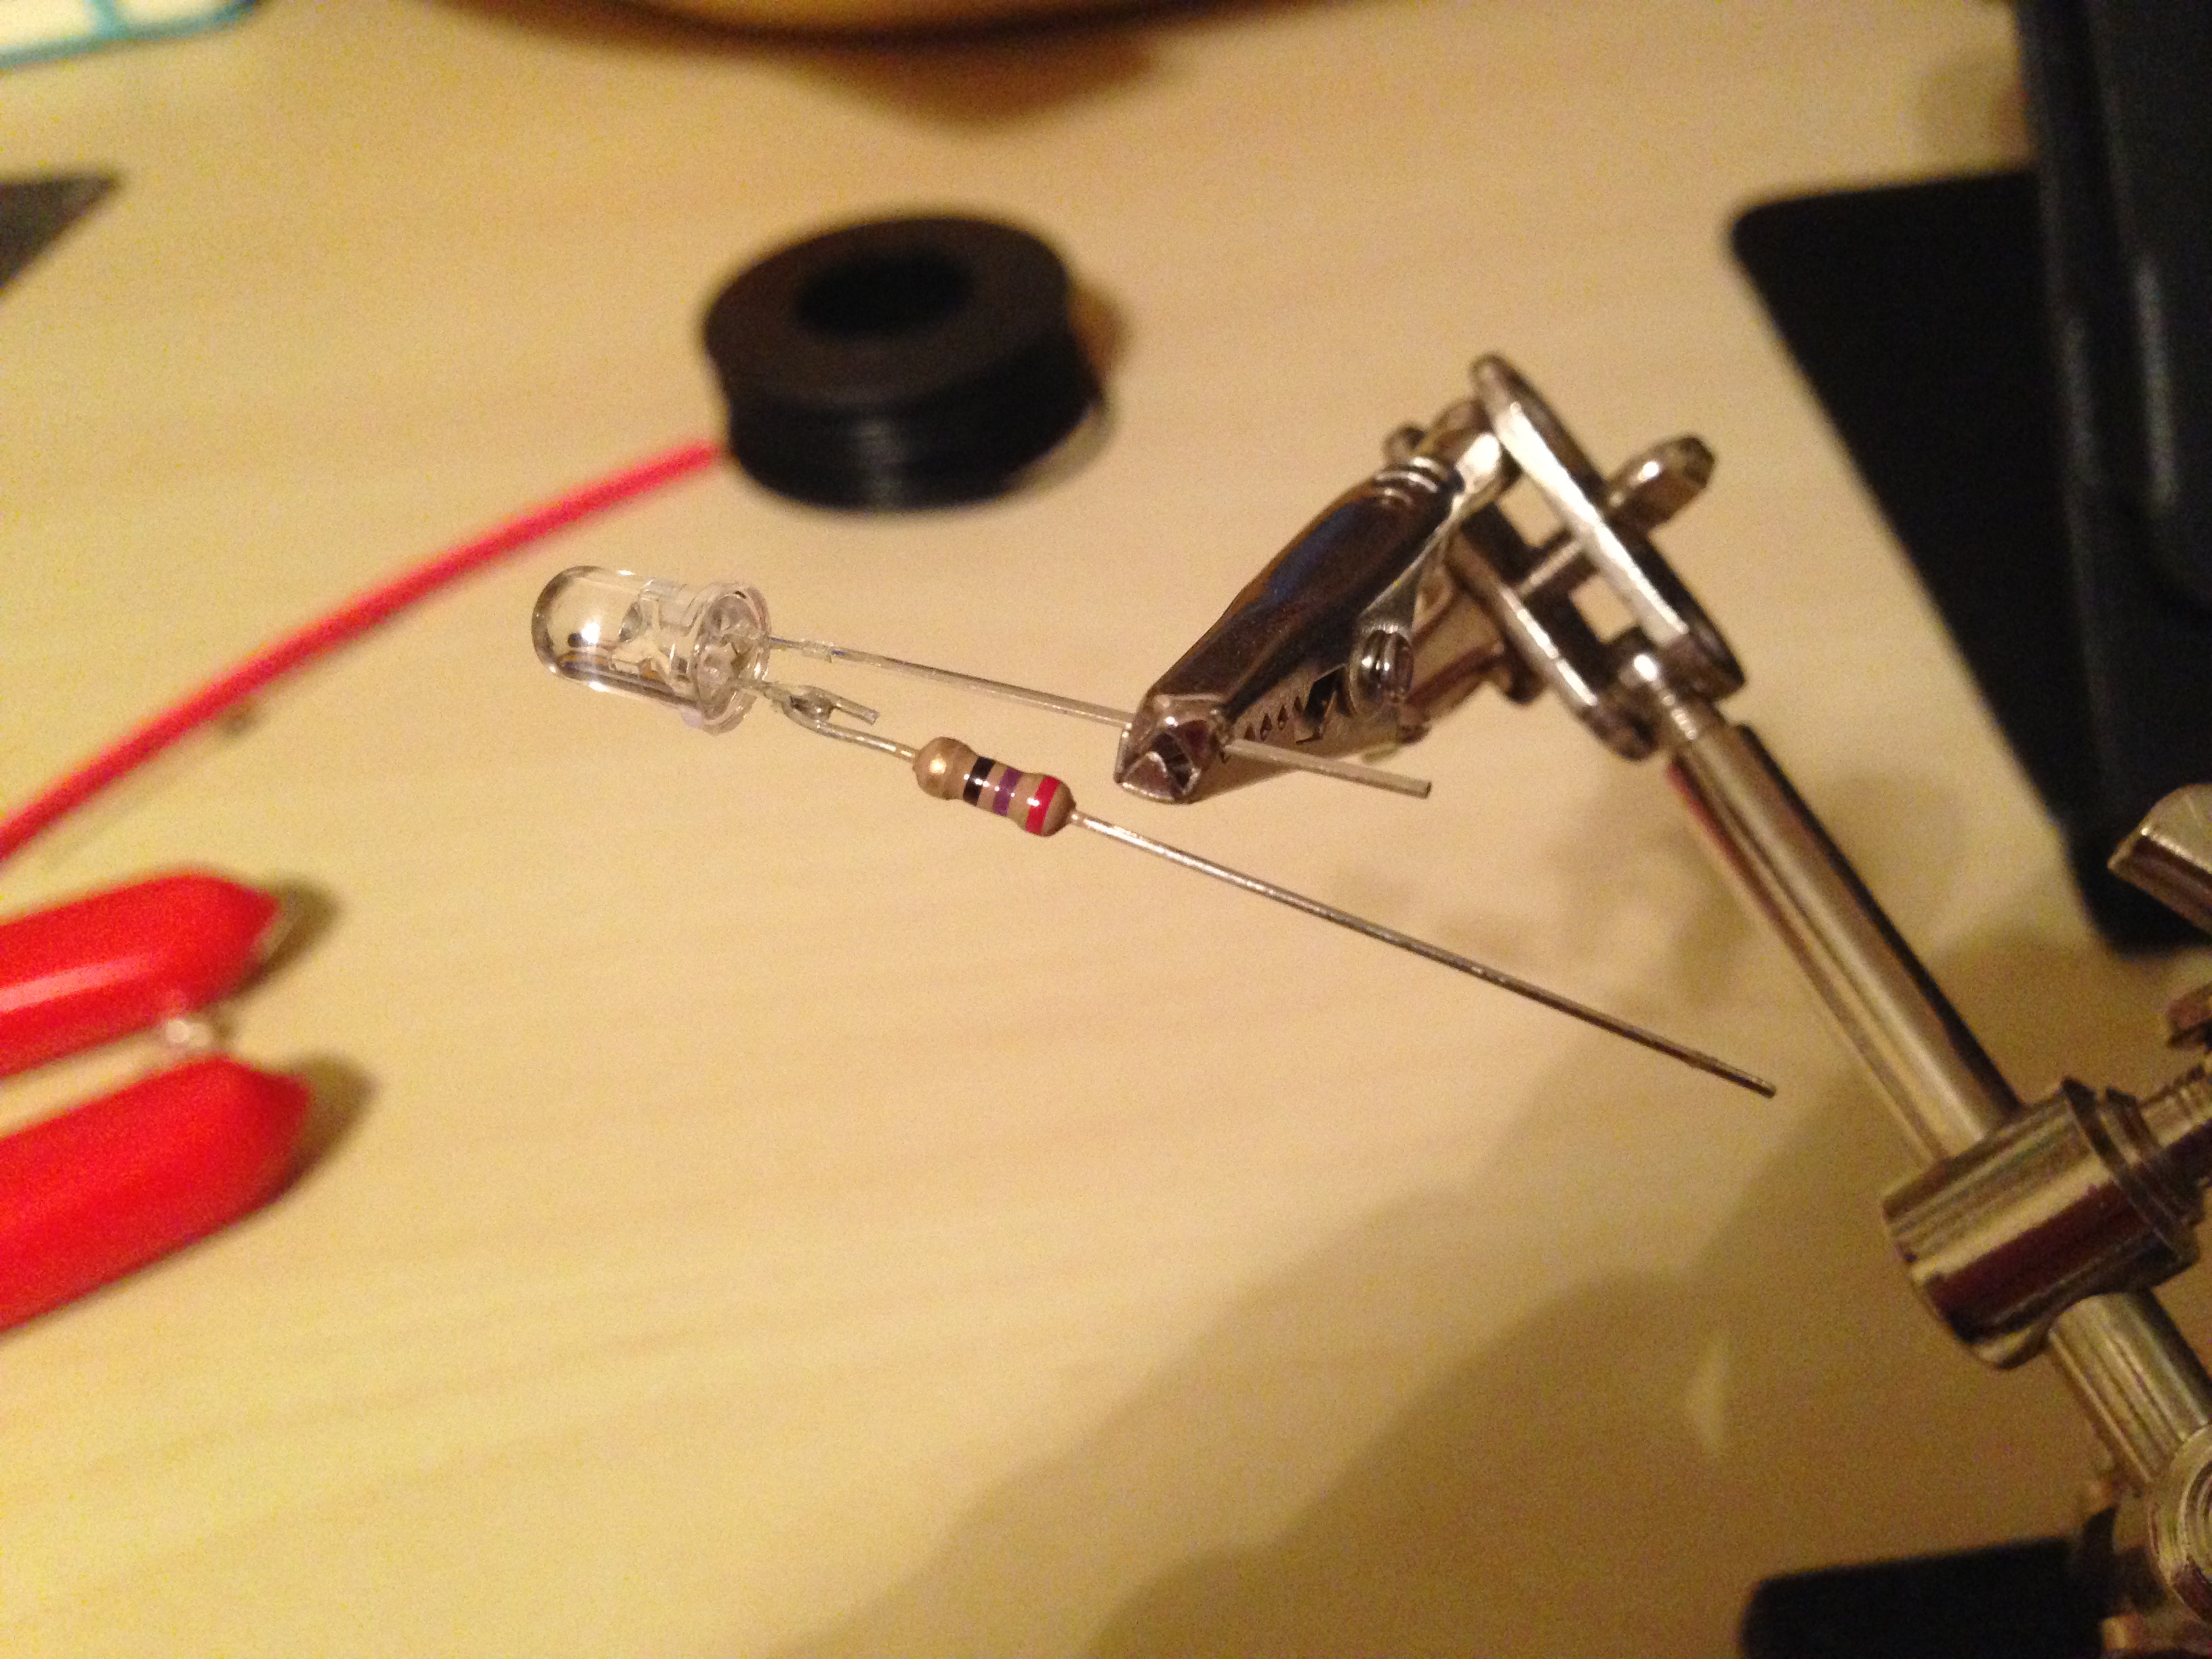
Solder a length of wire to the other end of the resistors.
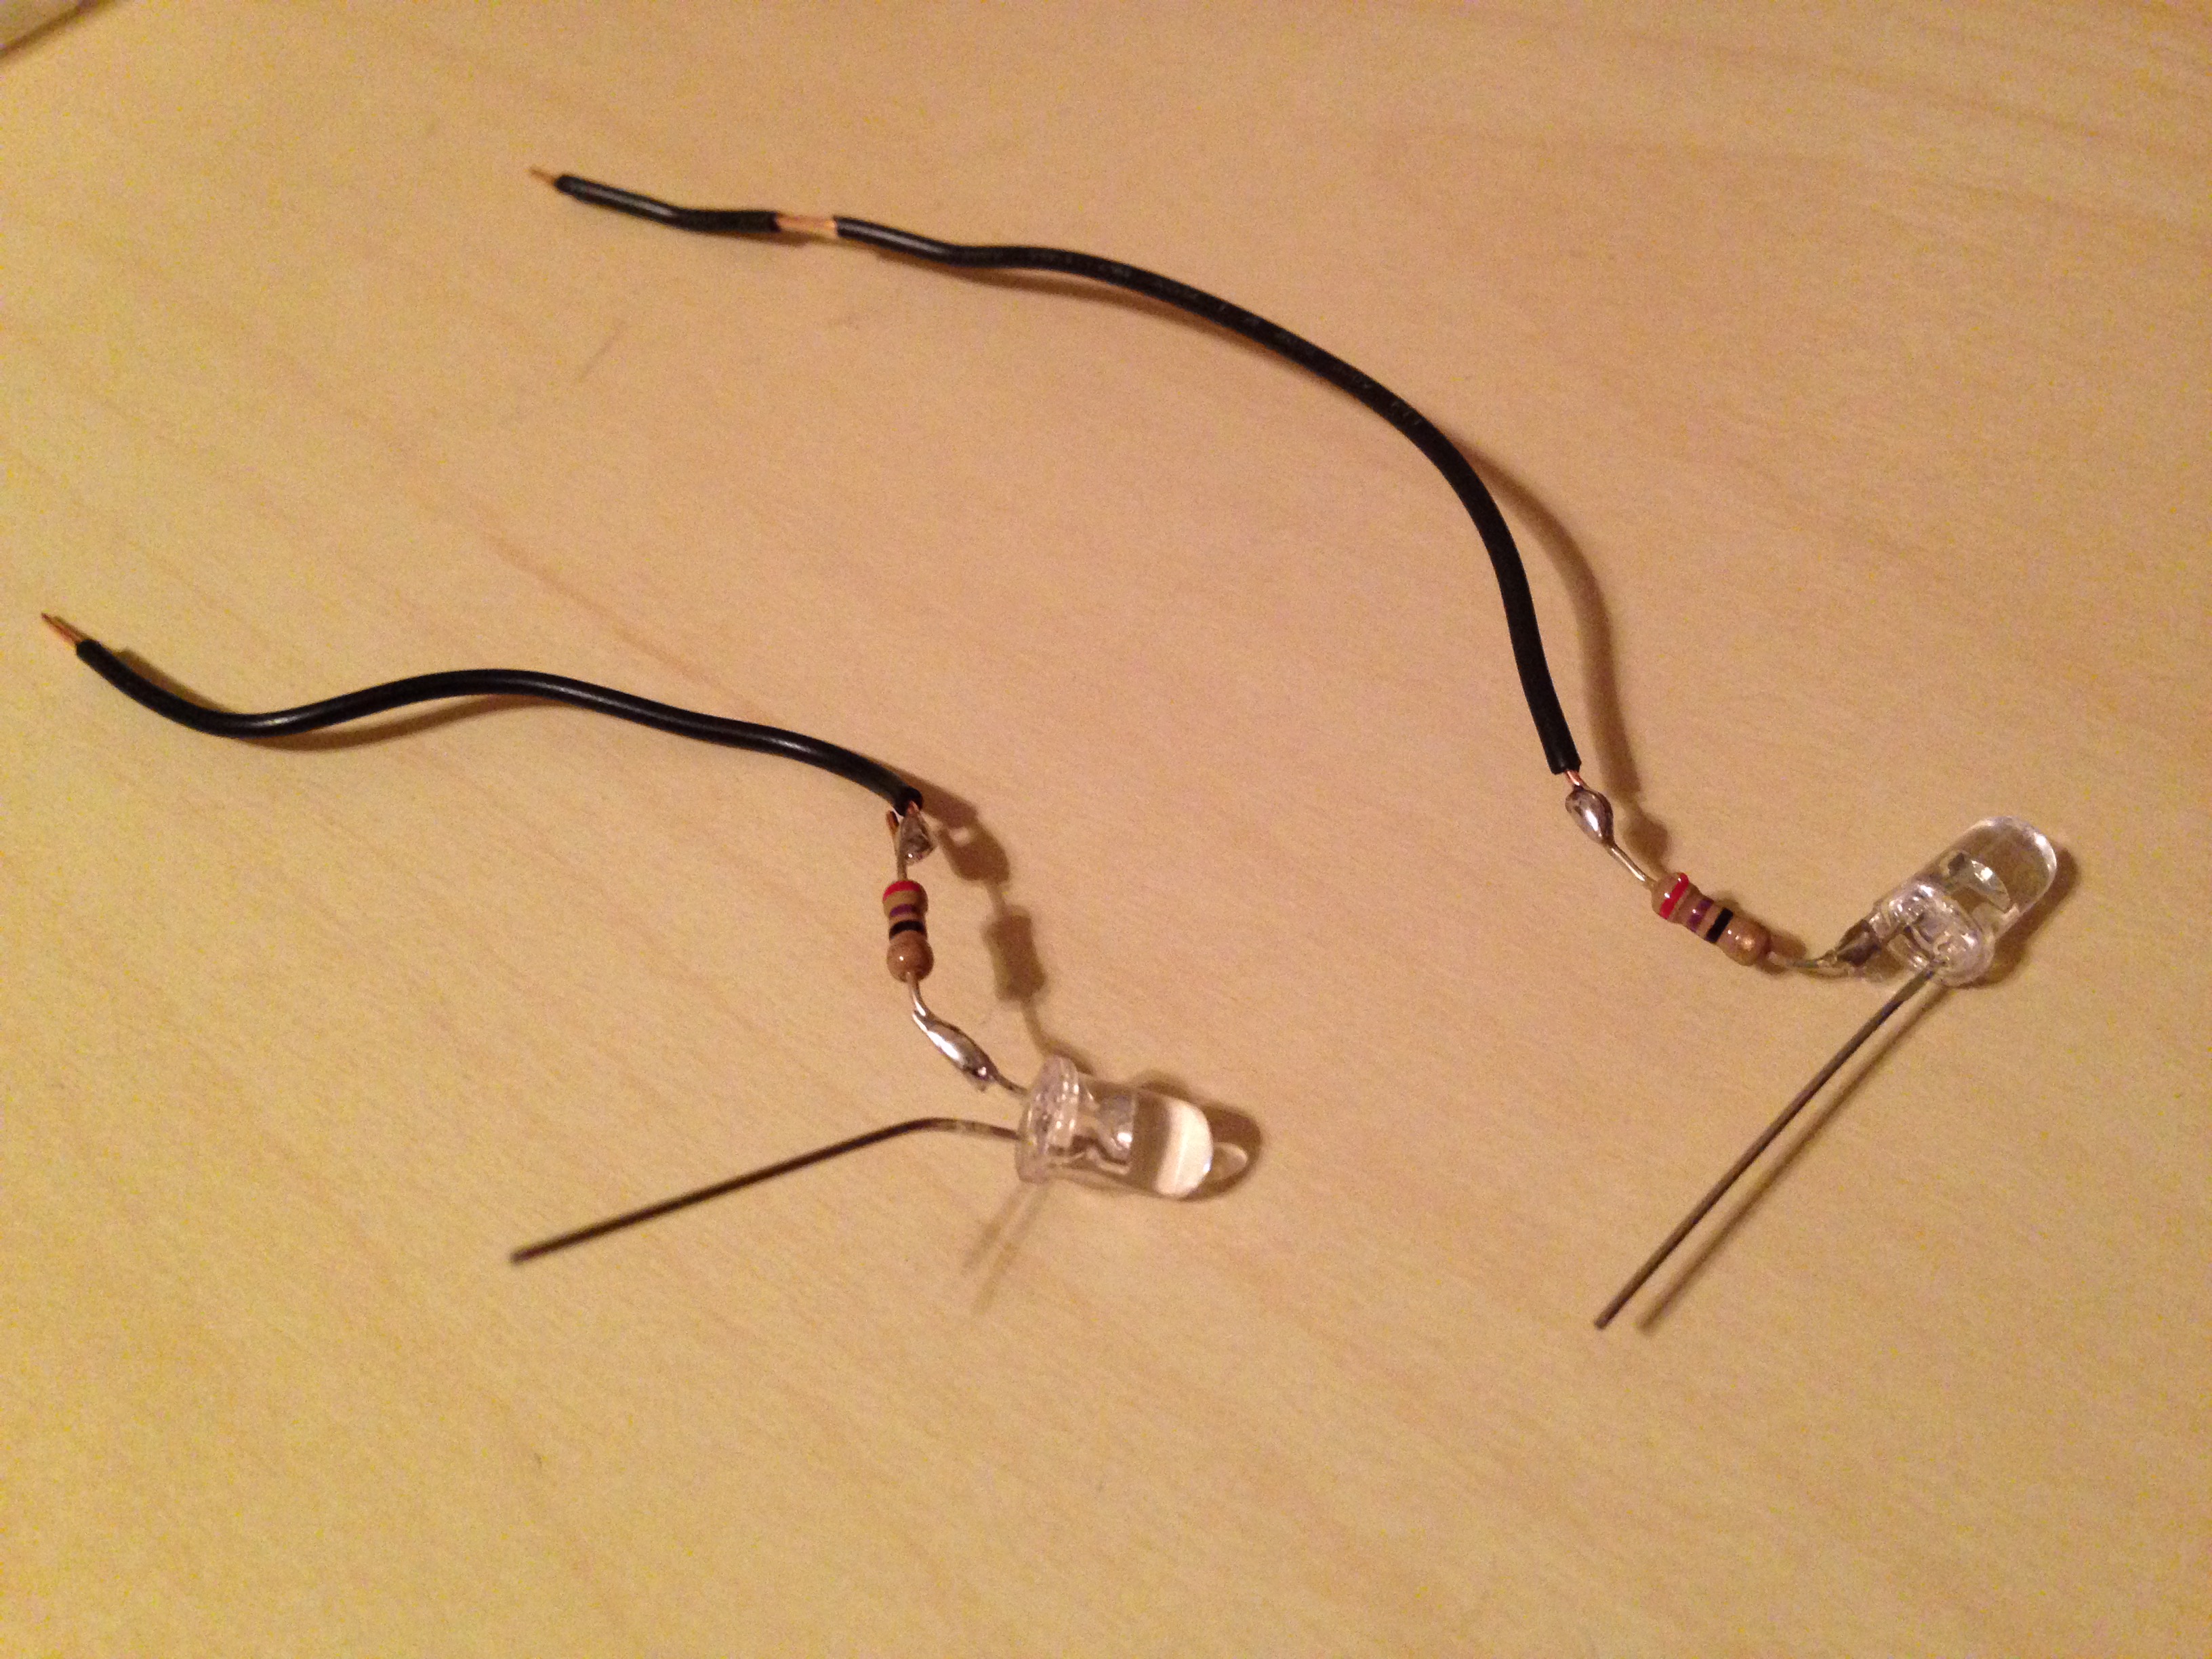
Cover the resistor/connections in heat shrink tubing.
LED Circuit
Wire up the reed switch to the charging board, and connect both of the LED/resistor combos in parallel to complete the circuit.

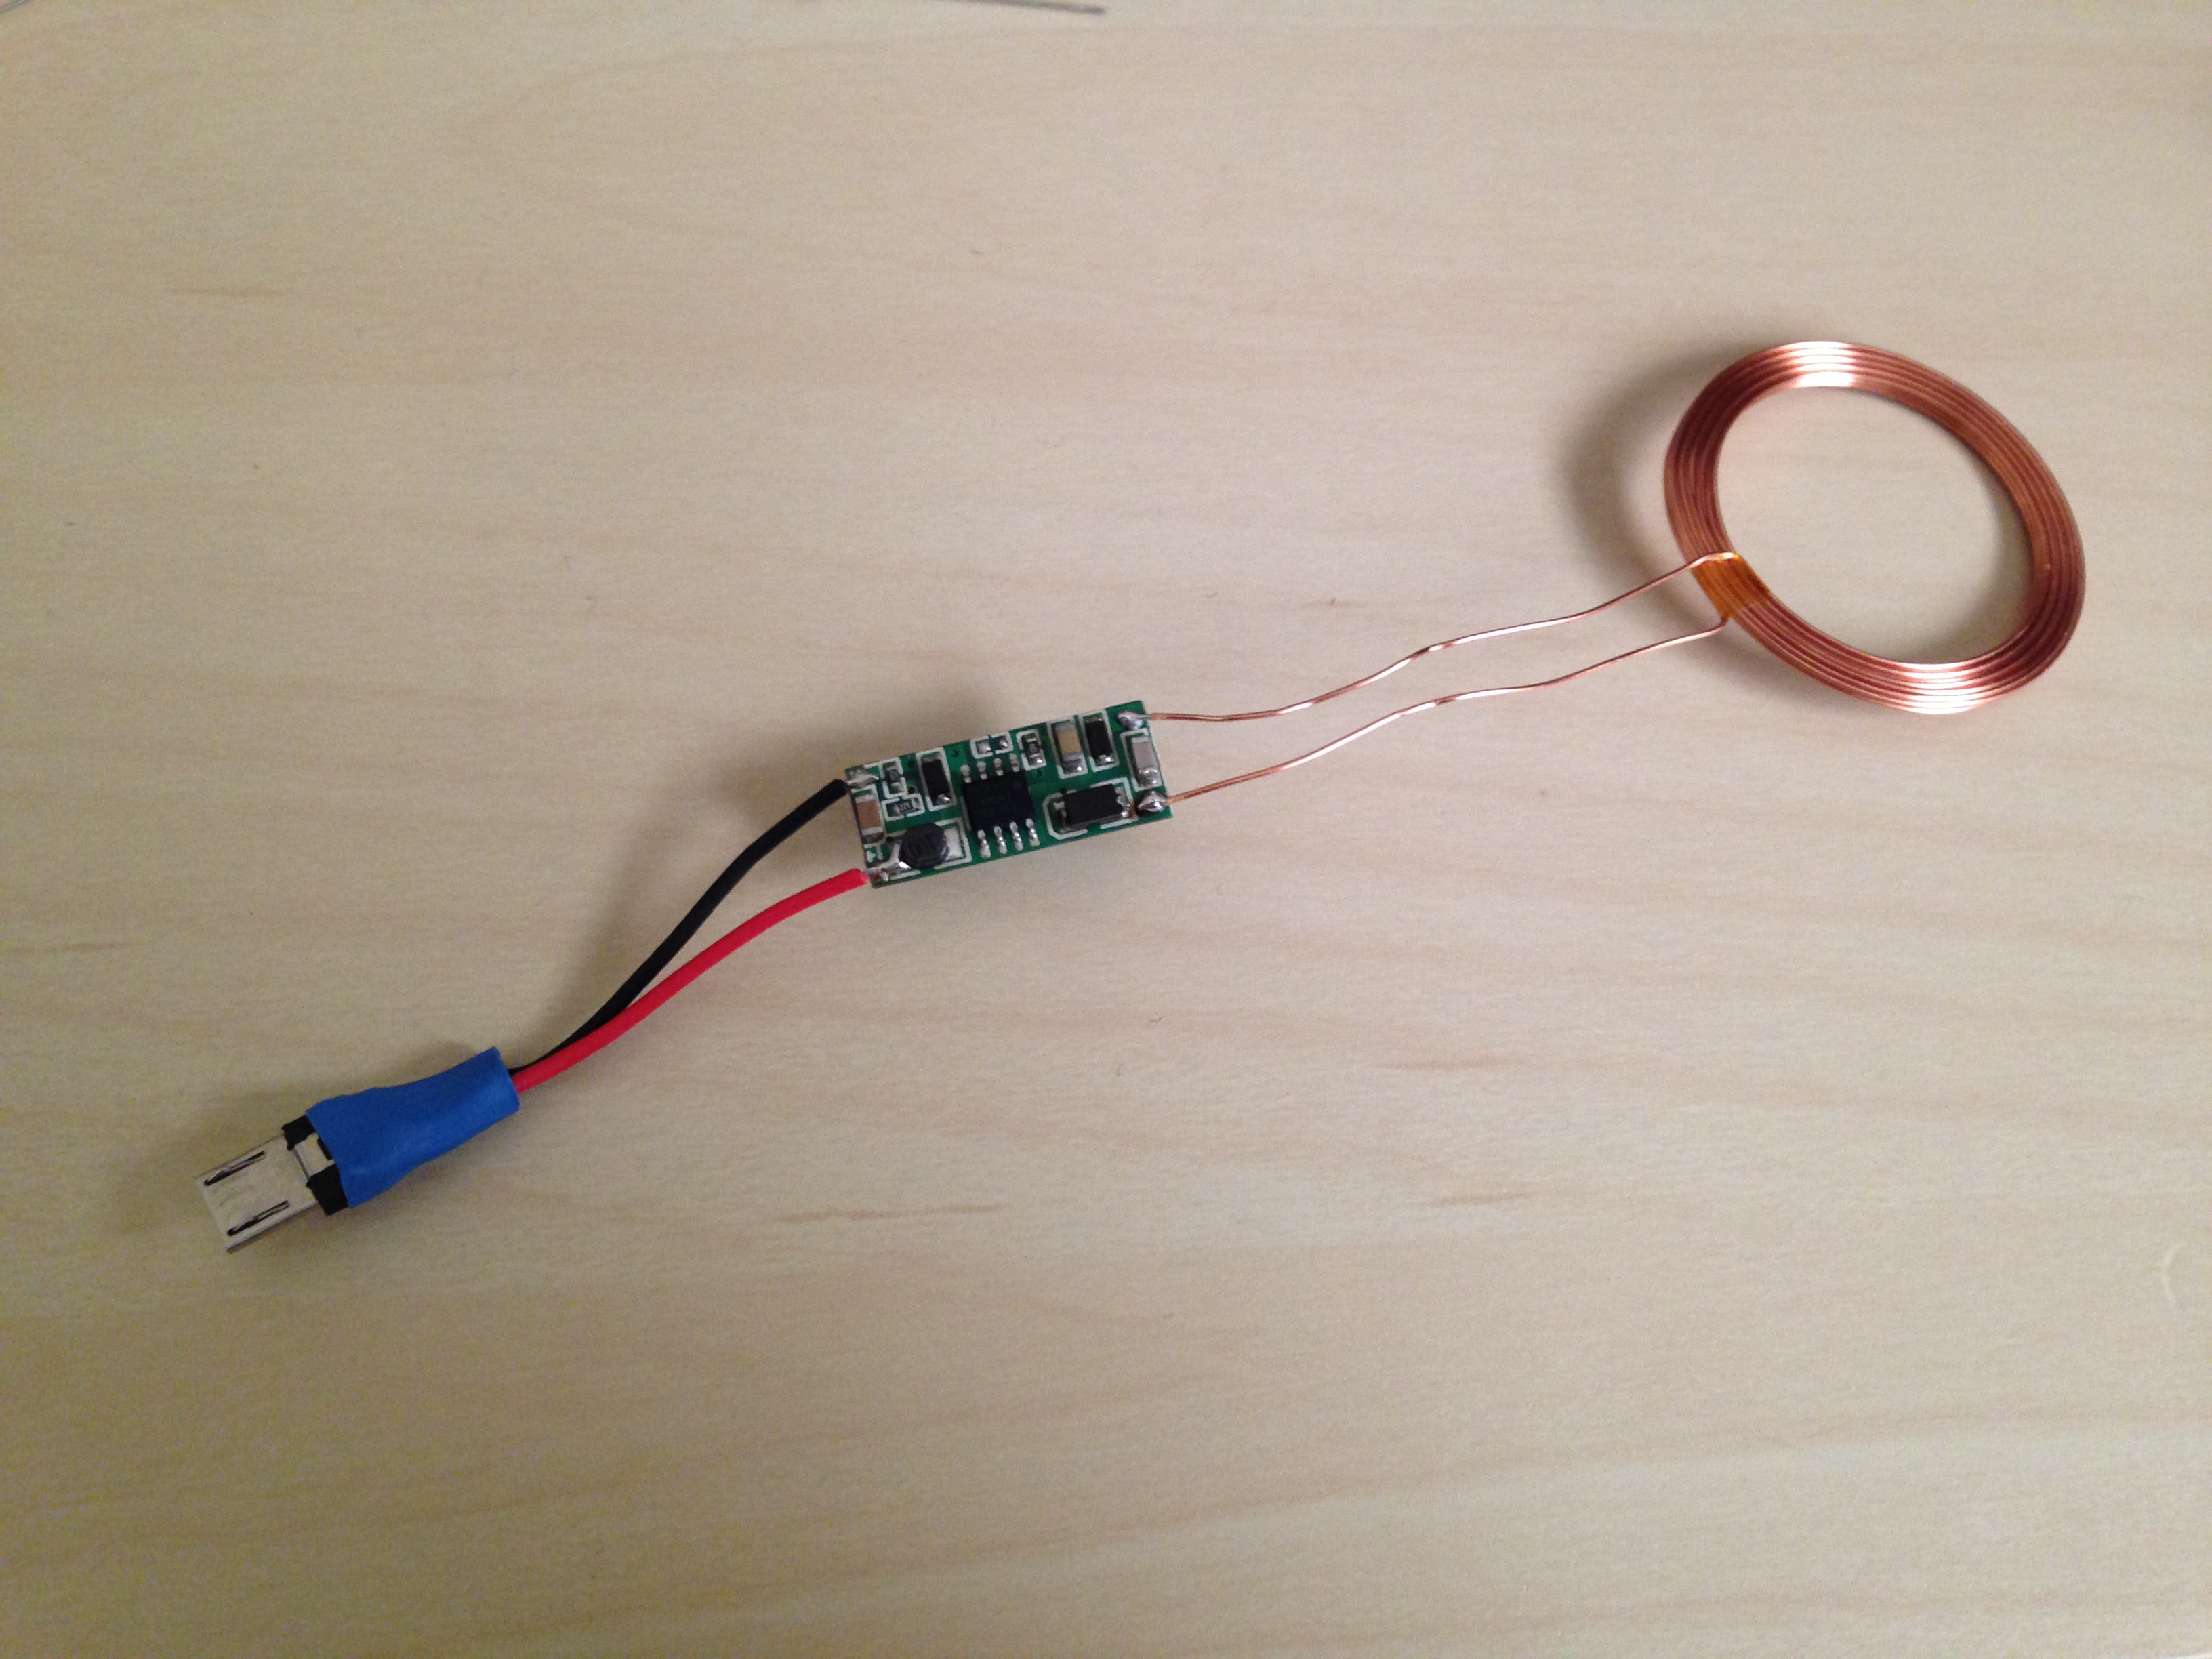
Inductive Charging Circuits
Components may vary, so a multimeter is essential here. For the sake of brevity, I’ll only say this once: CHECK ALL YOUR CONNECTIONS BEFORE AND AFTER SOLDERING. If you’ve never used a multimeter before, have no fear and refer to this handy guide.
Connect the red wire on your inductive charging output to “1” on the micro USB, and black to “5.”

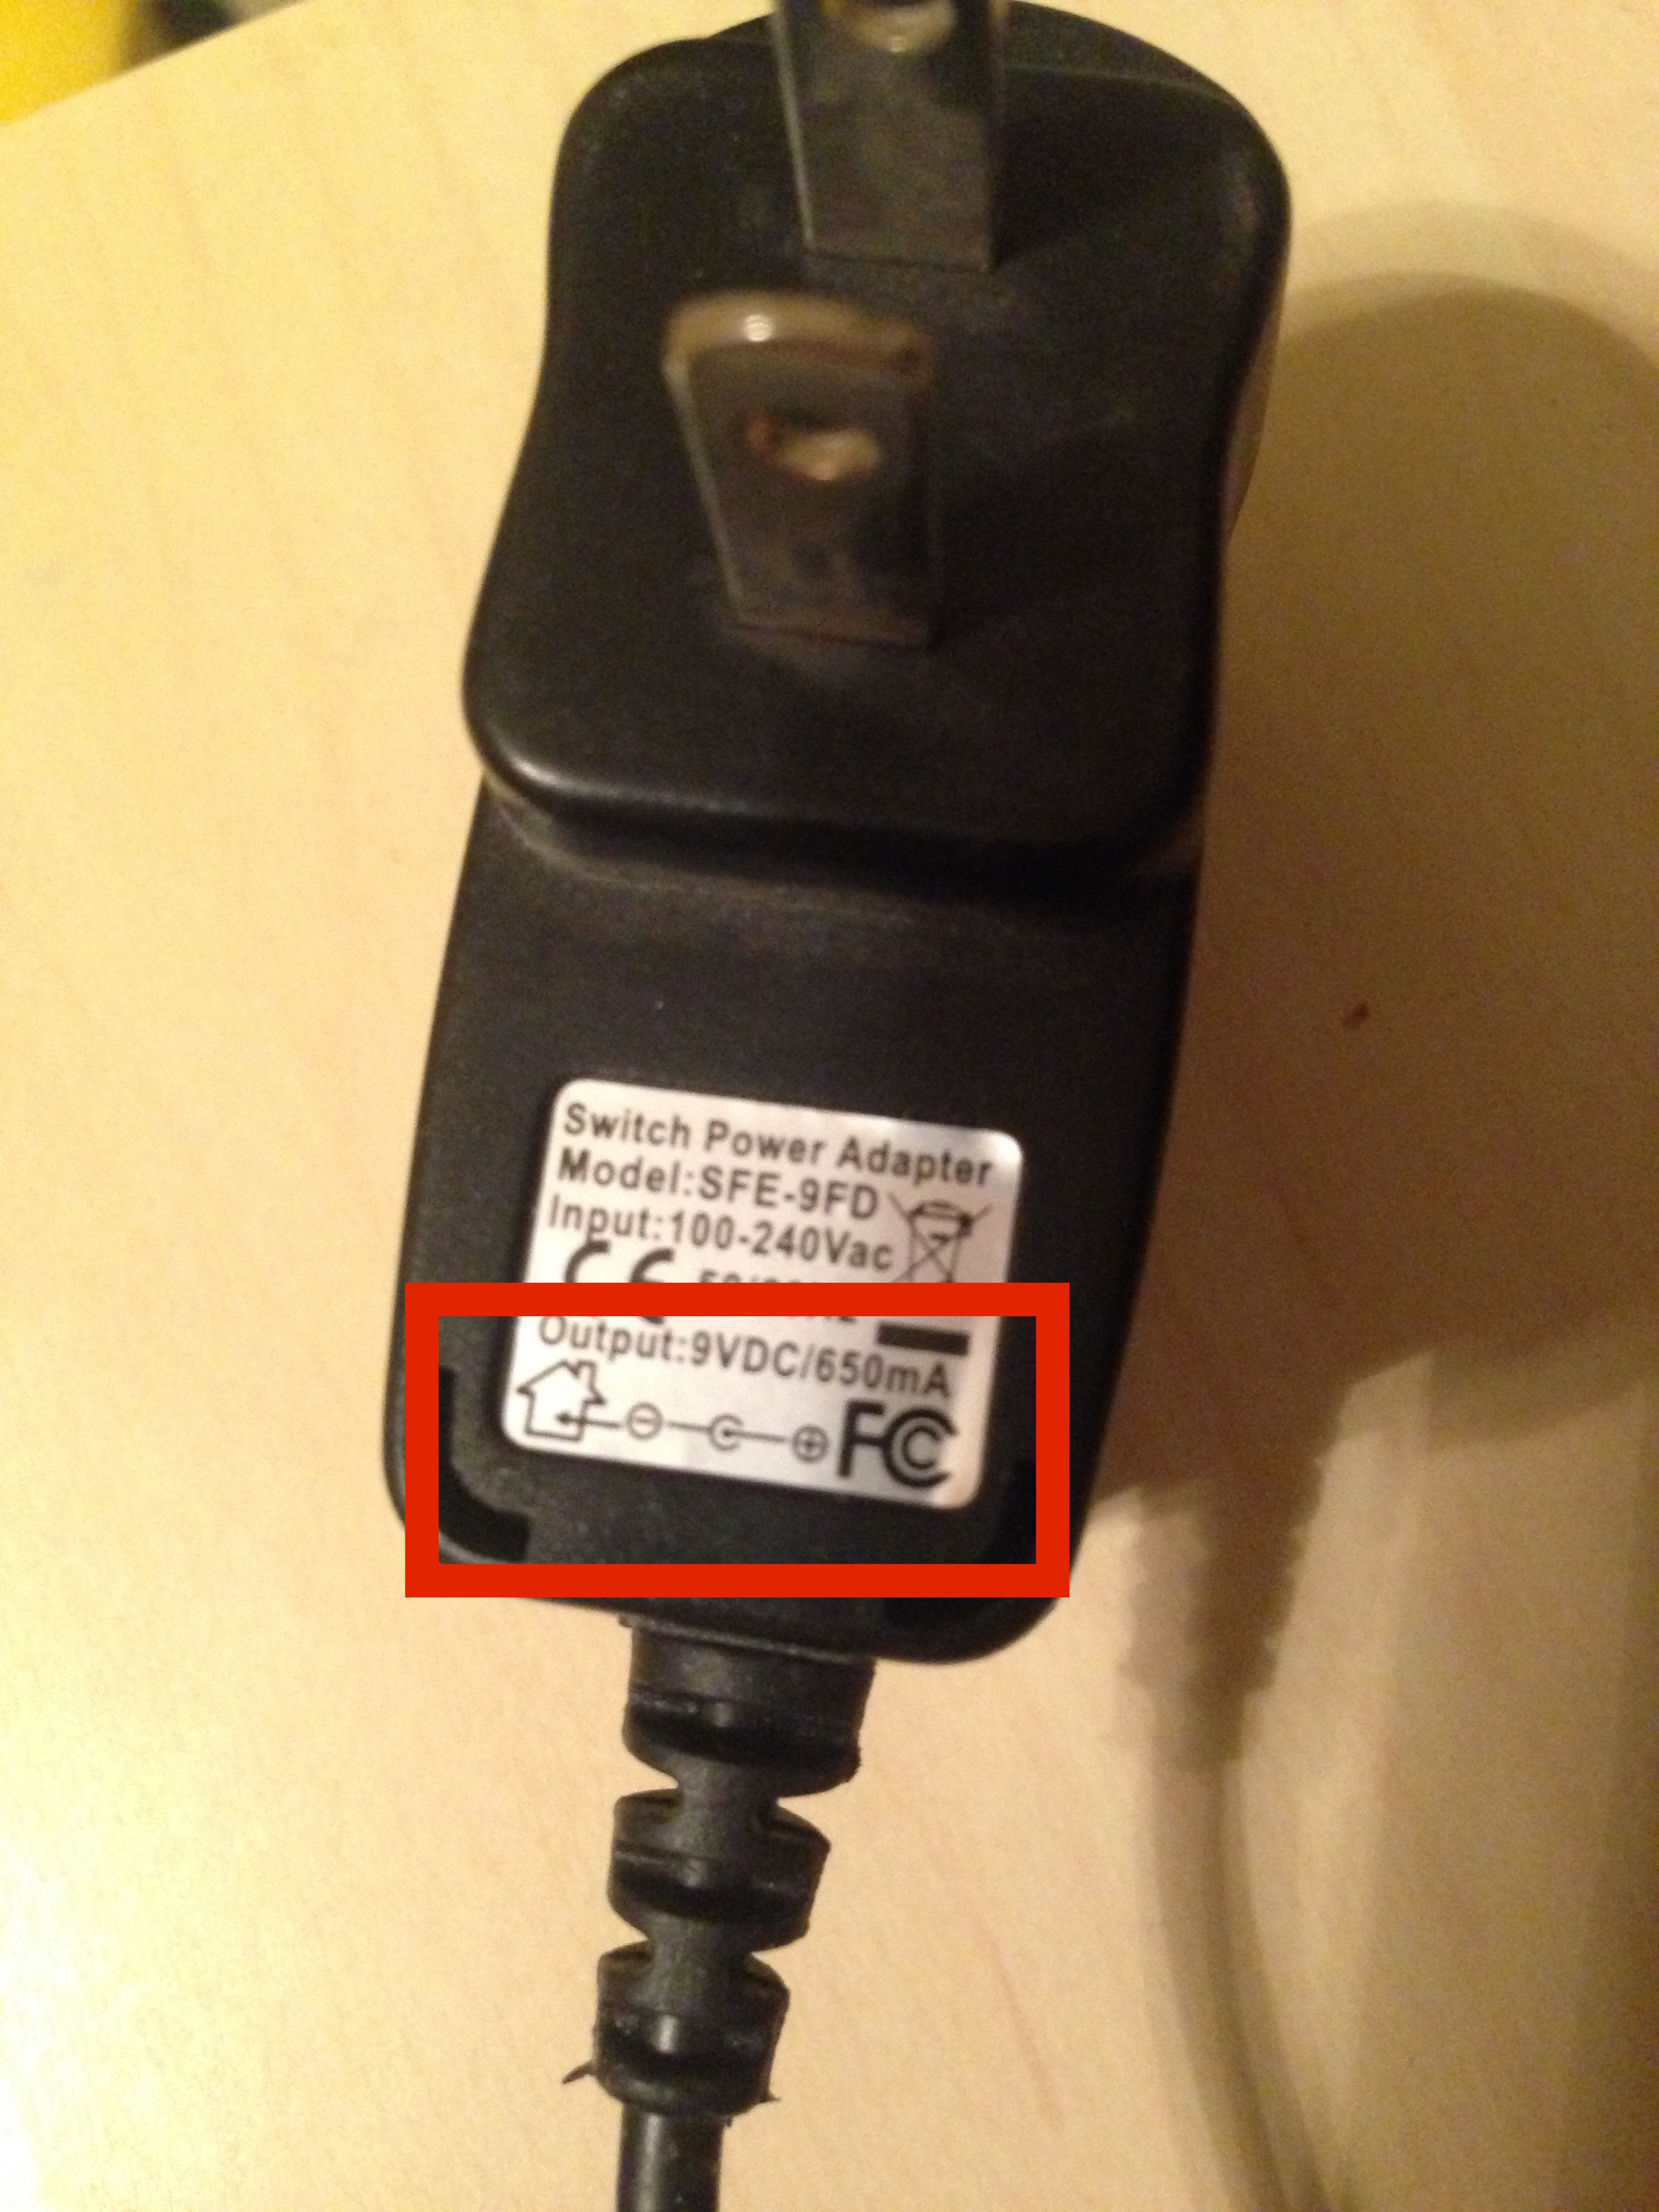
Before wiring the DC barrel jack, check your power adapter to make sure you understand which end is positive and which is negative.
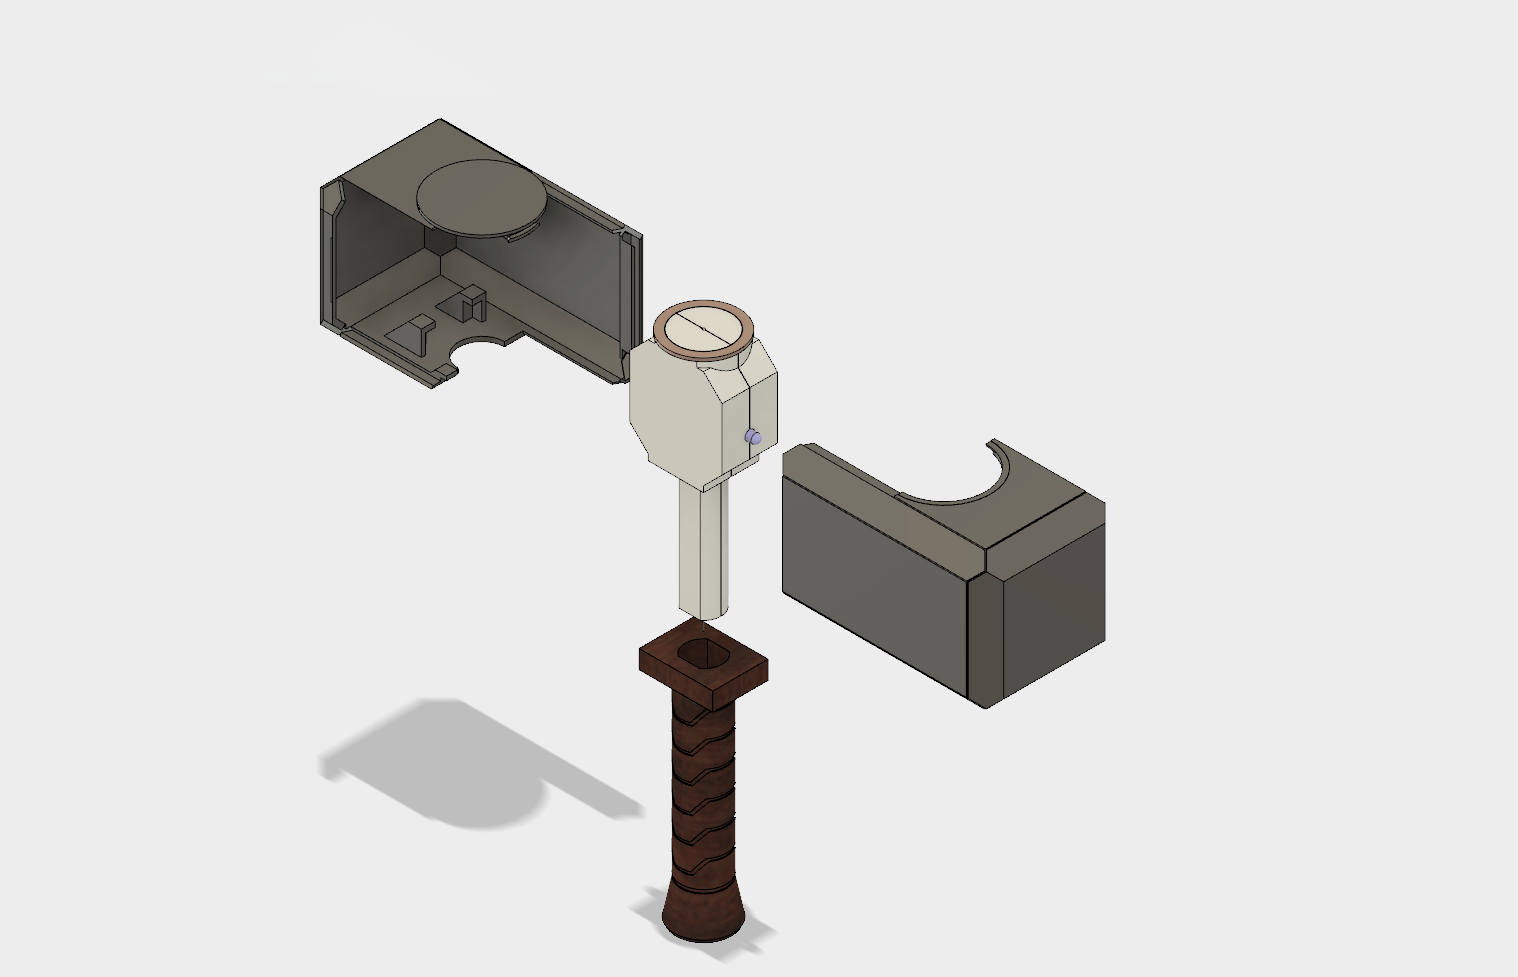
Assemble Mjölnir Internals
Connect the battery and inductive charging parts to the LED circuit, and fit inside (not shown: wires or micro USB).

You may need to maneuver the wires and boards so that they fit properly within. If it helps at all, it was difficult for me to do too. This is the price I pay for giving myself silly benchmarks like, “no supports or screws.”

Assemble Mjölnir
Handle will snugly slide over the internals, and the hammer pieces will snap together.
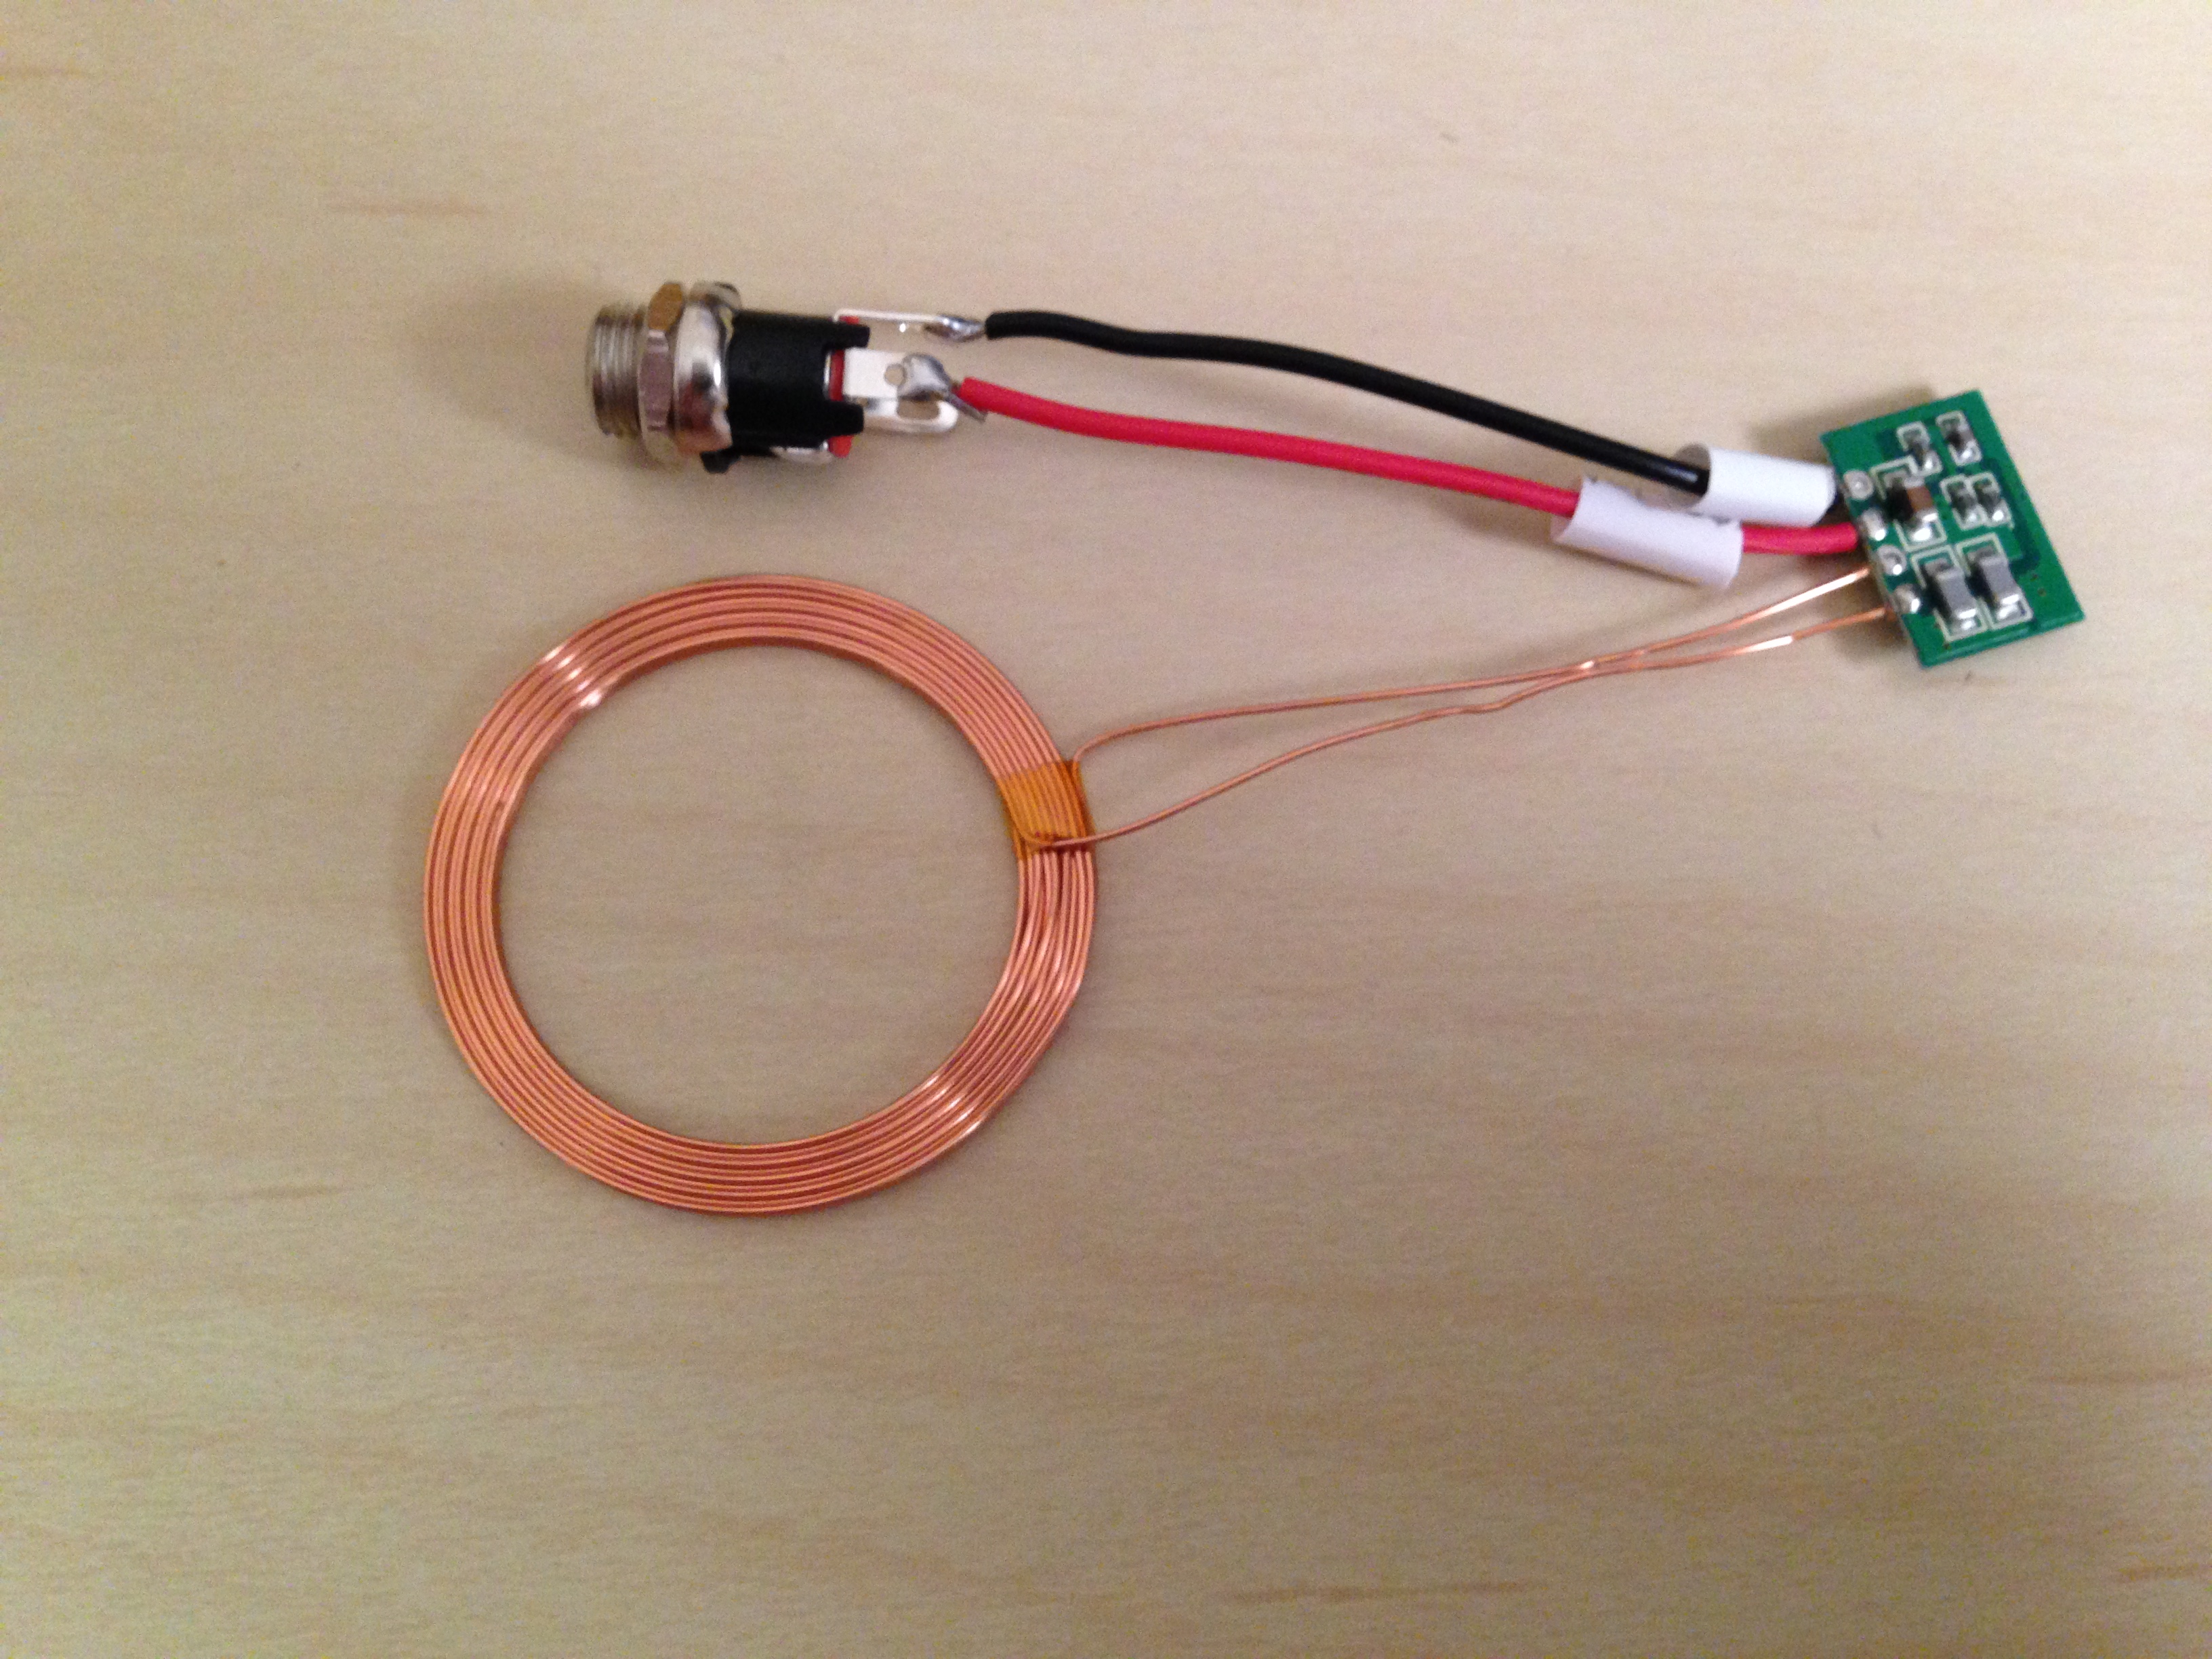
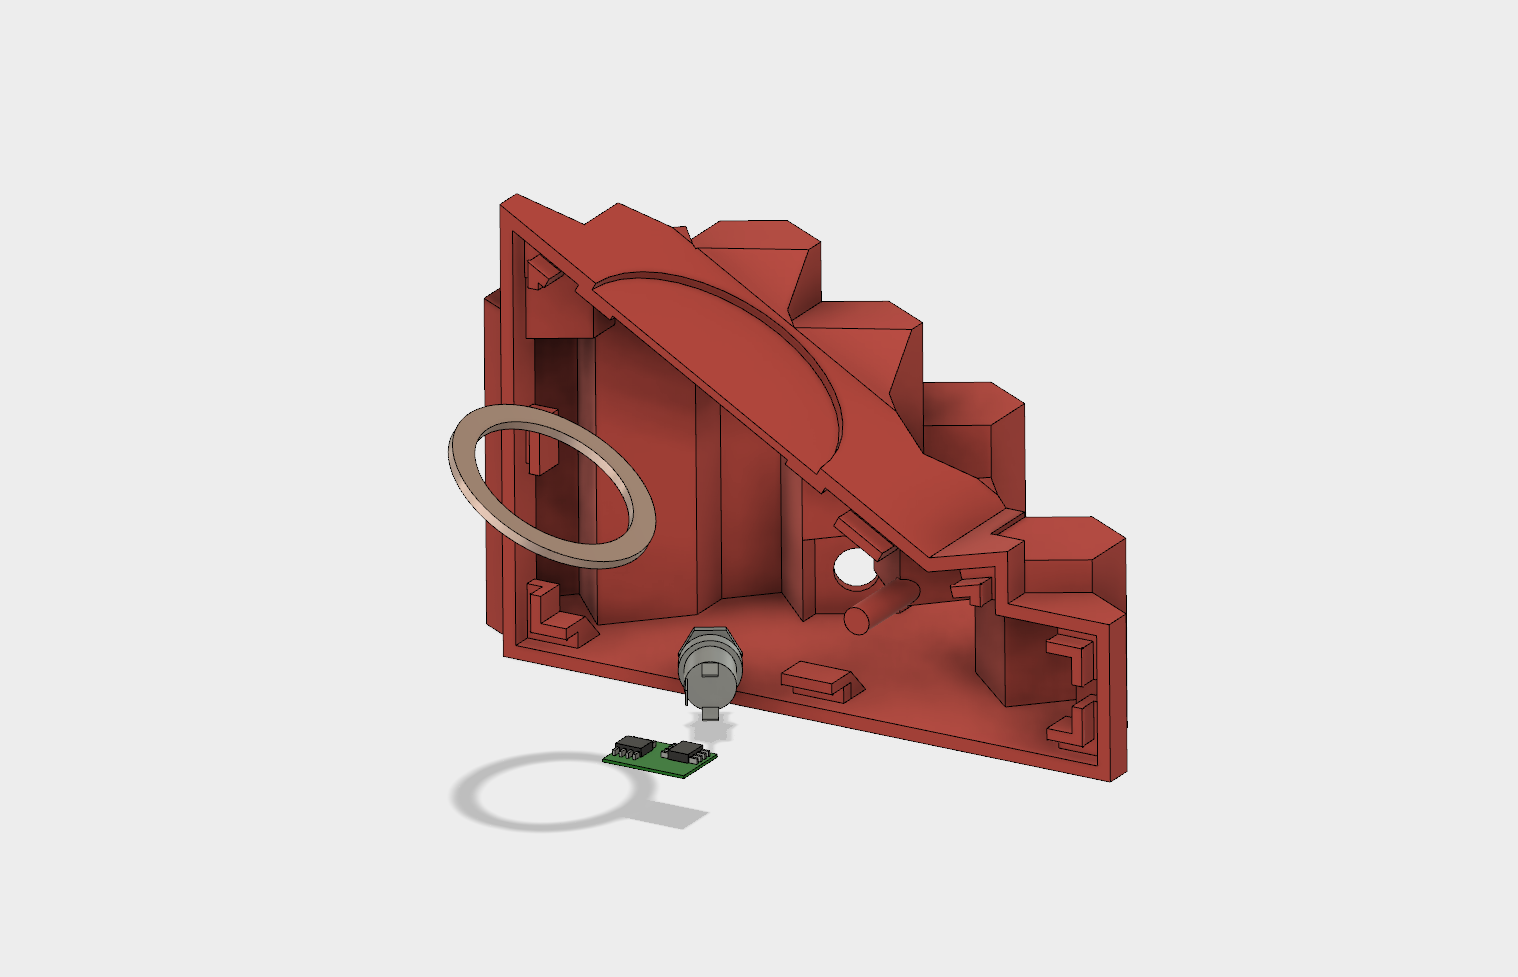
Assemble Charging Station Internals
Slide the induction ring into the slot, and use a small crescent wrench to mount the DC barrel jack to the back side of the charging station.

Assemble Charging Station
Snap housings together with the center piece.

Assemble Ring
Fit magnet inside. This might be a good place for glue if it’s not very snug. Last thing you need is a ring that doesn’t work and an errant magnet. Especially if you’ve got small kids around.

Prove Your Worthiness
Show all your friends that you alone can bring Mjölnir to life! Scoff at their feeble attempts and queries into the secrets of wielding this legendary weapon!
When you run out of power, return Mjölnir to the charging station (make sure it’s plugged in). Be careful to follow proper LiPO Battery practices to prevent damage or overcharging. If you stuck with 15% infill on the hammer housing, you should be able to see a green LED light up inside, indicating the battery is fully charged.
If you enjoy what you see here and want to keep updated on projects and posts, give me a follow on twitter @DragonMtnDesign. Have a question or comment? Leave those below. If you really enjoyed this, consider donating on my Cults3D page… you know, for Asgard?
.
.
.
March 2020 UPDATE: Files are available here! Click the Download button below for a zip file.
Files are available under the Creative Commons BY-NC-SA license.
1 Comment