RoboKitty

Life, uh… finds a way…
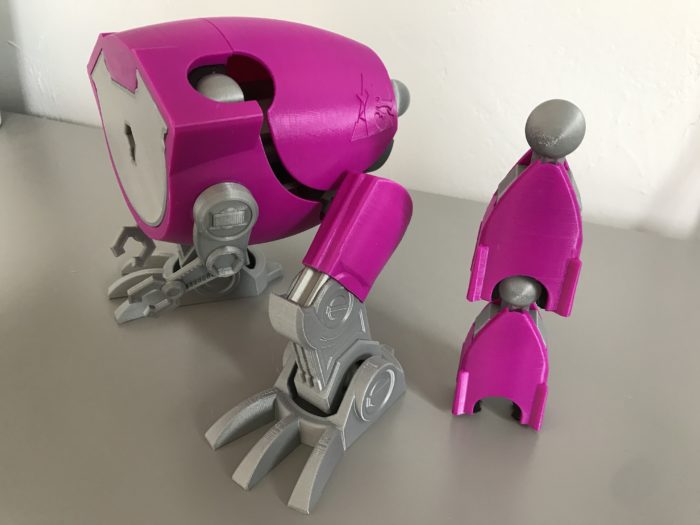
Parts List:
Missile Launcher – Dragon Mountain Design (x2)
Helpful Tools:
3D Printer (or printing service capable of using flexible materials)
SUPERTite Multi-Grab 360 (Switching to this adhesive from E6000 as it is less of a toxic hazard)
1. Print Out Parts
Files are exclusive to MyMiniFactory
March 2020 UPDATE: Files can be downloaded directly from this site at the bottom of the page. They are also available on Prusa Printers!
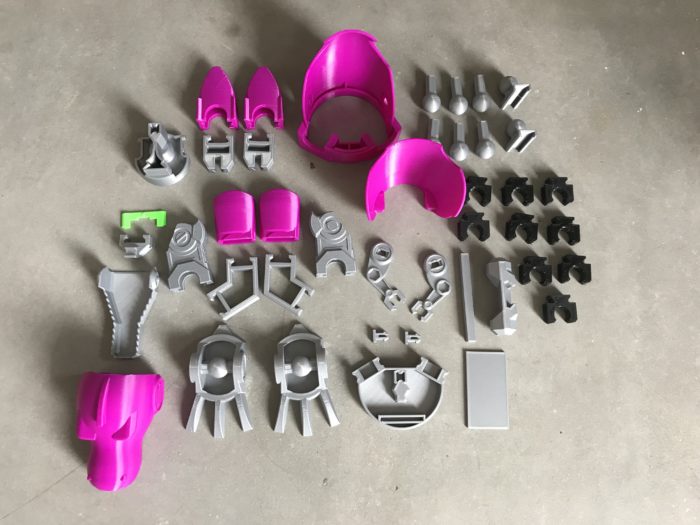
There are a lot of parts. Take notes:
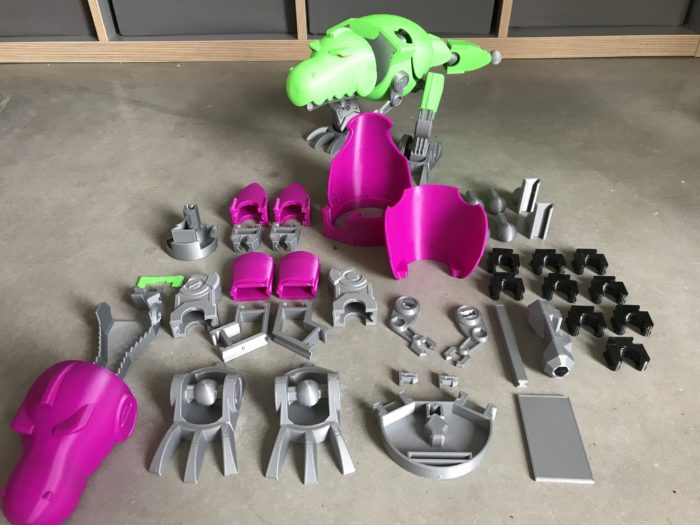
DMD-Ball (x6), RK-BlasterBall (x2), RK-Head
Material: PLA
Infill: 20%
Supports: Yes. Those overhangs on the head are no joke
Brim: Yes.
RK-BackPanel, RK-BellyPanel, RK-Hips, RK-UpperLegCover (x2), RK-LowerLegCover (x2), RK-TailCover (x2), RK-Eyes
Material: PLA
Infill: 20%
Supports: No
Brim: Yes. Areas touching build-plate are thin.
RK-Backside, RK-Foot (x2), RK-HeadAdapter, RK-Jaw, RK-Leg (x2), RK-Shoulders, RK-TailLink (x2)
Material: PLA
Infill: 20%
Supports: No.
Brim: Recommended. Possibly not necessary, but it was cold out in my workshop when I was printing mine and didn’t want to take unnecessary risks.
RK-ArmPin (x2), RK-RightArm, RK-LeftArm, RK-Ribs, RK-Spine
Material: PLA
Infill: 20%
Supports: No.
Brim: No.
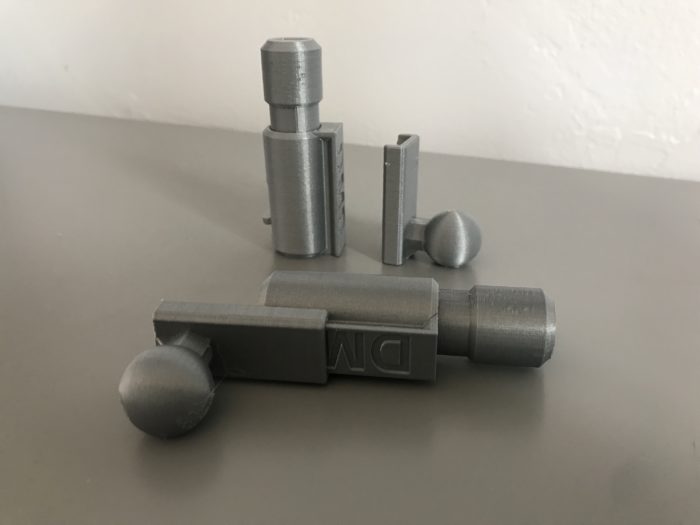
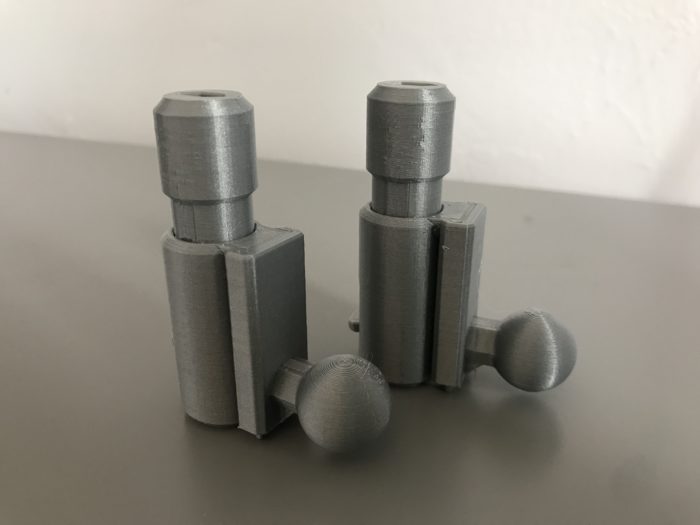
DMD-Socket (x9)
Material: Matterhackers PRO Flex (same as NinjaFlex SemiFlex)
Infill: 20%
Supports: No.
Brim: No.

**Also, if you’ve been looking to create something with ball/socket joints and like what I’ve started here, or if you need to make adjustments to the joints for your preferred fit, you can download the Fusion 360 file HERE.**
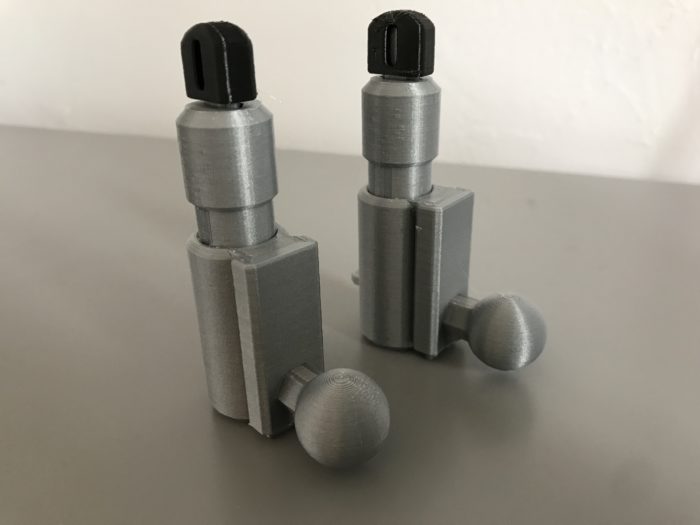
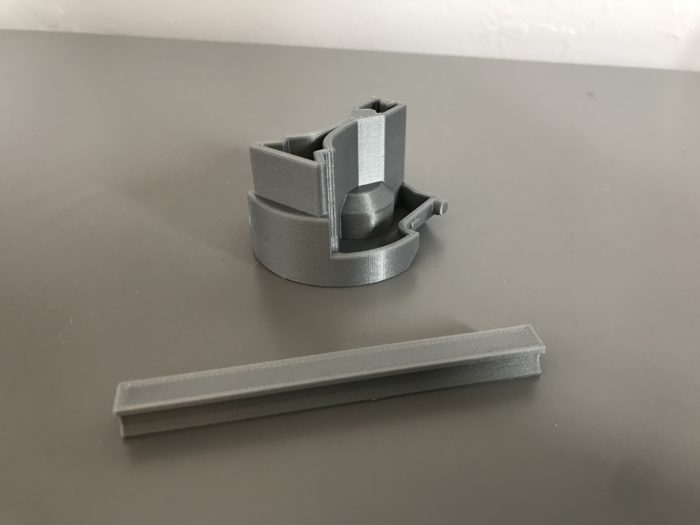
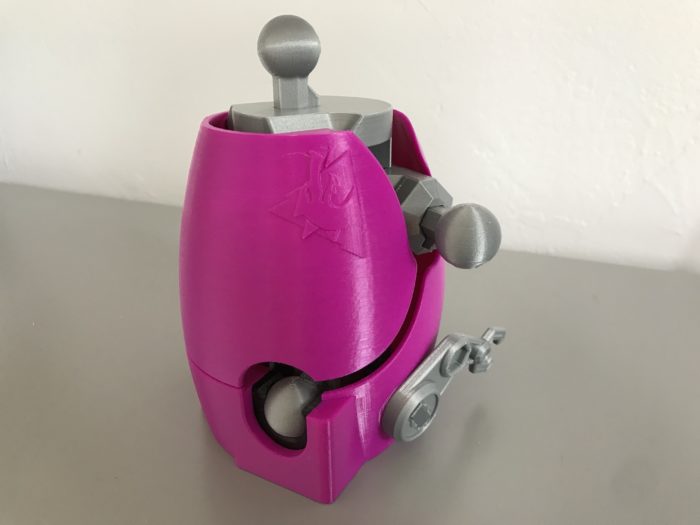
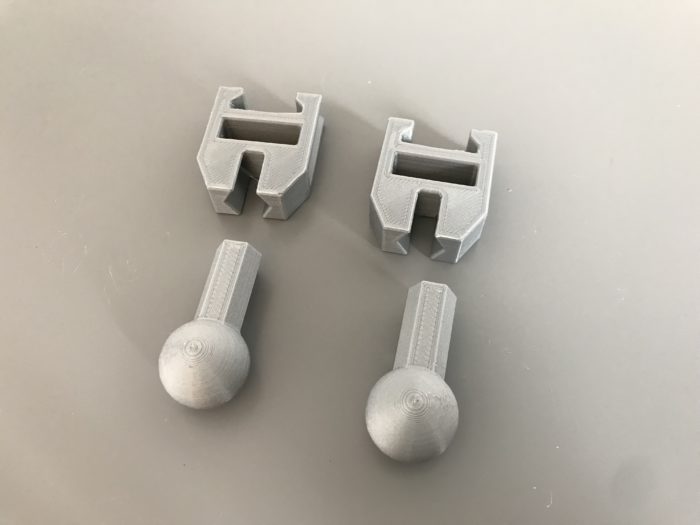
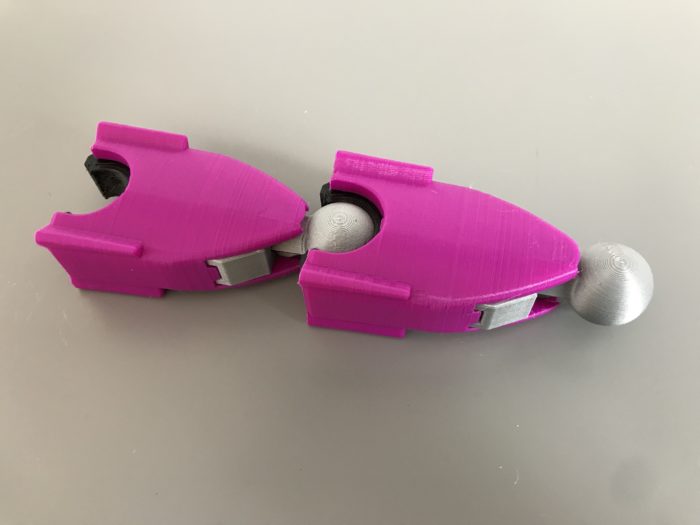
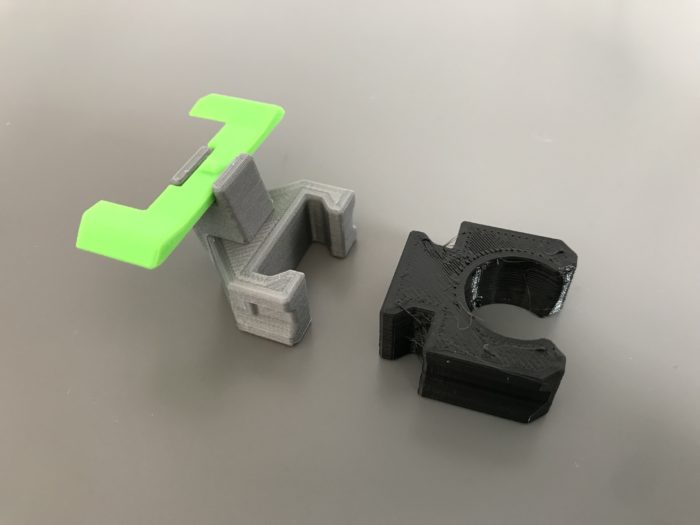
2. Blasters
Press-fit missile launchers into RK-BlasterBall as shown (x2). Use a little glue if necessary.
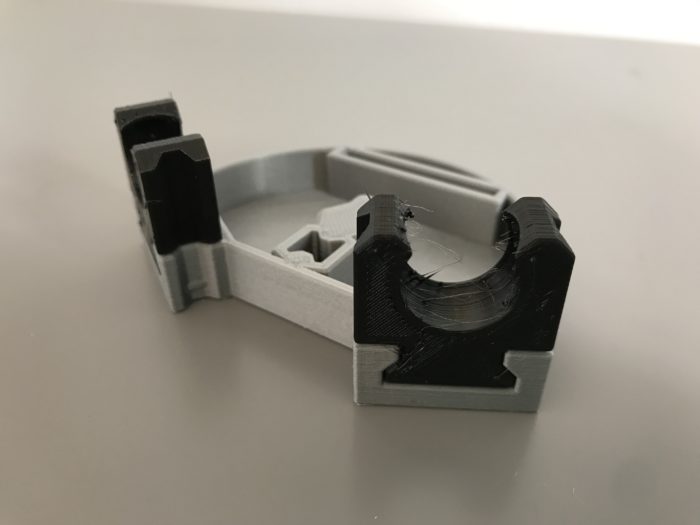
3. Arms
Press RK-ArmPin into RK-LeftArm and RK-RightArm as shown.

Press the arm assemblies into the corresponding holes of RK-BellyPanel. When assembling, make sure to orient the RK-ArmPin parts so that the snaps exert their force parallel to the printing layers. Forcing them in perpendicular may cause delamination of the part in that area.
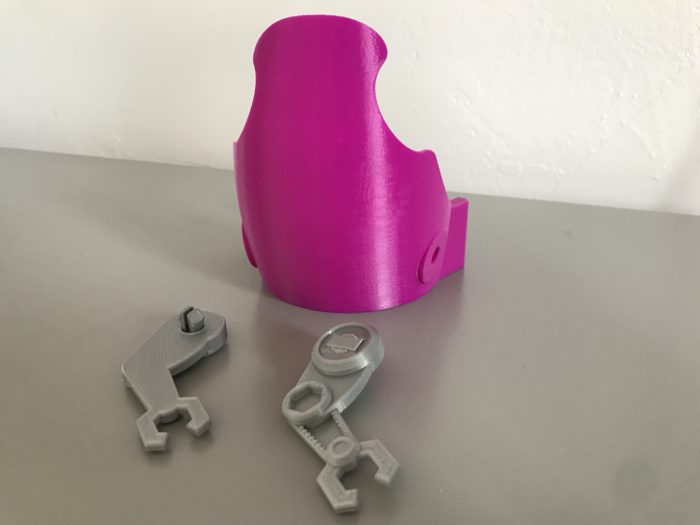


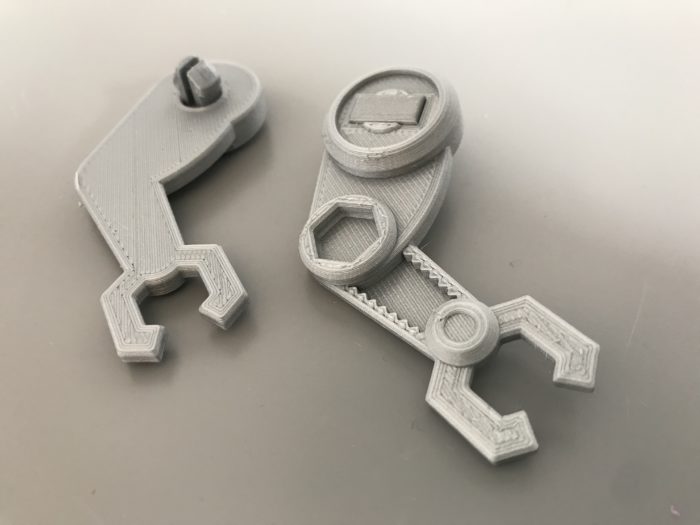
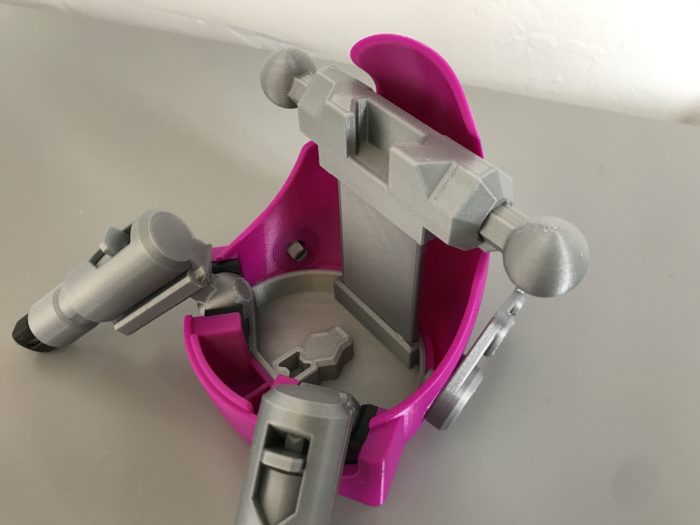
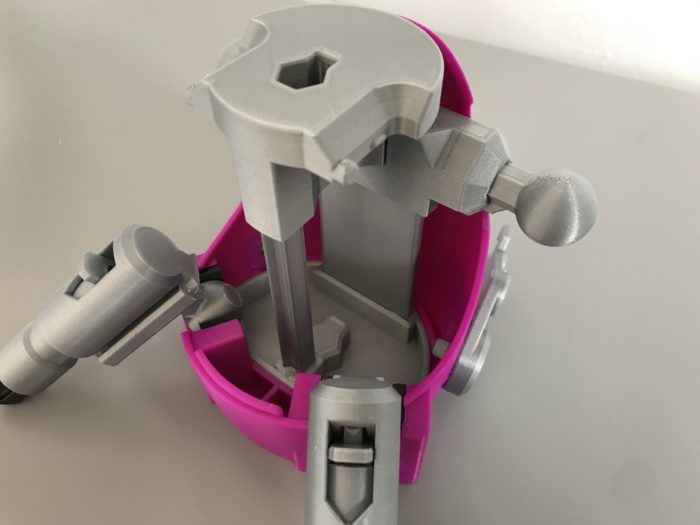
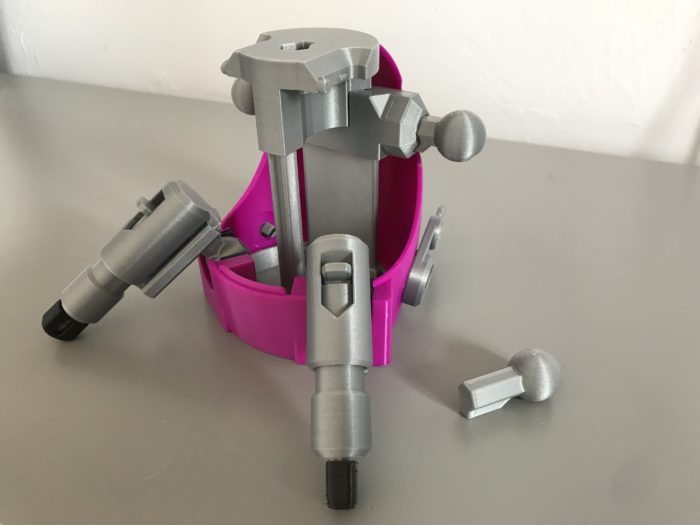
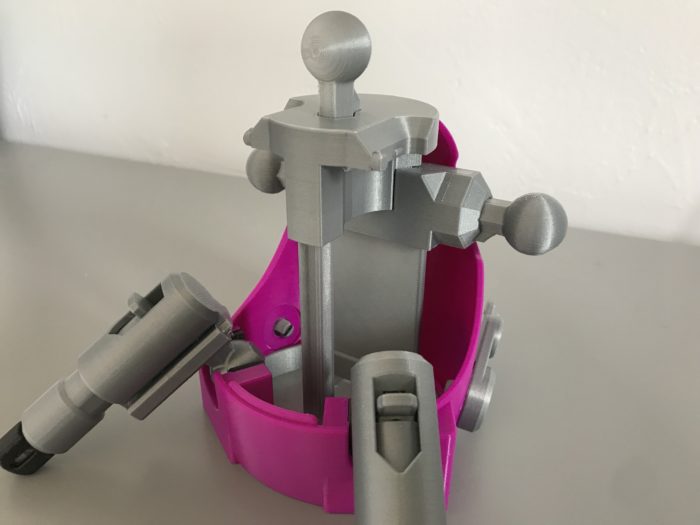
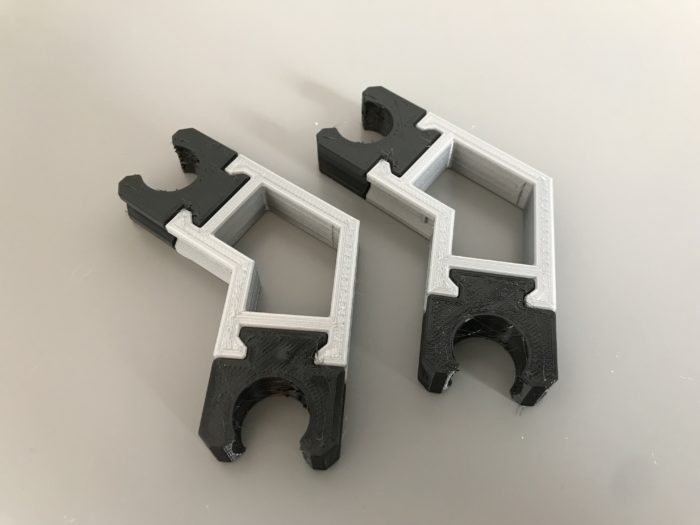
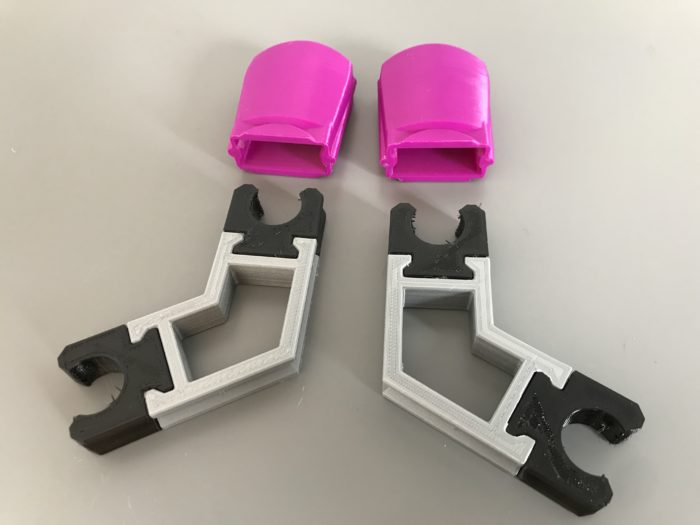
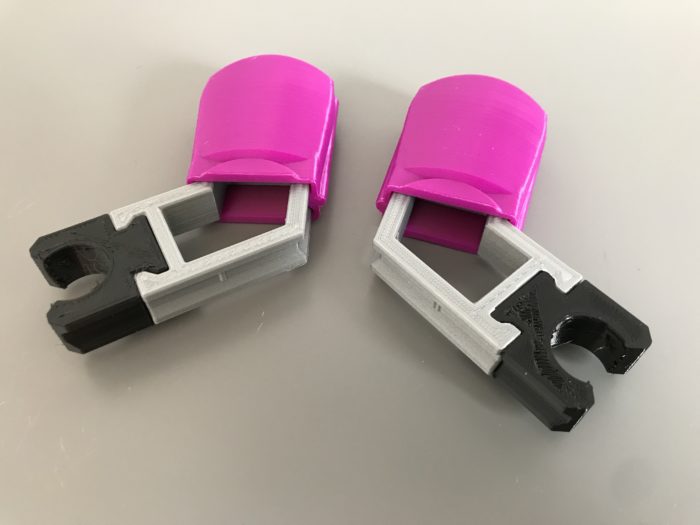
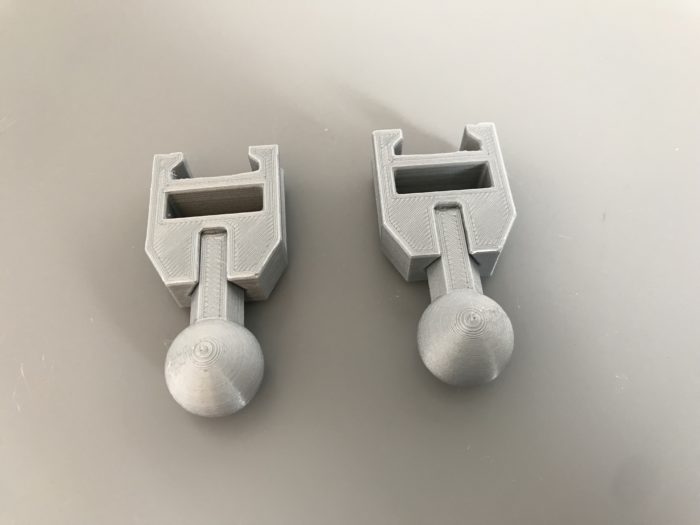
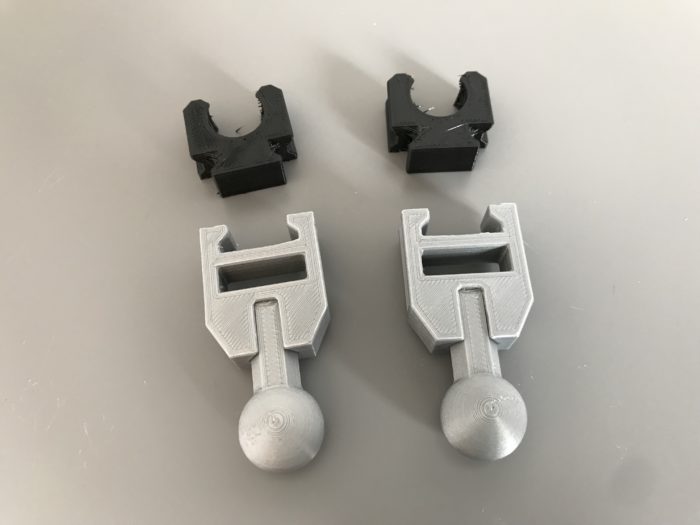
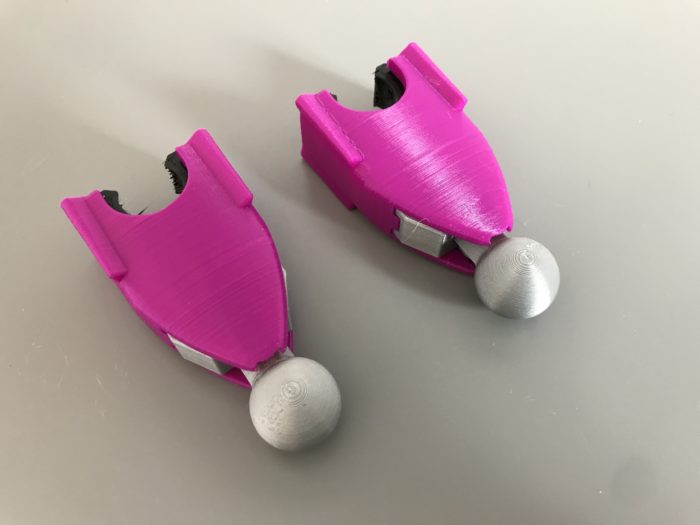
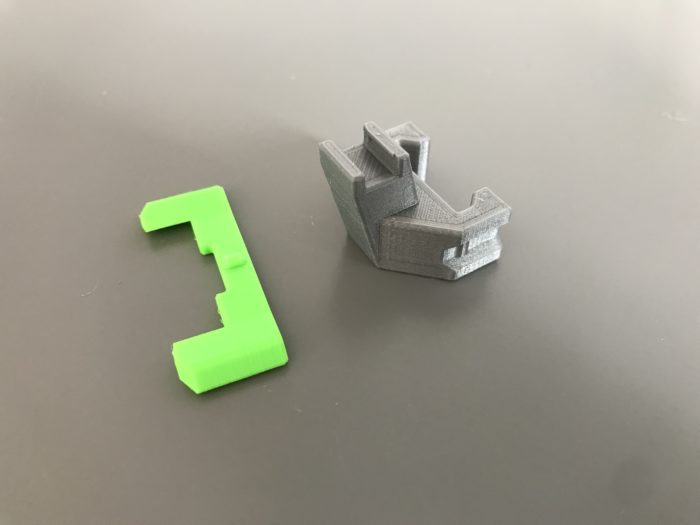
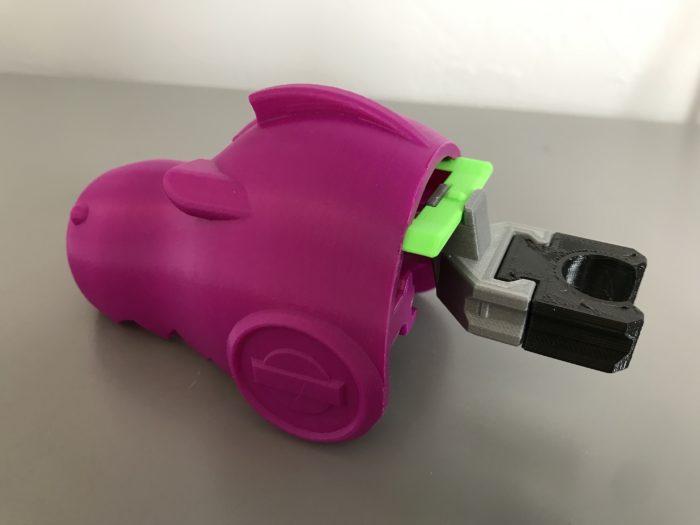
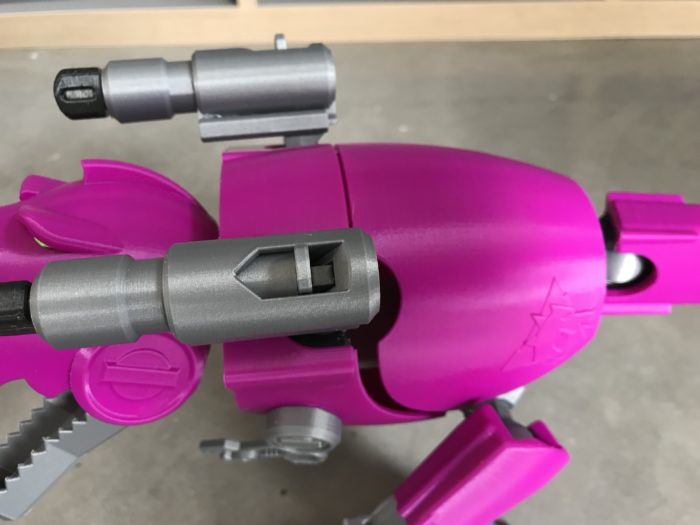
4. Shoulders
Fit DMD-Socket into RK-Shoulders (x2) as shown.

Insert the shoulder assembly into the belly panel assembly as shown. Parts will snap together when fully assembled.


Using a back-and-forth rotational motion while applying force inward, fit the blaster ball into the socket of the shoulder assembly (x2).


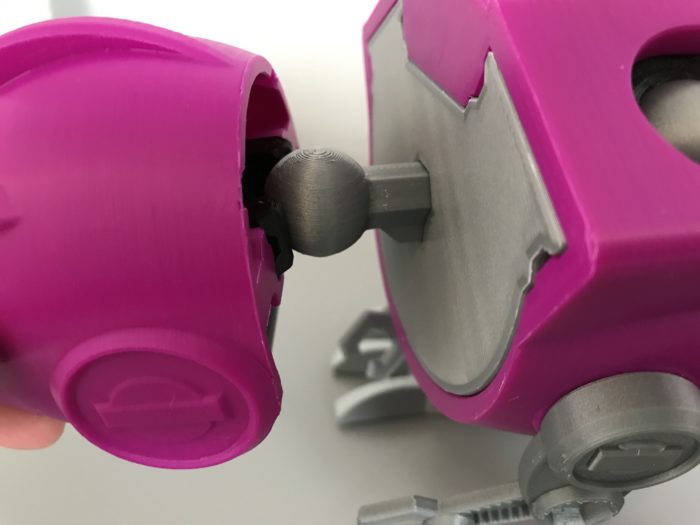
5. Hips
Press-fit DMD-Ball into RK-Hips as shown (x2). Use a little glue if necessary.


Press-fit RK-Ribs into the assembly as shown. Use a little glue if necessary.


Press-fit the hip assembly into the shoulder assembly as shown. Use a little glue if necessary.

6. Backside
Press-fit RK-Spine into RK-Backside as shown. Use a little glue if necessary.

Press-fit the backside assembly into the hip and shoulder assembly as shown. Use a little glue if necessary.

Press-fit DMD-Ball into the backside assembly as shown. Use a little glue if necessary.
Attach RK-BackPanel to the pins of RK-Backside and ensure it can open and close securely.


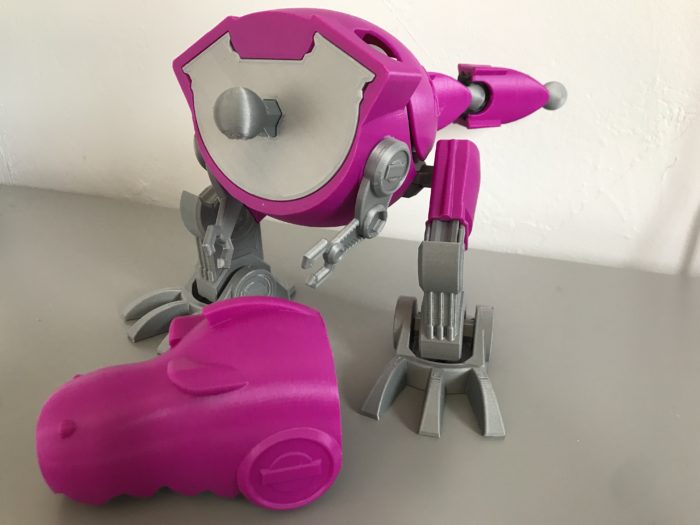
7. Legs
Fit DMD-Socket into both sides of RK-Leg (x2).

Slide RK-UpperLegCover onto one side of the leg assembly until it snaps into place (x2). Legs should mirror each other.
Slide RK-LowerLegCover onto the opposite side of the leg assembly until it snaps into place (x2).


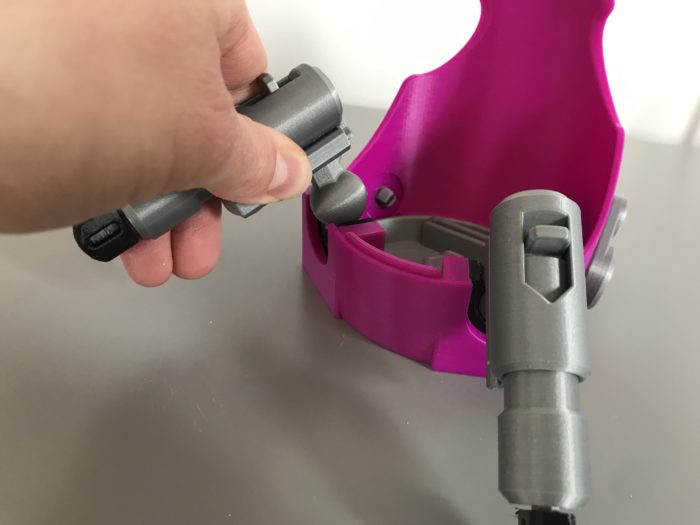
Using a back-and-forth rotational motion while applying force downward, attach the leg assemblies to RK-Foot (x2).


Using a back-and-forth rotational motion while applying force together, connect the leg assemblies to the hip assembly as shown (x2).


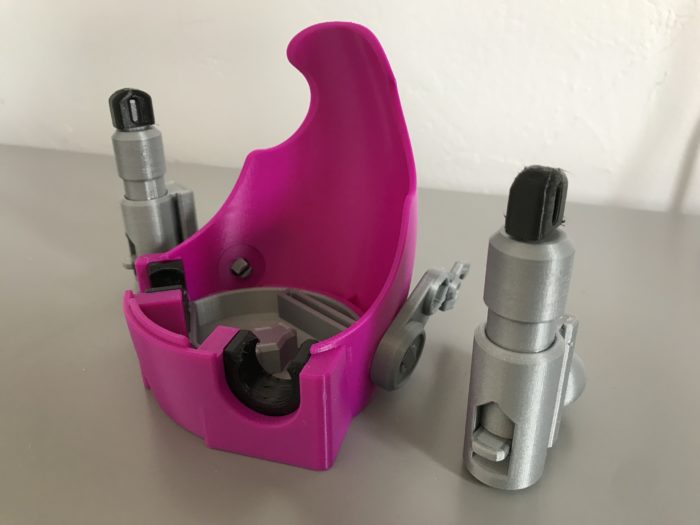
8. Tail
Press fit DMD-Ball into RK-TailLink (x2). Use a little glue if necessary.
Fit DMD-Socket into the tail assembly as shown (x2).

Slide RK-TailCover over the tail assembly until it snaps into place (x2).

Using a back-and-forth rotational motion while applying force together, connect the tail pieces together and to the backside assembly as shown.
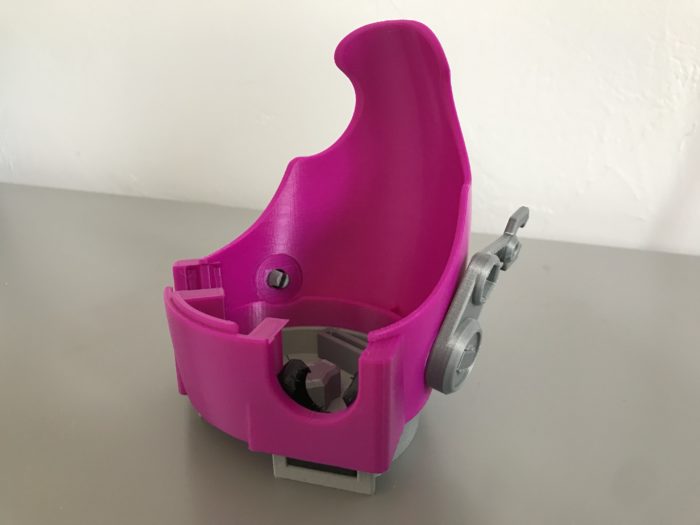
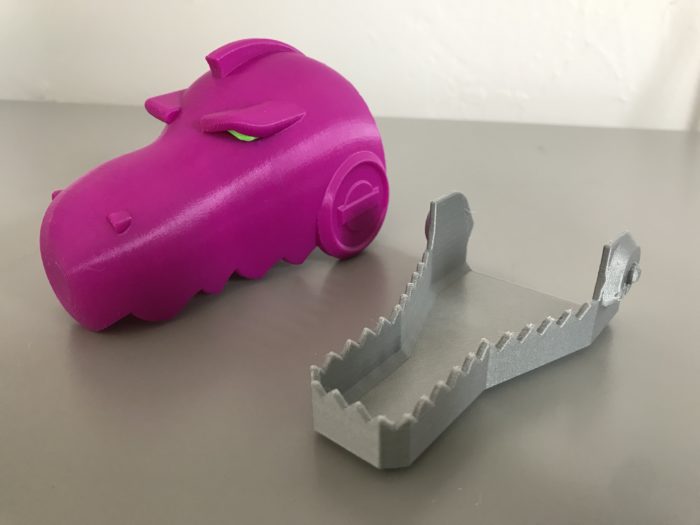
9. Head
Press-fit RK-Eyes into RK-HeadAdapter as shown.

Fit DMD-Socket into the head assembly as shown.

Slide RK-Head over the head assembly until it snaps into place.


Attach RK-Jaw to the head assembly as shown. Jaw will be able to hold three positions if assembled correctly.


Press-fit DMD-Ball into the shoulder assembly as shown. Use a little glue if necessary.


Using a back-and-forth rotational motion while applying force together, connect the head assembly to the rest of the assembly as shown.

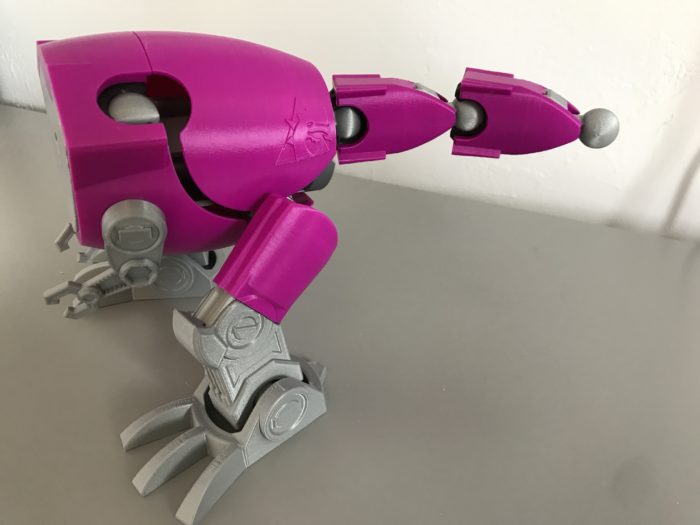
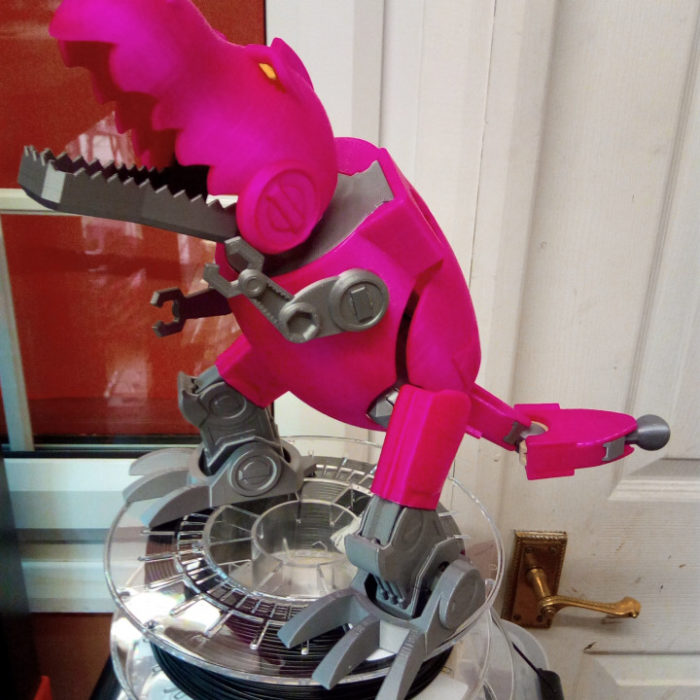
10. Dominate
Unleash your RoboKitty and vanquish all those who would oppose you!


Yeah, About That Name…
I realize it makes zero sense without context, so here’s the story:
When my daughter was a year and a half, every time we’d be in the toy aisles of Target, she’d gravitate toward this roaring and chomping T-Rex toy, plunk down in the aisle, and play with it. Obviously we got it for her that Christmas.
She named this ferocious dino “Kitty” and it was her baby.
No, I’m serious. She’d feed her, change her diaper, rock her to calm her down when she was upset, and put her to bed. This only increased a year later when we explained to her that she’d be a big sister.
More time has passed, and now that my son is around the same age, I knew I needed to get moving on this project so that he can join in the fun with another Kitty and they can play together with both. So far it’s working… I think.

My daughter loves the fact that she has a Kitty AND a RoboKitty, and my son gets the biggest grin on his face and roars whenever he opens RoboKitty’s mouth.
It gives me the greatest feeling.
Anyway, if you like what you’re seeing here, leave me a comment below, follow me on Twitter @DragonMtnDesign, or say hello to u/DragonMountainDesign if you see me around on Reddit.
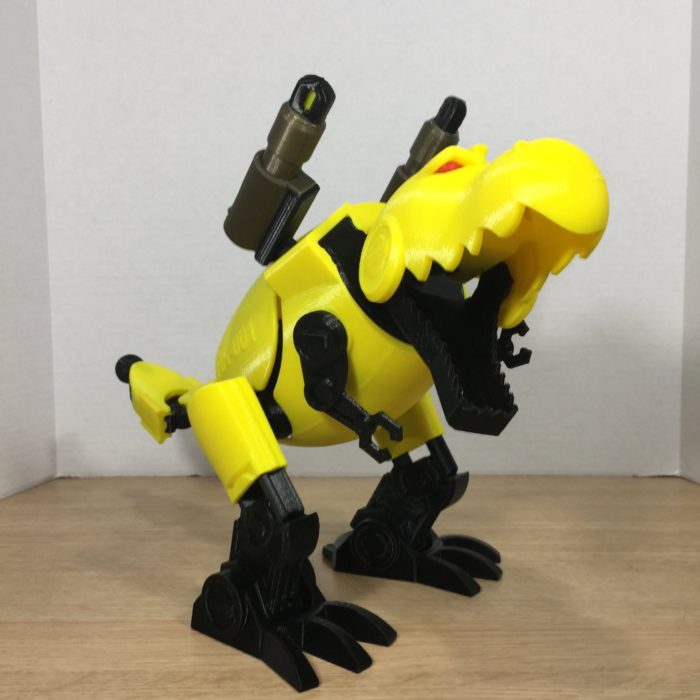
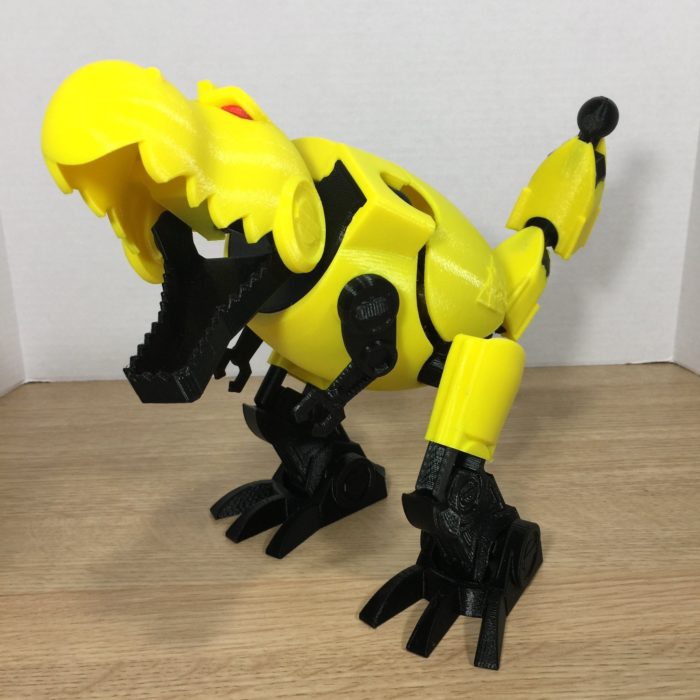
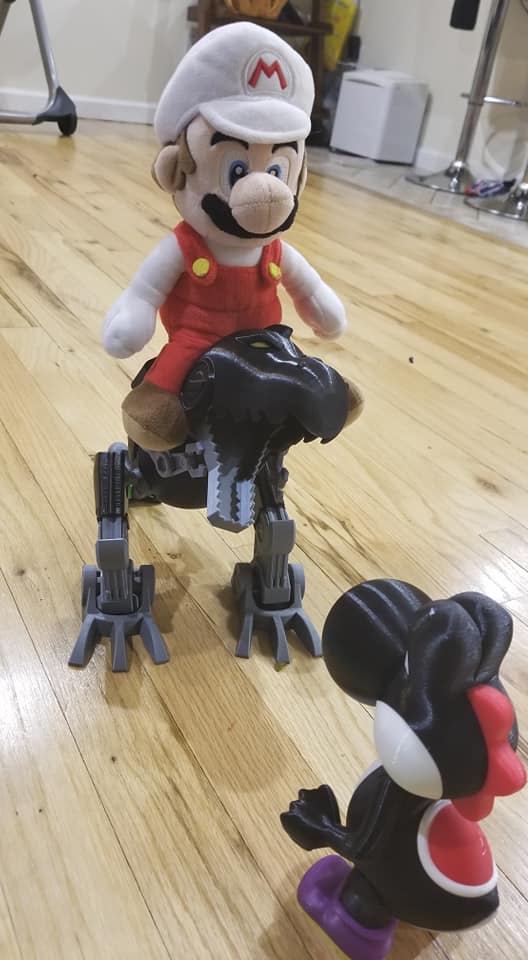
In The Wild
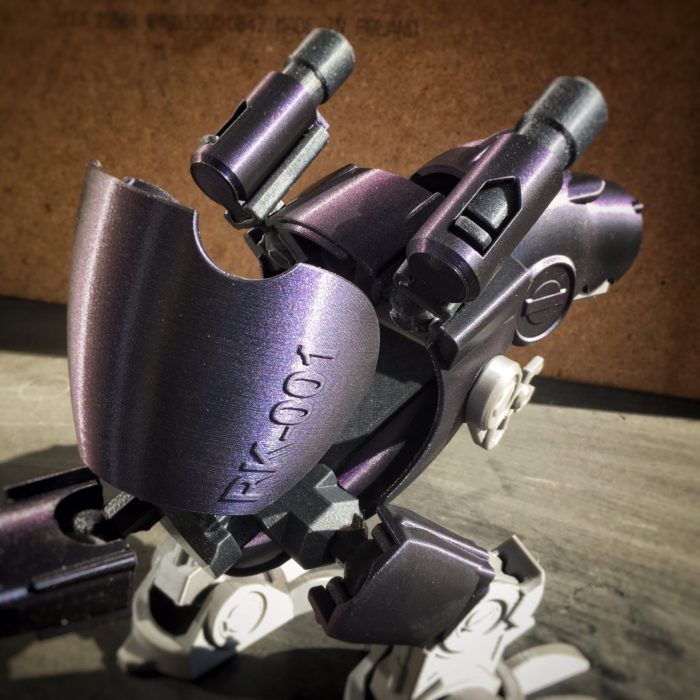
MyMiniFactory user severeon


MyMiniFactory user NeilHengist

MyMiniFactory user MrMechFace

MyMiniFactory user WastedNerd
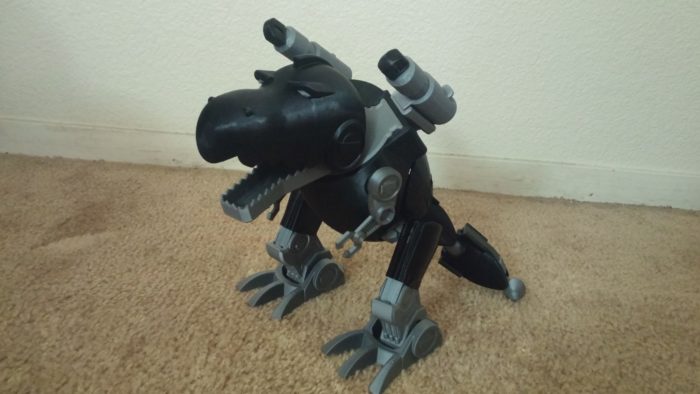
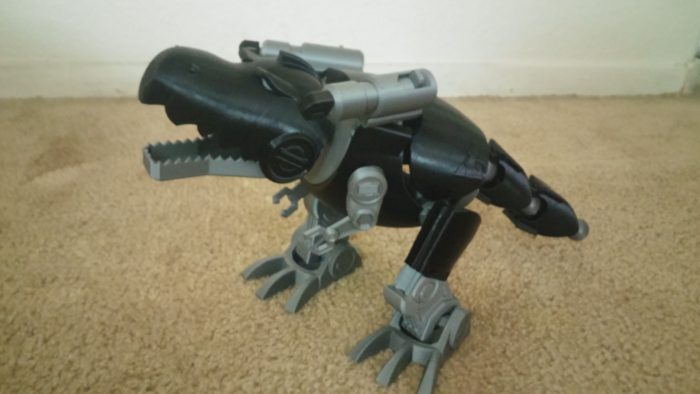
Reddit user u/Zorbick


@Print3DChannel on Twitter


Print 3D Channel also posted a great video to YouTube!
@grafitomi on Twitter printed in a filament called “Wizard’s Voodoo” and it is gorgeous.


@TheMantellis posted a YouTube video showing off their print
@Grampah_Joe_3D printed one at 200% size!


MyMiniFactory user ofirneger
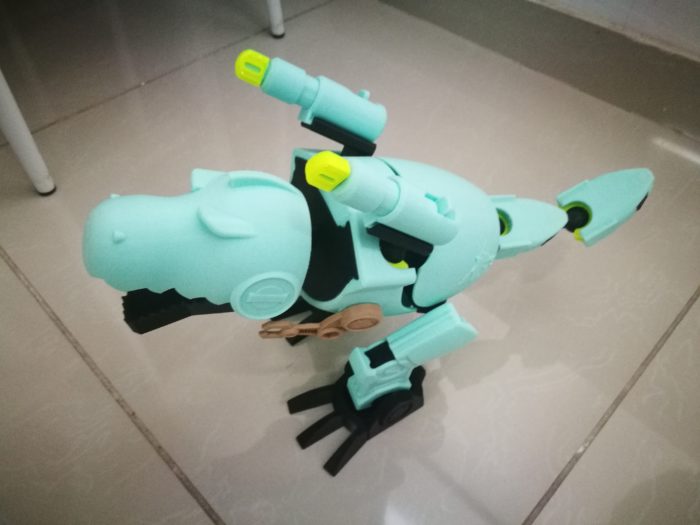
MyMiniFactory user sckulp

MyMiniFactory user CJNYC3


Thanks so much for sharing photos, everyone! They look great!
.
.
.
March 2020 UPDATE: Files are available here! Click the Download button below for a zip file.
Files are available under the Creative Commons BY-NC-SA license.
1 Comment