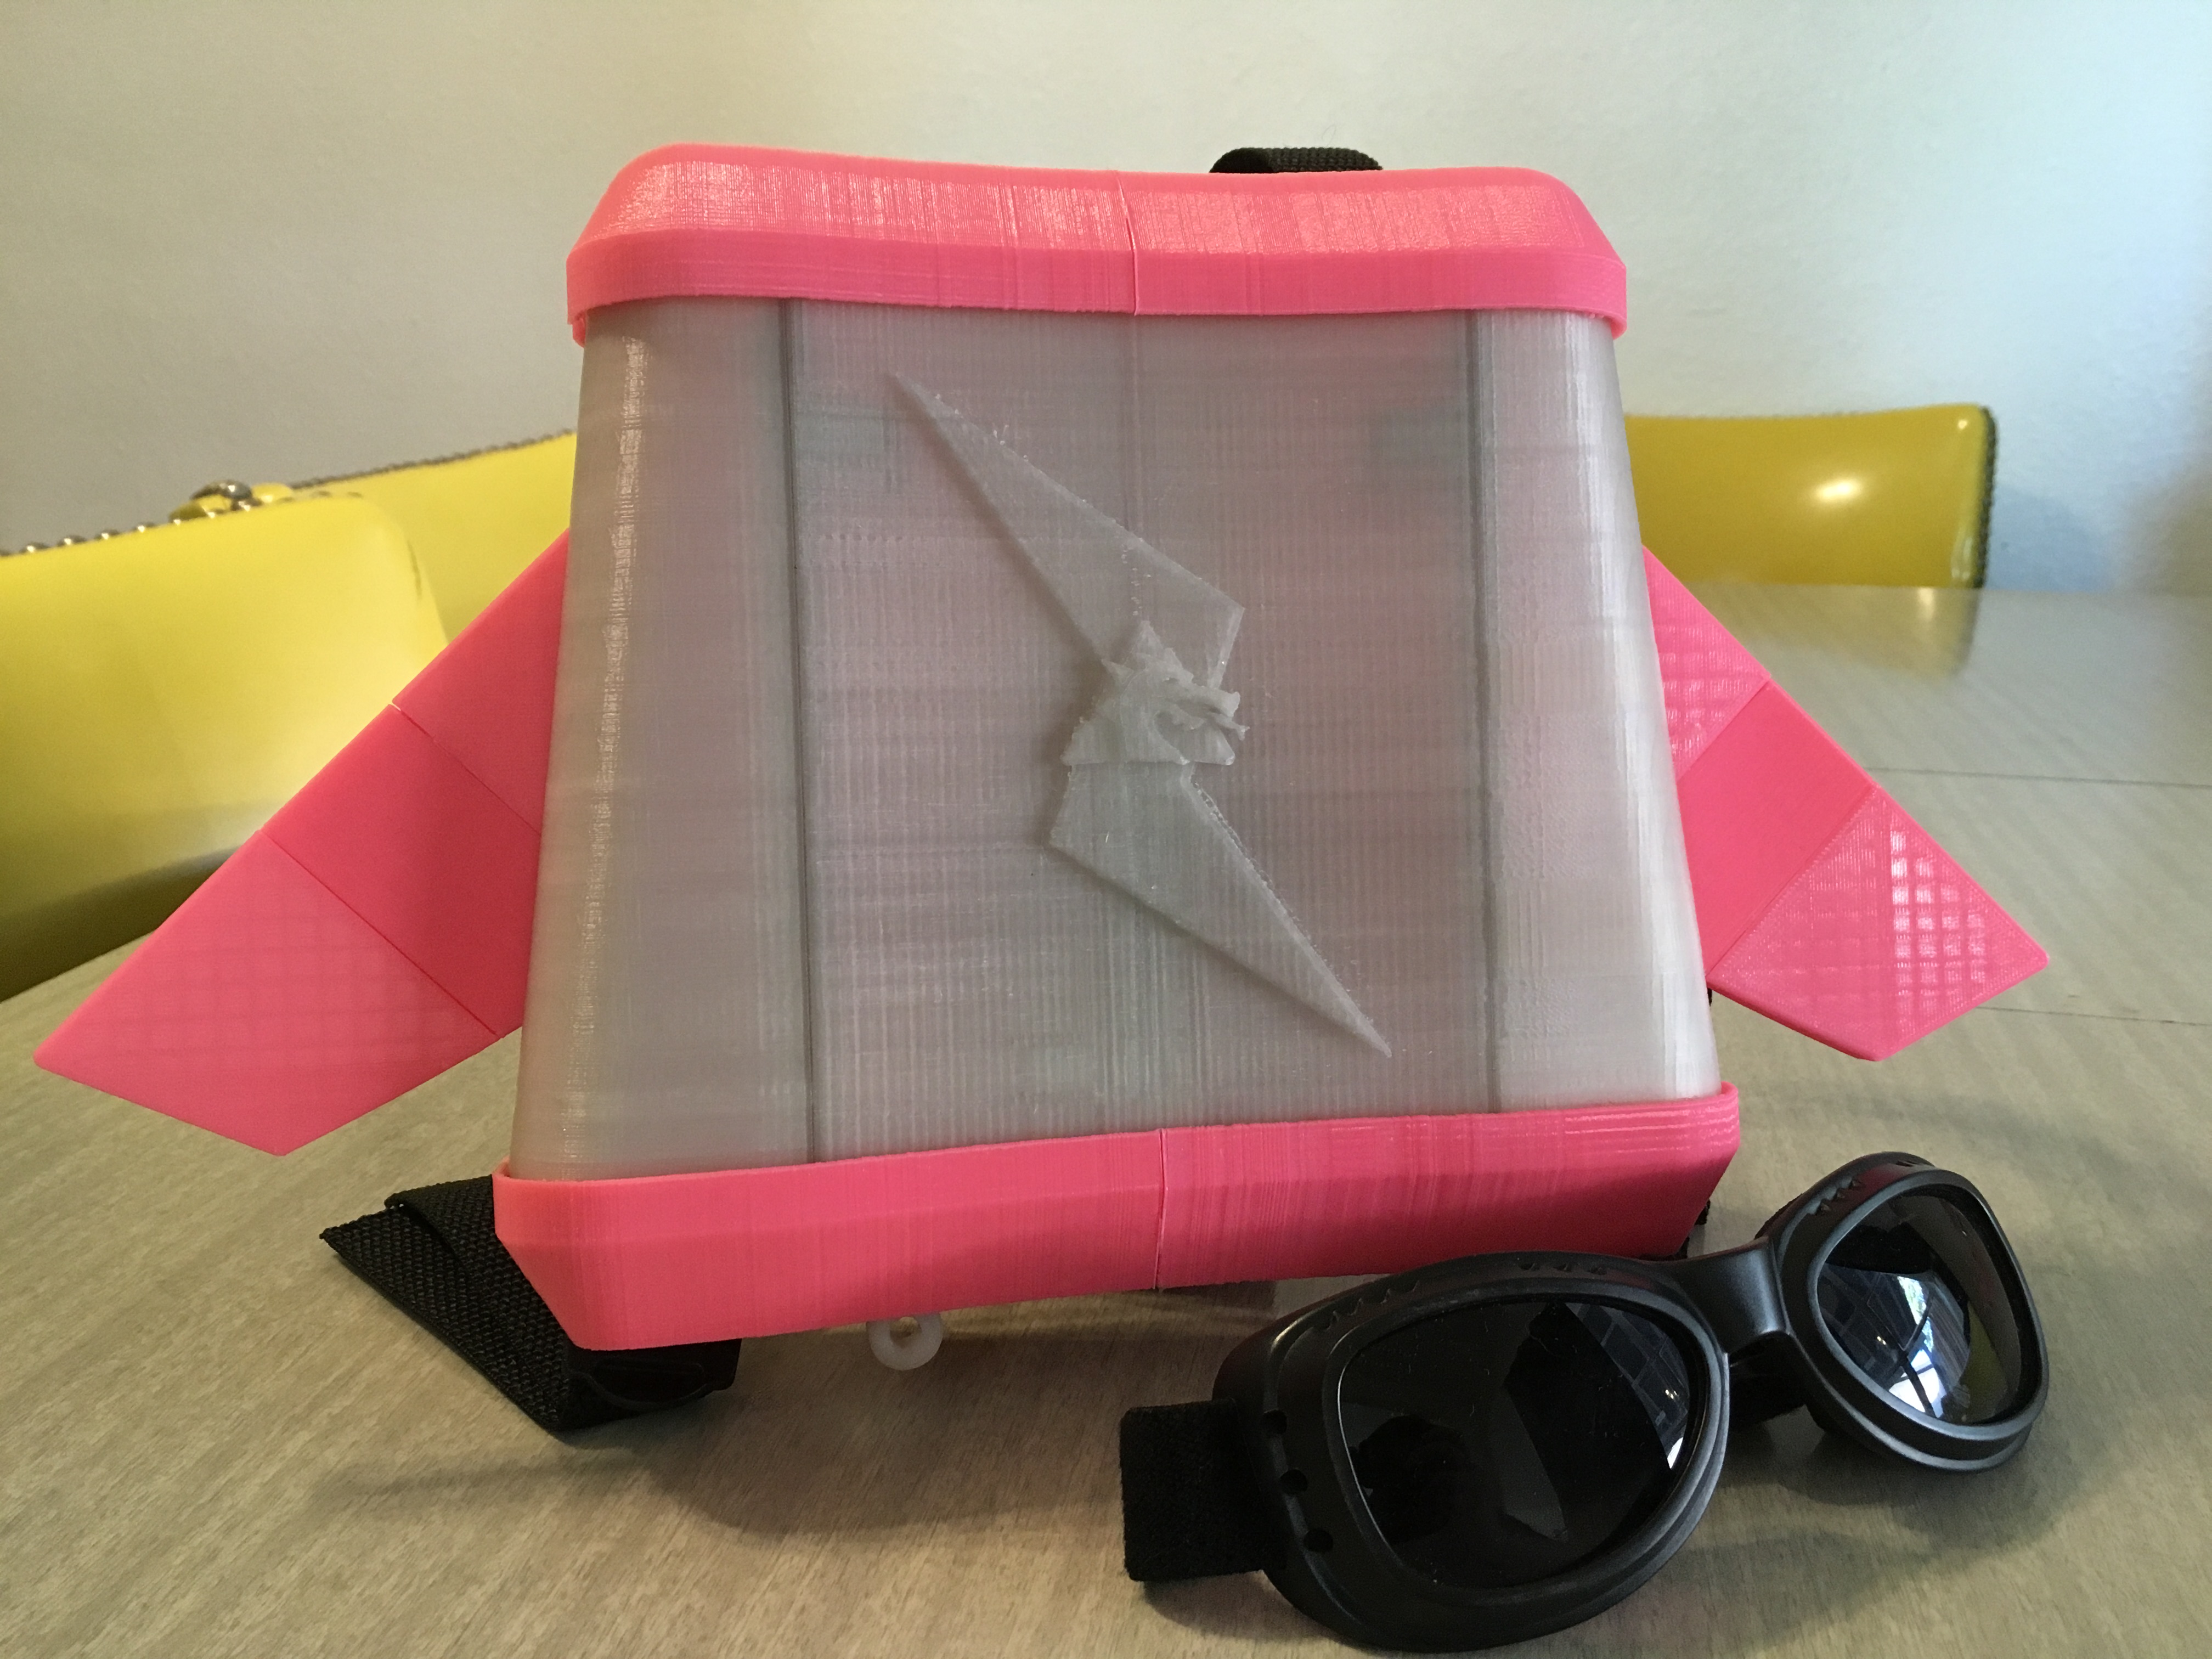
Project Space Princess – Jetpack
I think we all can agree that with the events of the last week, little girls could use some reassurance that they can be and already are strong, awesome, and more than objects.
I started designing this as a means to improve on a Halloween costume choice, but life got in the way of finishing it in time.
That was probably for the best. It’s more important that my daughter knows she can be a superhero any time she wants (Check out this TED talk by @DocChristopherB). To me, she’s always:
Captain Zoe: Space Princess!
Ambassador of peace! Defender of the weak! Master of beasts!
Now she has the jetpack to match.
Parts List:
1″ Black Nylon Strapping – Sew-Ology (I found this at Hobby Lobby)
Black Strap Adjusters – Sew-Ology (Also at Hobby Lobby)
Helpful Tools:
3D Printer
Needle-nose Pliers
Hammer
Sandpaper (maybe… probably…)
E6000 Glue (Due to the overall size and the likelihood of this being treated a bit roughly, I caved and used a lot of this instead of snap-fits)
Lighter
Print out Parts
All parts can be found on
Thingiverse,YouMagine,Cults3D, and MyMiniFactory.4/11/2018 UPDATE: Consolidating the number of places hosting the files. More changes to come, but they’re still available for free.
March 2020 UPDATE: Files can be downloaded directly from this site at the bottom of the page. They are also available on Prusa Printers!
The wings were printed out in 15% infill (needed them to be light enough for the springs to work well) and the rest in 30% infill (gotta be durable). Supports (everywhere) are needed on the wings only, and a brim setting was used on the large body components as per the examples below (don’t print all at once unless you’re confident and don’t mind the wait).
3/3/2017 UPDATE: I’d revise the infill on the CoilSprings to be 50-100%. “Springiness” on mine’s been dropping over time. This is most-likely due to the fact that it hangs on a wall in my daughter’s room near a humidifier, but I’d rather adjust this anyway.


I should also mention that you only need one of each component, with the exceptions being:
LinkagePin: x4
CoilSpring: x3
SpringPin: x3
WingLinkage: x2
Wing parts: x2
Wings
Using the E6000 glue, secure the three wing pieces together. Wait for it to cure properly before continuing.
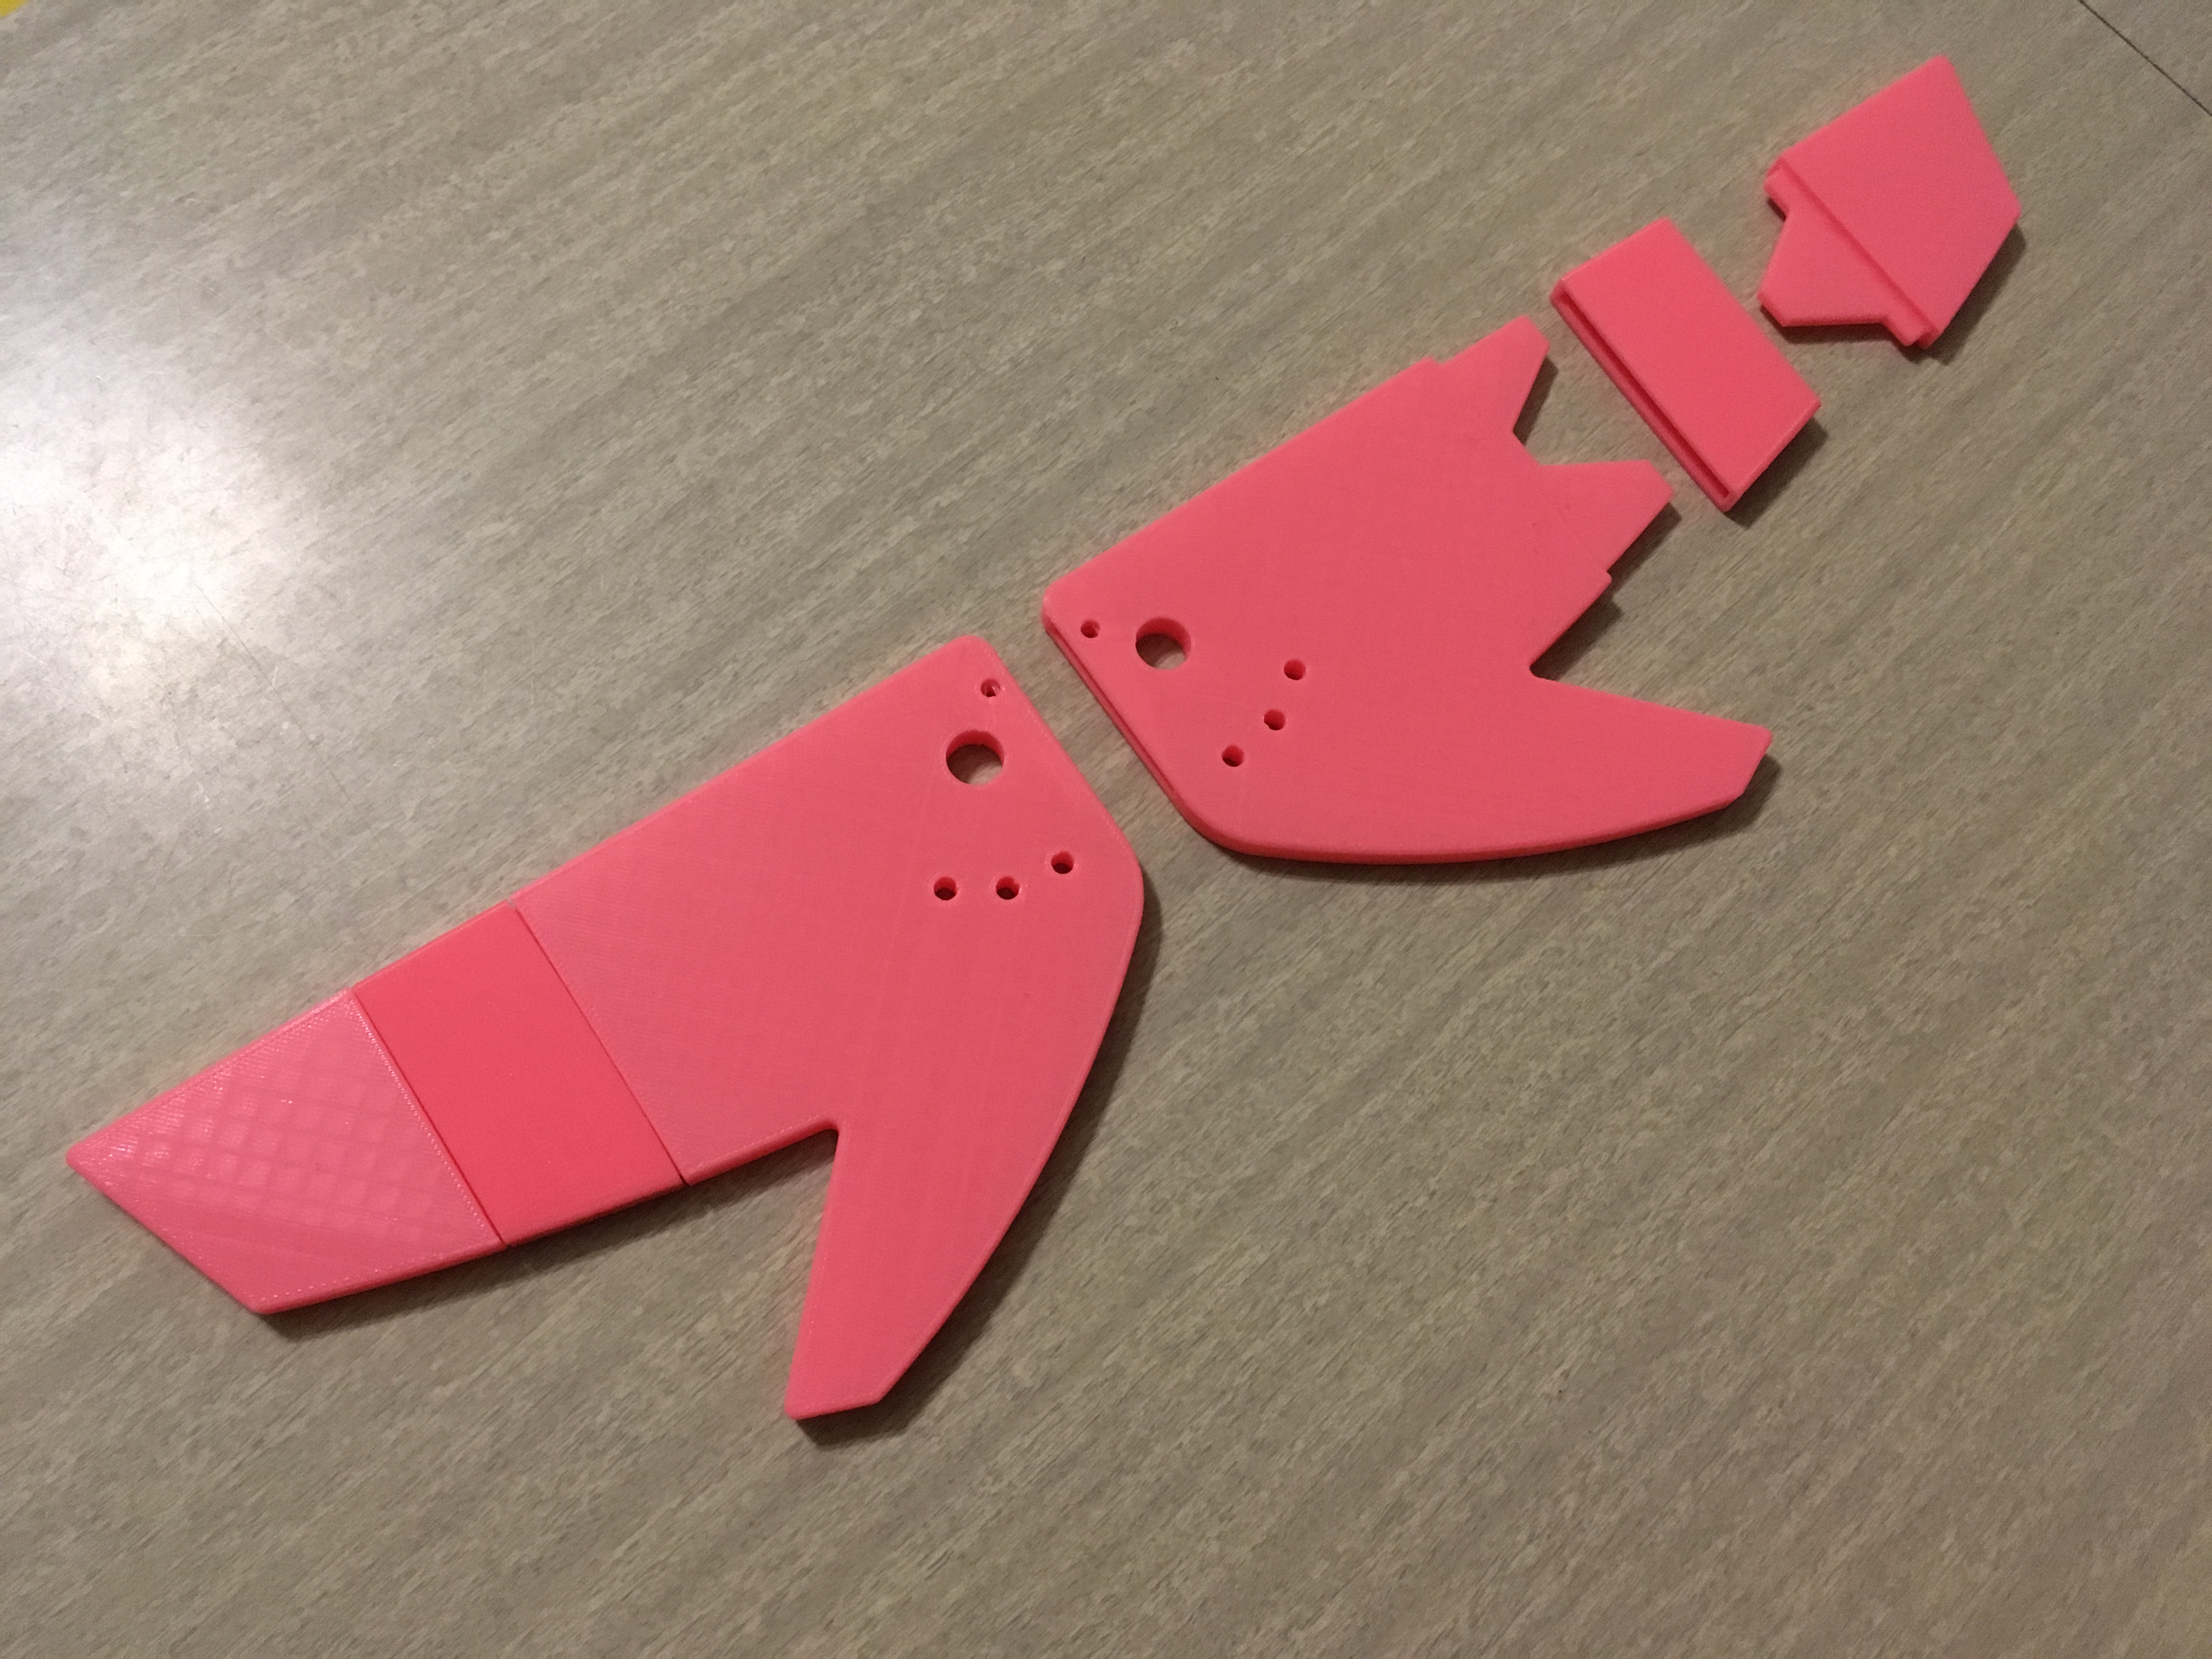
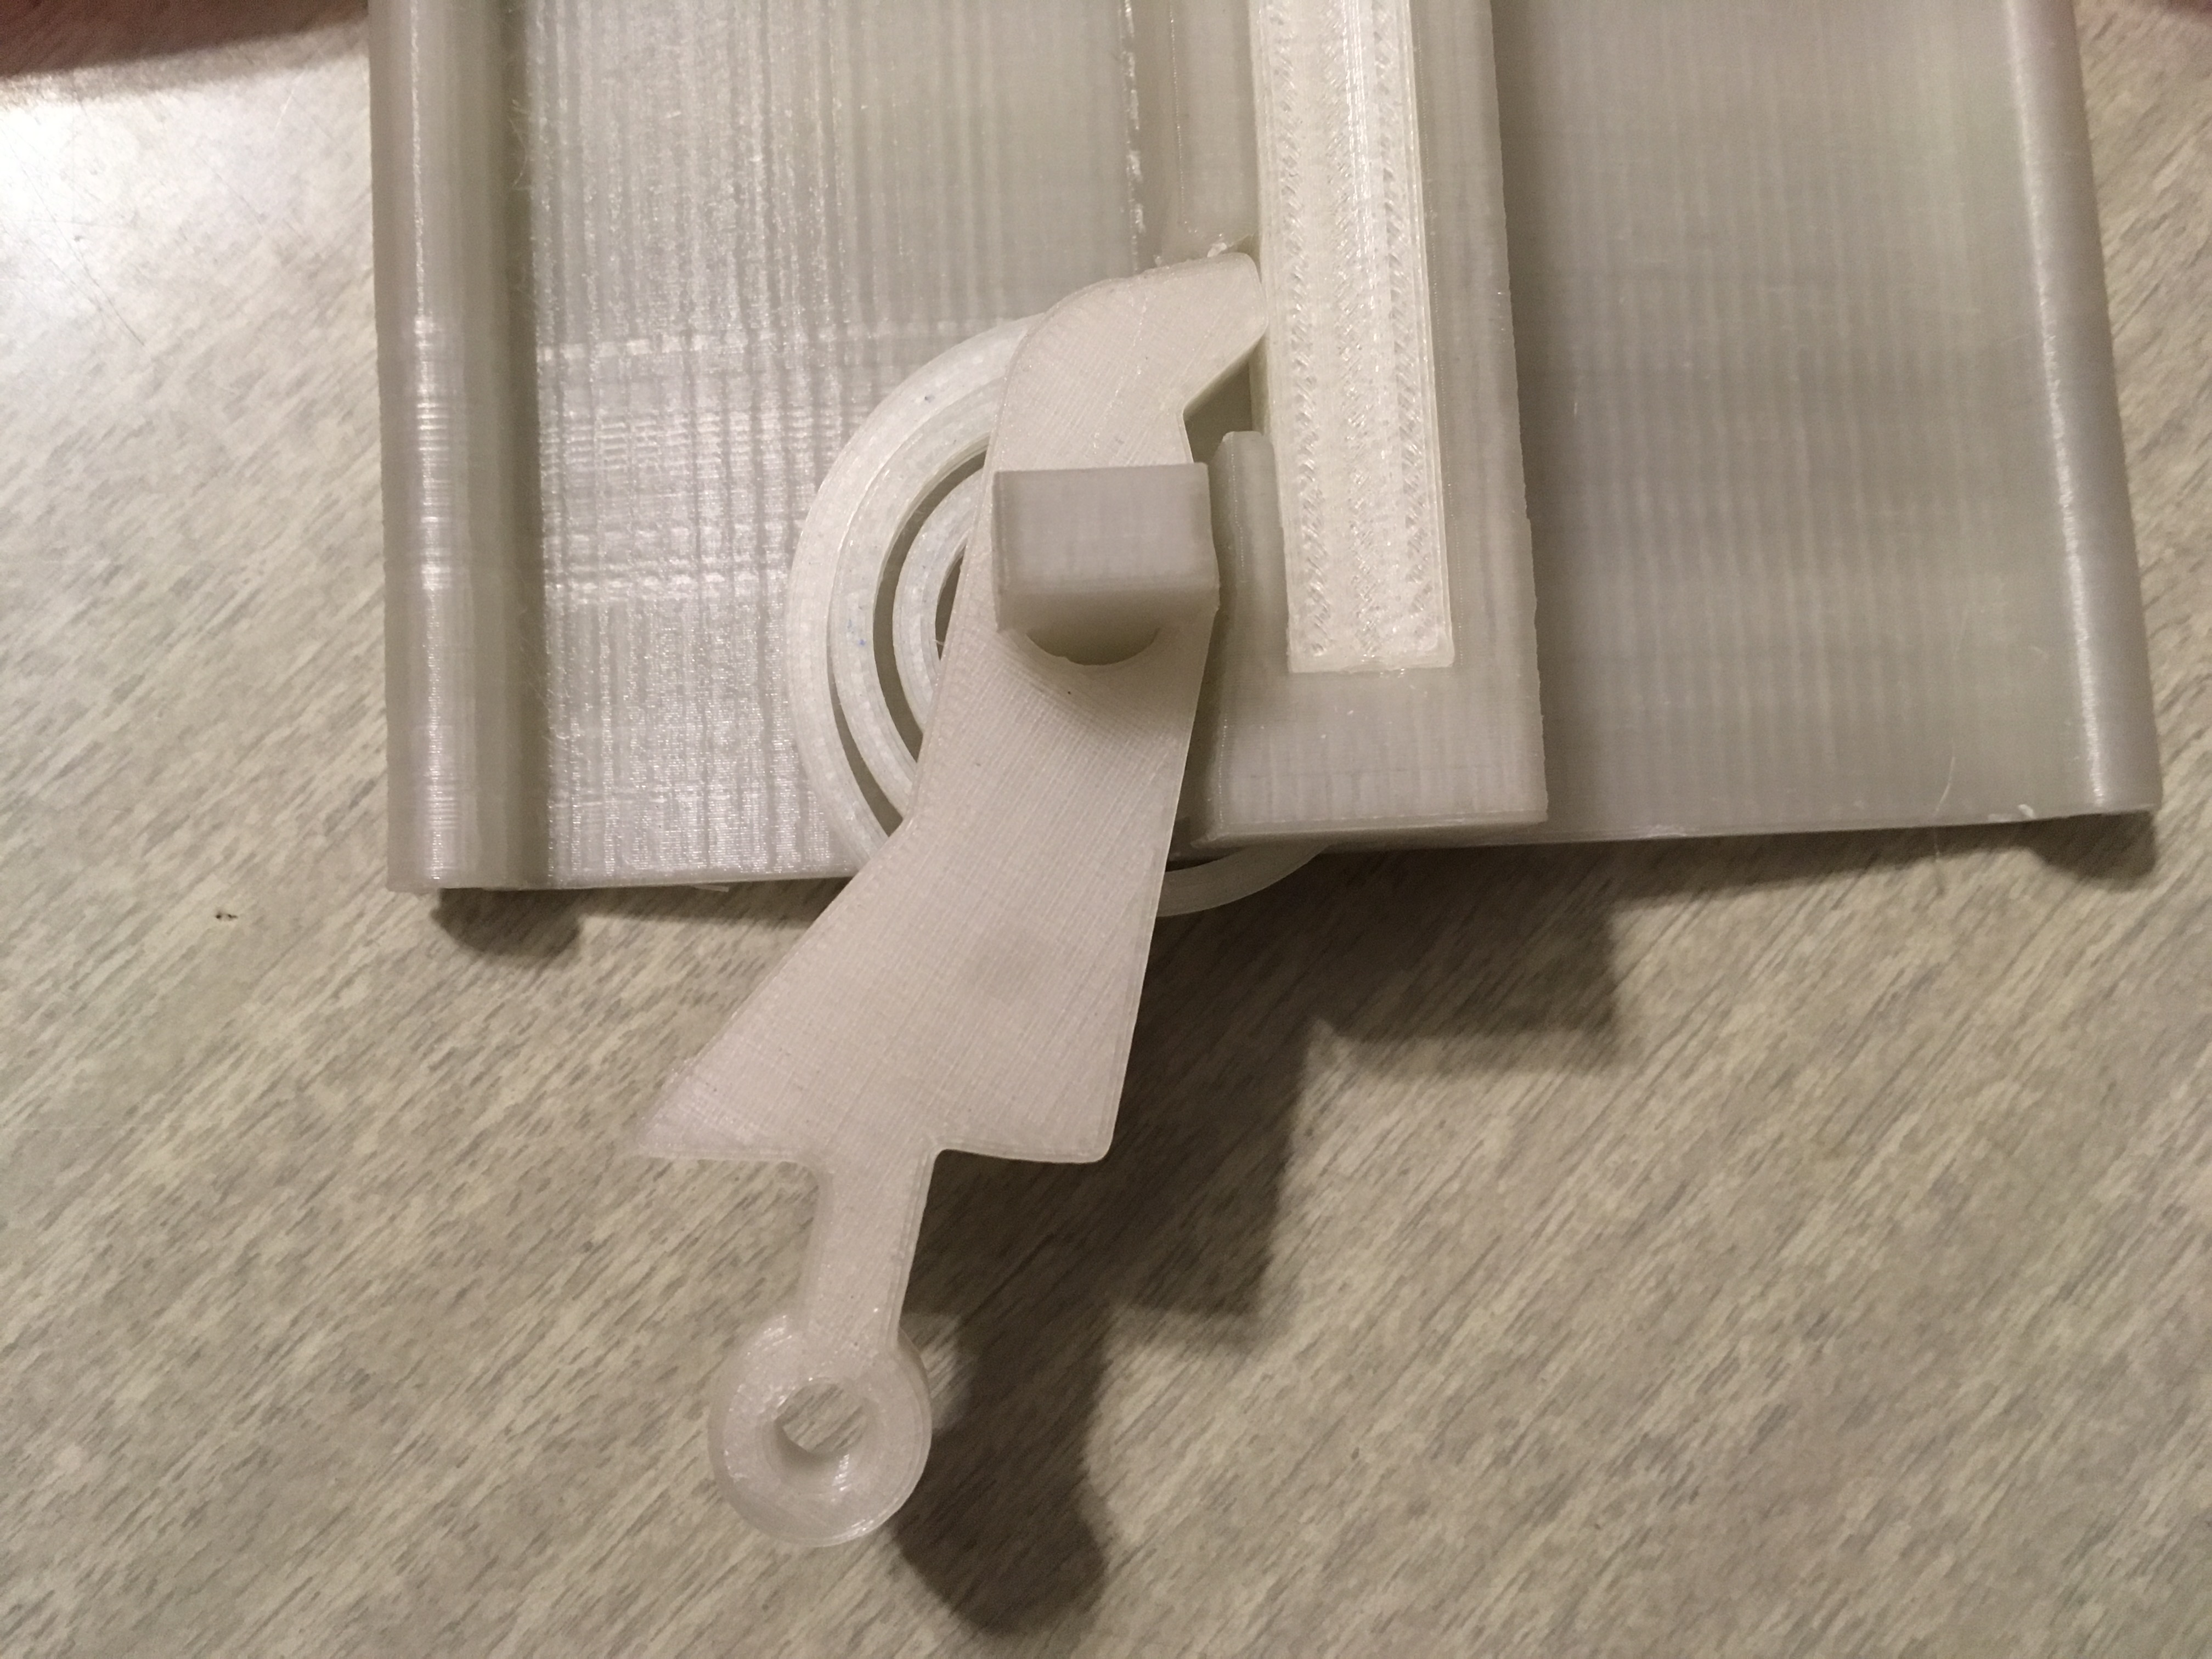
Before combining all the parts in the Linkage Assembly, make sure to do a fit check to ensure the moving components will have enough clearance to rotate freely. If not, use some sandpaper to open up some space. When you’re ready, use the needle-nose pliers and hammer to gently press-fit the the LinkagePins into the Wing/Linkage/LinkageSlider assembly.
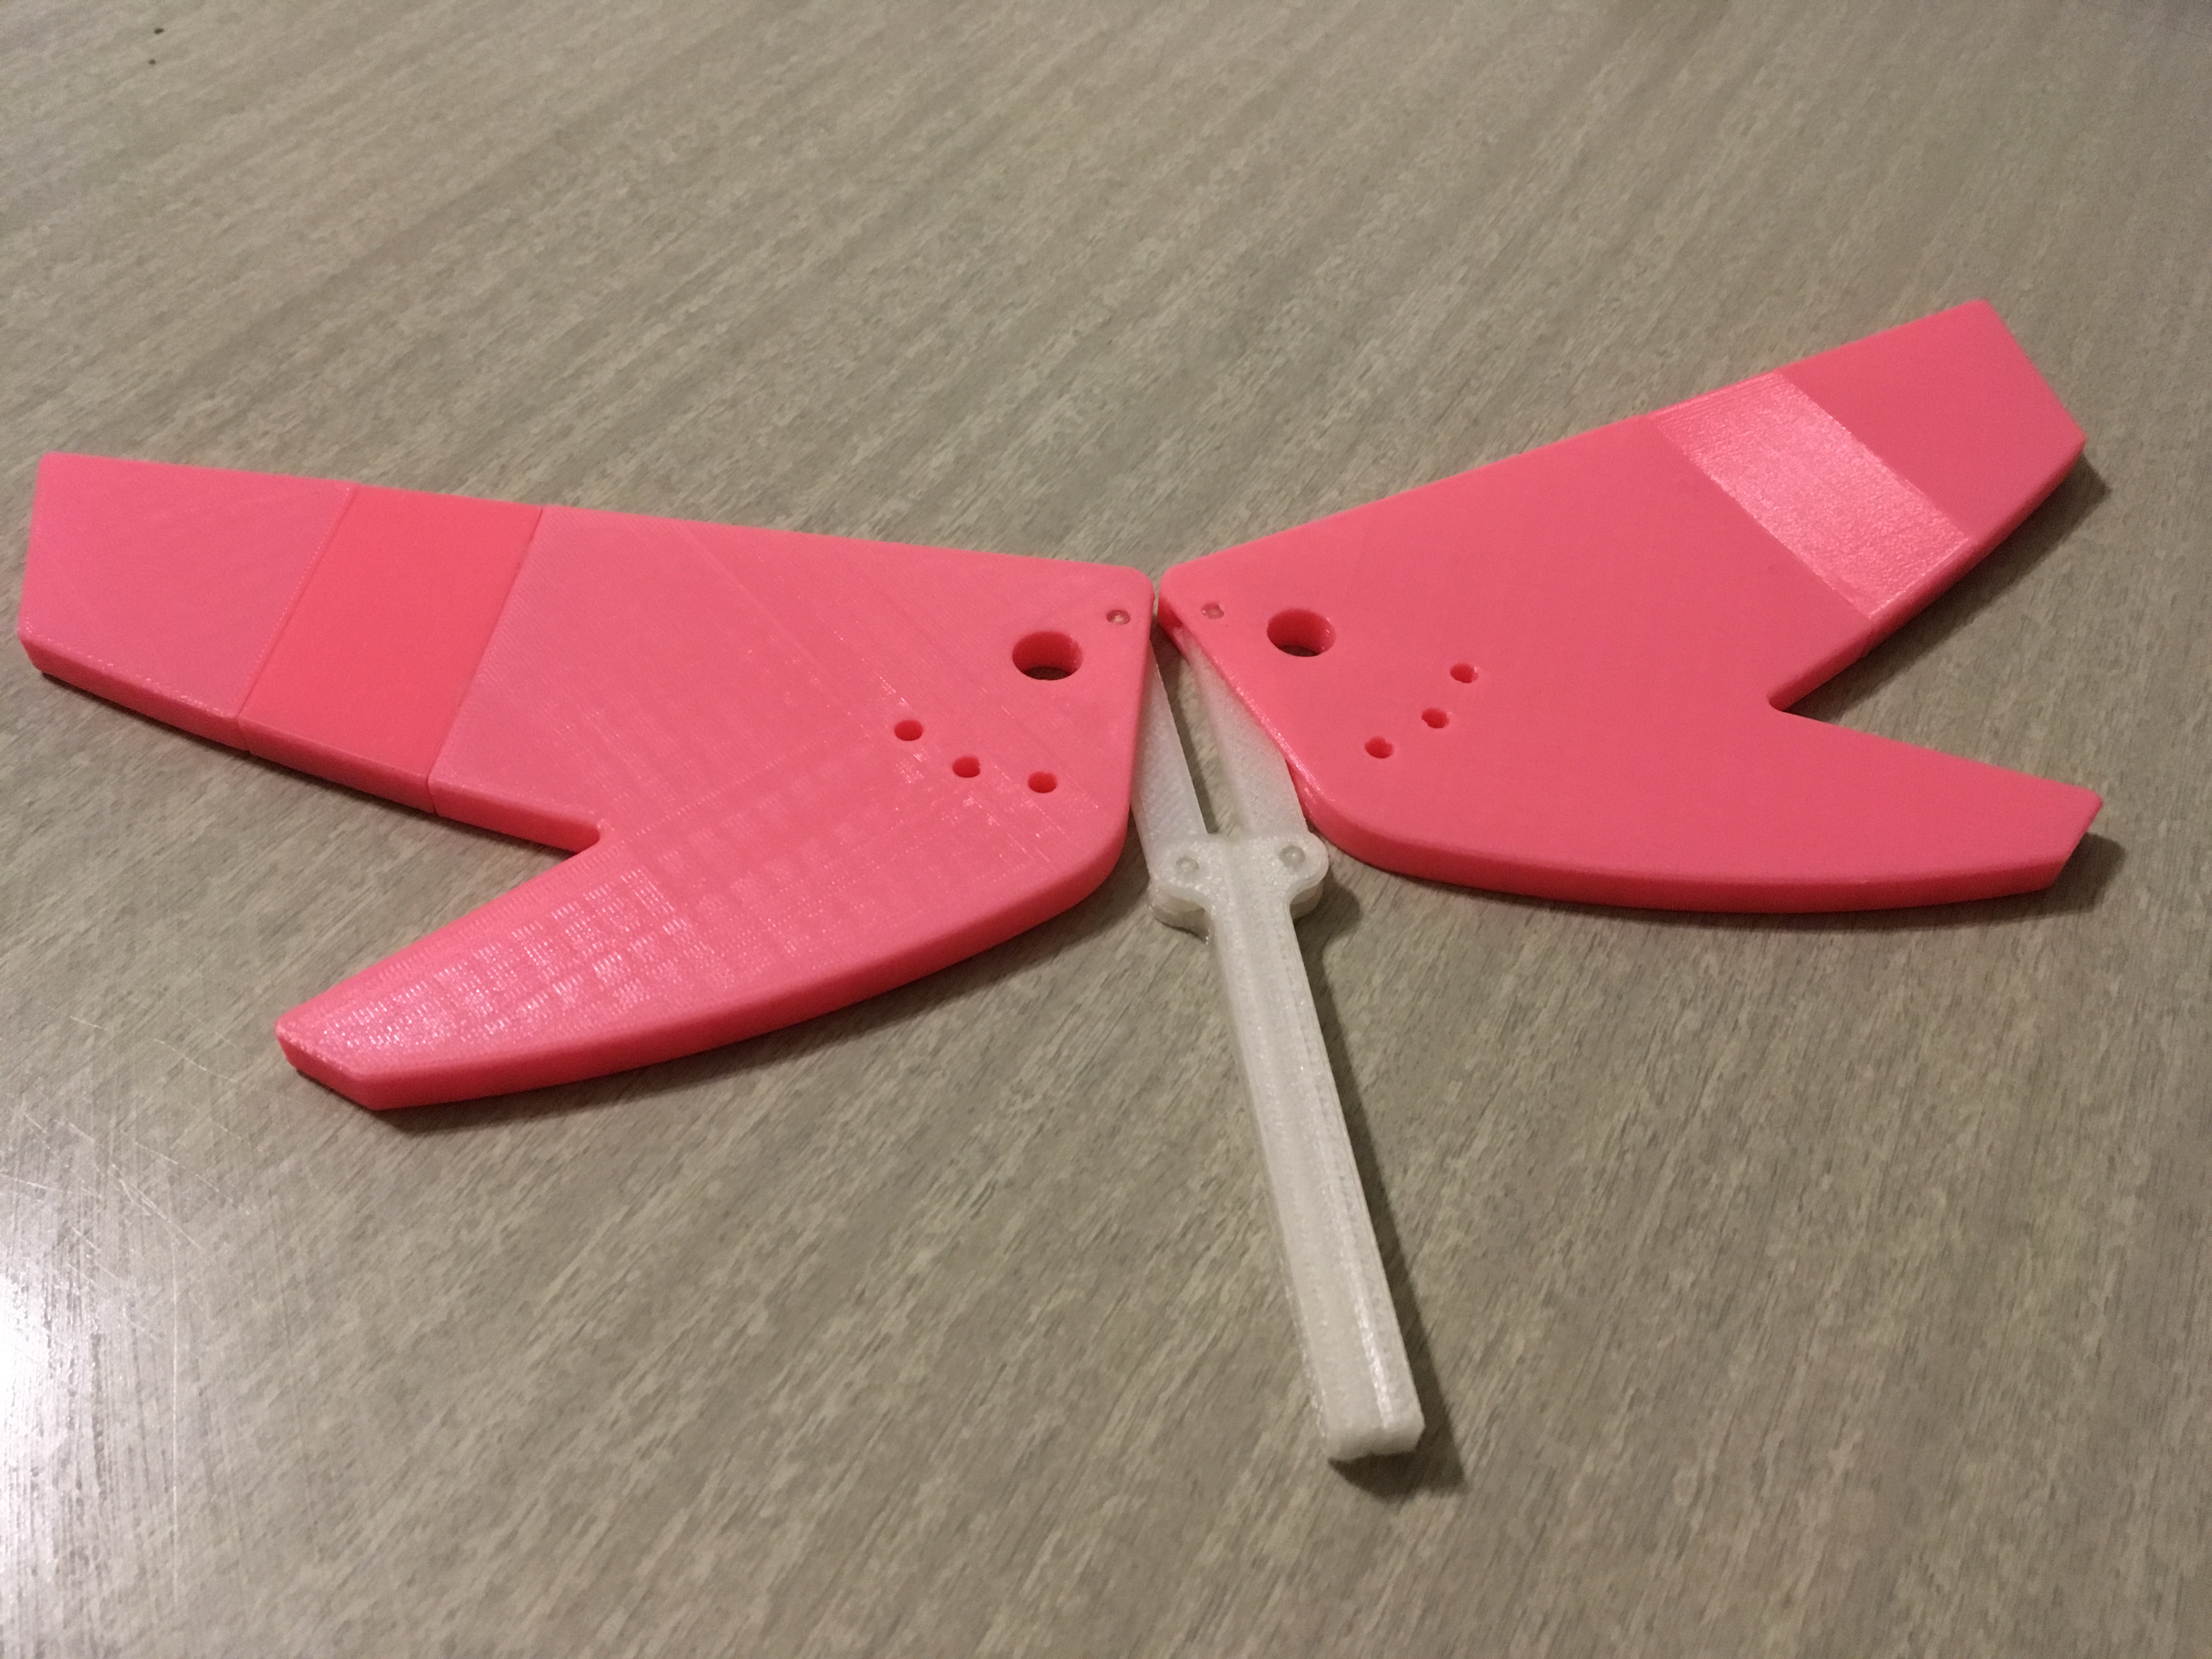
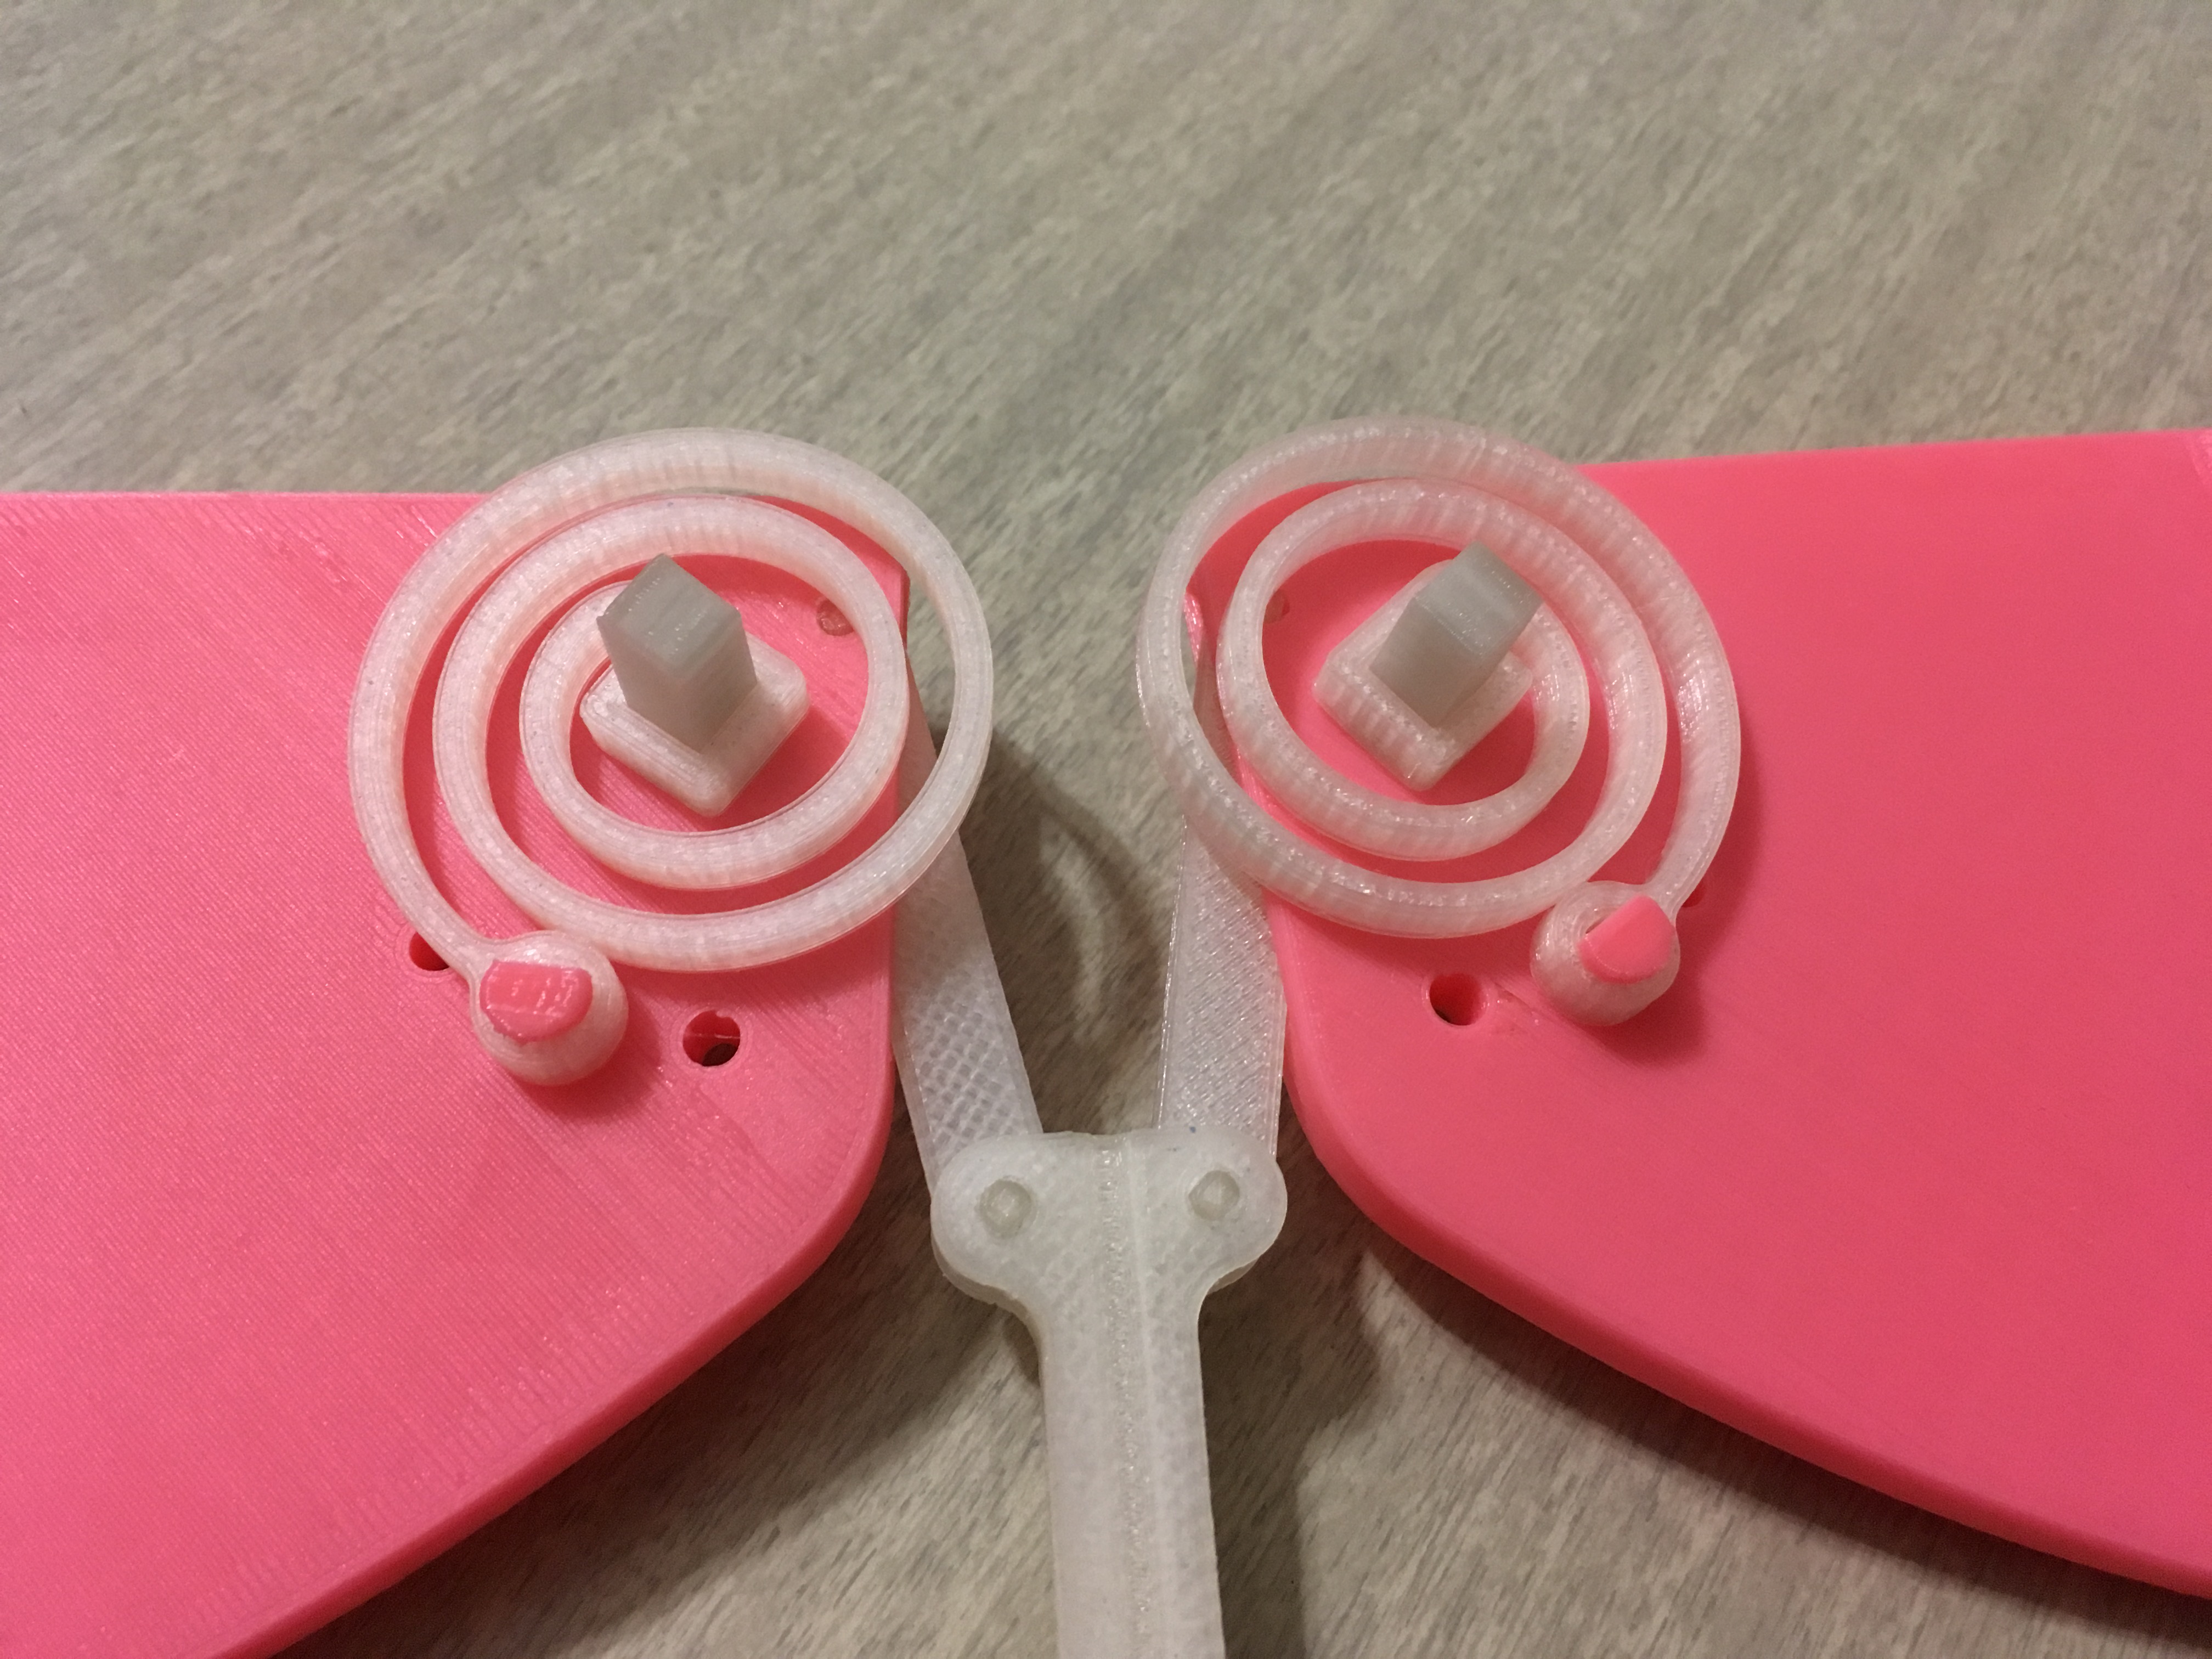
Coil Springs
Using the pliers and hammer as before, attach the CoilSpring to the wings using the SpringPins, and insert the left and right Wing Pins. If you find that you’ll need less or more “spring” to the wings, use the edge holes. I found that the middle ones worked best for me.
Also important: the left and right WingPins are keyed to their respective sides of the jetpack. This isn’t going to assemble very well (or at all) if they’re installed incorrectly (more on that in Step 5).
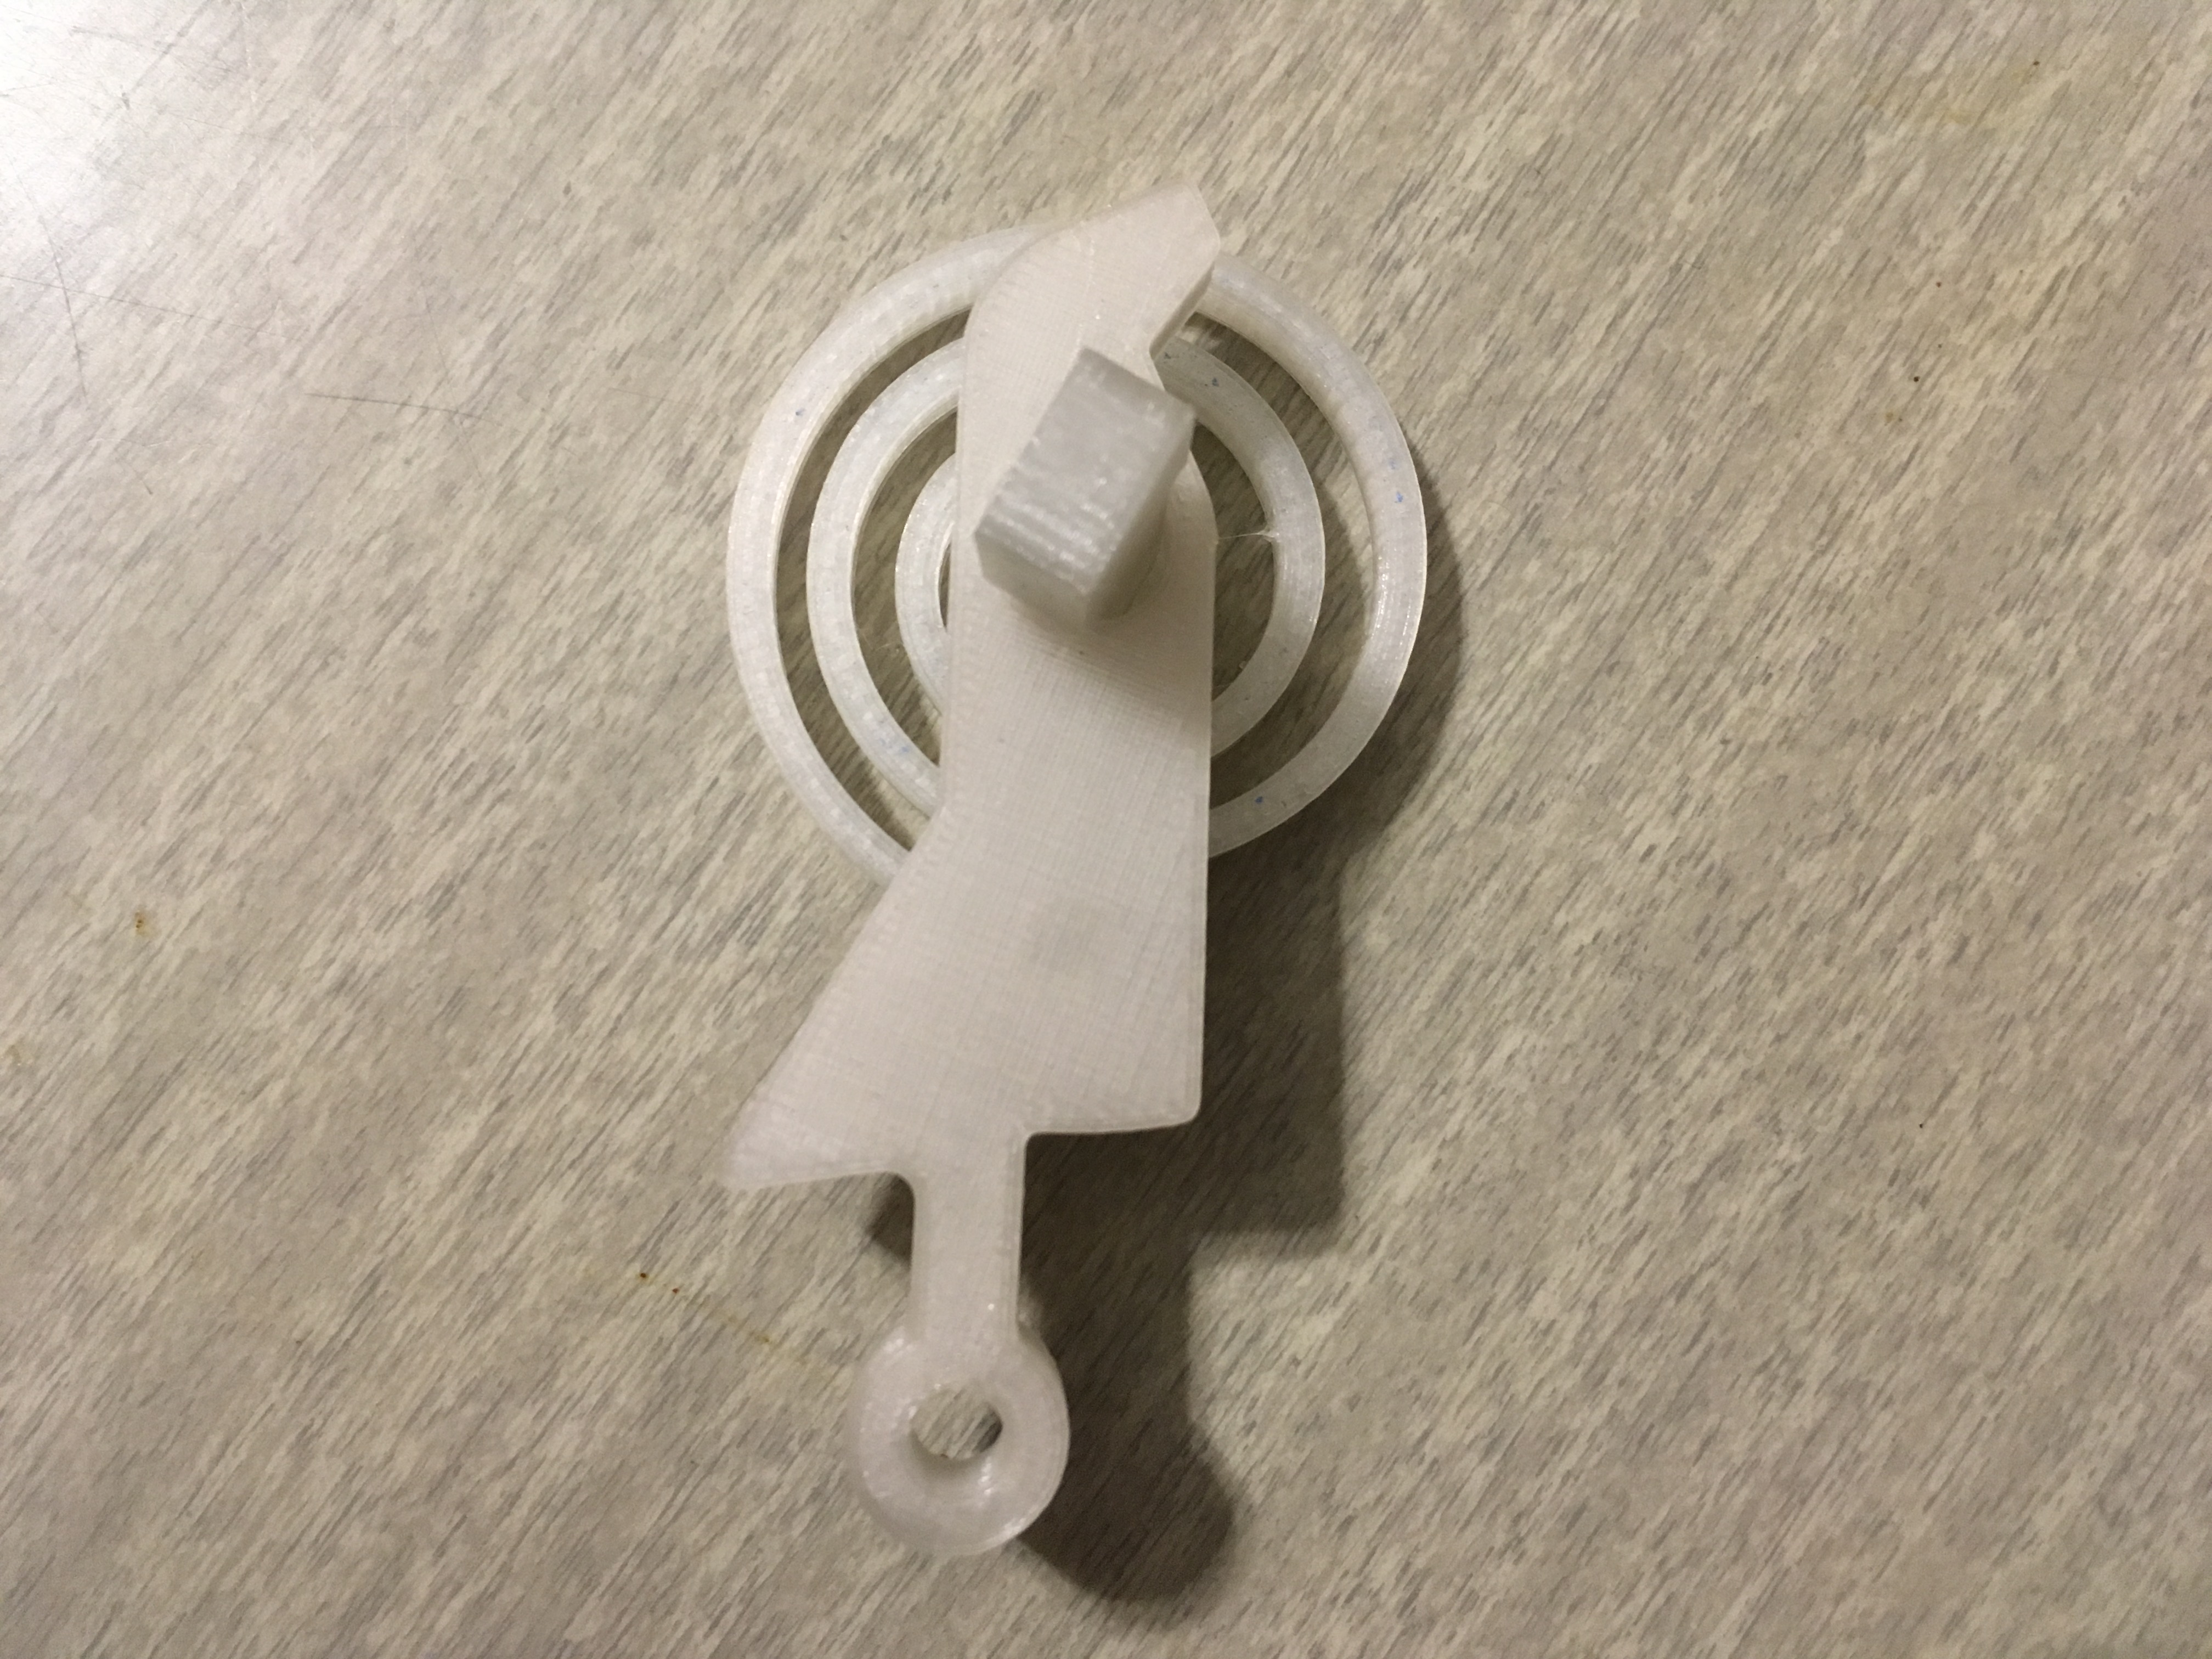
Latch Mechanism
Attach the remaining CoilSpring to the WingLatch using the final SpingPin as shown.

The LatchPin should be installed at an angle to how it will fit within the main housing.
Speaking of which…
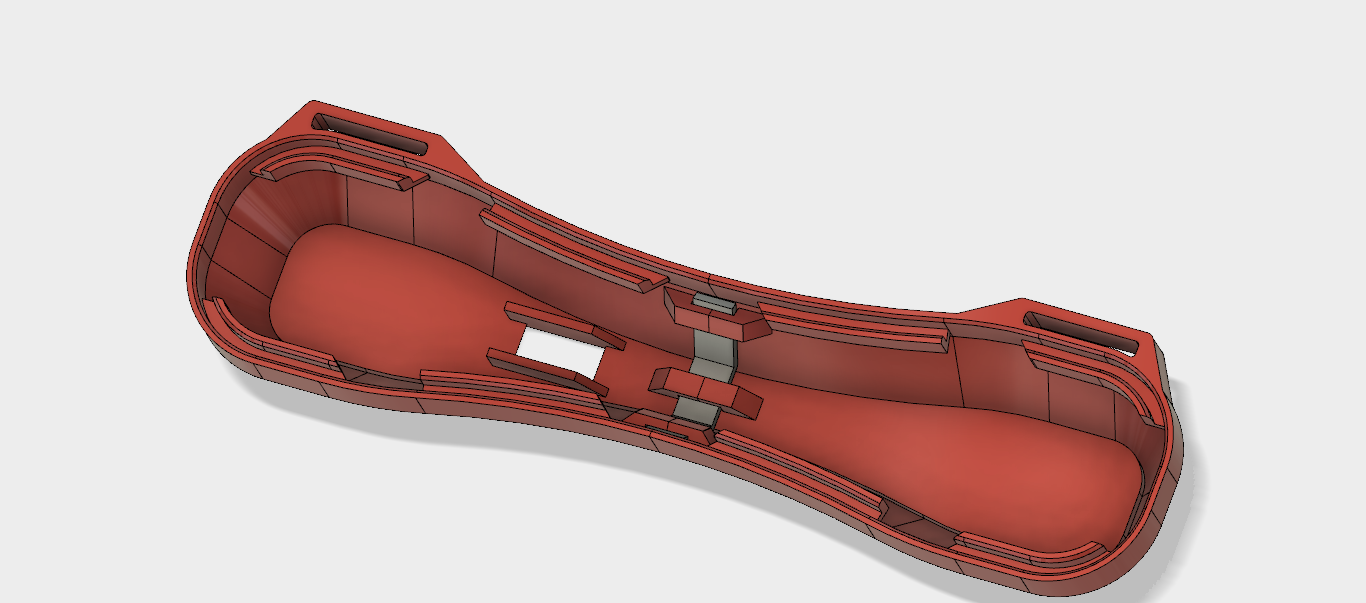
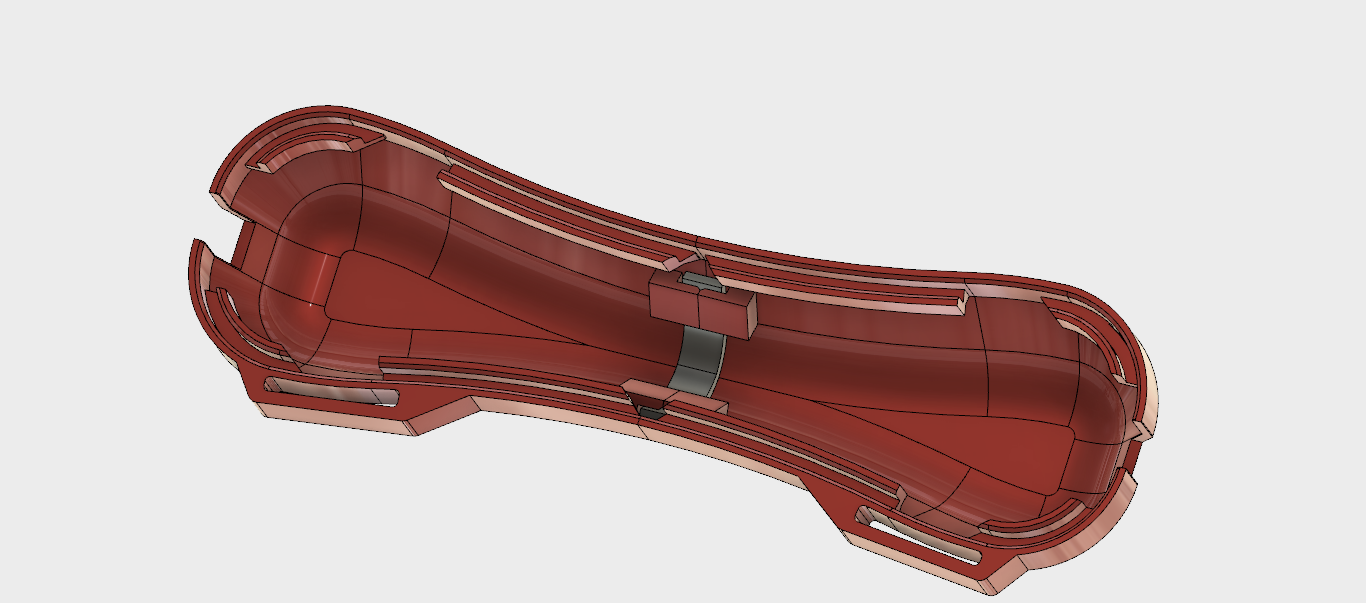
Main Housing
As mentioned above, the orientation of the left and right WingPins are important. They should look like this when installed onto the Back:
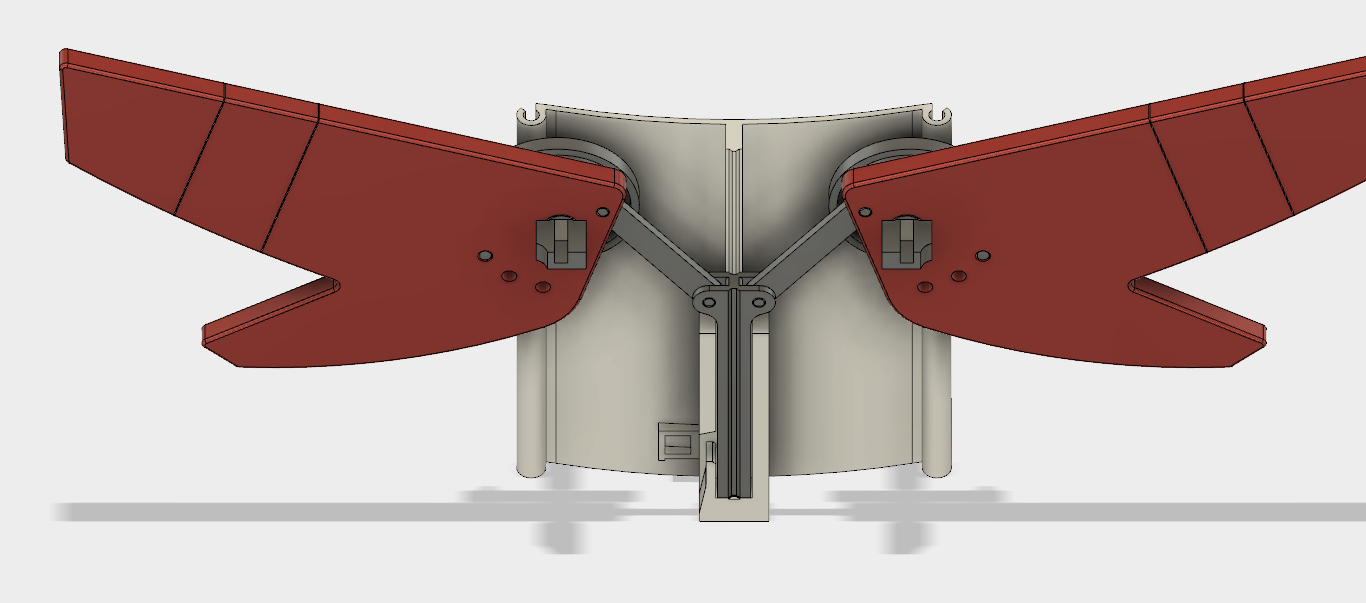
Test the “spring” of the wings and the clearance of the LinkageSlider. Make adjustments if necessary.
Fit the WingLatch assembly onto the Back, and turn the LatchPin clockwise until it will fit within the corresponding recess to secure it.
Fit the Front over the assembly and you’re well on your way.
Exhaust and Cap
Using the E6000 glue and the ExhaustLink, secure the left and right Exhaust components.
Do the same to the left and right Cap components using the CapLink. Allow time for the glue to cure.
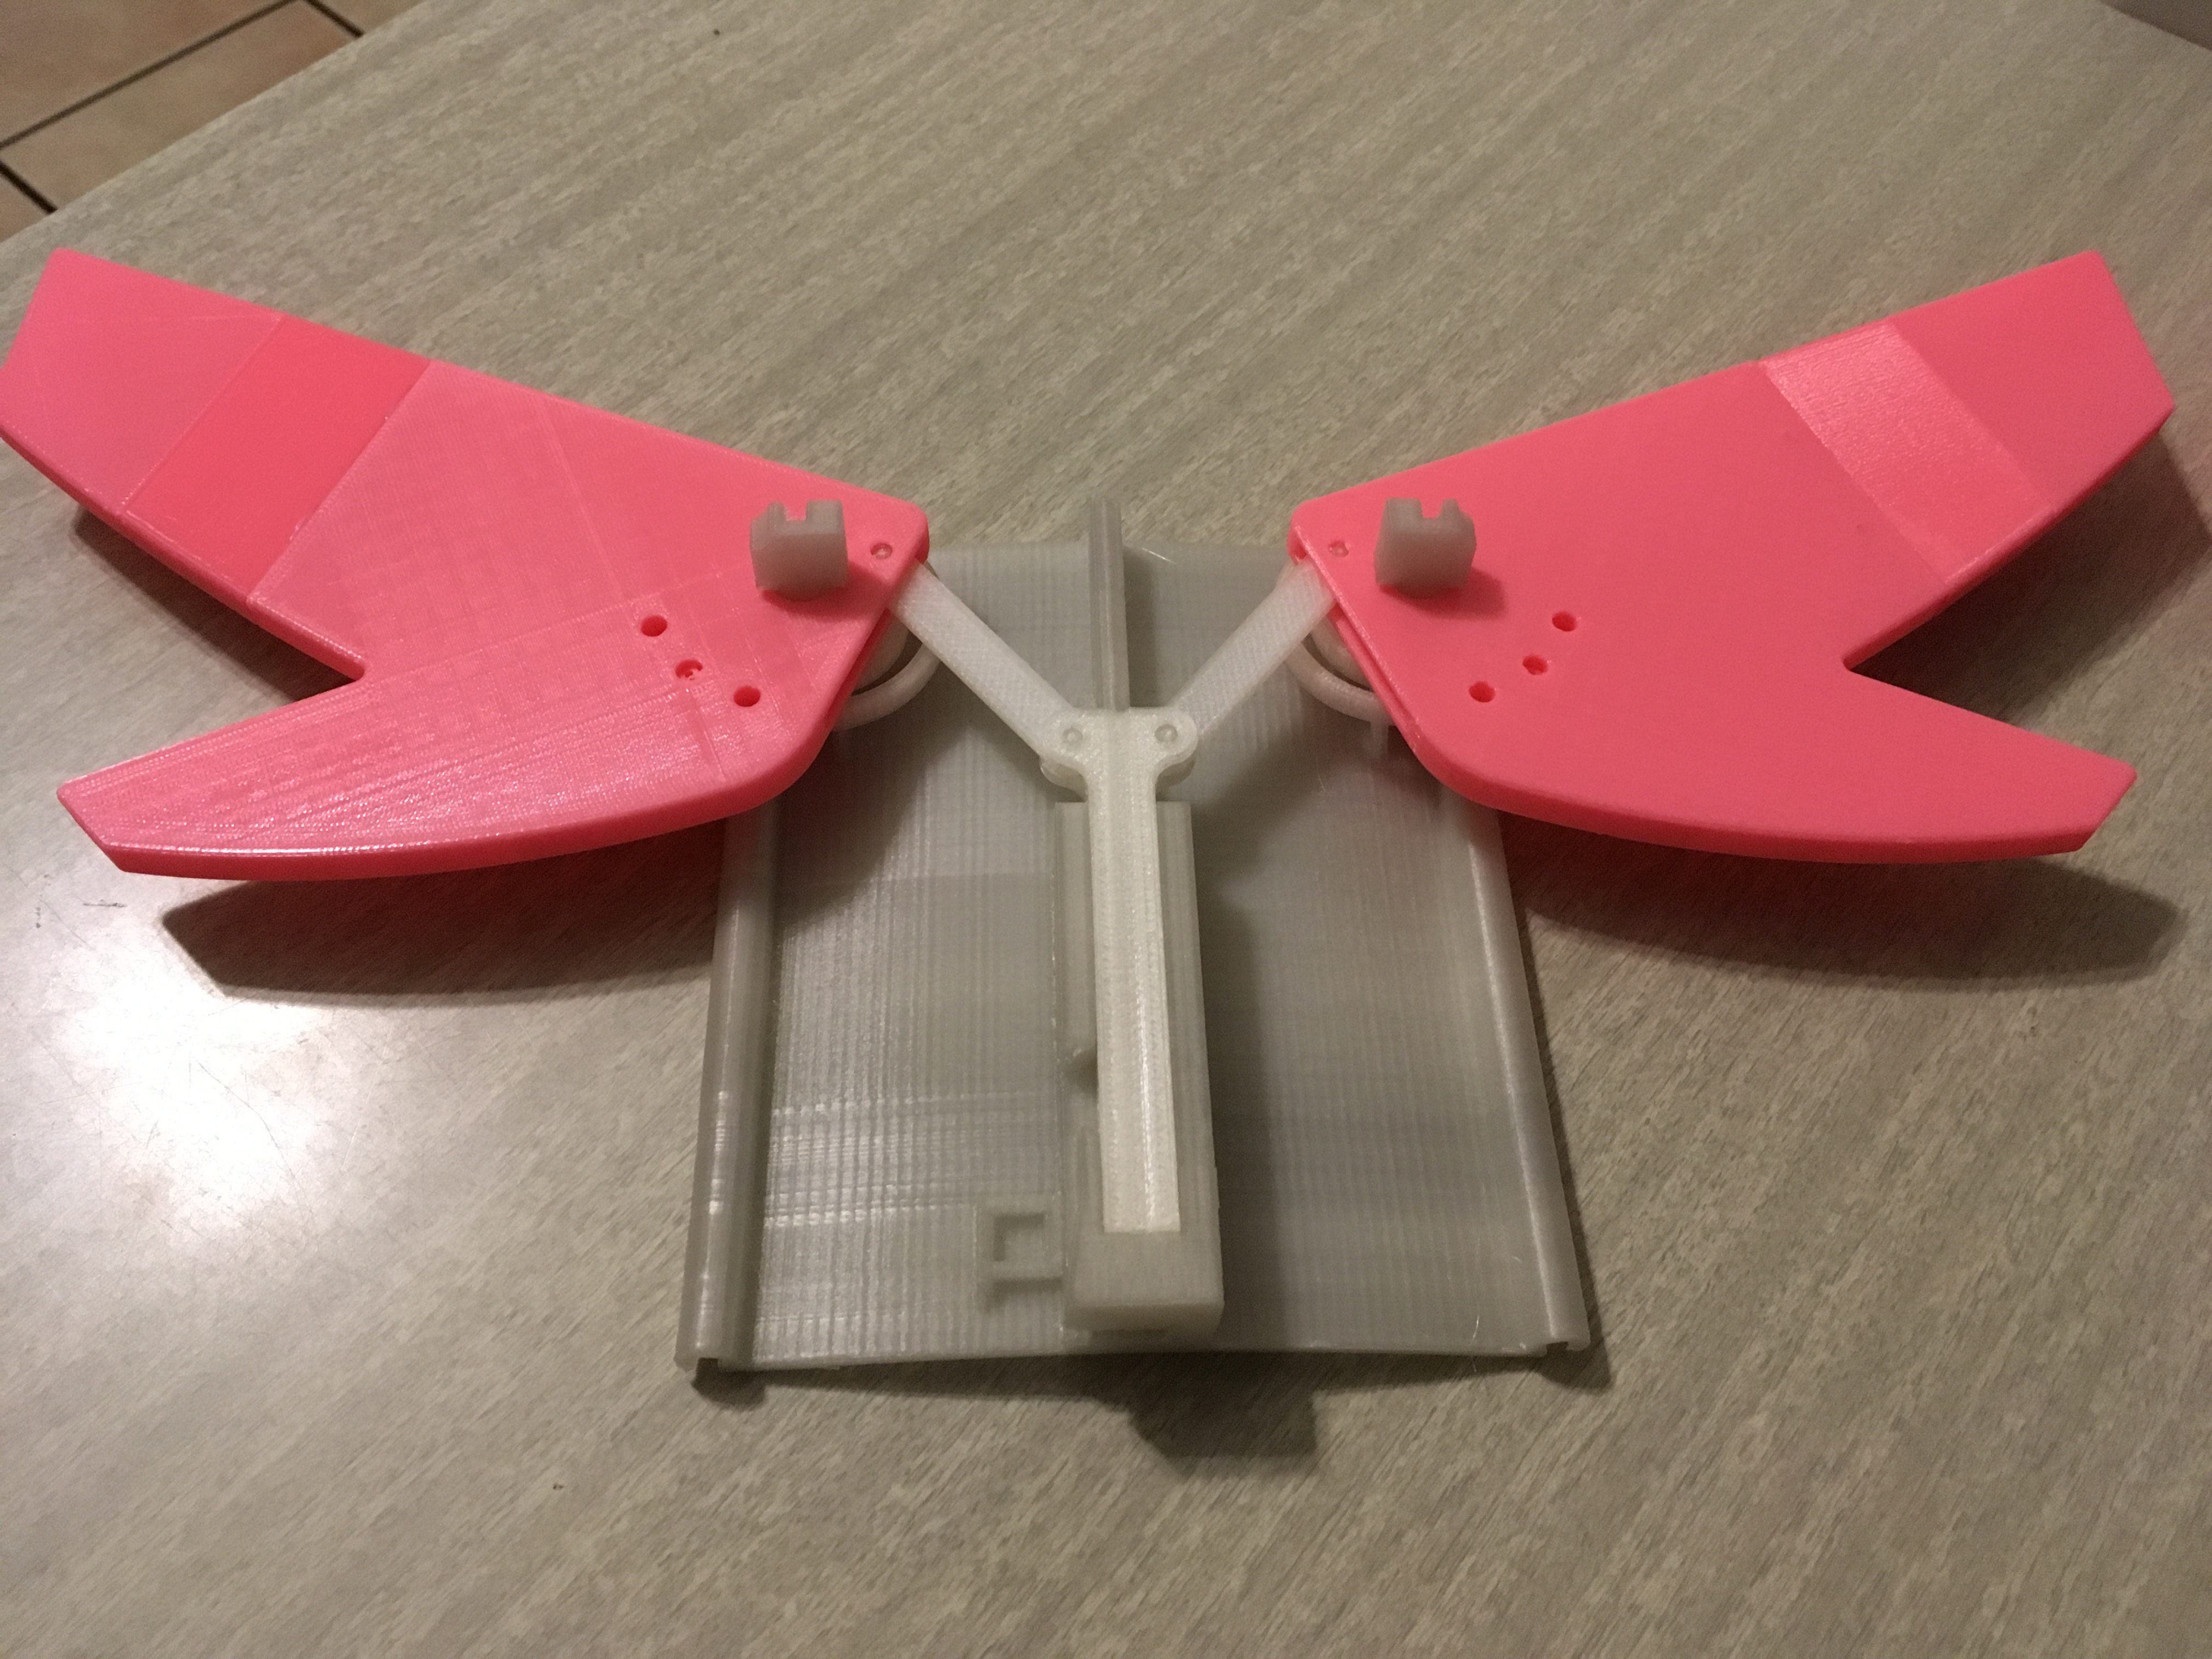
Final Assembly
Fit the Cap assembly over the Main Housing assembly, and slide the Left and Right sides up the “rail” features.


Fit the Exhaust assembly to the bottom of everything and give the Latch and Wing mechanisms a few tests. If you’re satisfied and ONLY AFTER you’re satisfied, remove the Cap and Exhaust to add some glue to the mating features. Re-assemble and allow for time to cure.

Strap
Fold the strap into two equal lengths and cut the center. Use a lighter to melt the ends to prevent them from fraying, and feed the ends through the slots in the Cap and Exhaust.

Taking both ends of each side, weave them through the strap adjusters as shown.

Protect and/or Rule the Galaxy
(Thanks to my wife for modeling.)

Fold the wings down, strap it on, throw the latch, and BAM! Wings deploy!
The latch has a loop in the bottom in case you’d like to attach a string.
If your kid’s shoulders (Or yours. That’s cool too.) are a bit broader, get two nylon straps instead of splitting the one.
If you like what you’re seeing here, leave a comment, or give me a follow on Twitter @DragonMtnDesign. I’m trying to push more updates and previews there, I promise. If you’re really enjoying my work, consider donating via Cults3D, MyMiniFactory, or Thingiverse.
.
.
.
March 2020 UPDATE: Files are available here! Click the Download button below for a zip file.
Files are available under the Creative Commons BY-NC-SA license.
2 Comments