Brave Prosthetic

My daughter’s Merida doll got Skywalker’d by the dog.

I came out of my sabbatical early to work with my four-and-a-half year old on a solution. Neither one of us could let an injury slow down a BA archer like Merida.
Background
During my son’s nap-times, my daughter and I held meetings to discuss and sketch out concepts on the whiteboard. We landed on a double-arrow design based on CheekymanDrone tech, with the addition that the bow arms can fold down to be used by the patient as a claw-hand. Would it be pretty? Debatable… but it would be rad as heck.

Measurements were taken and a test fit of the “sleeve” was scheduled, revealing that while the prosthetic would fit nicely, it was loose and would easily fall off. This needed some creativity.
I asked my daughter how we could make the sleeve fit better. She brainstormed while I both wrote and drew (she can’t quite read yet) her ideas down. Her thoughts were sound, as most of her suggestions were rattling around in my brain as well… except for magnets. That wasn’t even on my radar and it was the perfect solution.
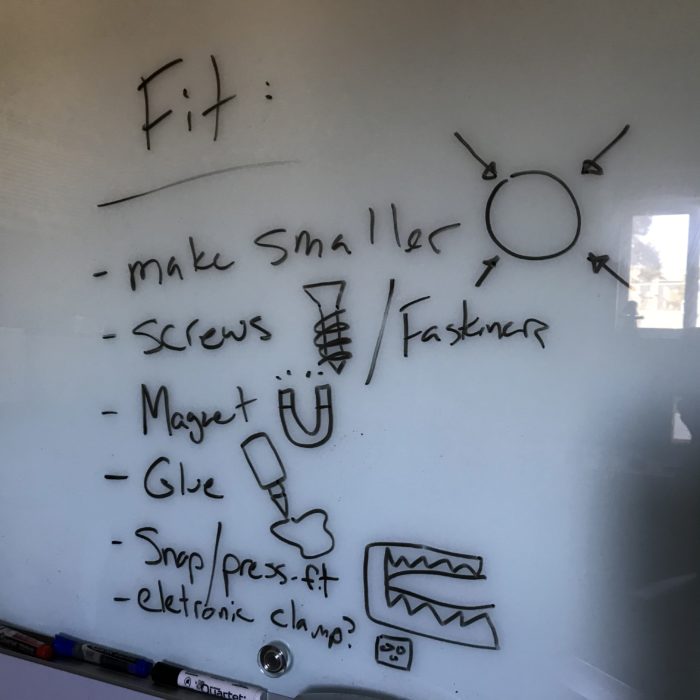
I got to work on the full design, consulted with my daughter on aesthetics, and we had Merida back up and shooting in no time.
Speaking of…
*DO NOT SHOOT ARROW PROJECTILES AT PEOPLE OR ANIMALS*
Parts
0.219″ OD x 1″ L x 1.09lb Max Load Compression Spring – McMaster 9657K690
1/4″ OD x 1/8″ THK NdFeB, Grade N42 Magnet – K&J Magnetics D42
6-32 x 1/2″ Philips Flathead Machine Screw (I picked up a small pack at Home Depot)
Tools
3D Printer (or printing service)
Pliers
Philips Screwdriver
Superglue (maybe)
1. Print
Files are available on MyMiniFactory (Been having some technical difficulties with uploading… go ahead and try the link though)
March 2020 UPDATE: Files can be downloaded directly from this site at the bottom of the page. They are also available on Prusa Printers!
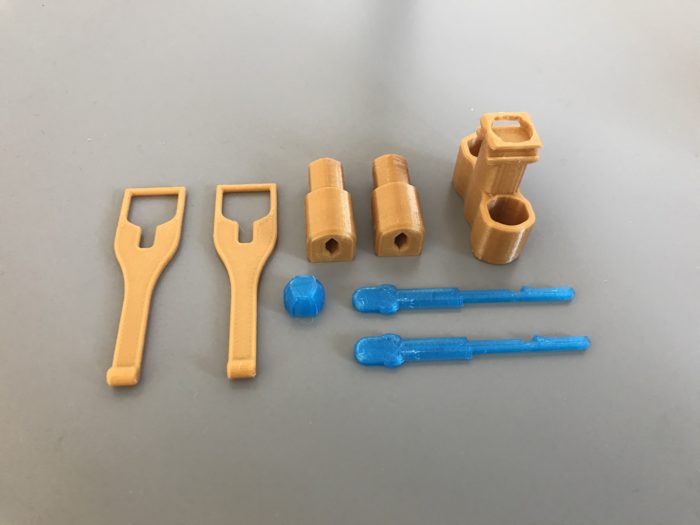
MP-Barrel (x2), MP-Back, MP-BowArm (x2), MP-Projectile (x2)
Material: PLA
Infill: 20%
Supports: No
Brim: No
MP-MagTip
Material: PLA
Infill: 20%
Supports: No
Brim: Recommended
2. Assemble
Going to start doing things a little differently with the occasional Exploded View (Ooooo!)
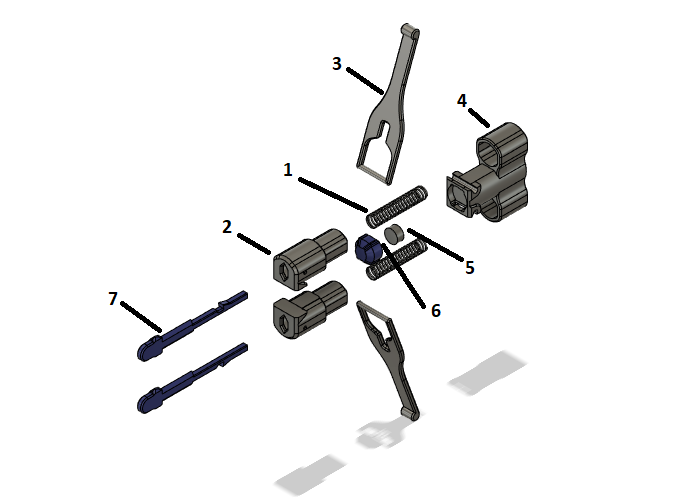
Reference:
Item 1 – Spring (x2)
Item 2 – MP-Barrel (x2)
Item 3 – MP-BowArm (x2)
Item 4 – MP-Back
Item 5 – Magnet
Item 6 – MP-MagTip
Item 7 – MP-Projectile
- Insert Item 1 into Item 2 (x2)
- Mate the cylinders of Item 3 into the recessed areas of Item 4 (x2)
- Press-fit Item 1 into Item 4, passing through the hole in Item 3 (x2)
- Press-fit Item 5 into Item 6
- Press-fit Item 6 into Item 4
- Insert Item 7 into the corresponding hole of Item 1 until it latches into the hole of Item 4 (x2)

3. Surgery
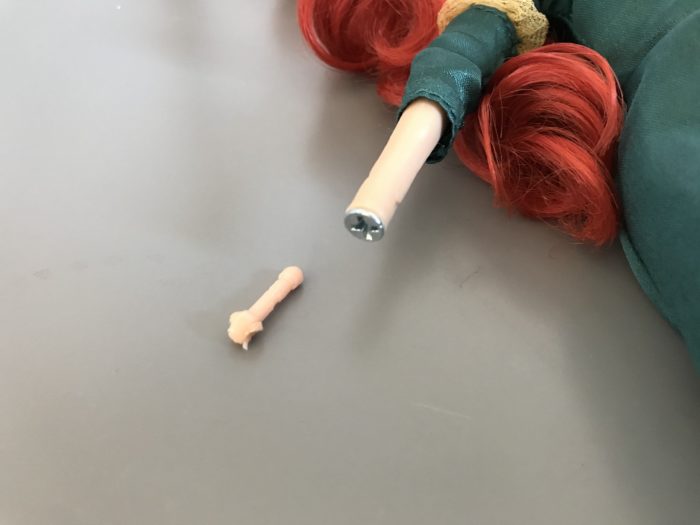
Pliers were used to pull the remaining wrist out of the arm (gruesome), and the 6-32 x 1/2″ screw was driven into the resulting hole to cap off said arm.
4. Complete
The prosthetic slips right over the arm and is held securely with the power of magnetism!
#Merida prosthetic turned out nicely! Magnet holds everything in place and arrows fire true. #ToyHospital. While we’re on the topic, it’s really weird that this doll didn’t originally come with a bow/arrows. I mean… being a BA archer is her thing! pic.twitter.com/hAZi2R35Cz
— DragonMtnDesign (@DragonMtnDesign) January 16, 2020
Like what you’re seeing here? Leave a comment below, follow me on Twitter @DragonMtnDesign, or say hey if you see me or my work around on Reddit (u/DragonMountainDesign).
.
.
.
March 2020 UPDATE: Files are available here! Click the Download button below for a zip file.
Files are available under the Creative Commons BY-NC-SA license.
