Project Space Princess – Utility Belt
All heros, especially those of the Space Princess persuasion, need a solid utility belt. Make one for the protagonist in your life… Or yourself… Those don’t have to be mutually exclusive.
Parts List:
1-1/2″ Lightweight Polypropylene – Strapworks (I bought 10′ of the stuff. You won’t need that much, but it is so inexpensive I didn’t care. Pick whatever color you want. There are lots of options.)
1-1/2″ Plastic Slide – Strapworks (x1 if you want, but x2 for a cleaner-looking front. We’ll follow the x2 version.)
Heavy Duty Snaps – Dritz (x1 package. As the link would suggest, these were obtained from Joann’s)
Helpful Tools:
Measuring Tape
Scissors
Snap-assembling tool (I got cheap and taped a few 1/4″ flat washers together)
Hammer
Lighter
Print Out Parts
Files can be found at
Thingiverse,YouMagine,Cults3D, and MyMiniFactory. Both sections of the buckle can print as one piece. Model therefore is as such.4/11/2018 UPDATE: Consolidating the number of places hosting the files. More changes to come, but they’re still available for free.
March 2020 UPDATE: Files can be downloaded directly from this site at the bottom of the page. They are also available on Prusa Printers!
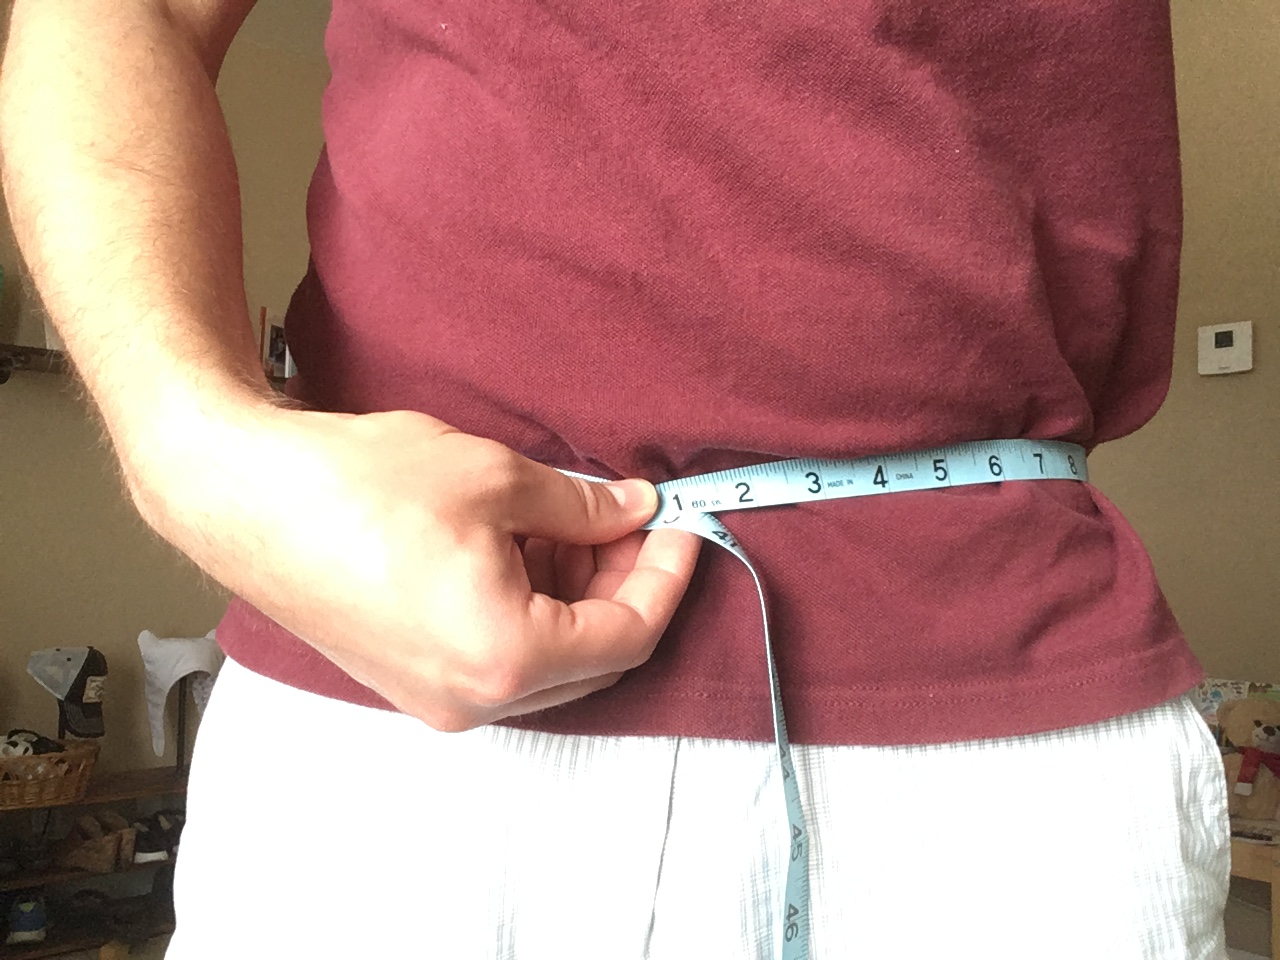
Measurements
Using the tape measure, wrap it around the waist of your subject. Add around 12″ or more to that number.
Prep Belt Material
Using scissors and a lighter, straight-cut the belt material to length, and melt the edge to prevent fraying. Snip the corners off, and melt those as well. Feel free to eyeball the corner cuts.
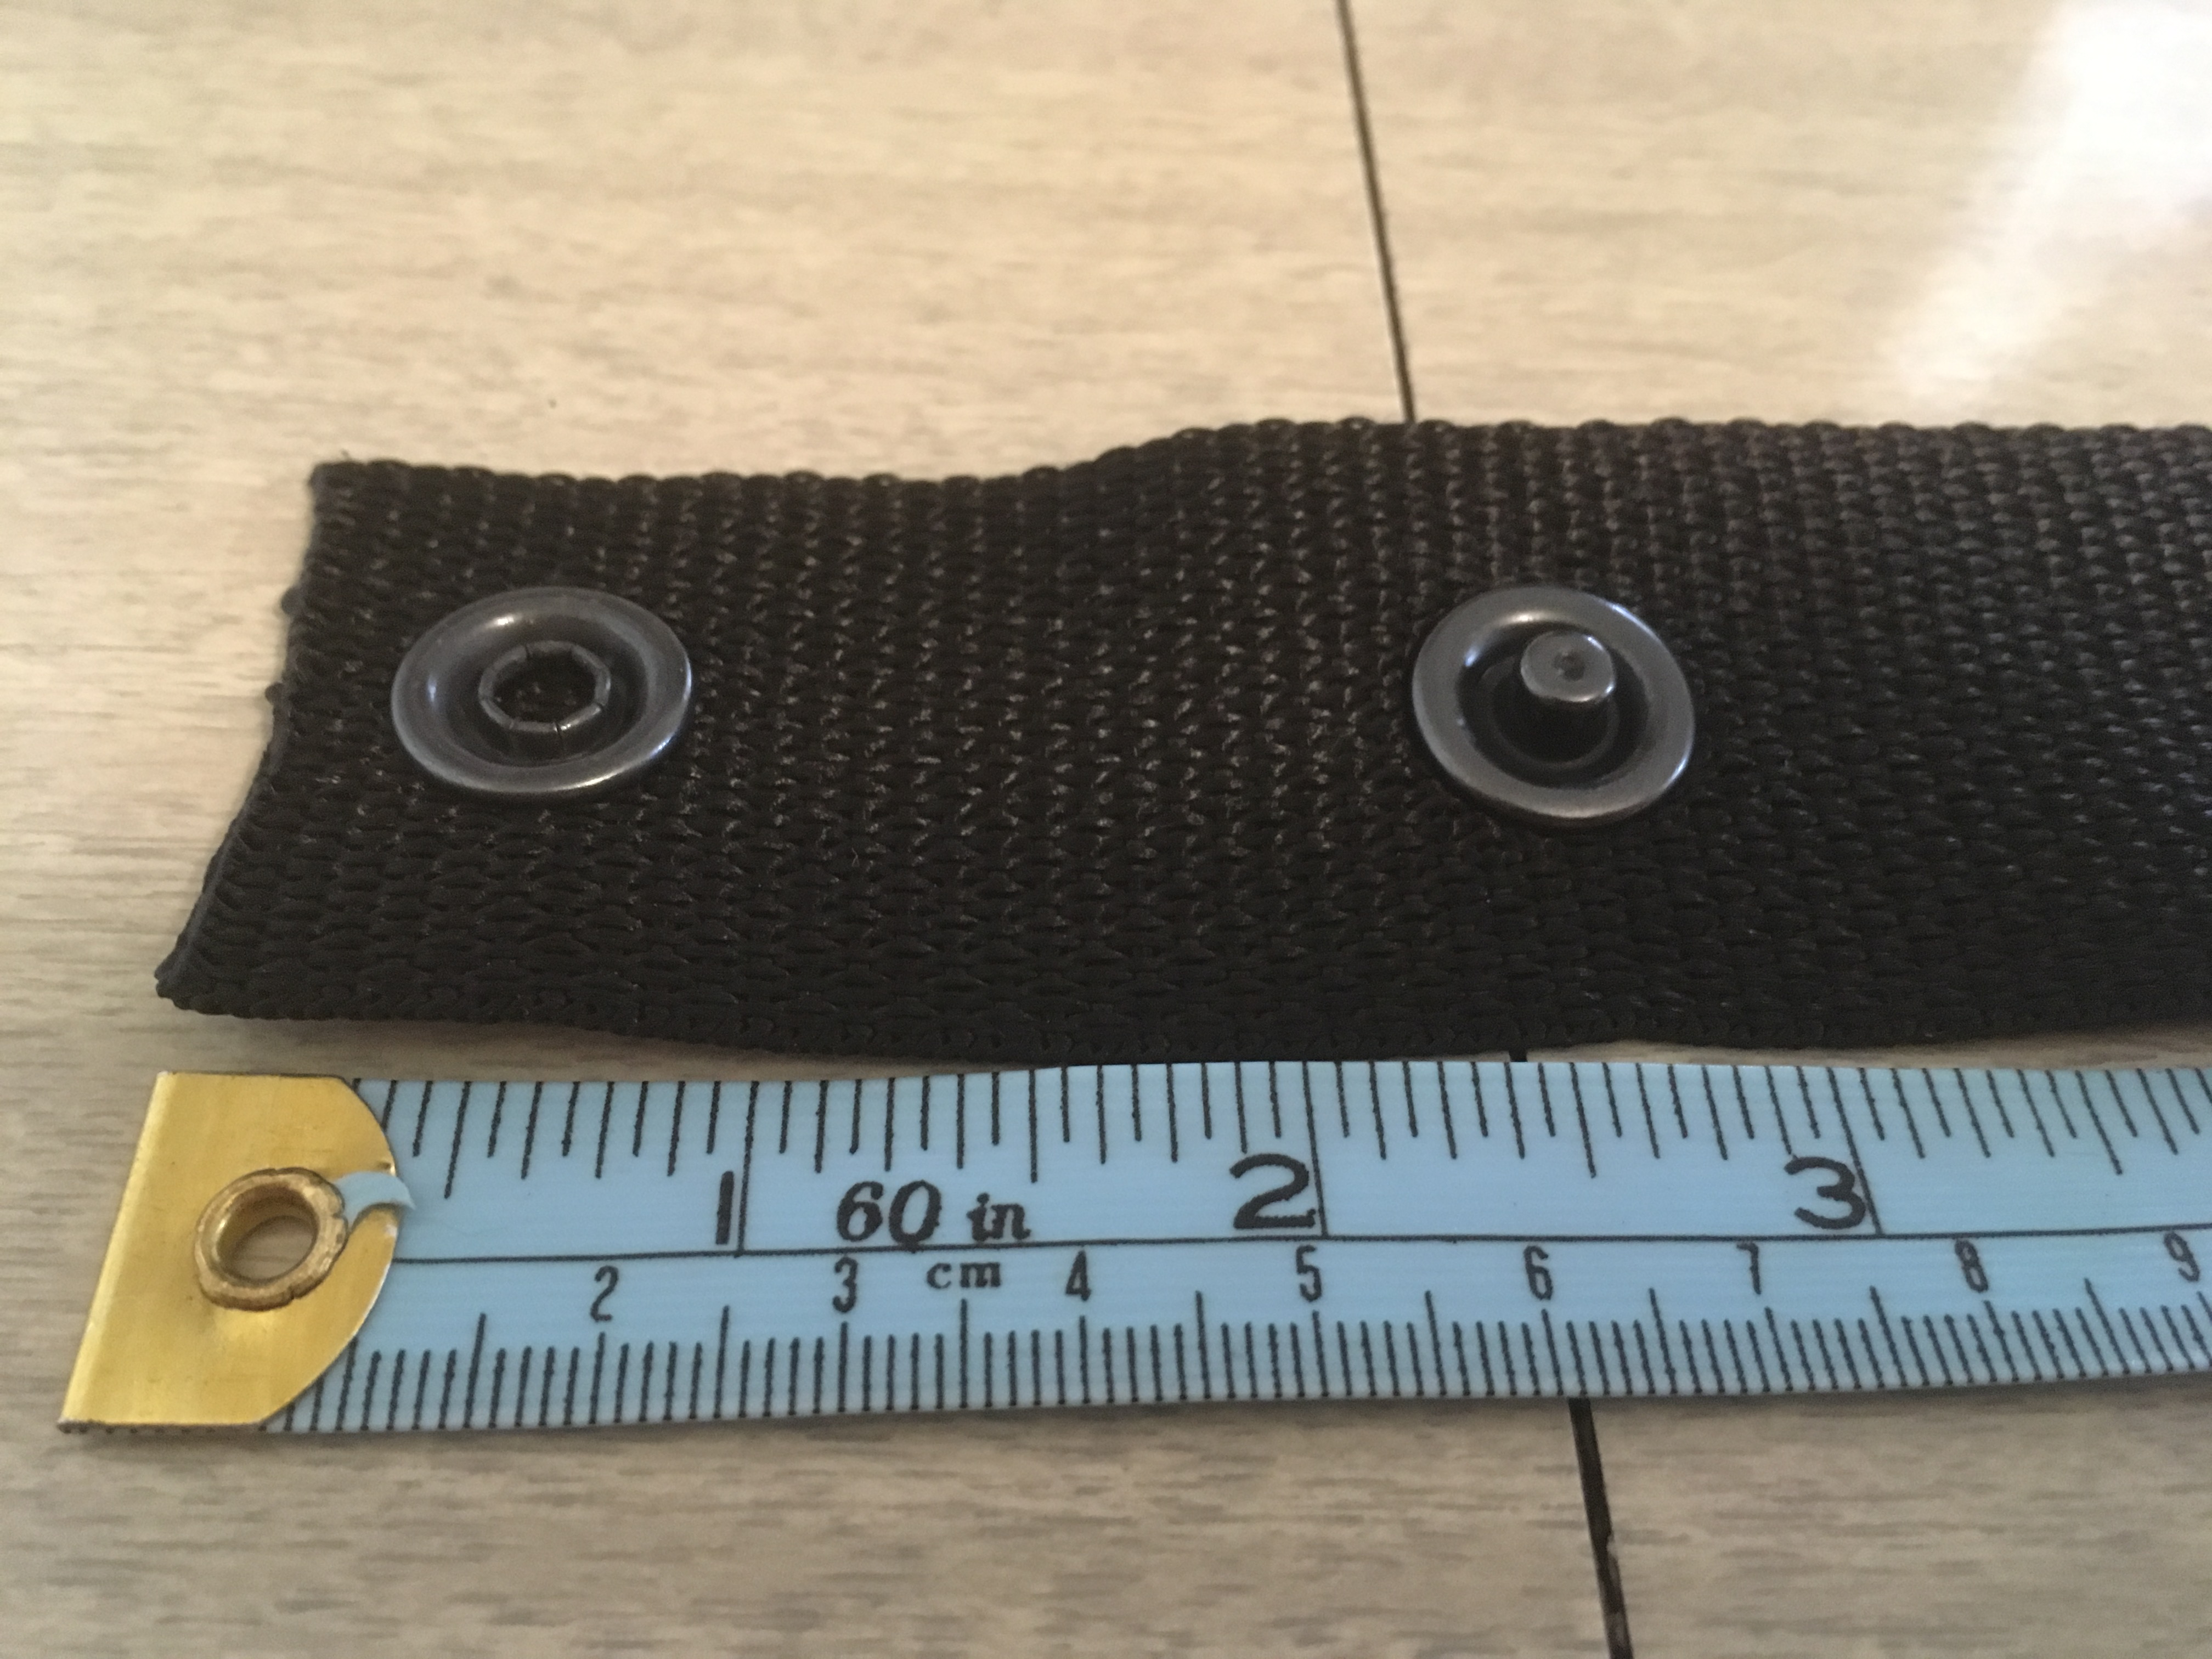
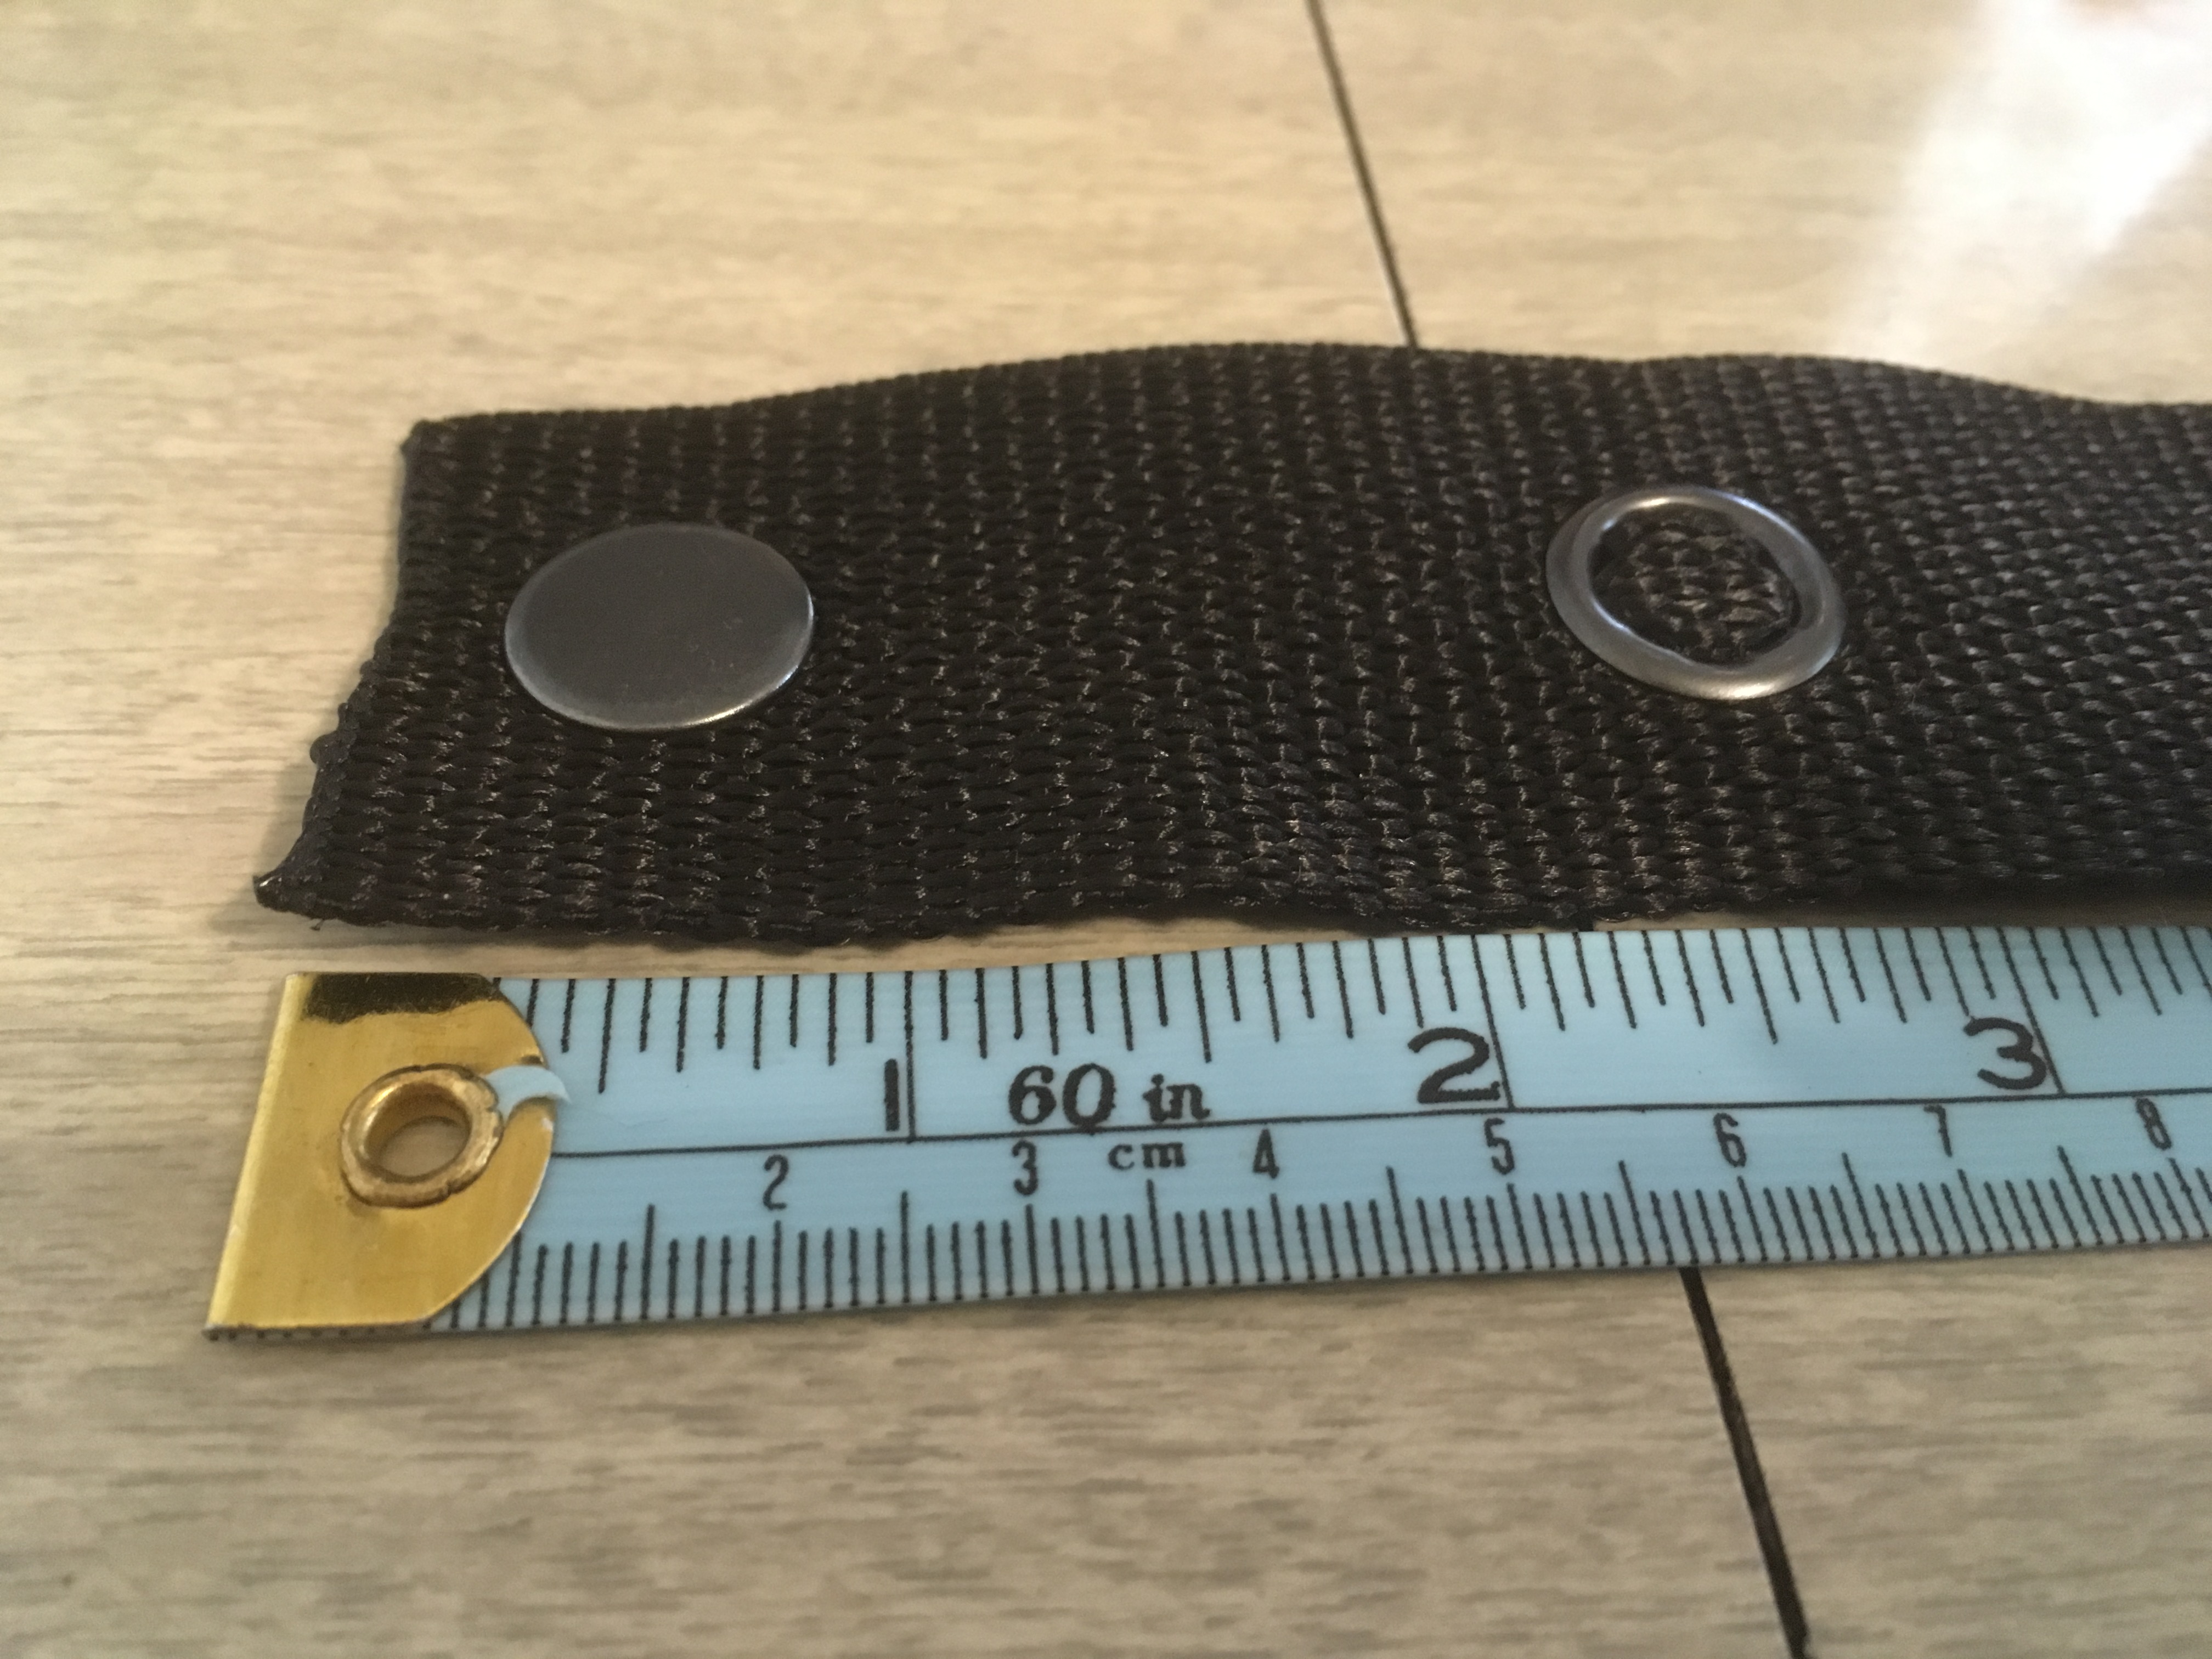
Attach Snaps
Center the “inside” snap pieces 1/2″ from the edges of the belt, and the “outside” snap pieces 2-1/2″ from the edges. Secure using your hammer and snap-assembling tool.
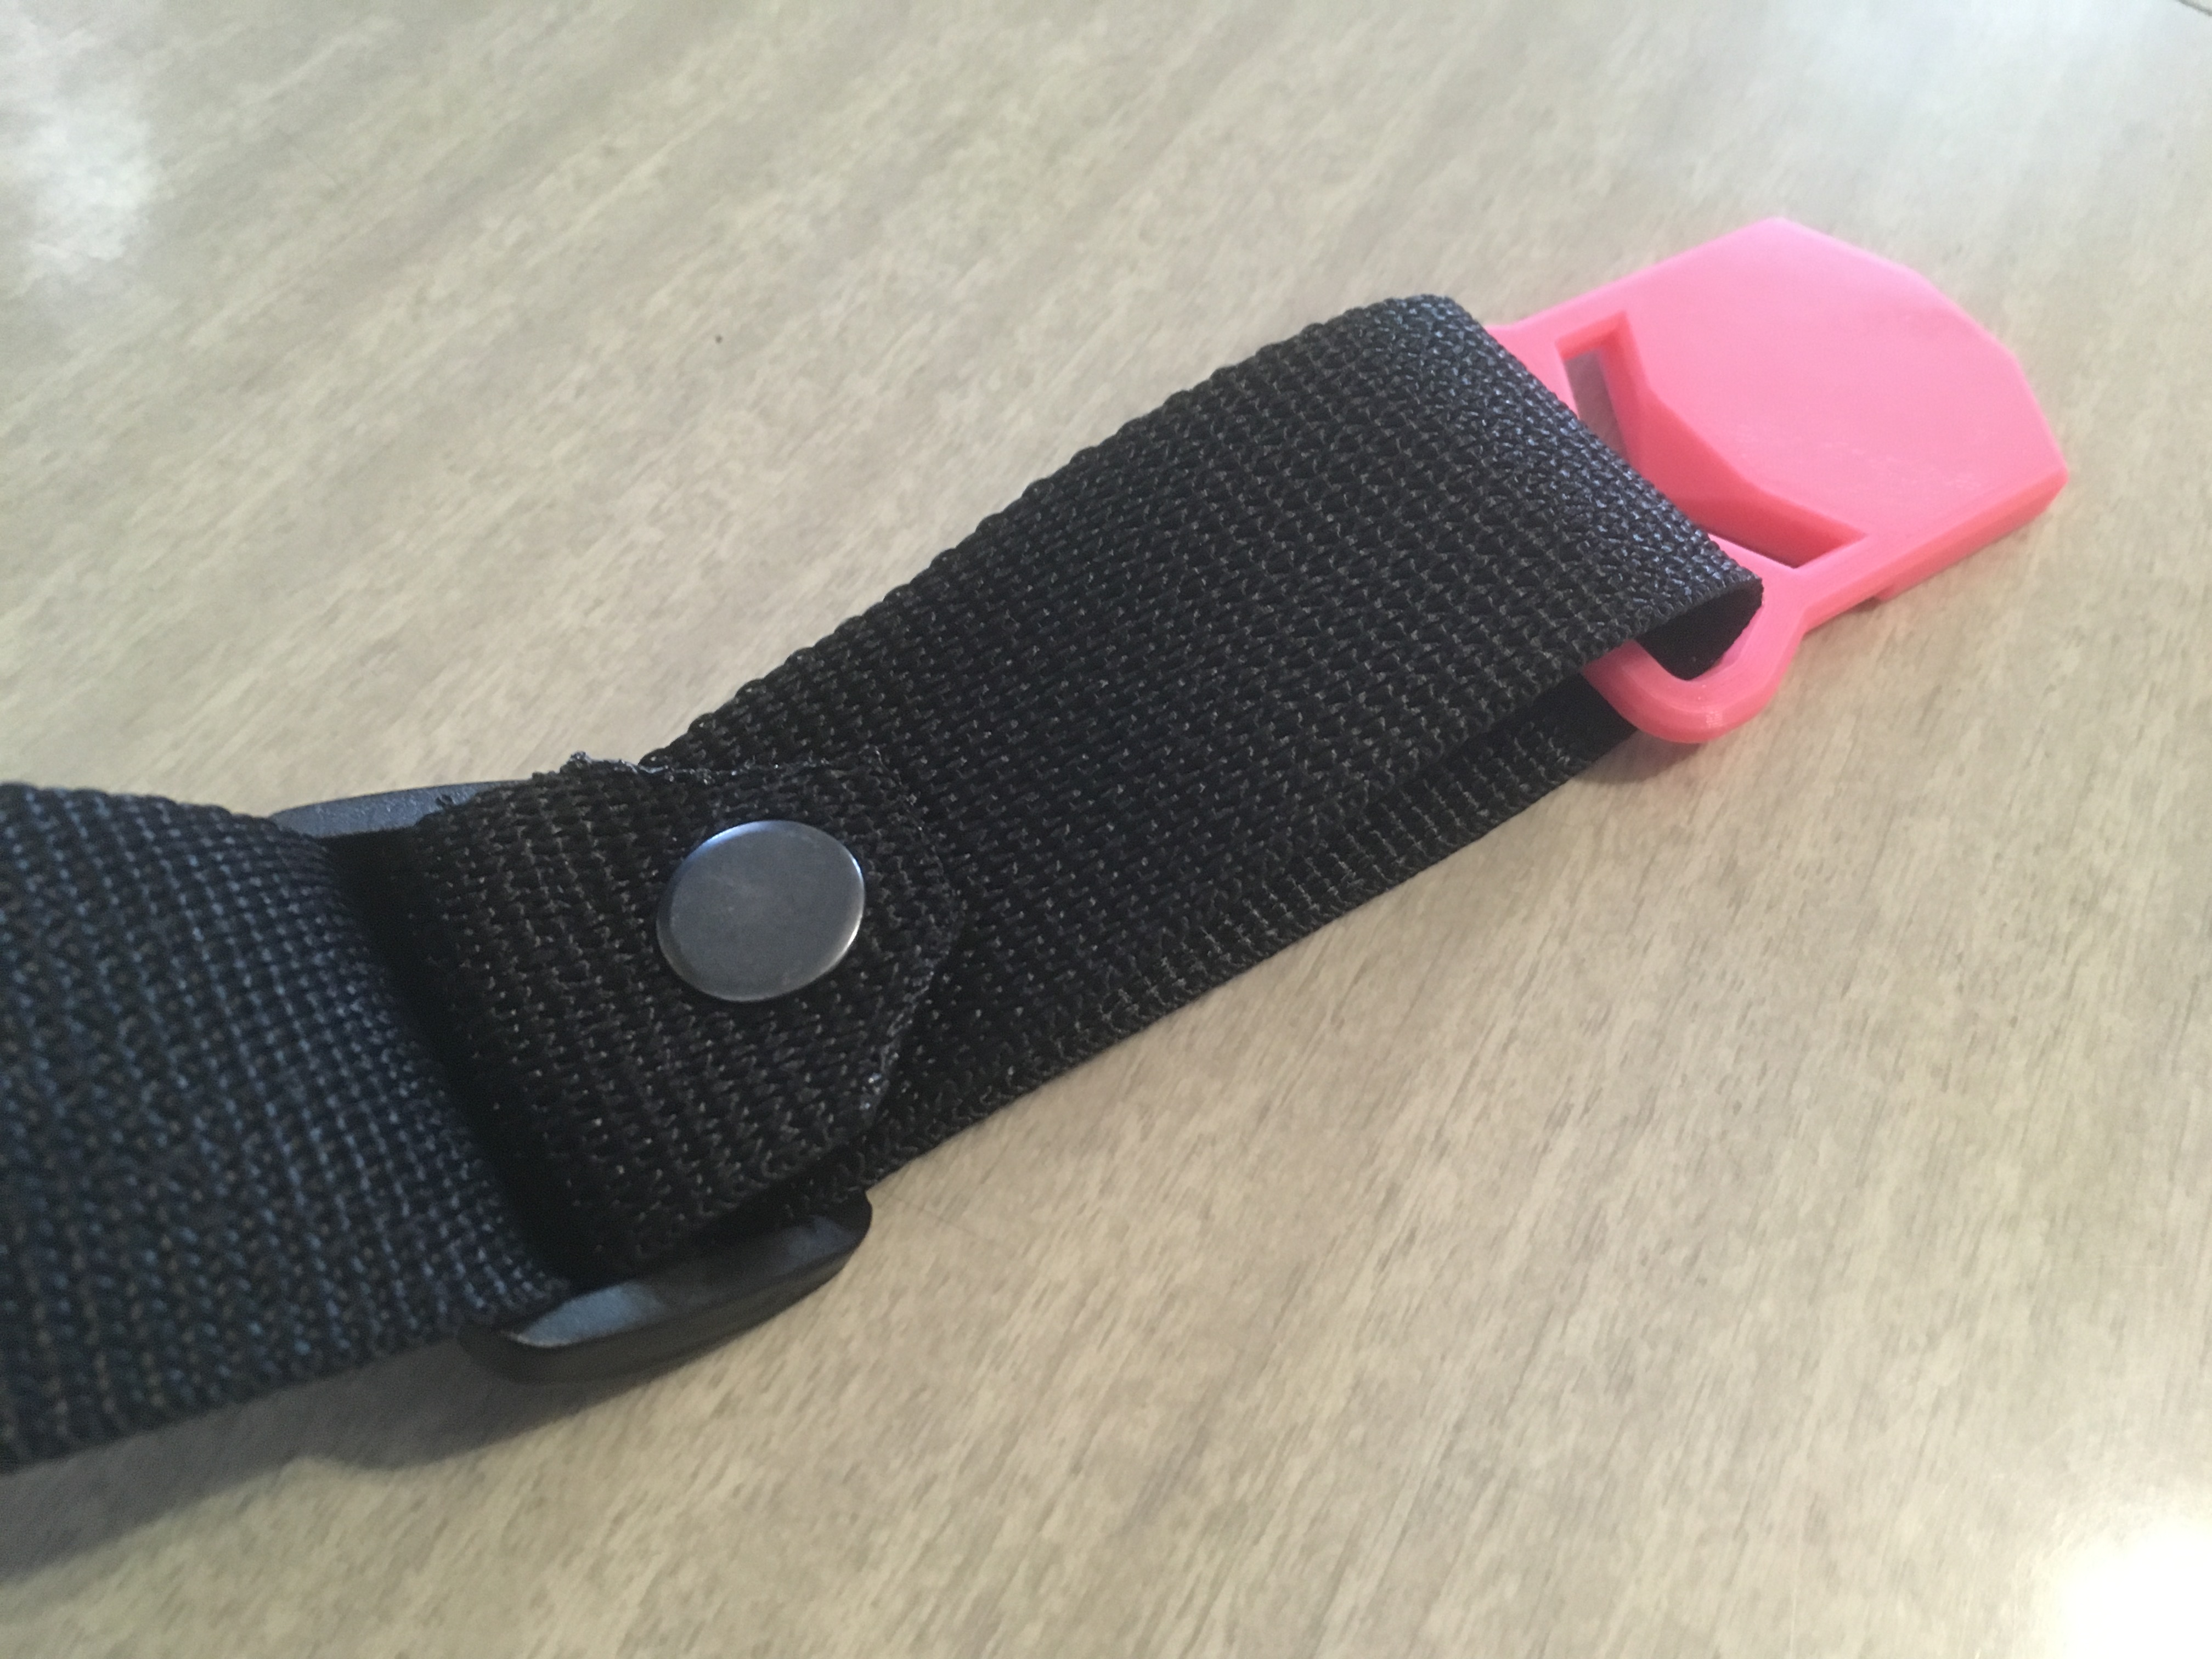
Slip in Slides
Weave each end of the belt through the slides as shown.

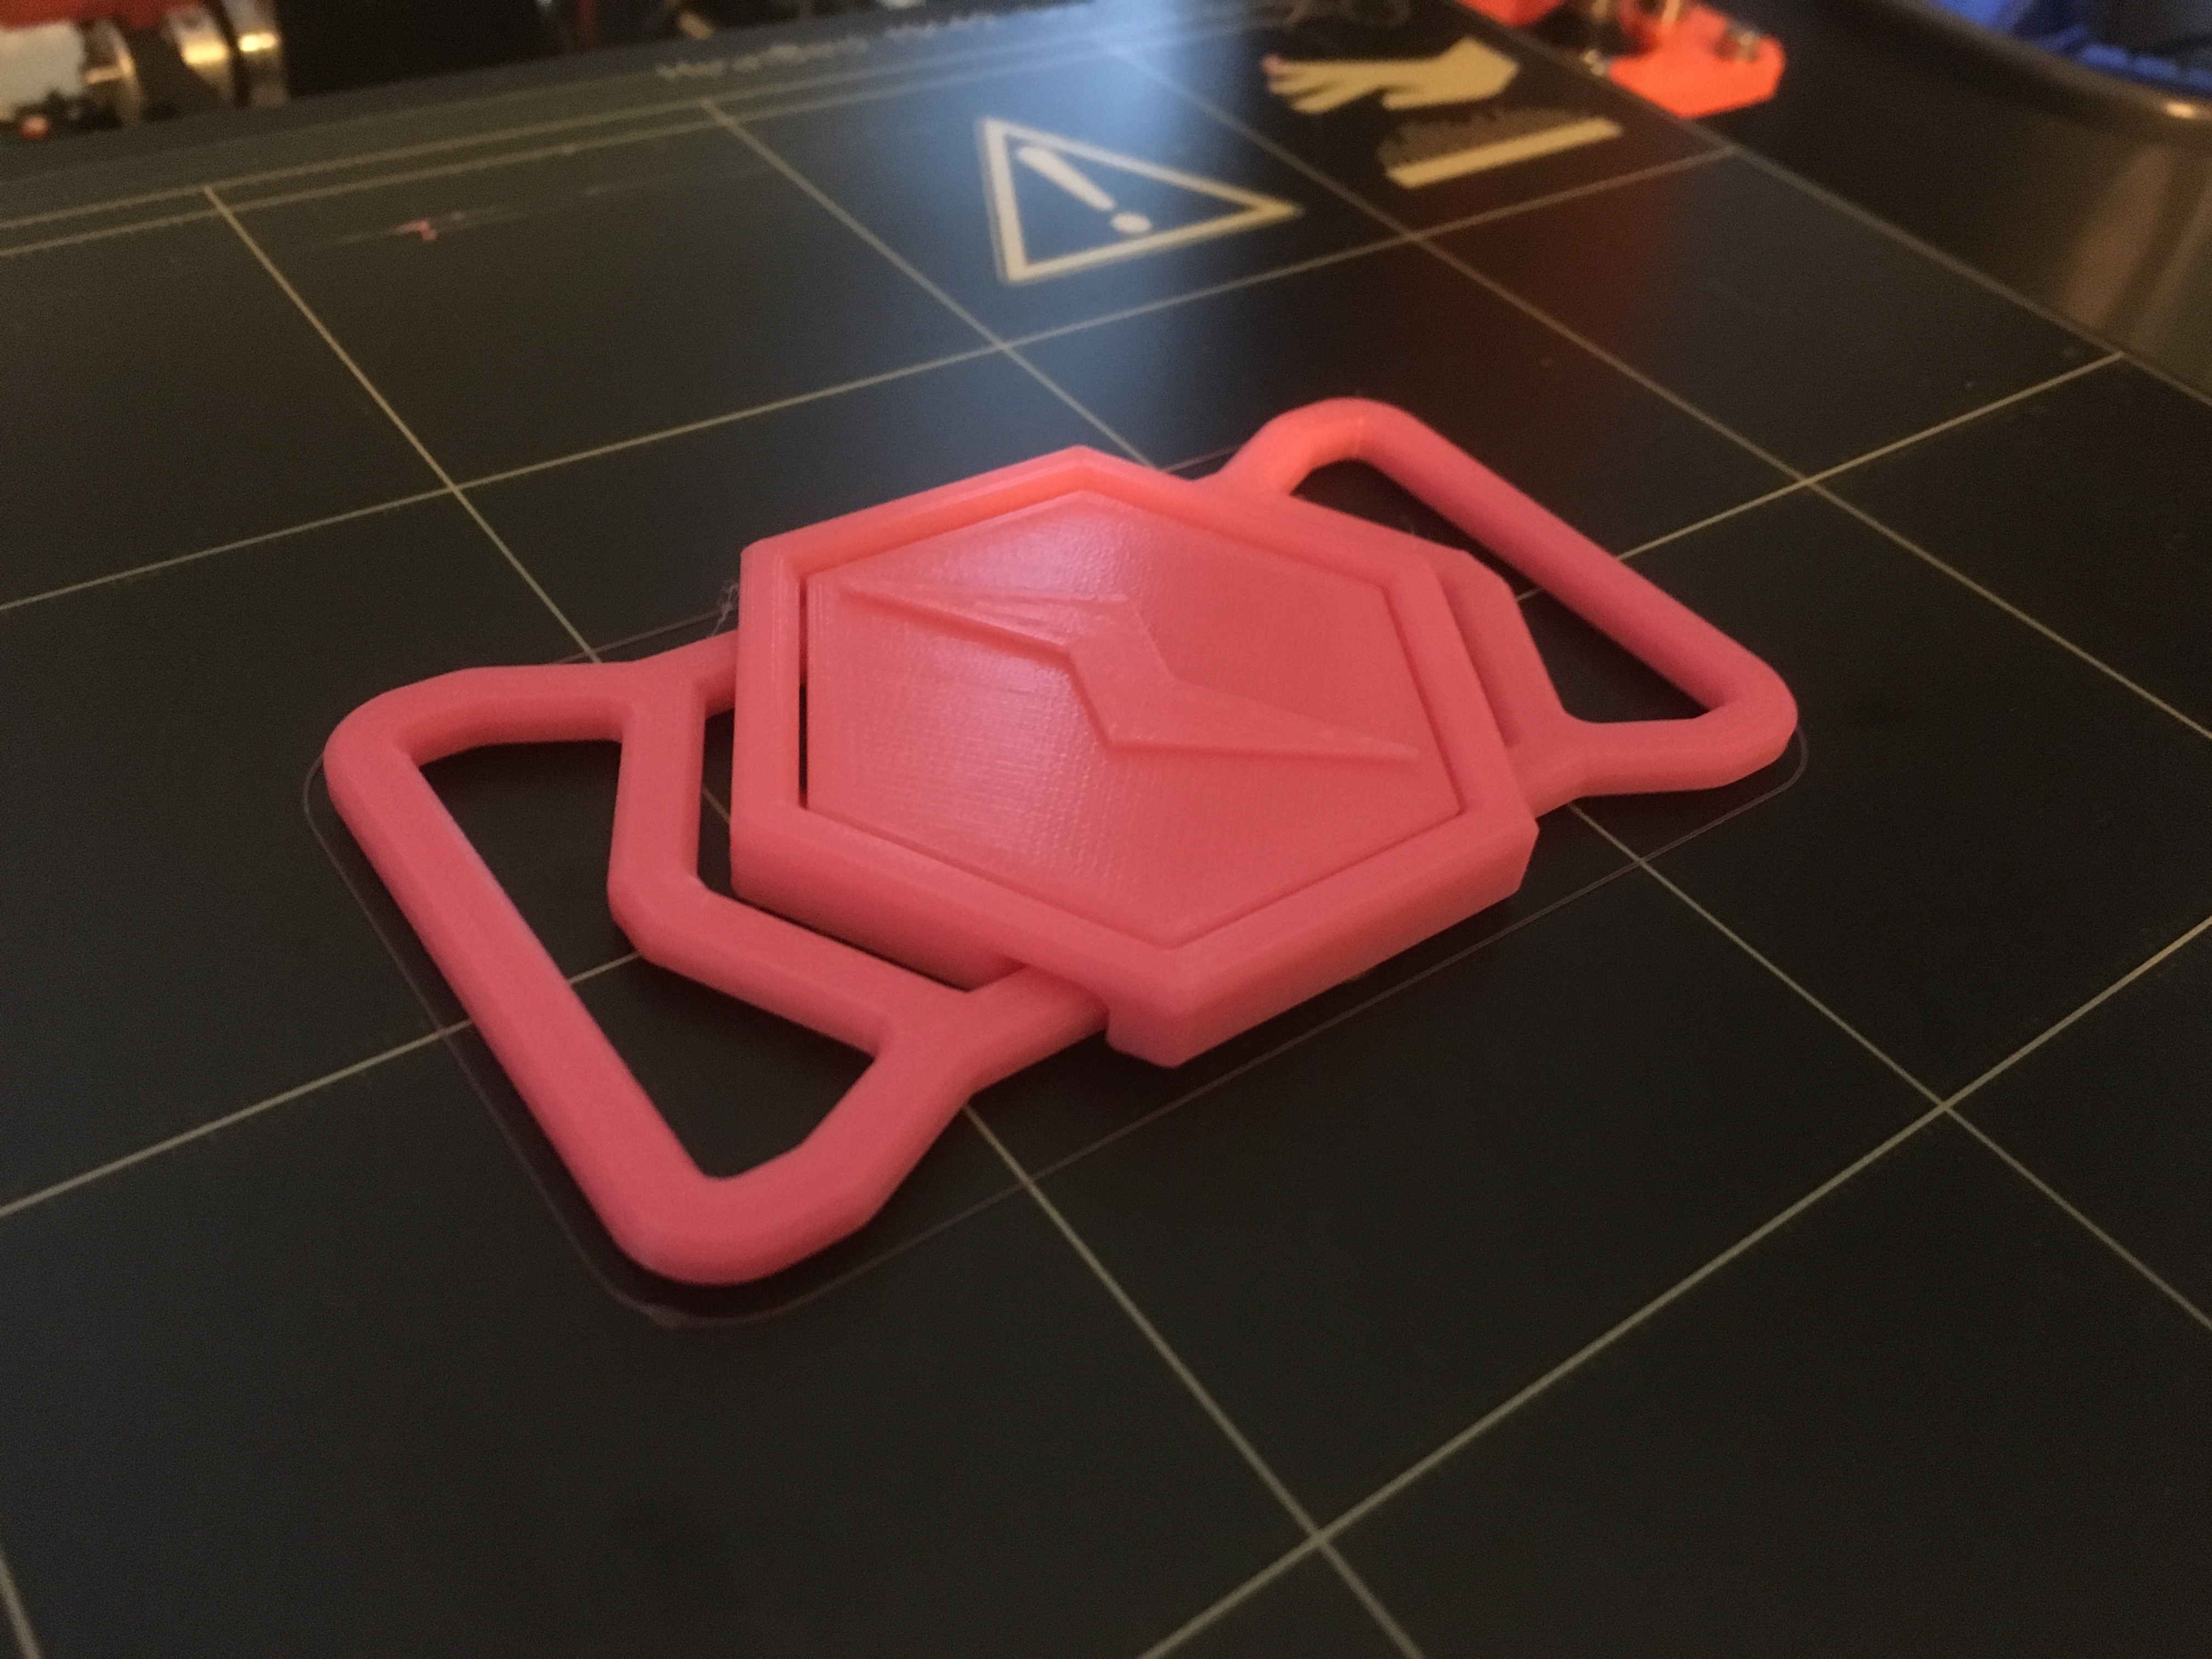
Buckle Time
“Frame” piece on the left, “Center” on the right.

Finish and Snap
Weave the ends once again through the slides as shown. Snap the snaps together.

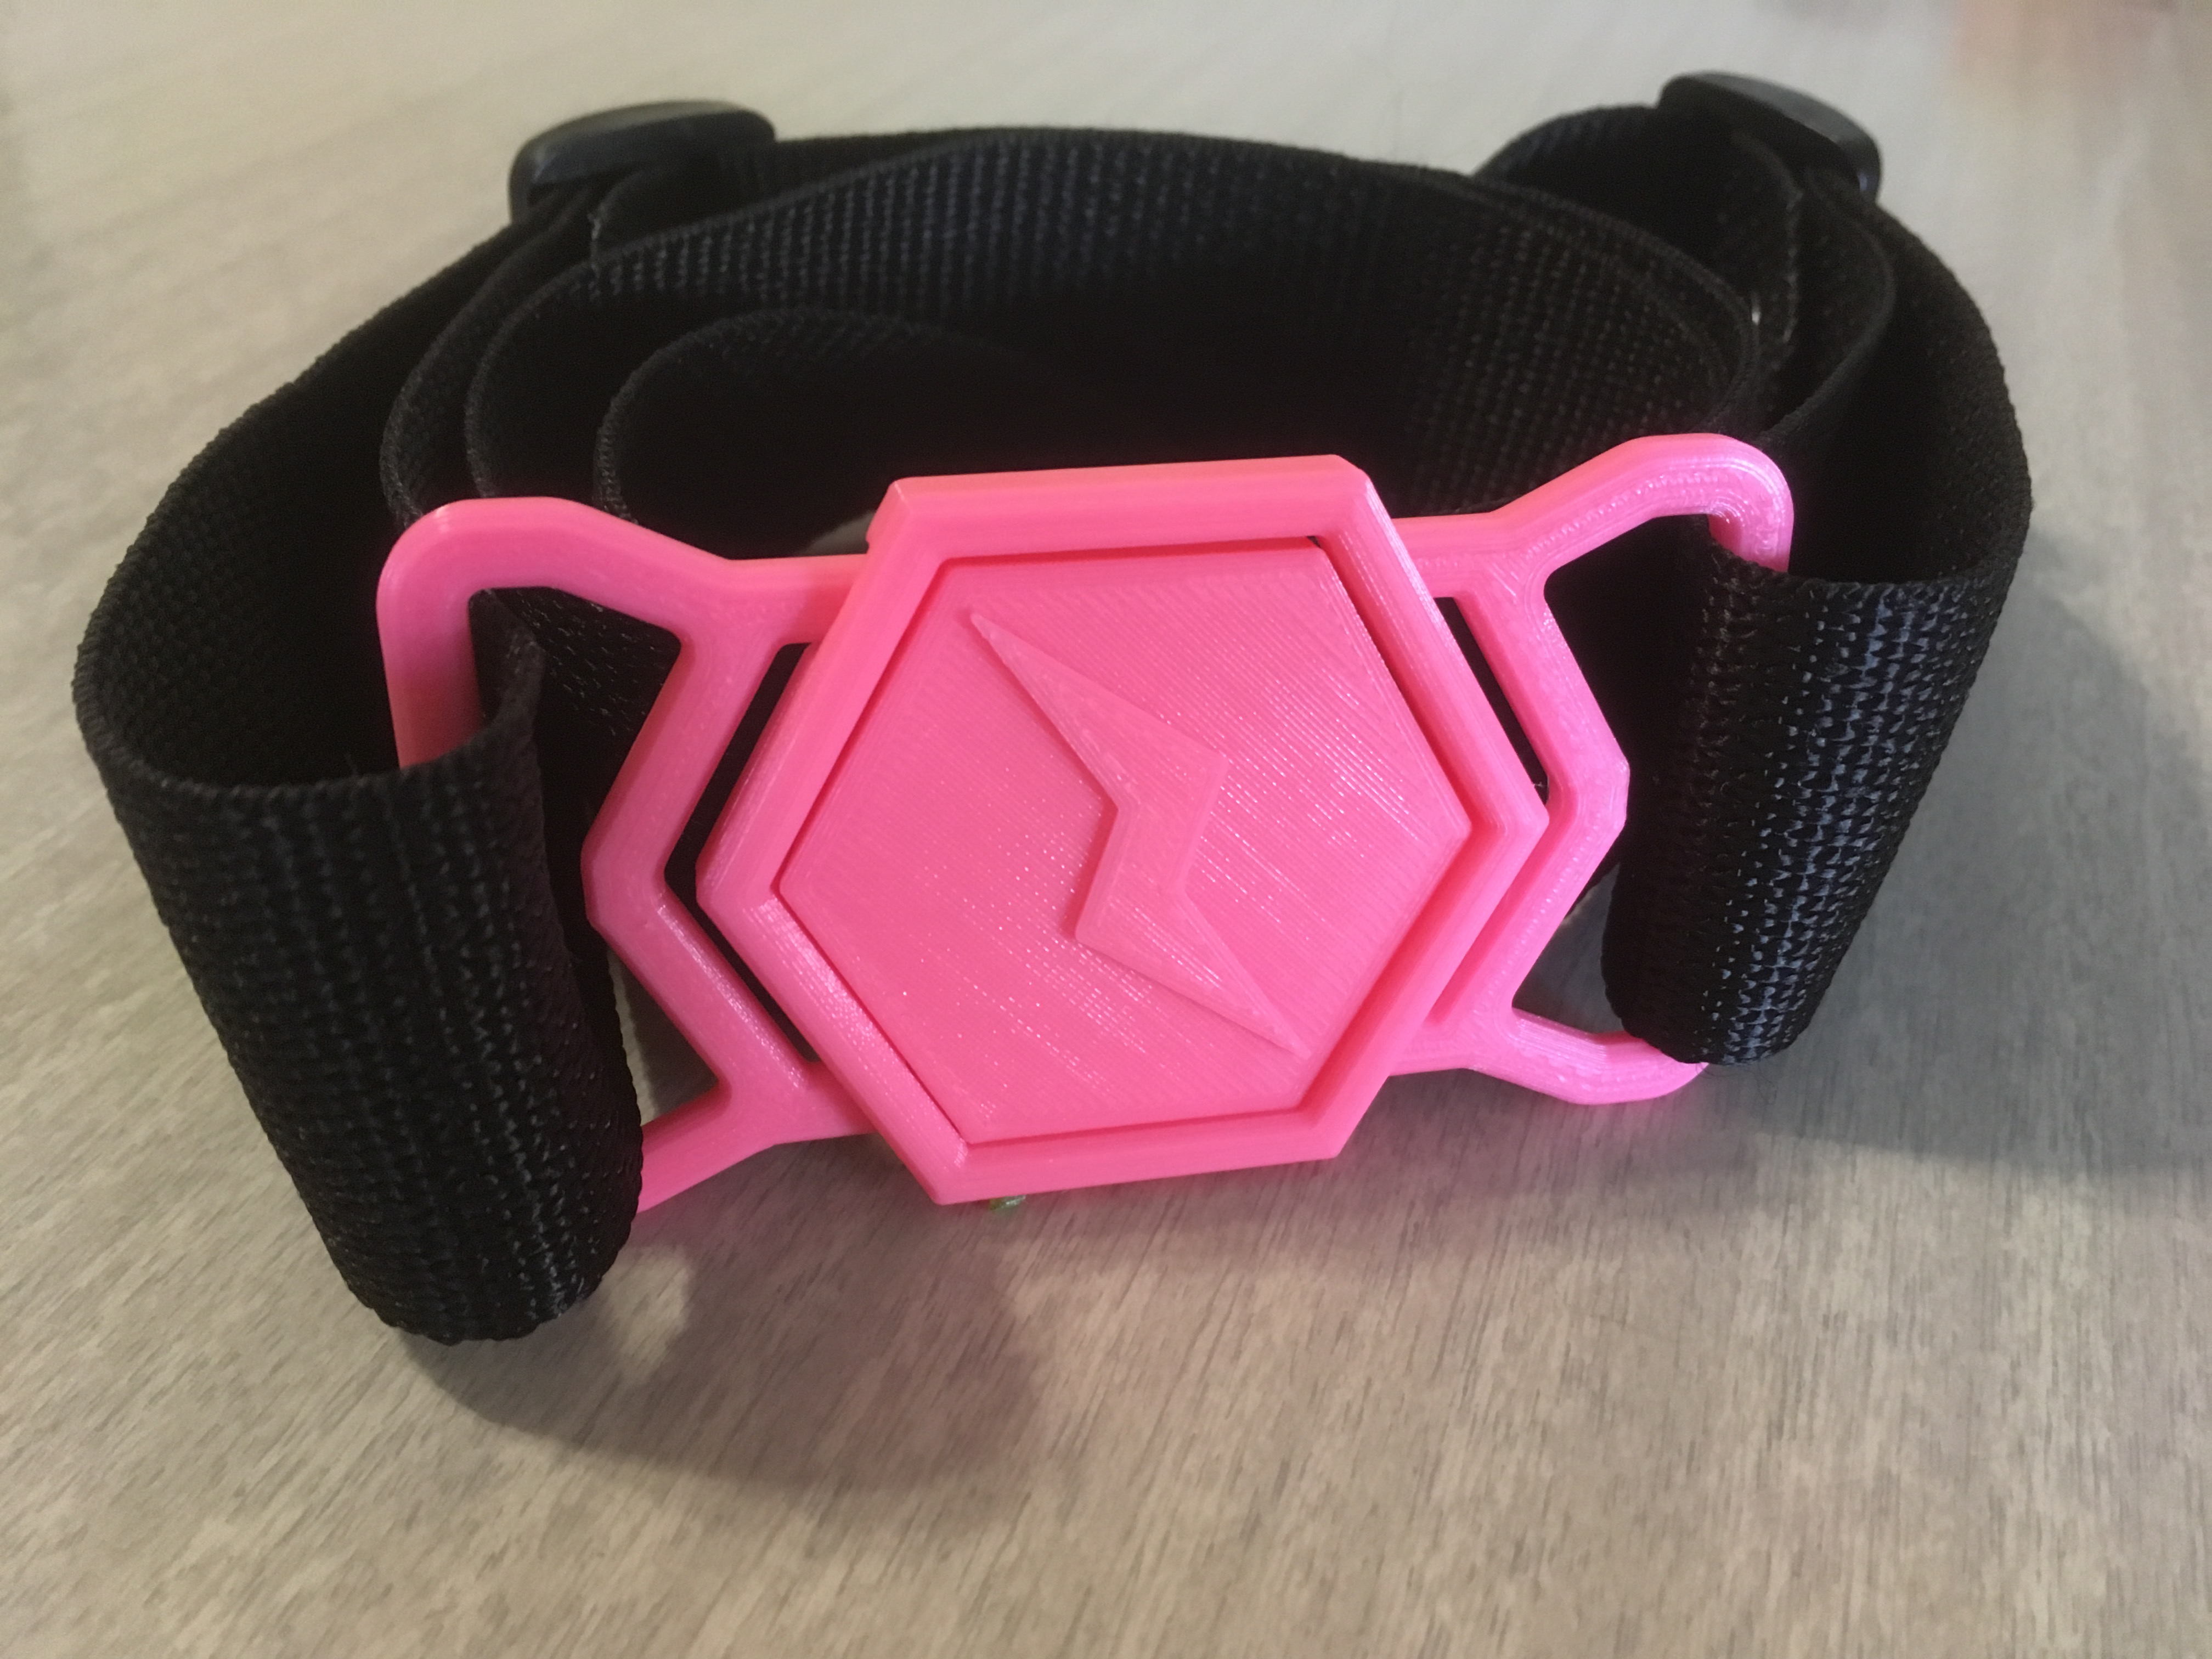
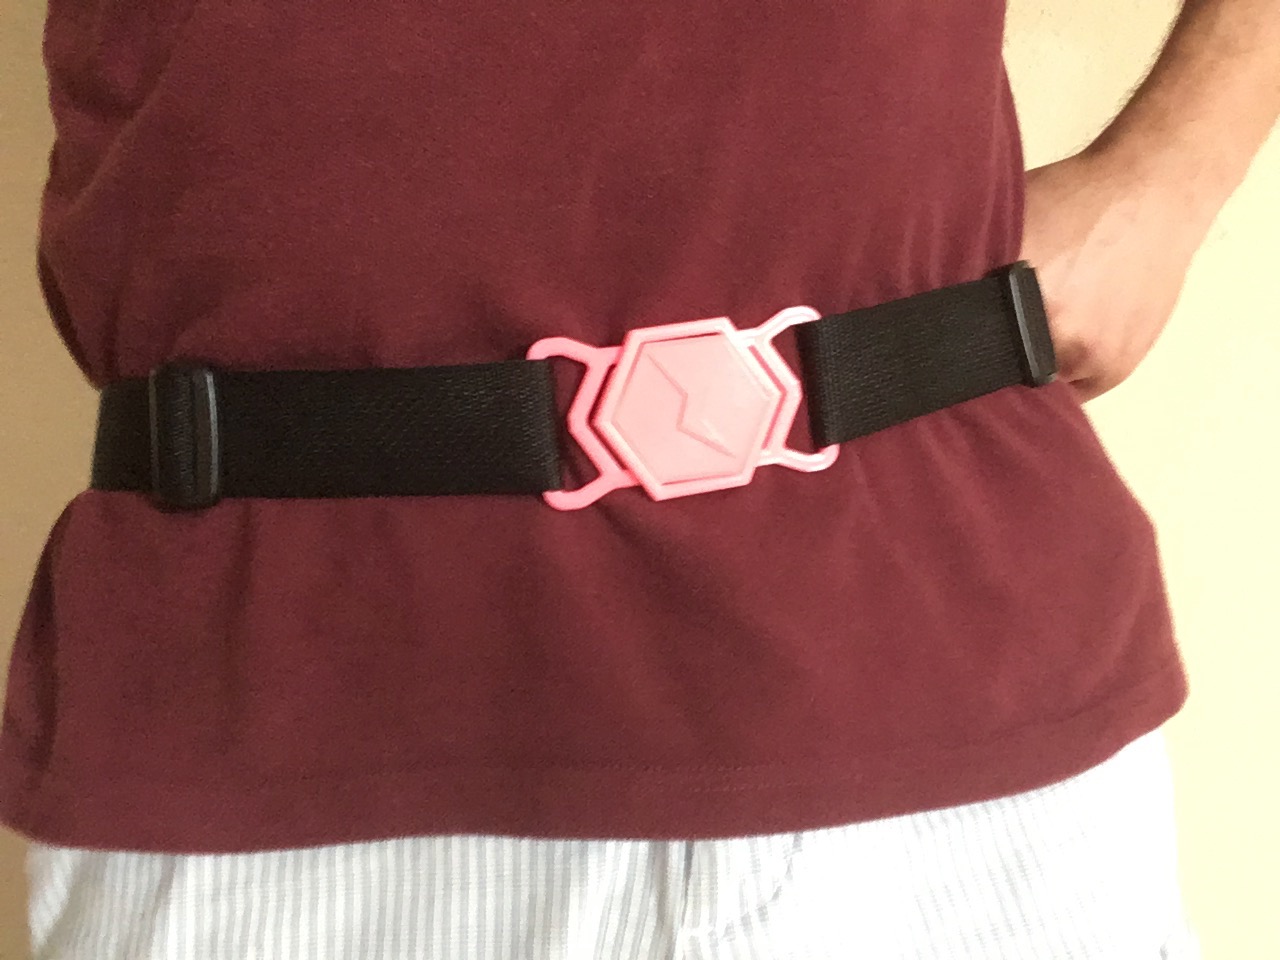
Adjust and Suit Up
Fit the “Center” component into the “Frame,” and adjust the slides to your most comfortable fitting.
Enjoying what you see here? Give me a follow on twitter @DragonMtnDesign for updates and previews.
.
.
.
March 2020 UPDATE: Files are available here! Click the Download button below for a zip file.
Files are available under the Creative Commons BY-NC-SA license.